
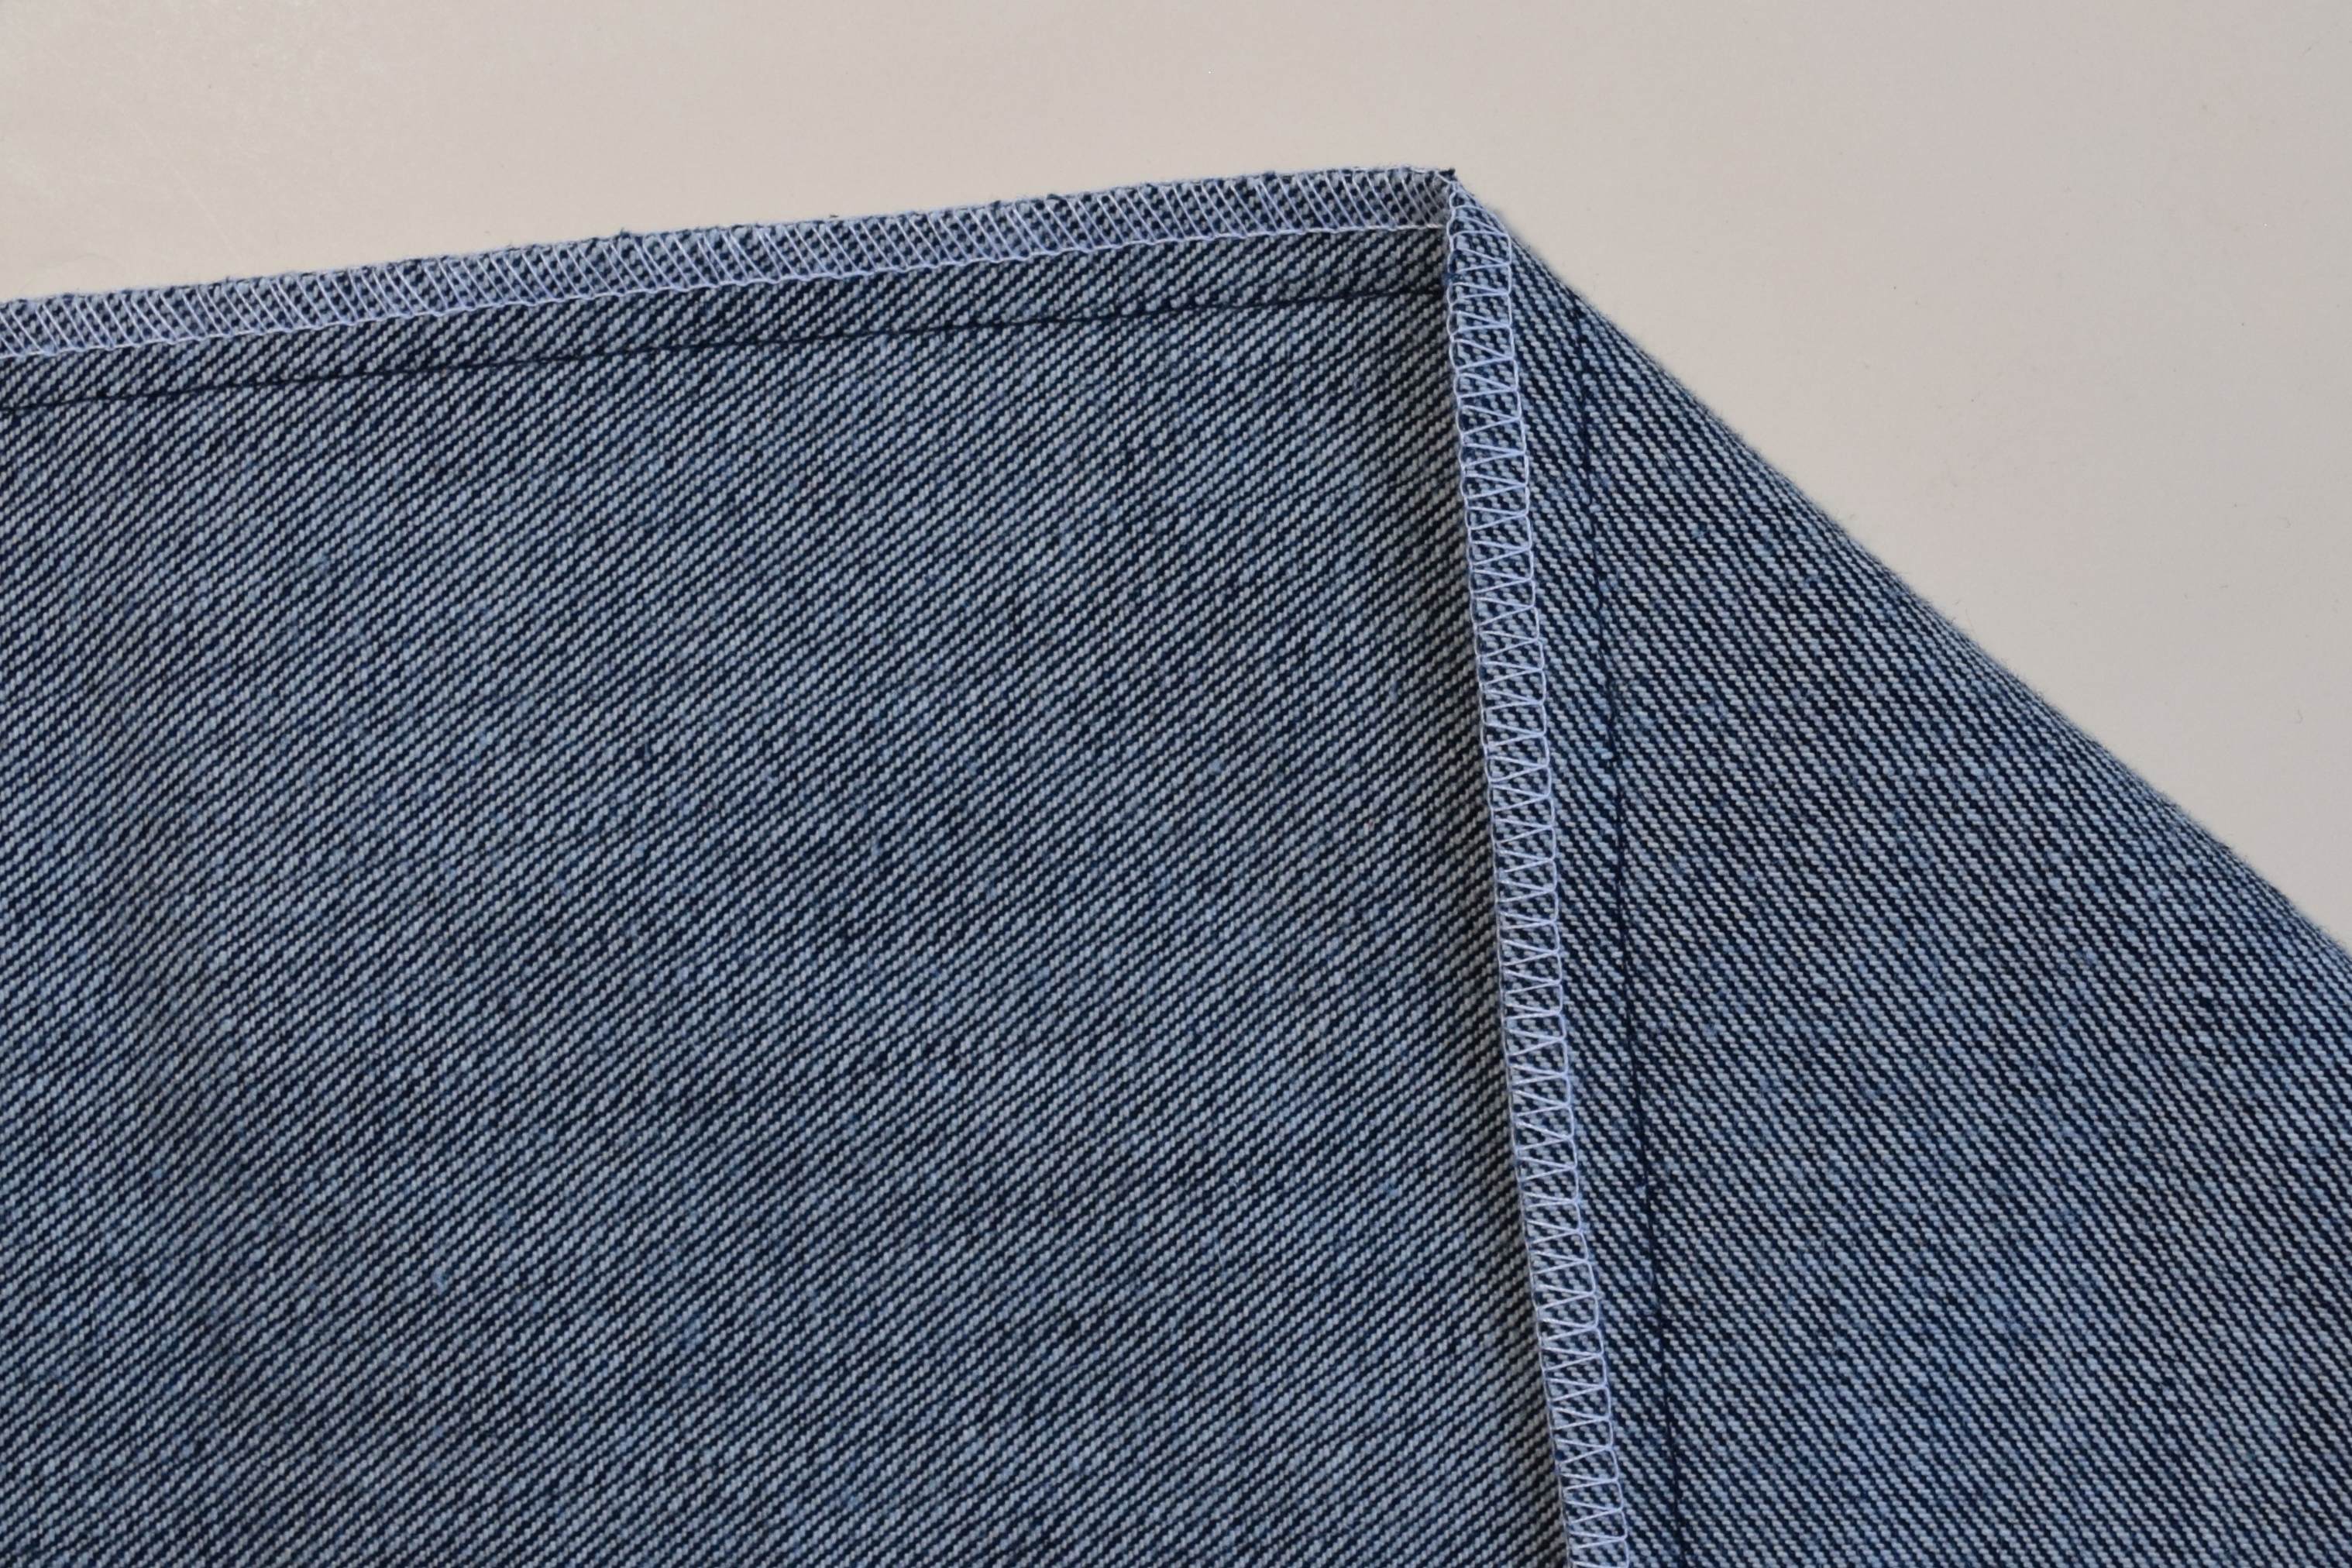
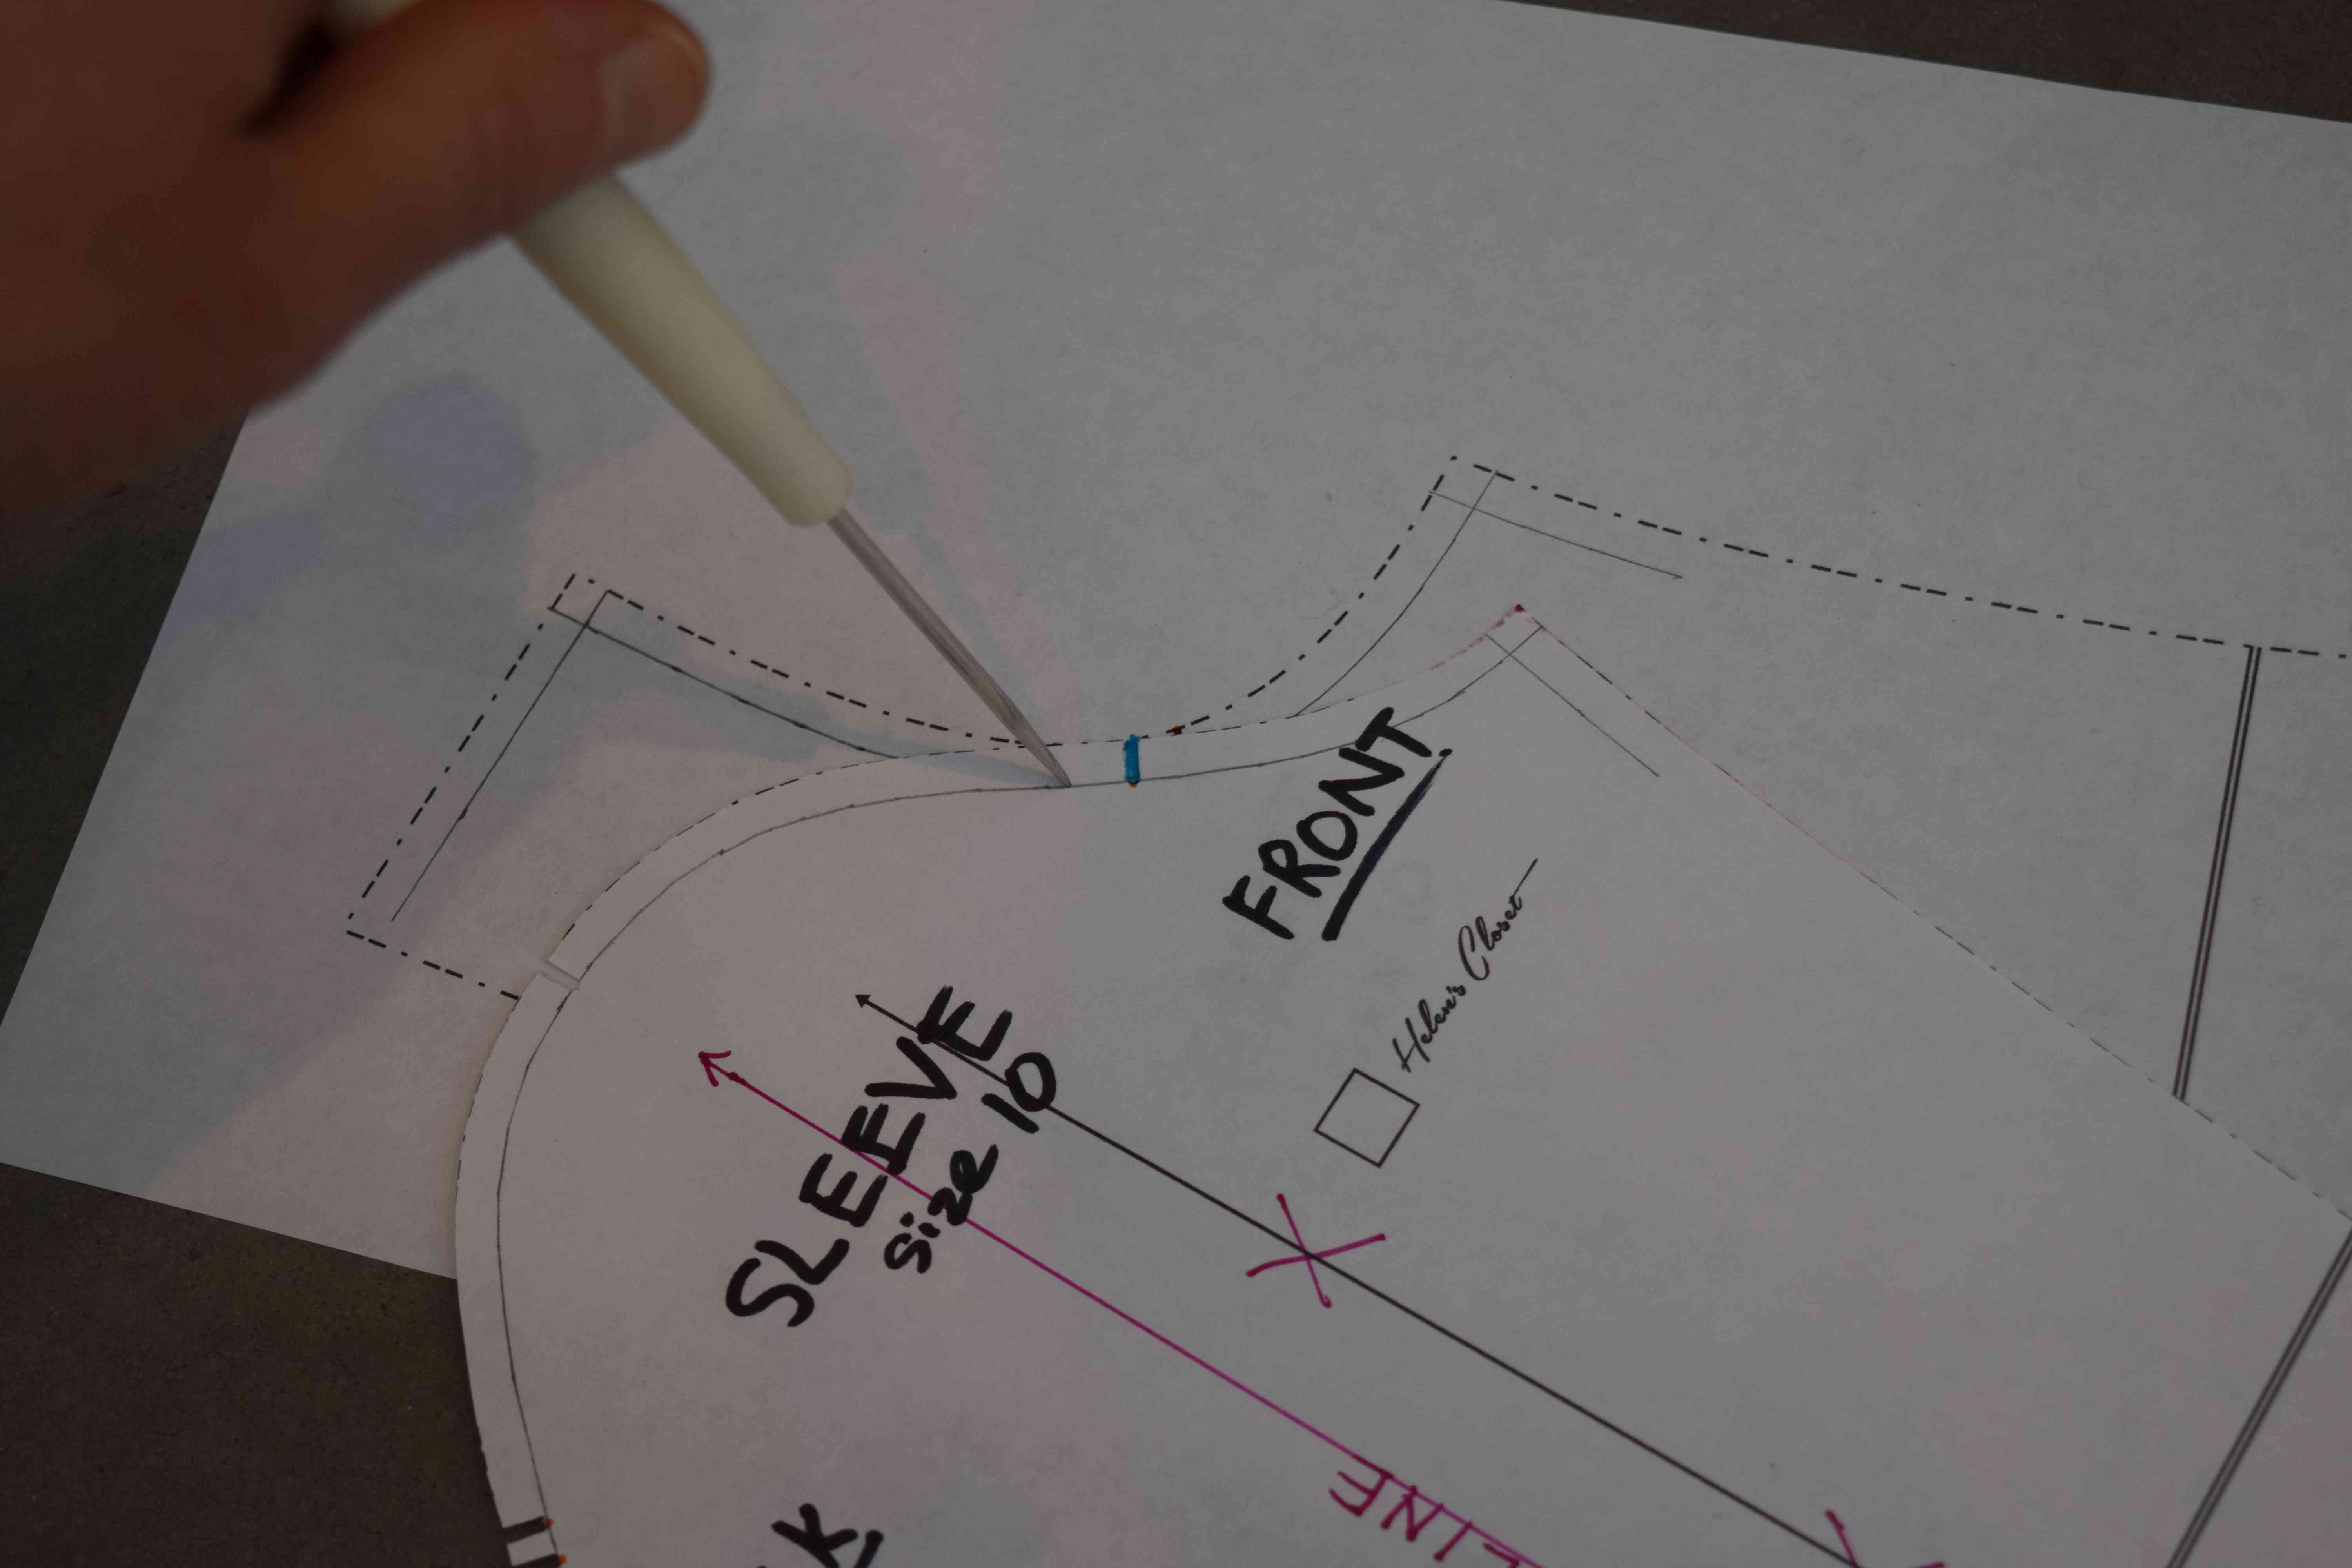
The lack of an ultra-fine point, washable fabric marking pen has been a constant source of frustration to me the entire time I’ve been sewing. Every time I try to mark the top stitching line on my pocket corners or the stitching line on a v-neck t-shirt, and it comes out all wonky because my marks were too thick, I think, “If only I had a finer point marking pen, this could have come out perfectly!” A few months ago, for no apparent reason, this frustration suddenly went from a slightly irritating problem in the back of my mind to a pressing problem that I just had to solve.
After becoming obsessed with finding or making the perfect extra-fine point washable marking pen for fabric, I spent an utterly ridiculous amount of time and money trying different pens. Seriously, I’ve hardly sewn anything for the last few months. I’ve just been playing with pens. Luckily you can benefit from my crazy obsession, because while I couldn’t find a readily available truly washable fine point pen that would mark fabric, I did finally come up with a way to make the perfect washable fabric marking pen.
When I discovered Crayola Ultra-Clean fine line washable markers a few years ago, it was definitely a game changer for my sewing. They are amazing, and they wash out well enough that I am quite comfortable using them to mark the right side of white fabric. I mark all sorts of things I wouldn’t have before, and my sewing has improved because of this.
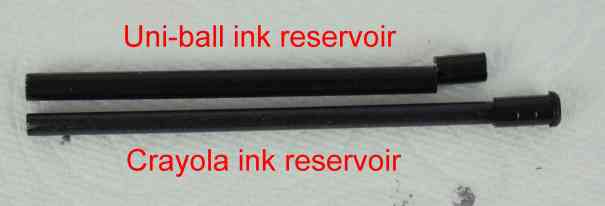
The only problem is that Crayola fine line markers make a mark about 1 mm wide when they are new, and the lines get wider as the marker tips wear out. Most of the time this is fine for garment sewing, but sometimes I really need a washable marking pen that makes a finer line—about the width of a piece of thread. And it needs to be a type of pen that will write on all types of fabric, even stretchy knits, without snagging or stretching out the fabric.
I tried a bunch of different washable pens on the market, including some that were actually marketed as washable fabric marking pens, and none of them washed out anywhere near as well as Crayola Ultra-Clean washable markers. I reviewed each of them at the end of this post. If you are only marking on the wrong side of your fabric and don’t need a super-washable pen, maybe one of those options would work for you. But I’ve gotten spoiled using Crayola Ultra-Clean washable markers, and I couldn’t bring myself to use anything less washable.
So I started thinking about how I could put Crayola washable marker ink into a finer point pen. It turns out, it is possible, and it works great! I tried it with many different types of porous plastic tipped fineliner pens that write 0.5 mm wide or finer, and most of them worked.
I’m sharing this tutorial with you so you too can have the perfect fabric pen. I hope someday Crayola will either make fineliner pens that use their ultra-clean washable ink, or partner with a sewing notions company to put their amazingly washable ink into fineliner pens to make truly washable pens for sewers, but for now you will have to do some pen hacking and put together your own washable fine point fabric pens.
Links in this post identified by an asterisk (*) are Amazon affiliate links. If you click through and make a purchase, I will earn a commission (at no additional cost to you).
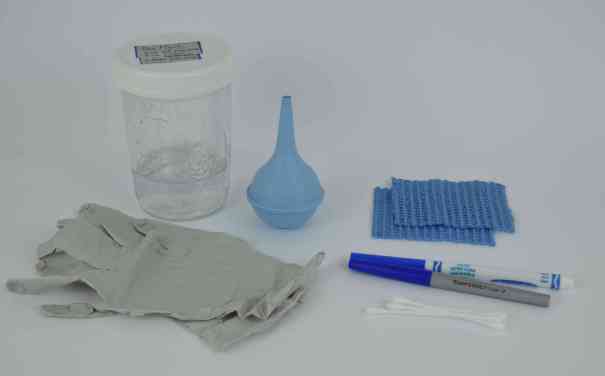
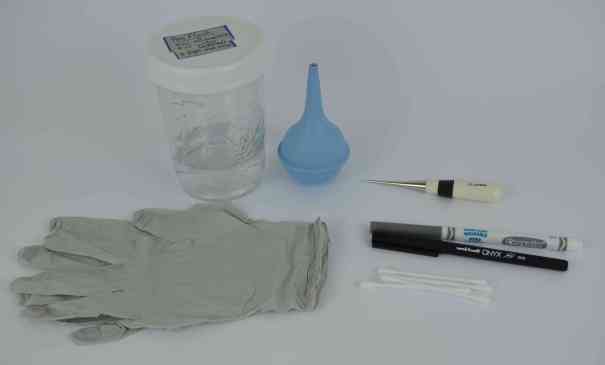
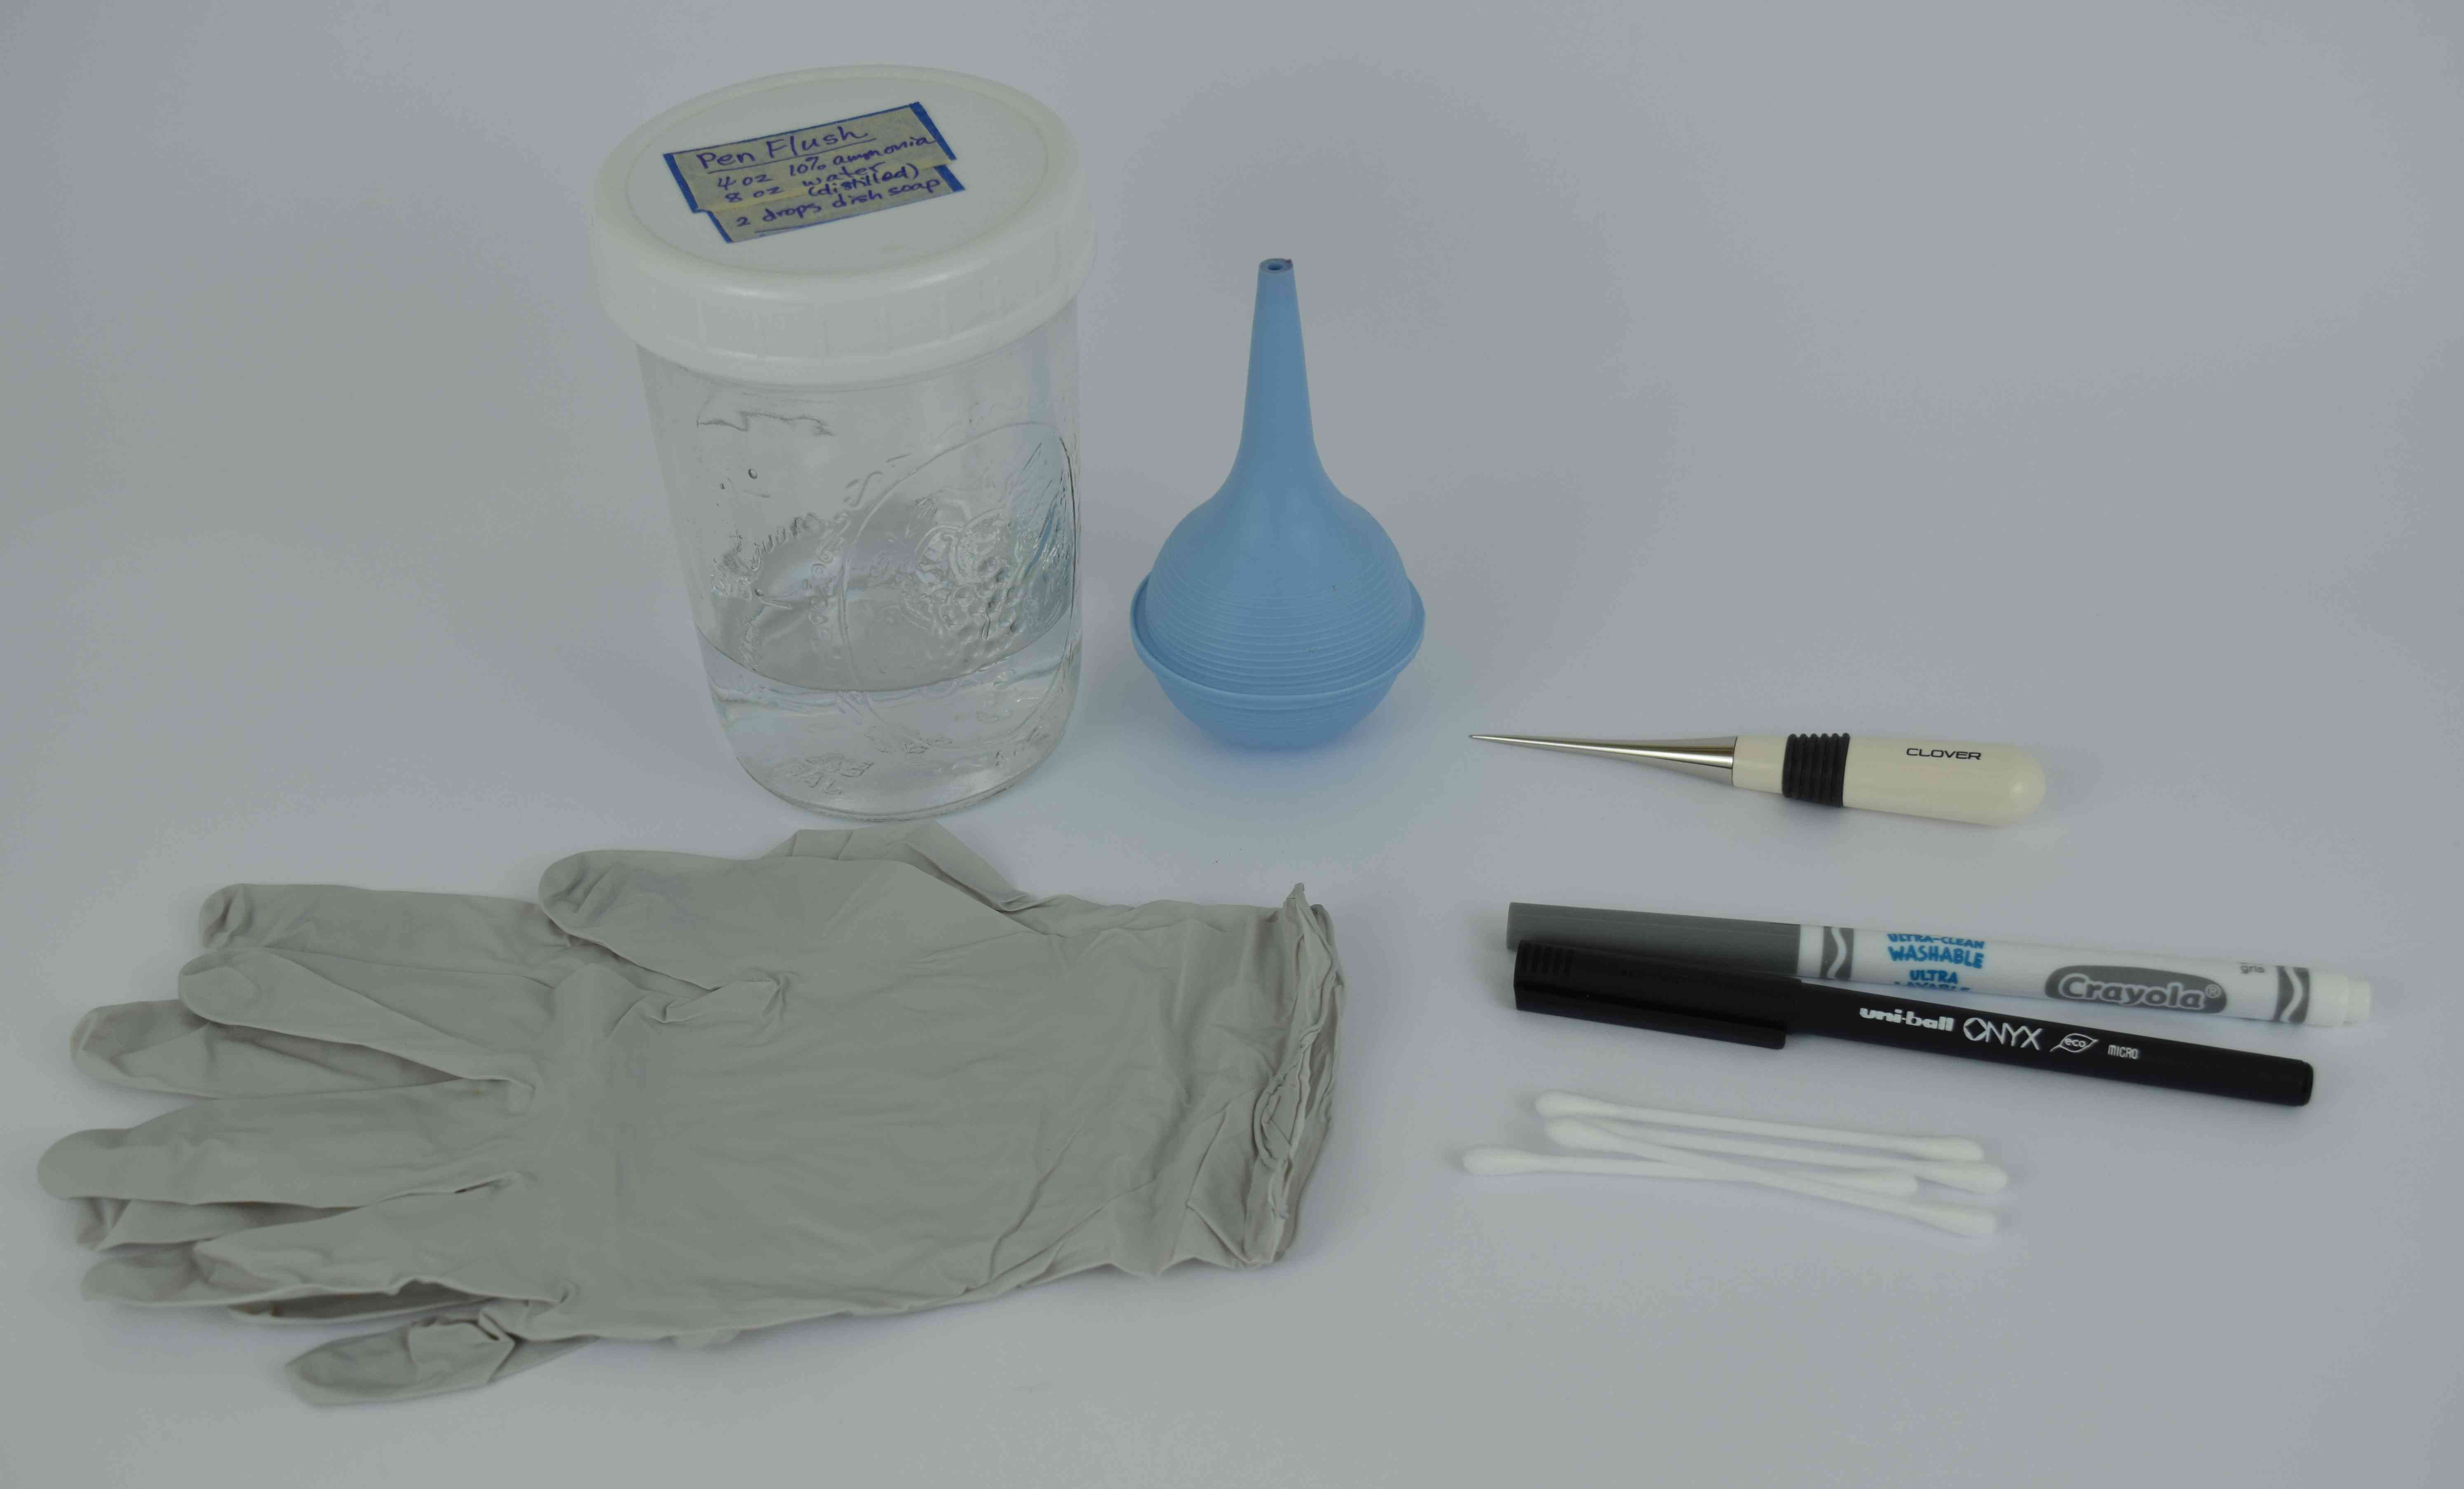
To make your perfect ultra-fine point, ultra-washable fabric marking pen, you will need Crayola Fine Line Ultra-Clean washable markers* and a fine tipped fineliner pen that has a marker-style fiber filled ink reservoir inside it. I have picked out seven types of pens that I know work to transplant the Crayola marker ink into, and I include specific instructions and supply lists for each type of pen below, since they are all a little different.
There are no substitutes for the Crayola Fine Line Ultra-Clean washable markers. Sorry. Do not use Crayola Super Tips, other Crayola washable markers, or any other brand of washable markers. Crayola makes a lot of different kinds of markers, and not all stores that sell Crayola markers carry this specific type of marker, so make sure you are getting the right kind. Look for “Ultra-Clean” and “Fine Line” on the package.

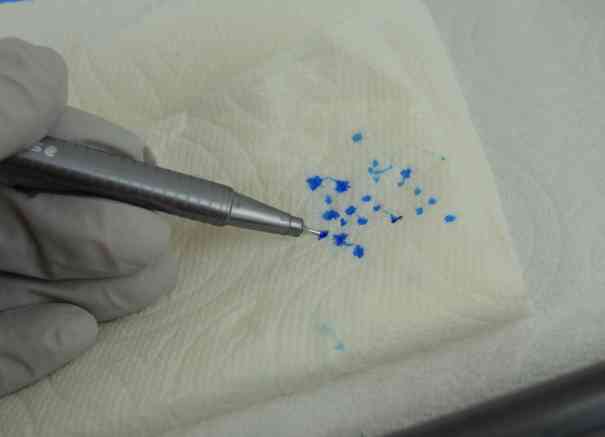
I haven’t found any other marker, pen, or ink that is anywhere near as washable as the Crayola Ultra-Clean washable markers. To illustrate just how much more washable the Ultra-Clean markers are, below is a test swatch of white cotton jersey that I marked on with a RoseArt washable marker (left), a Crayola Super Tip washable marker (center), and a Crayola Ultra-Clean Washable fine line marker (right). I ironed the sample on the portion below the dotted line, then threw it in with a load of laundry I was washing in cold water. The Crayola Ultra-Clean marker washed out completely, but the other two left stains, especially where they were ironed.
I don’t know whether or not Crayola marker inks contain any chemicals that will corrode metal over time, so the safest option is to choose fineliner pens that do not contain any metal in areas that are in contact with the ink.
I did geek out and test the pH of the Crayola Ultra-Clean marker ink, since the only thing that Crayola says regarding the pH is that most of their products are not acid-free, and I was worried the marker ink might be really acidic. In case you would like to know, here are the results of my pH tests:
| pH of Crayola Ultra-Clean Washable Marker Ink |
| Red |
6.5 |
| Orange |
6.6 |
| Sandy Tan |
6.8 |
| Yellow |
6.7 |
| Green |
6.4 |
| Blue Lagoon |
6.6 |
| Blue |
6.2 |
| Violet (Purple) |
5.8 |
| Pink |
6.7 |
| Brown |
6.0 |
| Gray |
6.5 |
| Black |
6.0 |
I’m not sure what the pH will tell you, other than the marker inks are all slightly acidic (but not acidic enough that I would worry about using them on fabric). Purple had the lowest pH, so perhaps it might be more prone to corrode metal pen parts. But who knows, it might be fine. I have an older purple Crayola Ultra-Clean washable marker that is a slightly different color than the one in my newest set, so apparently Crayola changes their ink formulas sometimes. Don’t count on your markers being the same as the ones I bought this year.
Most fineliner pens have metal around the tip, so even though it may be risky to use these pens, I will show you how to put marker ink into a few of these types, in case you want to try it. If you try a pen with metal on the tip, I recommend that you periodically check for visible corrosion on the tip, and test wash a marked scrap of fabric now and then to make sure the ink is still completely washable (rust will leave permanent stains on fabric). Keep in mind the chemical formula for each ink color is different, so just because one color is safe doesn’t mean the others are. Also keep in mind Crayola could change their ink formulas in the future.
I haven’t had any problems with my metal tipped pens yet, but it’s only been a few weeks, and I haven’t tried every color in every type of pen. If you have a problem with corrosion on your pen tip, please leave a comment at the end of this post with the pen type and ink color you used so others will know what to avoid. Also, if you are reading this in, say, the year 2021 or later, and want an update on how my metal-tipped pens have fared over time, leave a comment asking me for an update.
Before we get started with instructions for each of the pens you can convert to washable ink, here are some tips and cautions for washable fabric markers/pens:
- Maybe this first one is obvious, but only use washable fabric markers or pens on items that will be washed in water.
- Don’t use washable markers/pens on fusible interfacing or fabric that will be fused to interfacing, since the ink will mix with the interfacing adhesive and set in permanently.
- While I personally use these washable markers and pens with abandon on everything I sew, I do recommend that you test before using them on a special project or an unusual fabric, just to be safe.
- Crayola Ultra-Clean marker ink washes out best from fabric made from plant fibers or synthetic fibers (cotton, linen, polyester, rayon, etc.). Be sure to test before using them on silk, wool, or other animal fibers. I do not hesitate to use these washable pens on washable silk or wool, but I am extra careful to mark lightly. Fine tipped pens are better than markers for silk and wool, since they put less ink into the fabric. On fabrics that stain more easily, it may help to soak the garment in plain cold water before washing with detergent. If marks remain where you saturated the fabric with too much ink, a second wash usually gets them out.
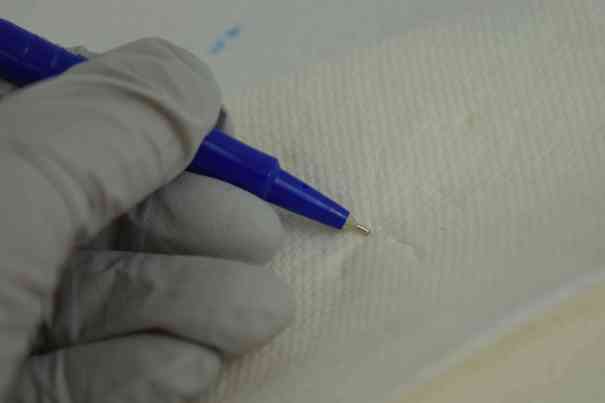
- Mark your fabric lightly. Don’t press hard or saturate the fabric with marker ink, or it will be harder to wash out.
- Porous plastic point pen tips are fragile (don’t drop your pen on the tip!) and like felt-tip markers, they wear down with use, so pressing lightly when you use your pens will prolong the life of the pen tip.
- If you use washable marker ink on areas that will be enclosed inside bulky seams or places that will be covered in dense stitching (such as buttonholes), it may take several washes to get the ink out. It will eventually wash out, though. You can speed up the process by soaking the garment and then spraying the inky area with high pressure water from a hose or vegetable sprayer.
- Don’t iron your fabric immediately after marking it, while the ink is still wet. Wait a few minutes for the ink to dry before ironing. Ironing immediately may set in ink stains.
- The longer the ink sits on fabric, the harder it is to wash out. It is best to use washable markers on projects you will finish within a few days. If the ink remains on the fabric longer, you may need multiple washes, warmer water, and/or oxygen bleach to get the marks out completely.
- It takes a fair amount of agitation to wash out the marker ink. One regular washing machine cycle is usually plenty, but if you are hand washing your item, it may take a while to get the ink out. Soaking helps.
- Store your fineliner pens or markers point down. If that’s not convenient, get them out before you use them and set them point down in a cup for a while to help the ink flow toward the tip.
- Crayola washable marker ink tends to dry out fairly quickly on the tip of porous plastic tipped pens, so cap your washable pen as soon as you are done using it. If your pen stops writing, a quick scribble on a piece of paper will usually get the ink flowing again. If your pen needs a little more help after not being used for a while or after being left uncapped, briefly dip the tip in water, then blot the tip on a paper towel or fabric scrap.
OK, lets get started making a washable fabric marking pen! I’ll show you how to convert seven different types of pens, so you can use whichever type you prefer.
There are some steps that are the same for each type of pen, so lets go over those first.
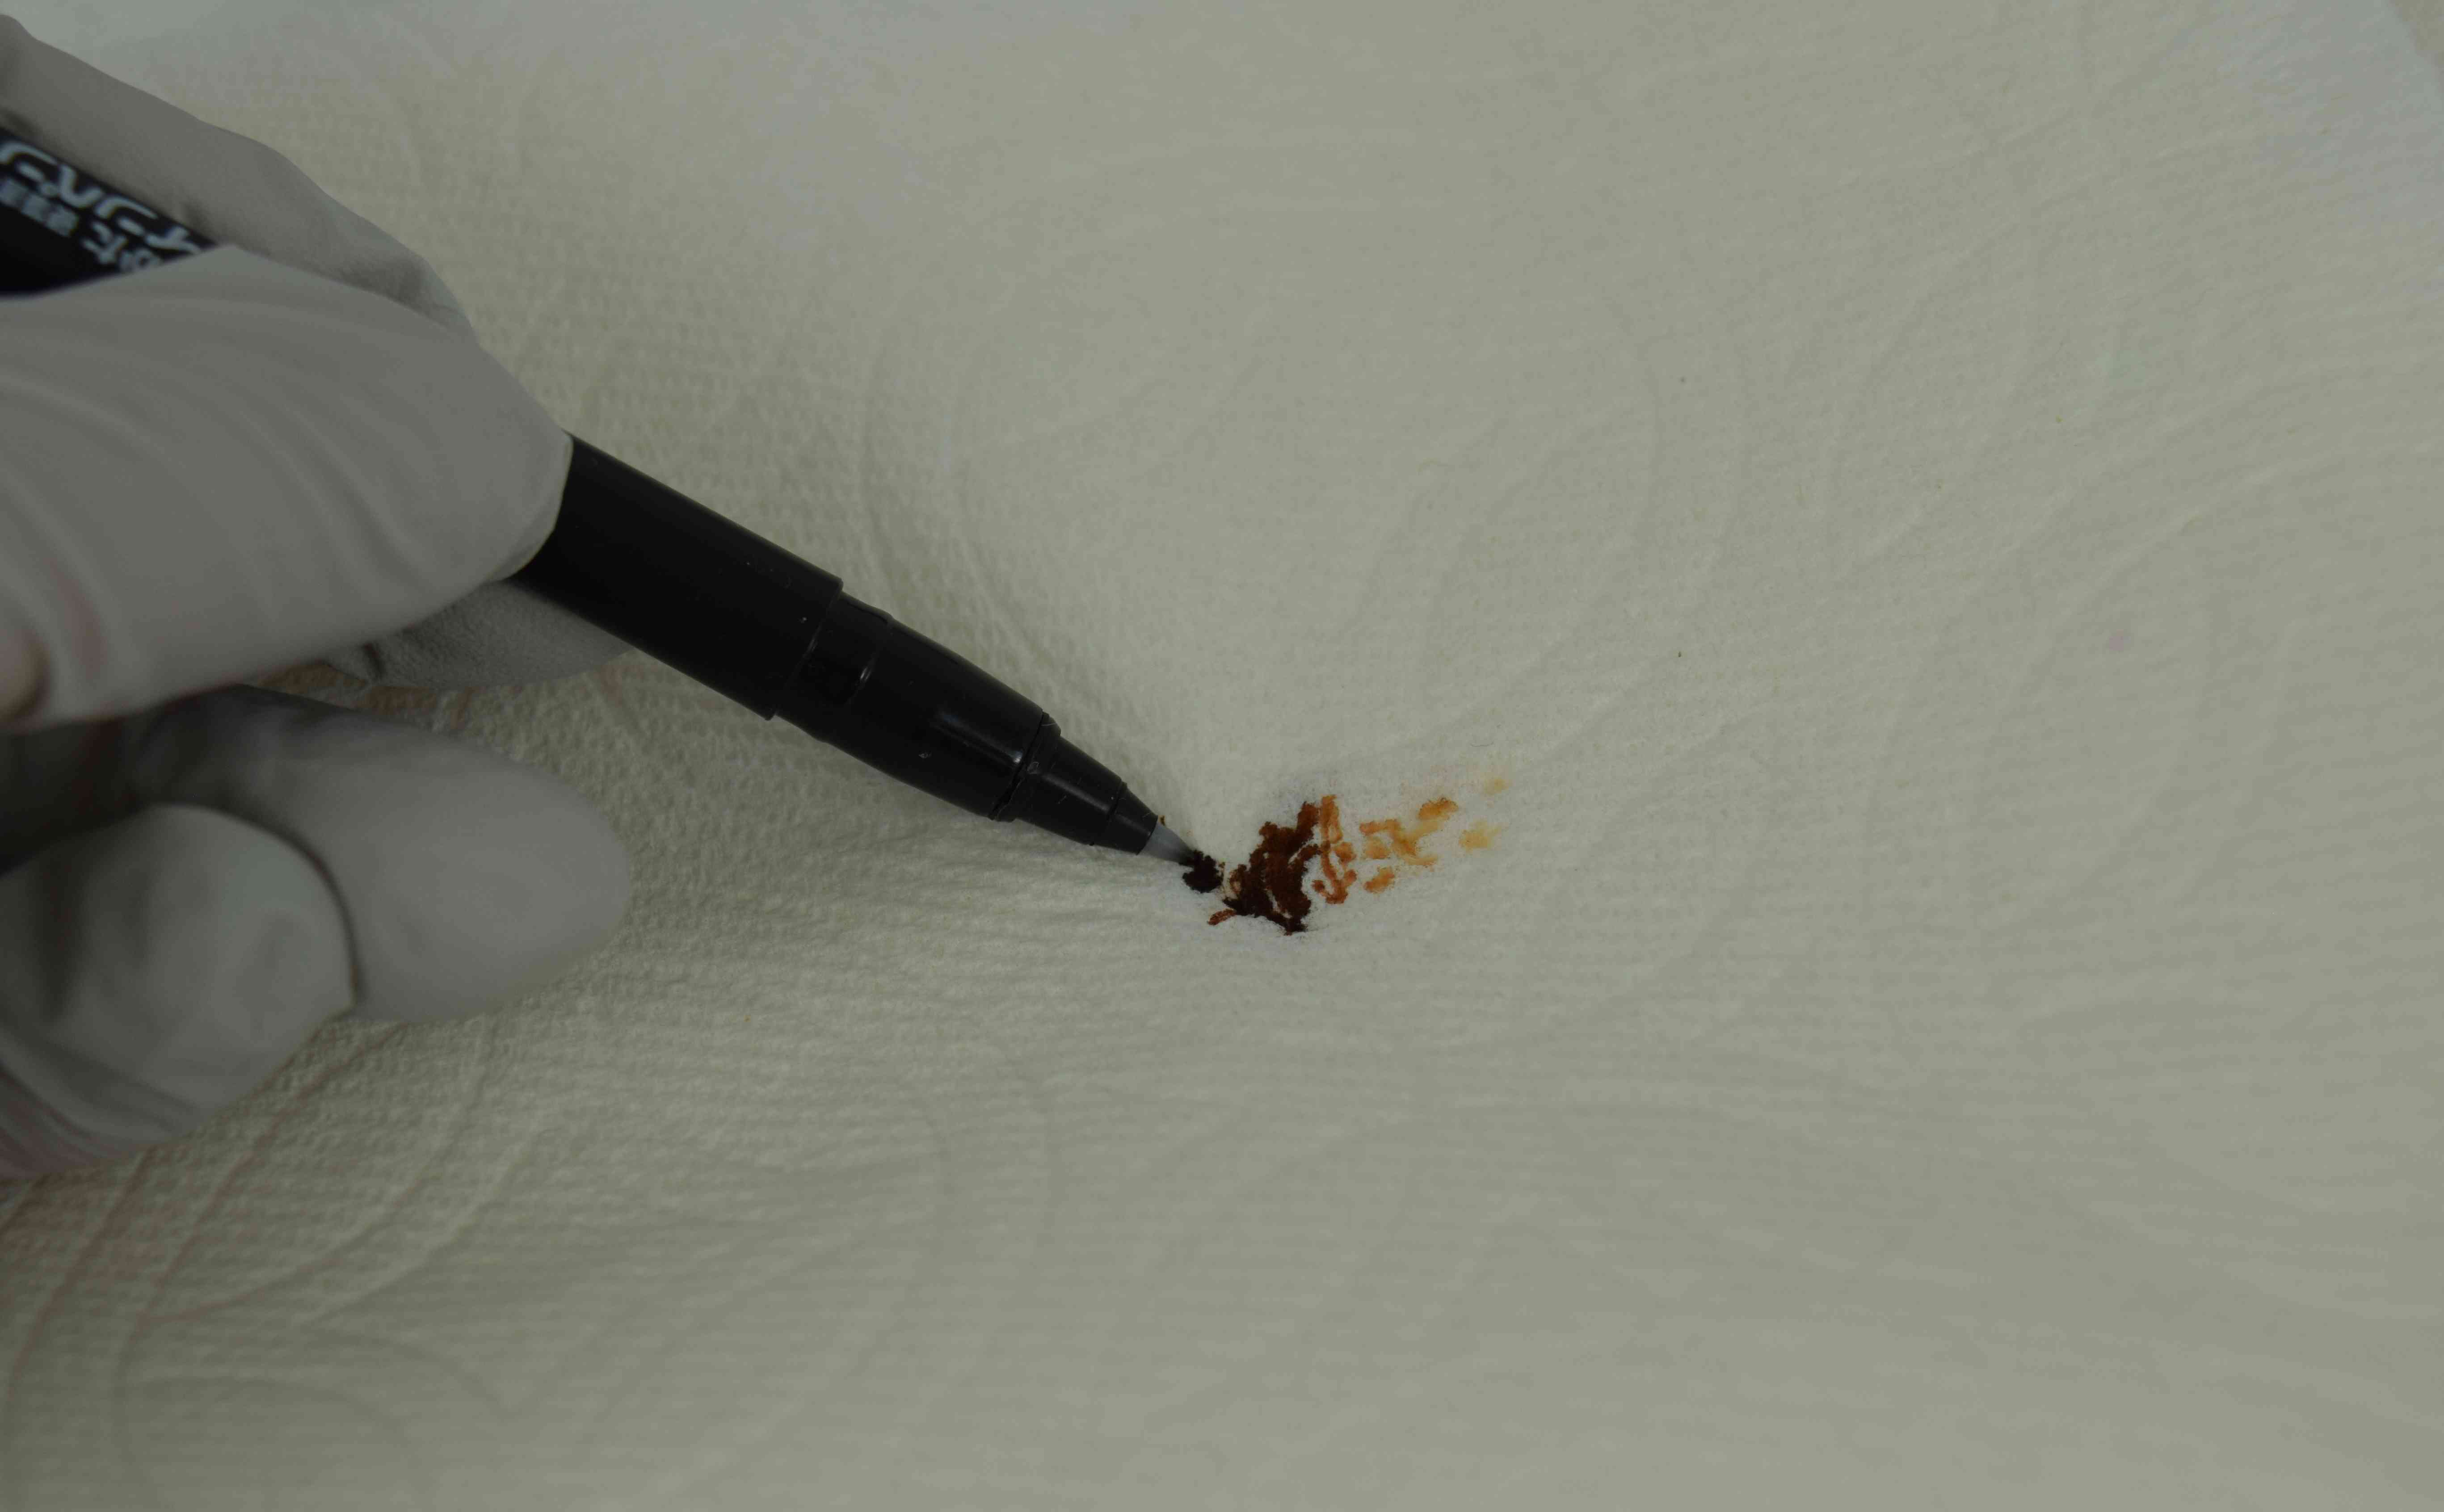
You will need to remove the ink reservoir, which is a flexible plastic tube filled with polyester fibers and ink, from the Crayola marker. You should either wear disposable gloves or wash your hands well before handling the ink reservoir. The ink has biocides in it to prevent mold and bacteria growth, but it is best not to risk contaminating it. I’ve had my kids’ markers get moldy before, and at that point there is nothing to do but throw them out.
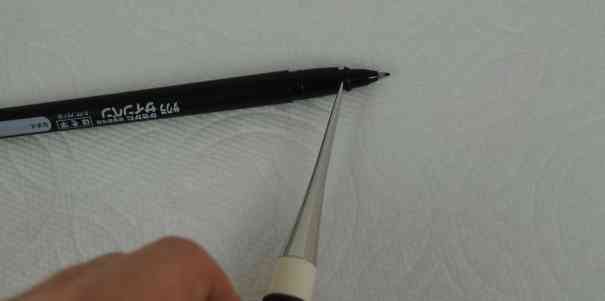
To remove the marker’s ink reservoir, you can either pull the end cap off with pliers (it will get smooshed, but you will be throwing it away anyway) or use a large pair of sharp scissors to wiggle off the end cap. Remove the fibrous cylinder that contains ink from inside the marker.

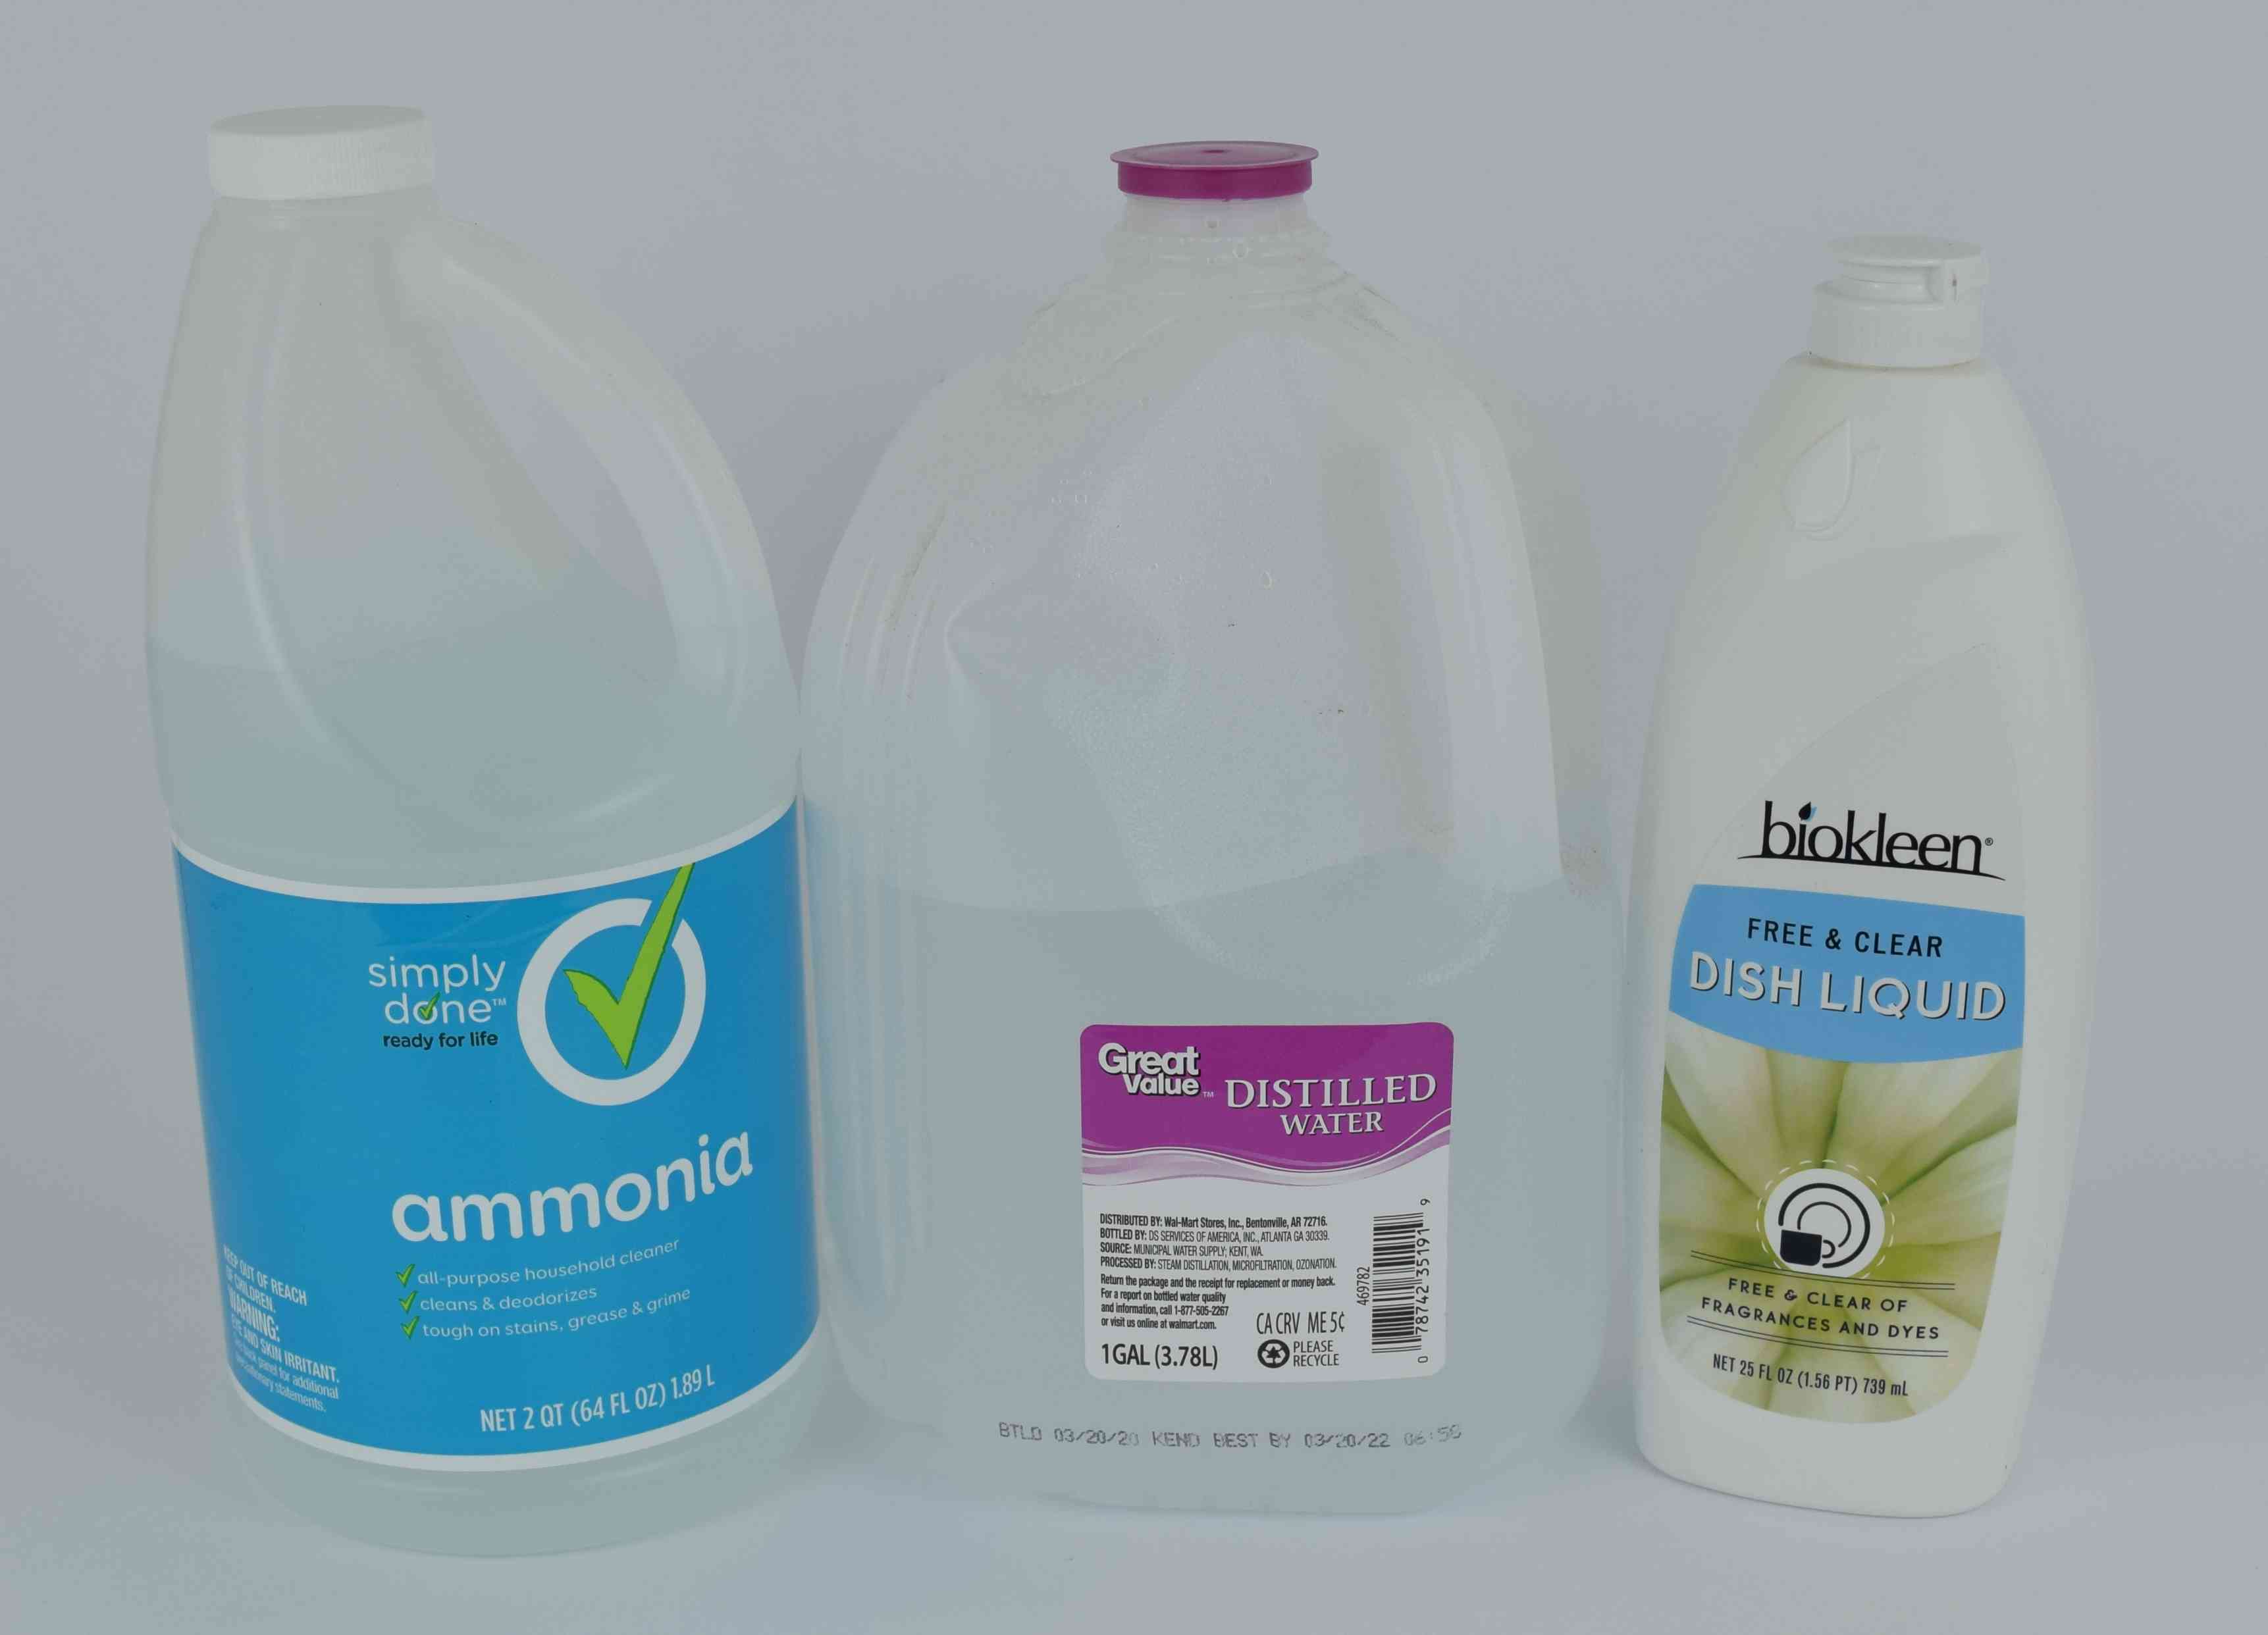
You will need pen flush to clean the original ink out of most of the pens. Here is the recipe:

Pen Flush
½ cup (100 ml) unscented household ammonia
1 cup (200 ml) distilled water
2 drops dish detergent for hand washing dishes (washing up liquid, for those of you in the UK)
Mix the ingredients together and store sealed in a jar.
Some of the fineliner pens don’t need pen flush to clean the original ink out, so check the directions for the specific pen you are converting. Also, even in the same type of pen, some colors of ink clean out more easily than others. You may only need to use water with a couple of drops of dish detergent to clean some of the pens. I mention this since I’m writing this blog post during the COVID-19 pandemic when people are buying out cleaning products, and ammonia can be hard to come by. An ammonia-containing window cleaner used undiluted might work instead of pen flush, too (I haven’t tried it, though).
*** Safety Tip *** Remember, don’t mix ammonia and bleach! After putting ammonia down your drain, flush plenty of plain water down the drain to get the ammonia out of the P-trap before scrubbing those ink stains out of your sink with a cleanser containing bleach.
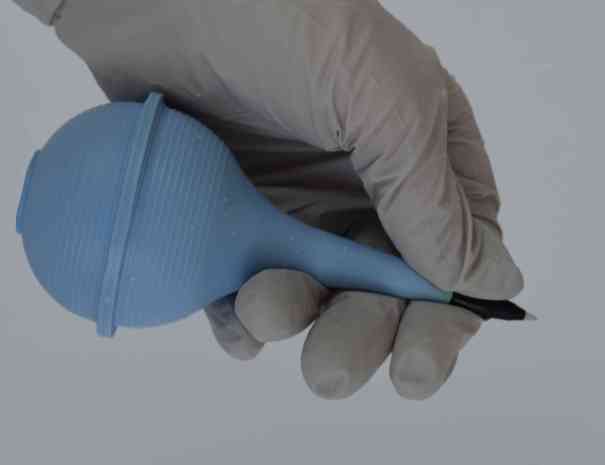
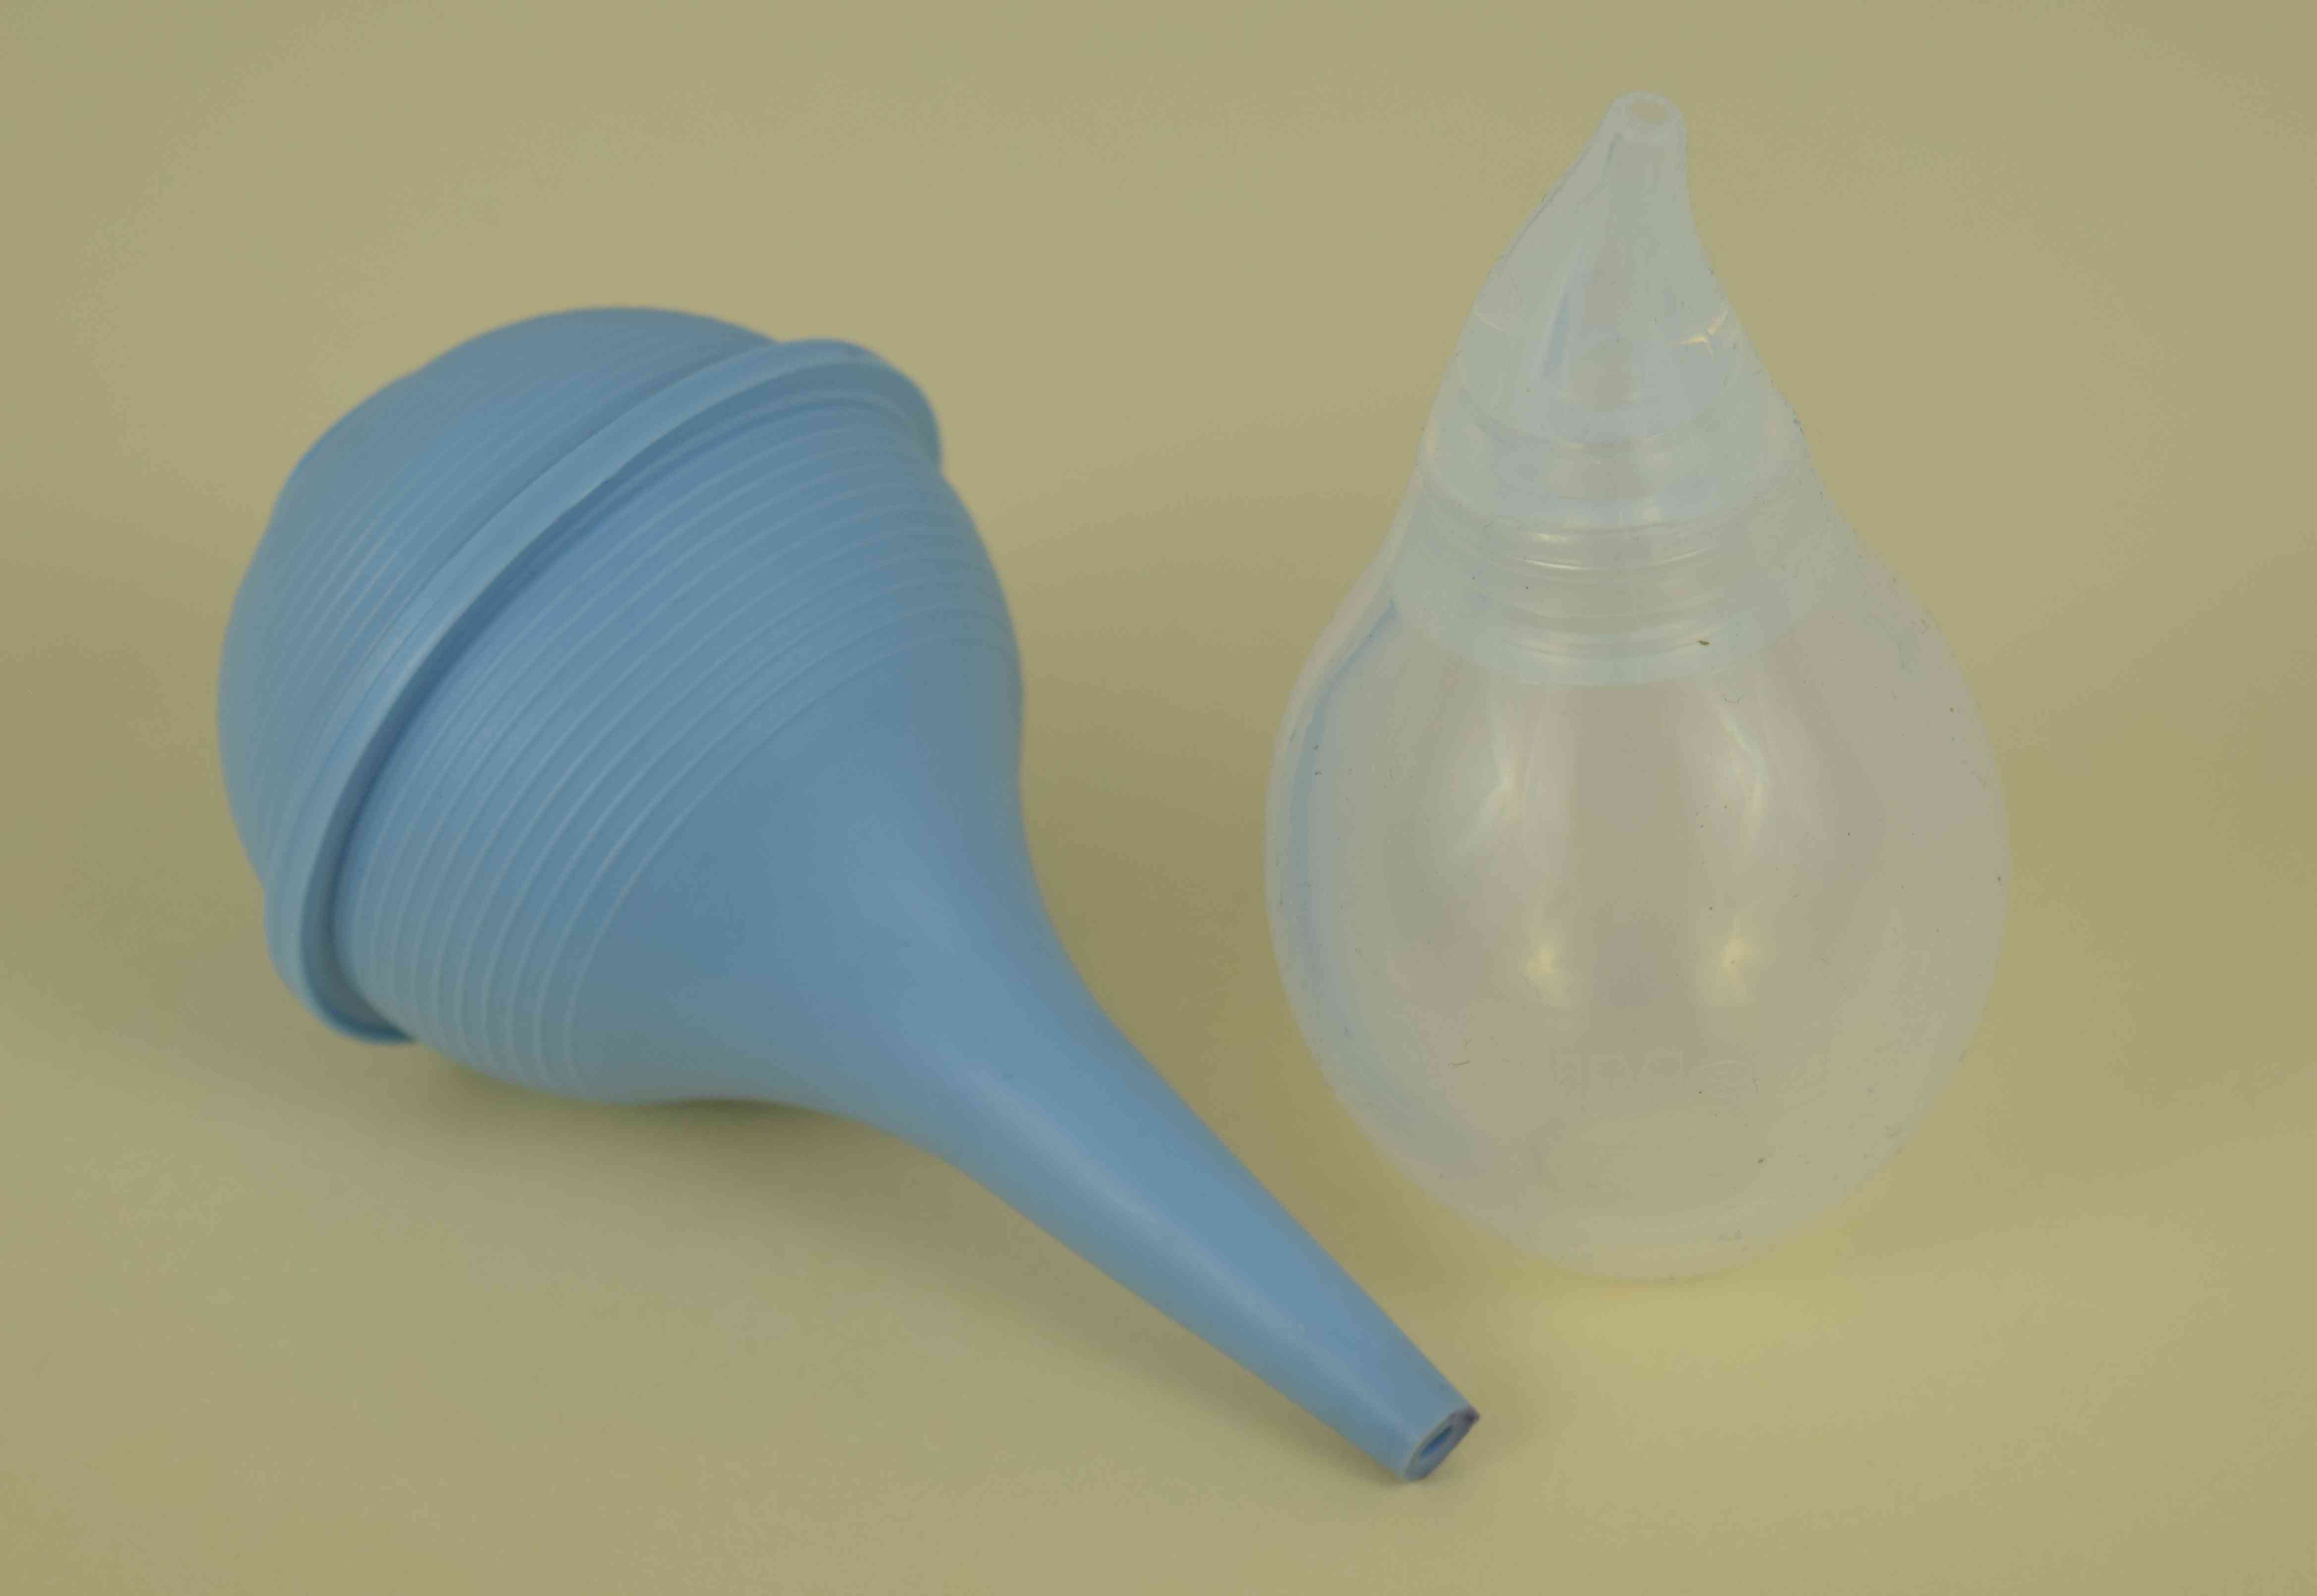
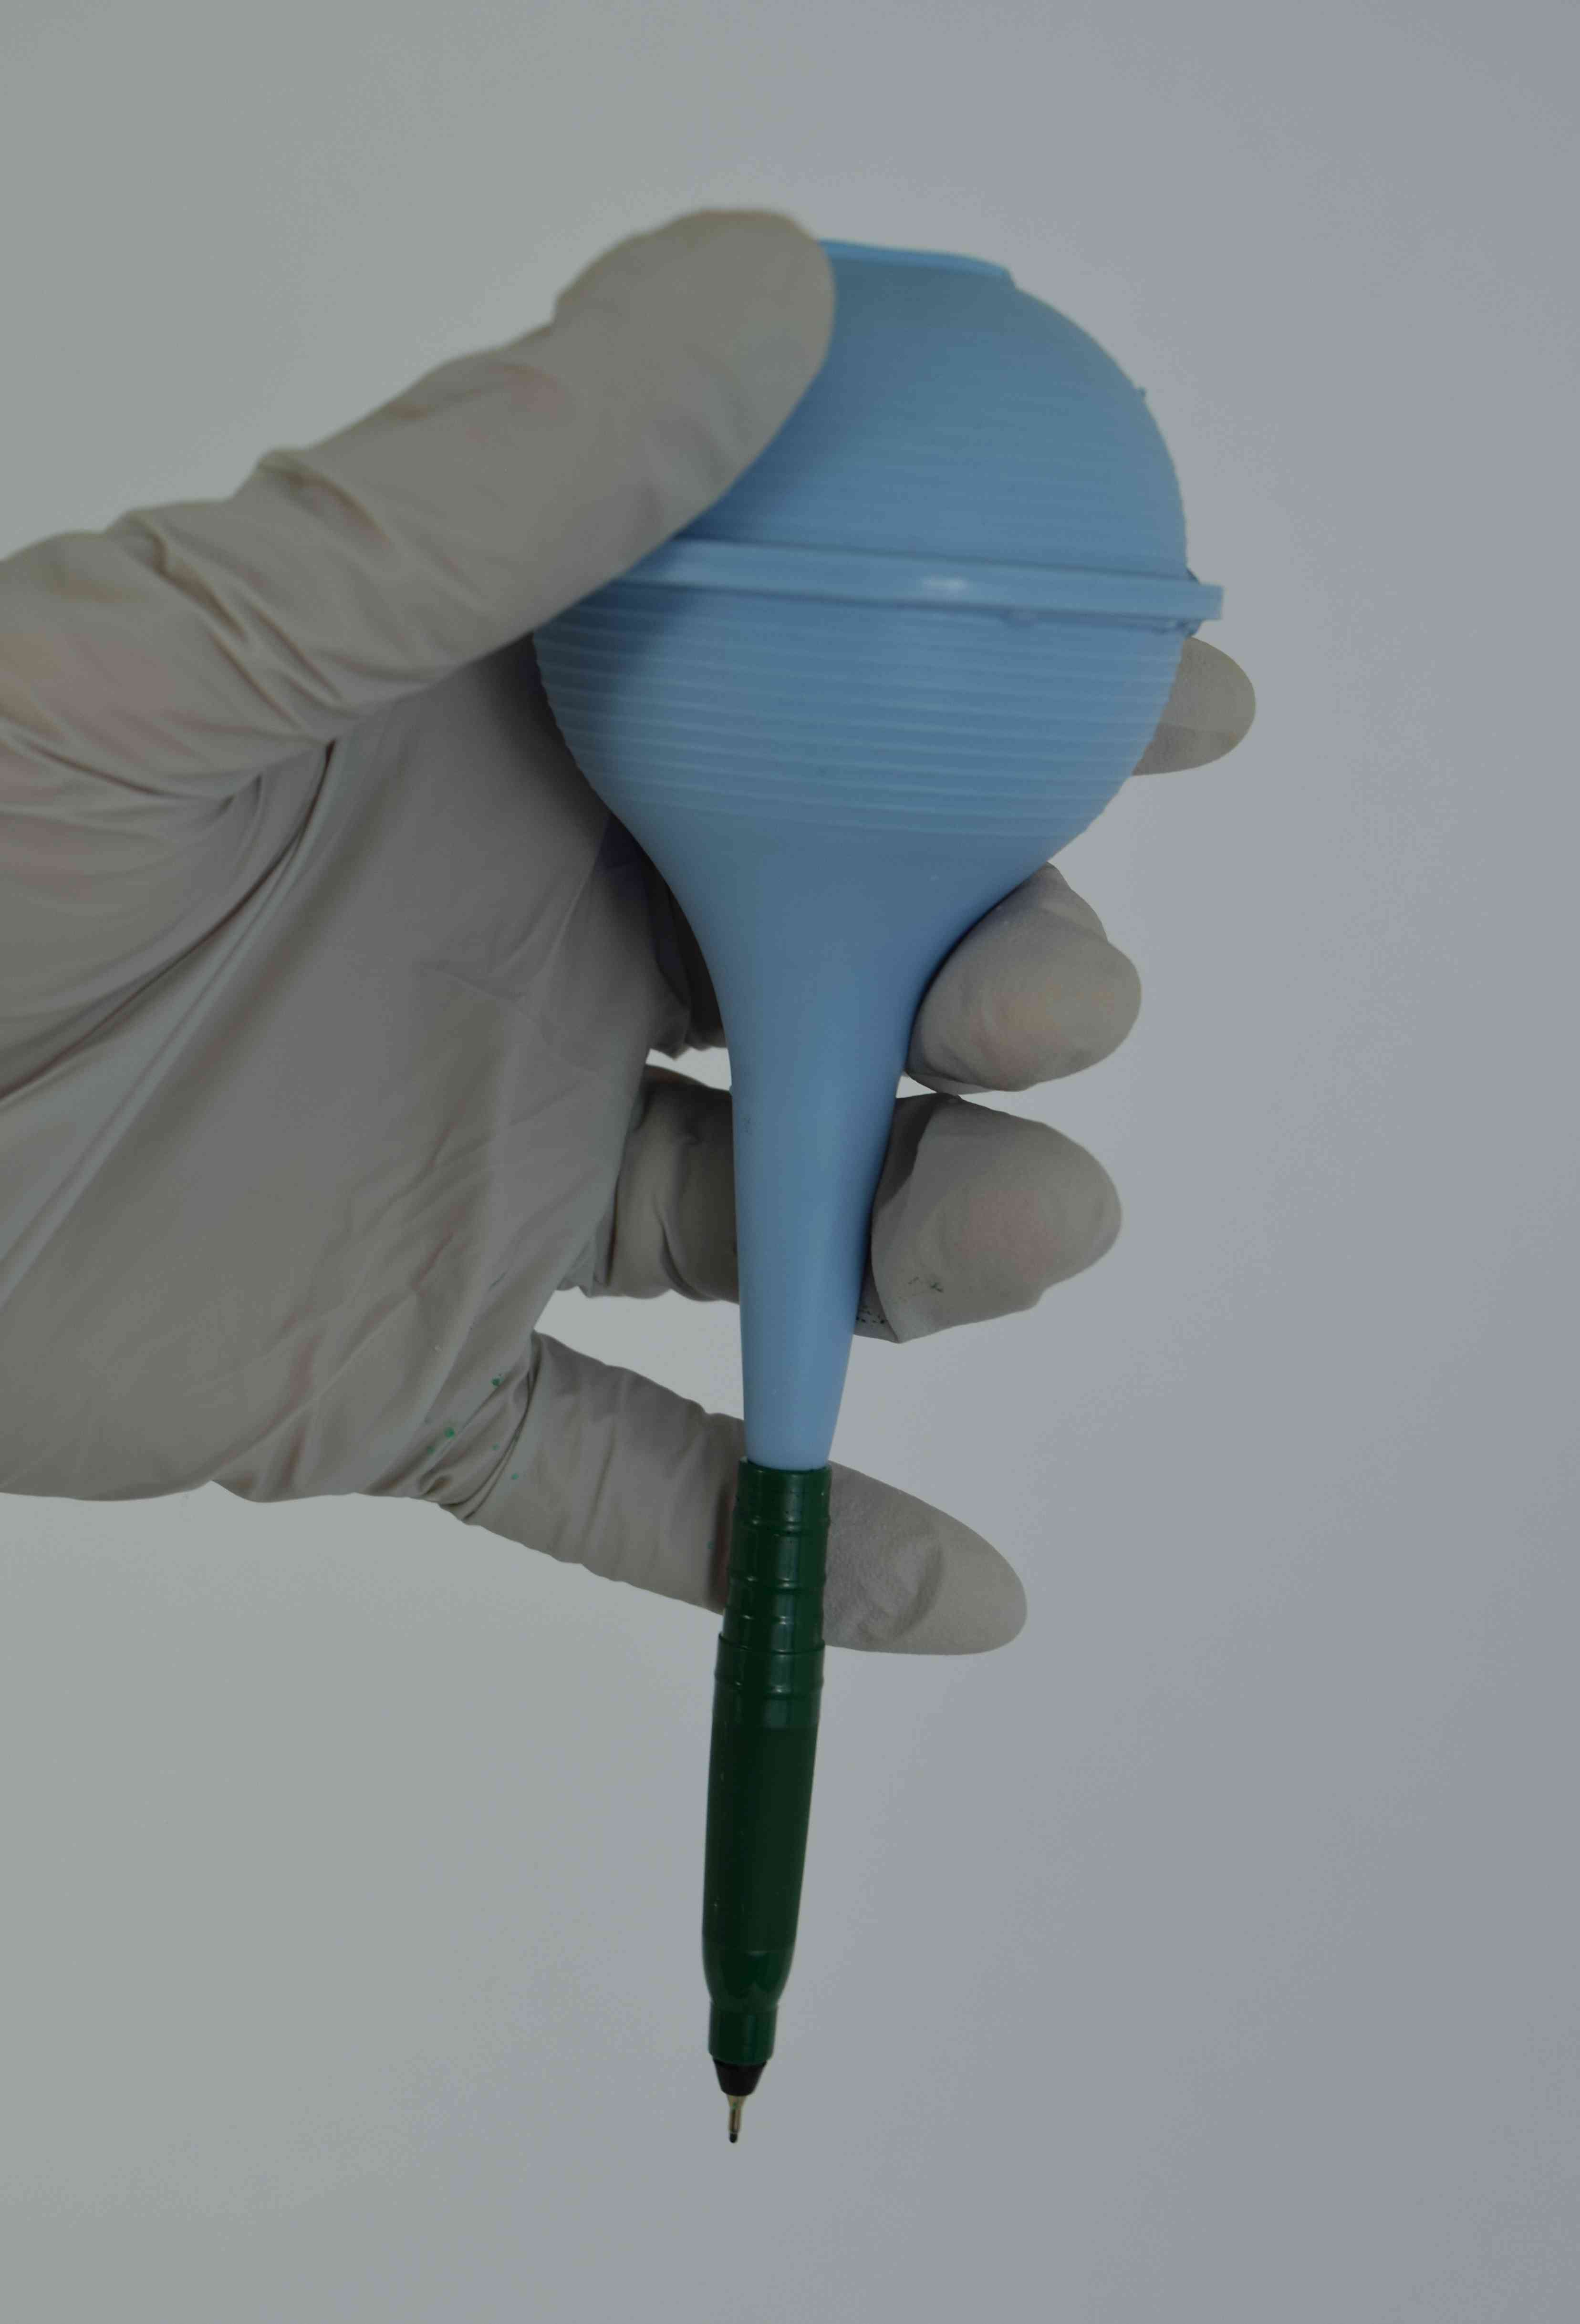
You will need a bulb syringe* (aka nasal aspirator, ear syringe, snot sucker) to clean your pen. If you are using the type of bulb syringe that doesn’t open up for cleaning, use a new one (boogers and ear wax are bad for pens!). If you have one that can be opened up for cleaning, make sure it has been cleaned well before using it on your pen.

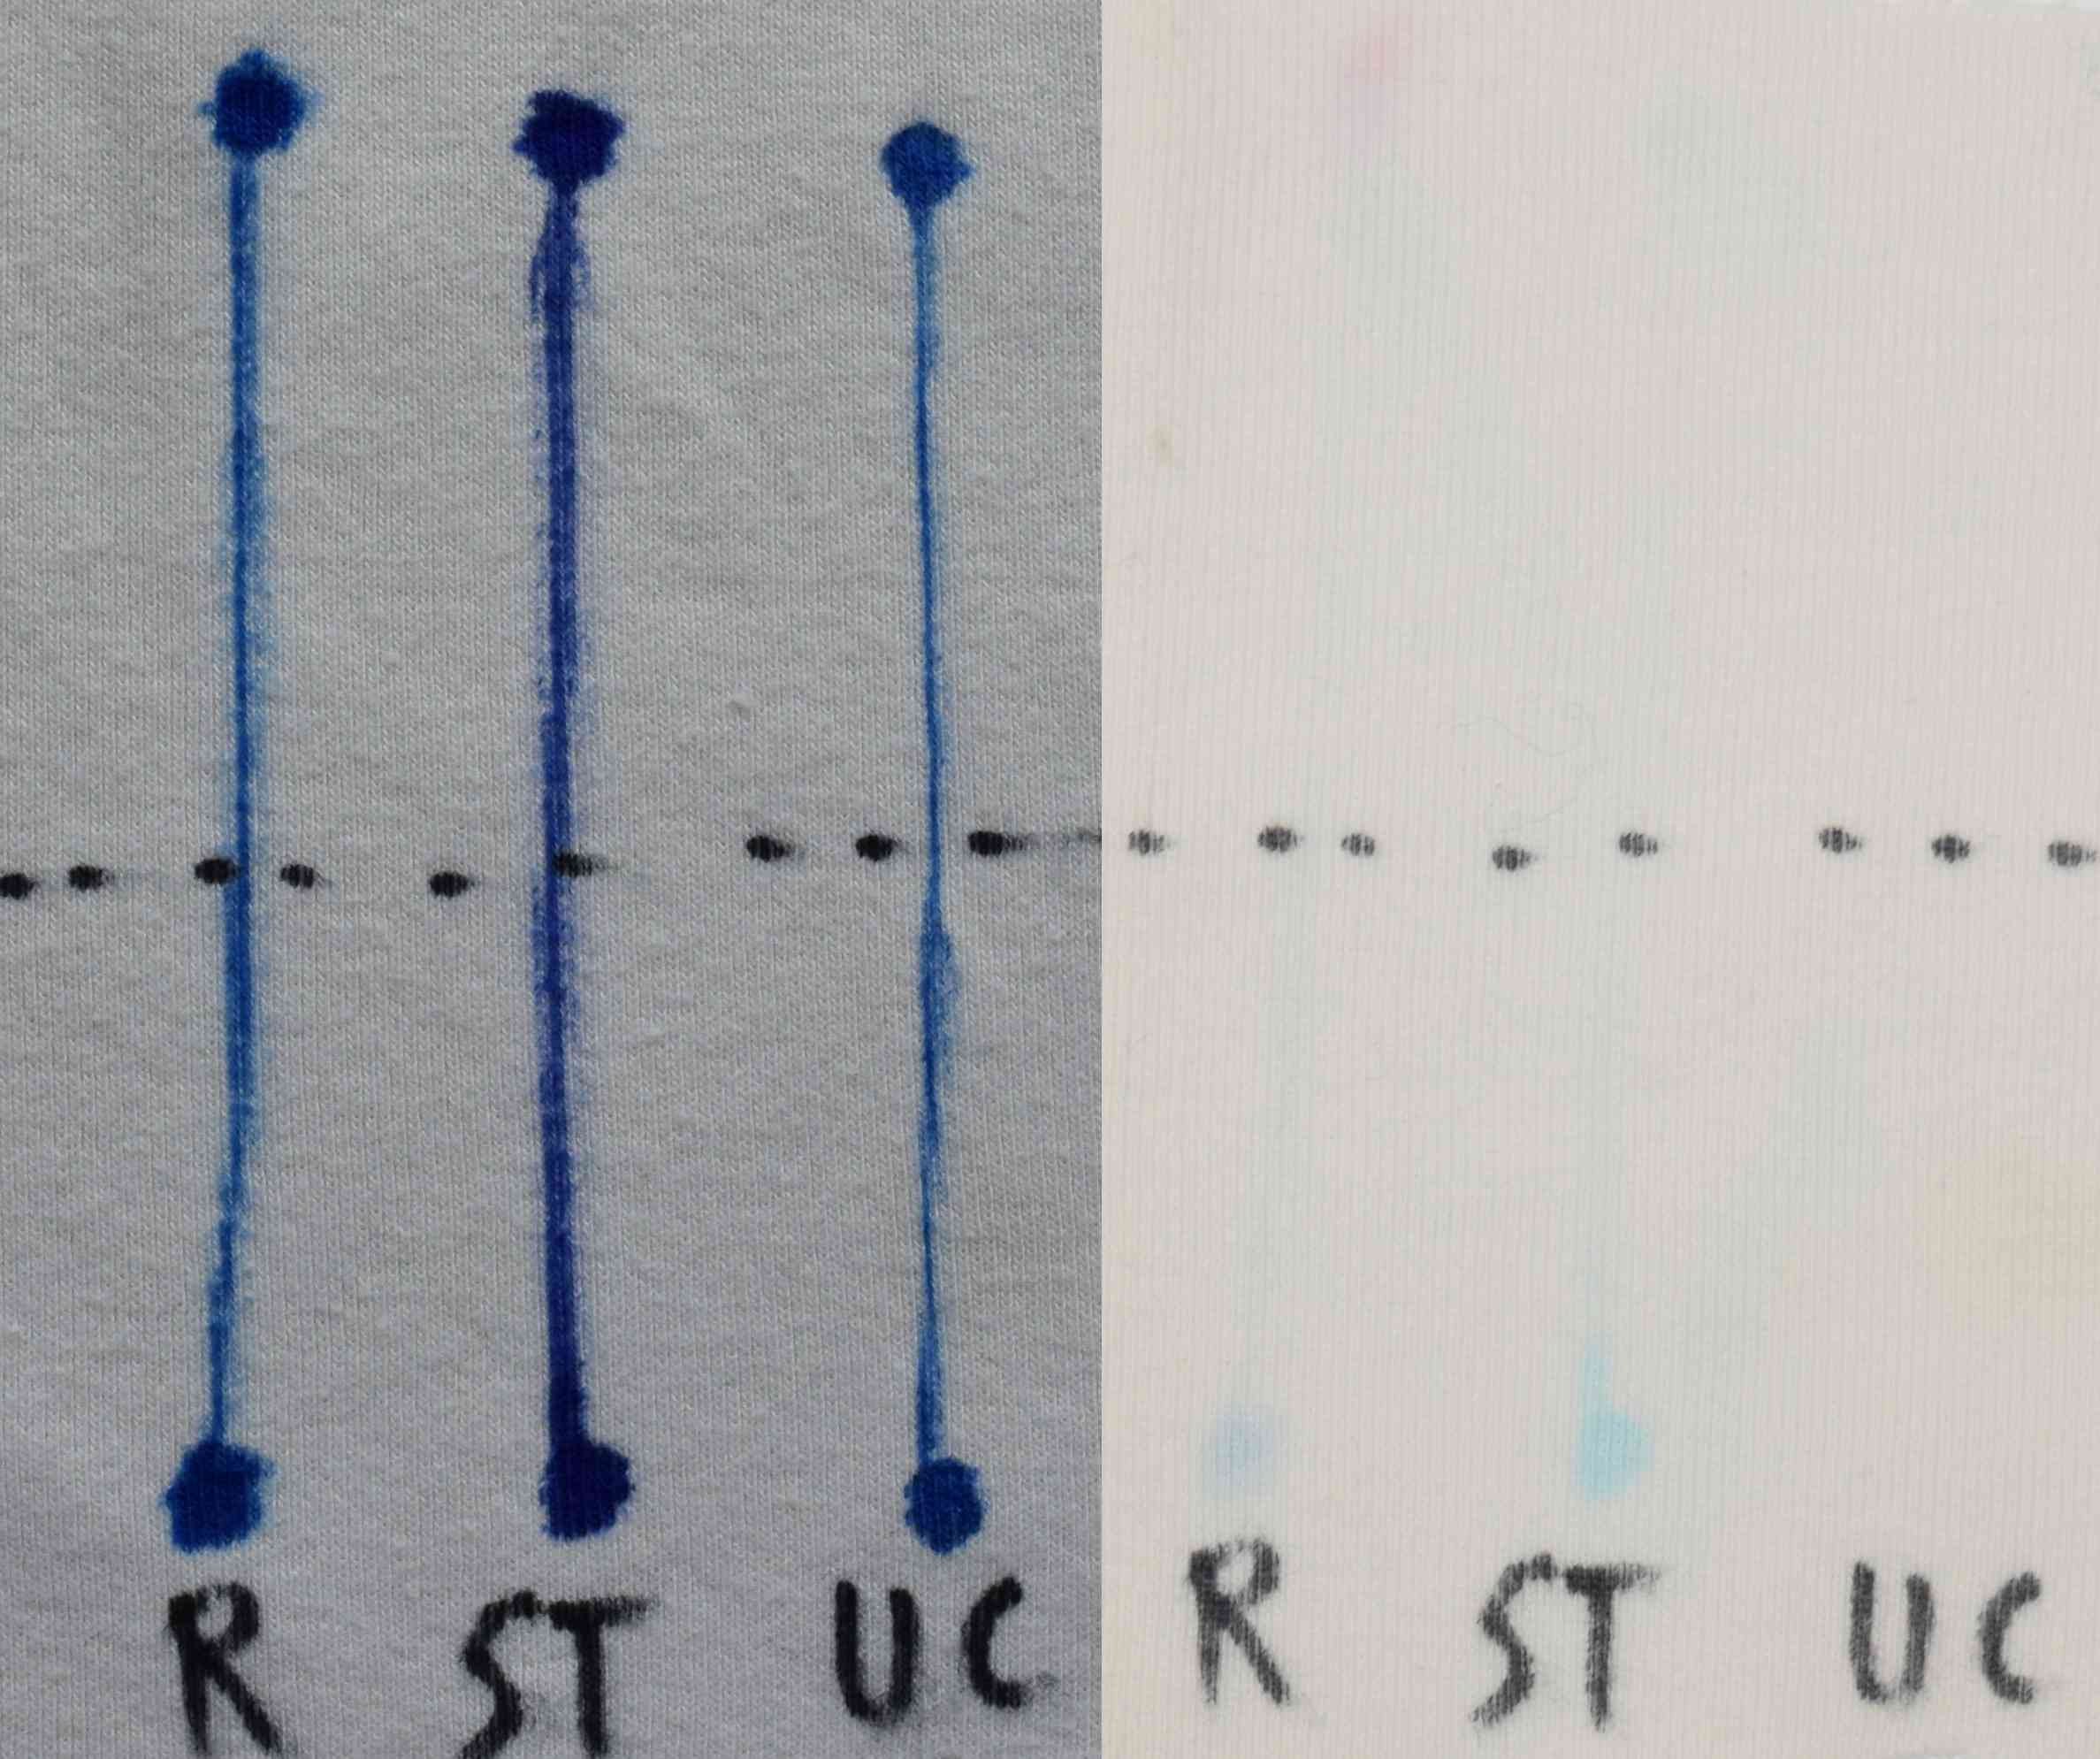
Below is a photo of a muslin test swatch of the washable pens I have currently. There are some slight differences in line width. I would say the Clover extra-fine air erasable pens and the uni-ball onyx eco micro pens made the finest lines (though there’s not a whole lot of difference—maybe a tenth of a millimeter). The Staedtler triplus pens had the widest lines and most consistent flow when stored point up, but storing any of the pens point down will improve their ink flow.
You can see that the pen lines are almost as fine as the width of a piece of thread—perfect for those times when you need to mark the exact location of a stitching line. The last two are Crayola fine line markers for comparison.

And here’s proof that the ink washes out. I ironed the section of the ink lines on the right, and it made no difference. I didn’t even bother to rinse or soak it—I just threw the test swatch in with a load of laundry. No trace of any of the colors remains.

I purchased all of the pens below in late 2019 and early 2020. Keep in mind manufacturers could change the design of their pens in the future, so the exact instructions below may need some alteration for different pen designs. Also, I’m sure there are other types of pens that will work. Hopefully the instructions below will give you ideas for how to convert other types of fineliner pens. I tried to pick some pens that are commonly available.
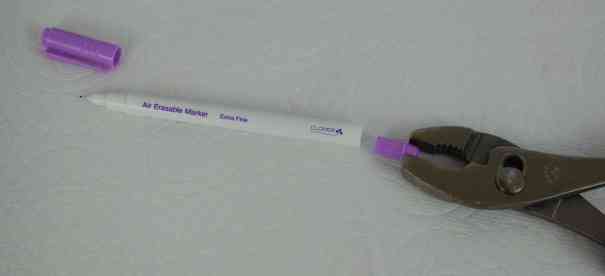
Clover Extra-Fine Air Erasable Pen
Clover Extra-Fine Air Erasable Pens are my top pick for converting to a washable ink pen. They are well-made pens with a very fine tip and no metal parts (so there is no possibility of the ink corroding the pen tip). They are easy to take apart and the original ink flushes out easily with plain water. They cost more than any of the other pens, but as long as you don’t damage the pen tip, you should be able to refill the same pen several times.

You will need:
Clover Extra-Fine Air Erasable Pen*
Crayola Fine Line Ultra-Clean washable marker*
Pliers
Small plastic straws and/or plastic tape
Disposable gloves (or just make sure to wash your hands well before and after touching the ink)
Bulb syringe
Metric ruler
Scissors
Paper towel
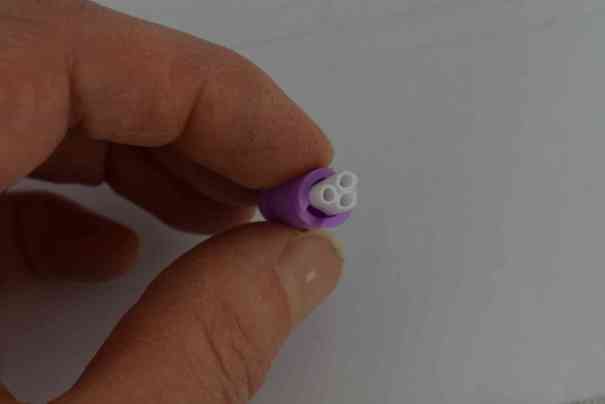
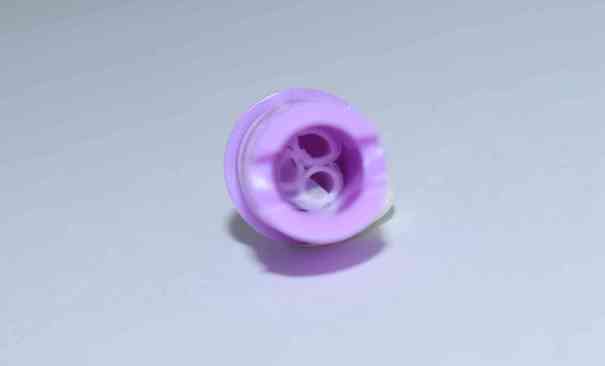
Use pliers to pull the end cap off the end of the Clover pen.
Remove the ink reservoir from inside the pen. If it is not dried out and you would like to save it to refill another air-erasable pen, wrap it in plastic wrap or a plastic sandwich bag, then foil, to keep it from drying out.
Take the pen to a sink. Wash out the cap and end cap, shake out the water, and set these parts aside. Suck up lukewarm water into the bulb syringe and firmly push the tip into the open end of the pen body. Hold the pen vertically with the tip of the pen near the bottom of the sink and squeeze the bulb to push water through the pen tip. Keep flushing water through the pen until the tip of the pen appears white, with no visible ink.

Shake excess water out of the pen and gently dab the tip of the pen on a paper towel.
The Crayola marker ink reservoir is longer and smaller in diameter than the Clover ink reservoir. Since the Crayola ink reservoir has a smaller diameter, it will actually fit inside the opening in the end cap rather than butting up against the end of it, so luckily you don’t need to cut it shorter. You do, however, need to add a small spacer inside the end cap to keep the ink reservoir sitting in the right place.
I made a spacer by taping together three plastic straws that cheap off-brand cotton swabs are made from. You could also use small clean drink stirring straws, a bit of aquarium tubing, or just roll up some plastic tape until it is the right diameter to fit inside the end cap.
Cut your spacer to be 5 mm long, and push it all the way down into the end of the pen end cap.
Remove the ink reservoir from the Crayola marker and push it down inside the Clover pen. Put the end cap on, making sure the ink reservoir sits inside the end cap as you put it on. Firmly push the end cap in place. You may need to bang the end of the pen on a table to get the end cap to snap in place.
Dab the tip of the pen on a paper towel until the ink comes out of the tip.

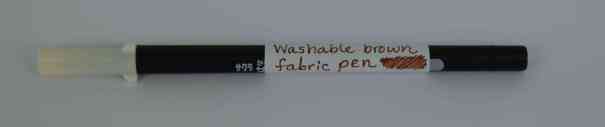
Add a label to the pen.

Sakura Kakikata Fine Tip Fineliner Pen
Sakura Kakikata fine tip pens are my second choice for converting to a washable ink pen. Other than the Clover air-erasable pen, it is the only other metal-free fineliner pen I could find that I was able to clean the ink out of.

You will need:
Sakura Kakikata Fine Tip Fineliner Pen. The fine tipped pens in this set of Sakura pens* appear to be the same type of pen.
Crayola Fine Line Ultra-Clean washable marker*
Pen flush (see recipe above)
Awl or similar pointy object
Disposable gloves (or just make sure to wash your hands well before and after touching the ink)
Bulb syringe
Scissors or razor knife
Cotton swabs
Paper towel
Remove the cap from the Sakura pen. Use an awl to carefully push off the tip of the pen. There are small indentations that you can get the tip of the awl into. After the tip comes part way off, pull it the rest of the way off with your fingers.
Tap the open end of the body of the pen on a paper towel set on a table to remove the ink reservoir and the plastic spacer tube. Set the ink reservoir aside, but don’t discard it yet.

Wash out the body of the pen, the spacer tube, and the cap with pen flush. Use a cotton swab to wipe out ink if needed. Rinse these pen parts, then shake off excess water and set them aside.
Fill the bulb syringe with lukewarm water. Push the pen tip onto the end of the bulb syringe and flush water through it. Flip the tip around, and flush water back through the other way. Suck up some pen flush, and flush that through the tip until it looks white/clear. If you see any ink still in the tip, drop the pen tip into your jar of pen flush and soak it for an hour or two. Flush the tip again with pen flush, then water. Dab the tip onto a paper towel to verify than no ink comes out from inside the tip.
Remove the ink reservoir from the Crayola marker.
Line up the end of the Sakura ink reservoir and the spacer tube. Set the Crayola ink reservoir next to it, aligned with the end of the Sakura ink reservoir. Cut the end of the spacer tube at the point where it is aligned with the end of the Crayola ink reservoir. You need the total length of ink reservoir plus spacer to remain the same.


Put the smaller piece of the spacer tube inside the body of the pen. Insert the Crayola ink reservoir. Push the pen tip firmly back in place.
Dab the tip of the pen on a paper towel until ink comes out.

Add a label to the pen.
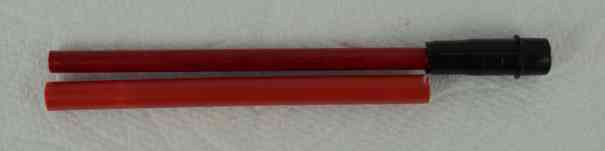
Sharpie Pen
Sharpie pens (which are different from Sharpie ultra-fine point permanent markers) can be converted fairly easily to use washable ink. They are porous plastic tip fineliner pens with water-based ink. You can get Sharpie pens in many colors, so you can match the pen colors to ink colors from a set of markers if you like.

You will need:
Sharpie pen*
Crayola Fine Line Ultra-Clean washable marker*
Pen flush (see recipe above)
Pliers
Awl or similar pointy object
Disposable gloves (or just make sure to wash your hands well before and after touching the ink)
Bulb syringe
Cotton swabs
Paper towel
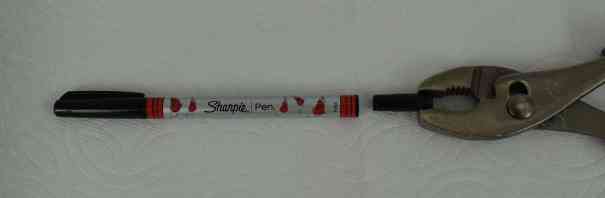
Pull the end cap off of the Sharpie pen with pliers.
Remove the ink reservoir from the pen.

Wash out the pen cap and end cap with pen flush. Rinse them, shake off excess water and set them aside.
Hold the pen body vertically in a sink with the tip near the bottom of the sink. Fill the bulb syringe with lukewarm water, insert it into the open end of the pen, and squeeze it to flush water out through the tip. Hold your fingers over the vent holes near the tip (the places the water shoots out sideways from) to force water out of the tip of the pen as you squeeze the bulb syringe. When the water runs mostly clear, suck up some pen flush into the bulb syringe and flush that through the pen.

Use an awl to pry off the tip of the pen.

Use a cotton swab dipped in pen flush to wipe out the tip end of the pen body. If it looks like there might still be some ink in the tip, put the tip of the pen in the jar of pen flush and let it soak for an hour or two.
Put the tip of the pen up against the bulb syringe and force some more pen flush through it. When it looks clean, flush water through it. Dab the tip on a paper towel to verify that you have gotten all of the ink out.

Put the tip back on the pen.
Remove the ink reservoir from the Crayola marker.
The Crayola marker ink reservoir is longer and smaller in diameter than the Sharpie pen ink reservoir.

However, it just so happens that if you put the end of the Crayola ink reservoir inside the end cap, the total length is the same as the original ink reservoir plus end cap.
Place the Crayola ink reservoir inside the hollow end cap, then insert the ink reservoir and end cap into the body of the pen. Push the end cap firmly in place.
Dab the tip of the pen on a paper towel until ink flows out.

Label your new washable fabric pen.

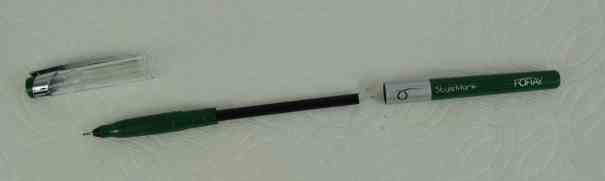
Foray Stylemark Pen
Foray Stylemark pens are store brand porous plastic tip pens from Office Depot/OfficeMax. They convert fairly easily to using washable ink.
You will need:
Foray Stylemark Pen*
Crayola Fine Line Ultra-Clean washable marker*
Pen flush (see recipe above)
Awl or similar pointy object
Disposable gloves (or just make sure to wash your hands well before and after touching the ink)
Bulb syringe
Cotton swabs
Paper towel
Remove the pen cap from the Foray Stylemark pen. Using your hands, pull apart the two halves of the pen and remove the ink reservoir.
Wash out the cap and back end of the pen with pen flush, rinse, shake out the excess water, and set aside.
Fill the bulb syringe with lukewarm water. Hold the tip section of the pen vertically, with the tip near the bottom of the sink. Insert the bulb syringe into the open end of the pen and squeeze the bulb to force water through the pen. Be careful, since water will shoot out sideways from three holes near the tip. When the water starts to run clear, hold your fingers over these vent holes as best as you can to force water out of the tip of the pen. When the water starts to look clear, suck up some pen flush into the bulb syringe and switch to flushing pen flush out of the pen tip of the pen, until that runs clear.

Use an awl to pry the tip of the pen off. Place the tip in the jar of pen flush and let it soak for an hour or two. Use a cotton swab dipped in pen flush to wipe out the tip end of the pen body. Rinse it and set it aside.

Put the pen tip directly up against the tip of the bulb syringe, and force more pen flush through it. If you still see some ink in the tip or wick, soak the pen tip in pen flush for an hour or two, then flush it out with the bulb syringe again. When it looks clean, flush water through the tip. Dab it on a paper towel to make sure no ink comes out.

Put the tip back on the pen.
Remove the ink reservoir from the Crayola marker. It is the same size as the one in the Foray Stylemark pen. Put the Crayola ink reservoir into the lower section of the pen, pushing it gently onto the wick inside. Push the back end of the pen back on.
Dab the tip of the pen on a paper towel until ink flows out.

Label your new washable fabric pen.
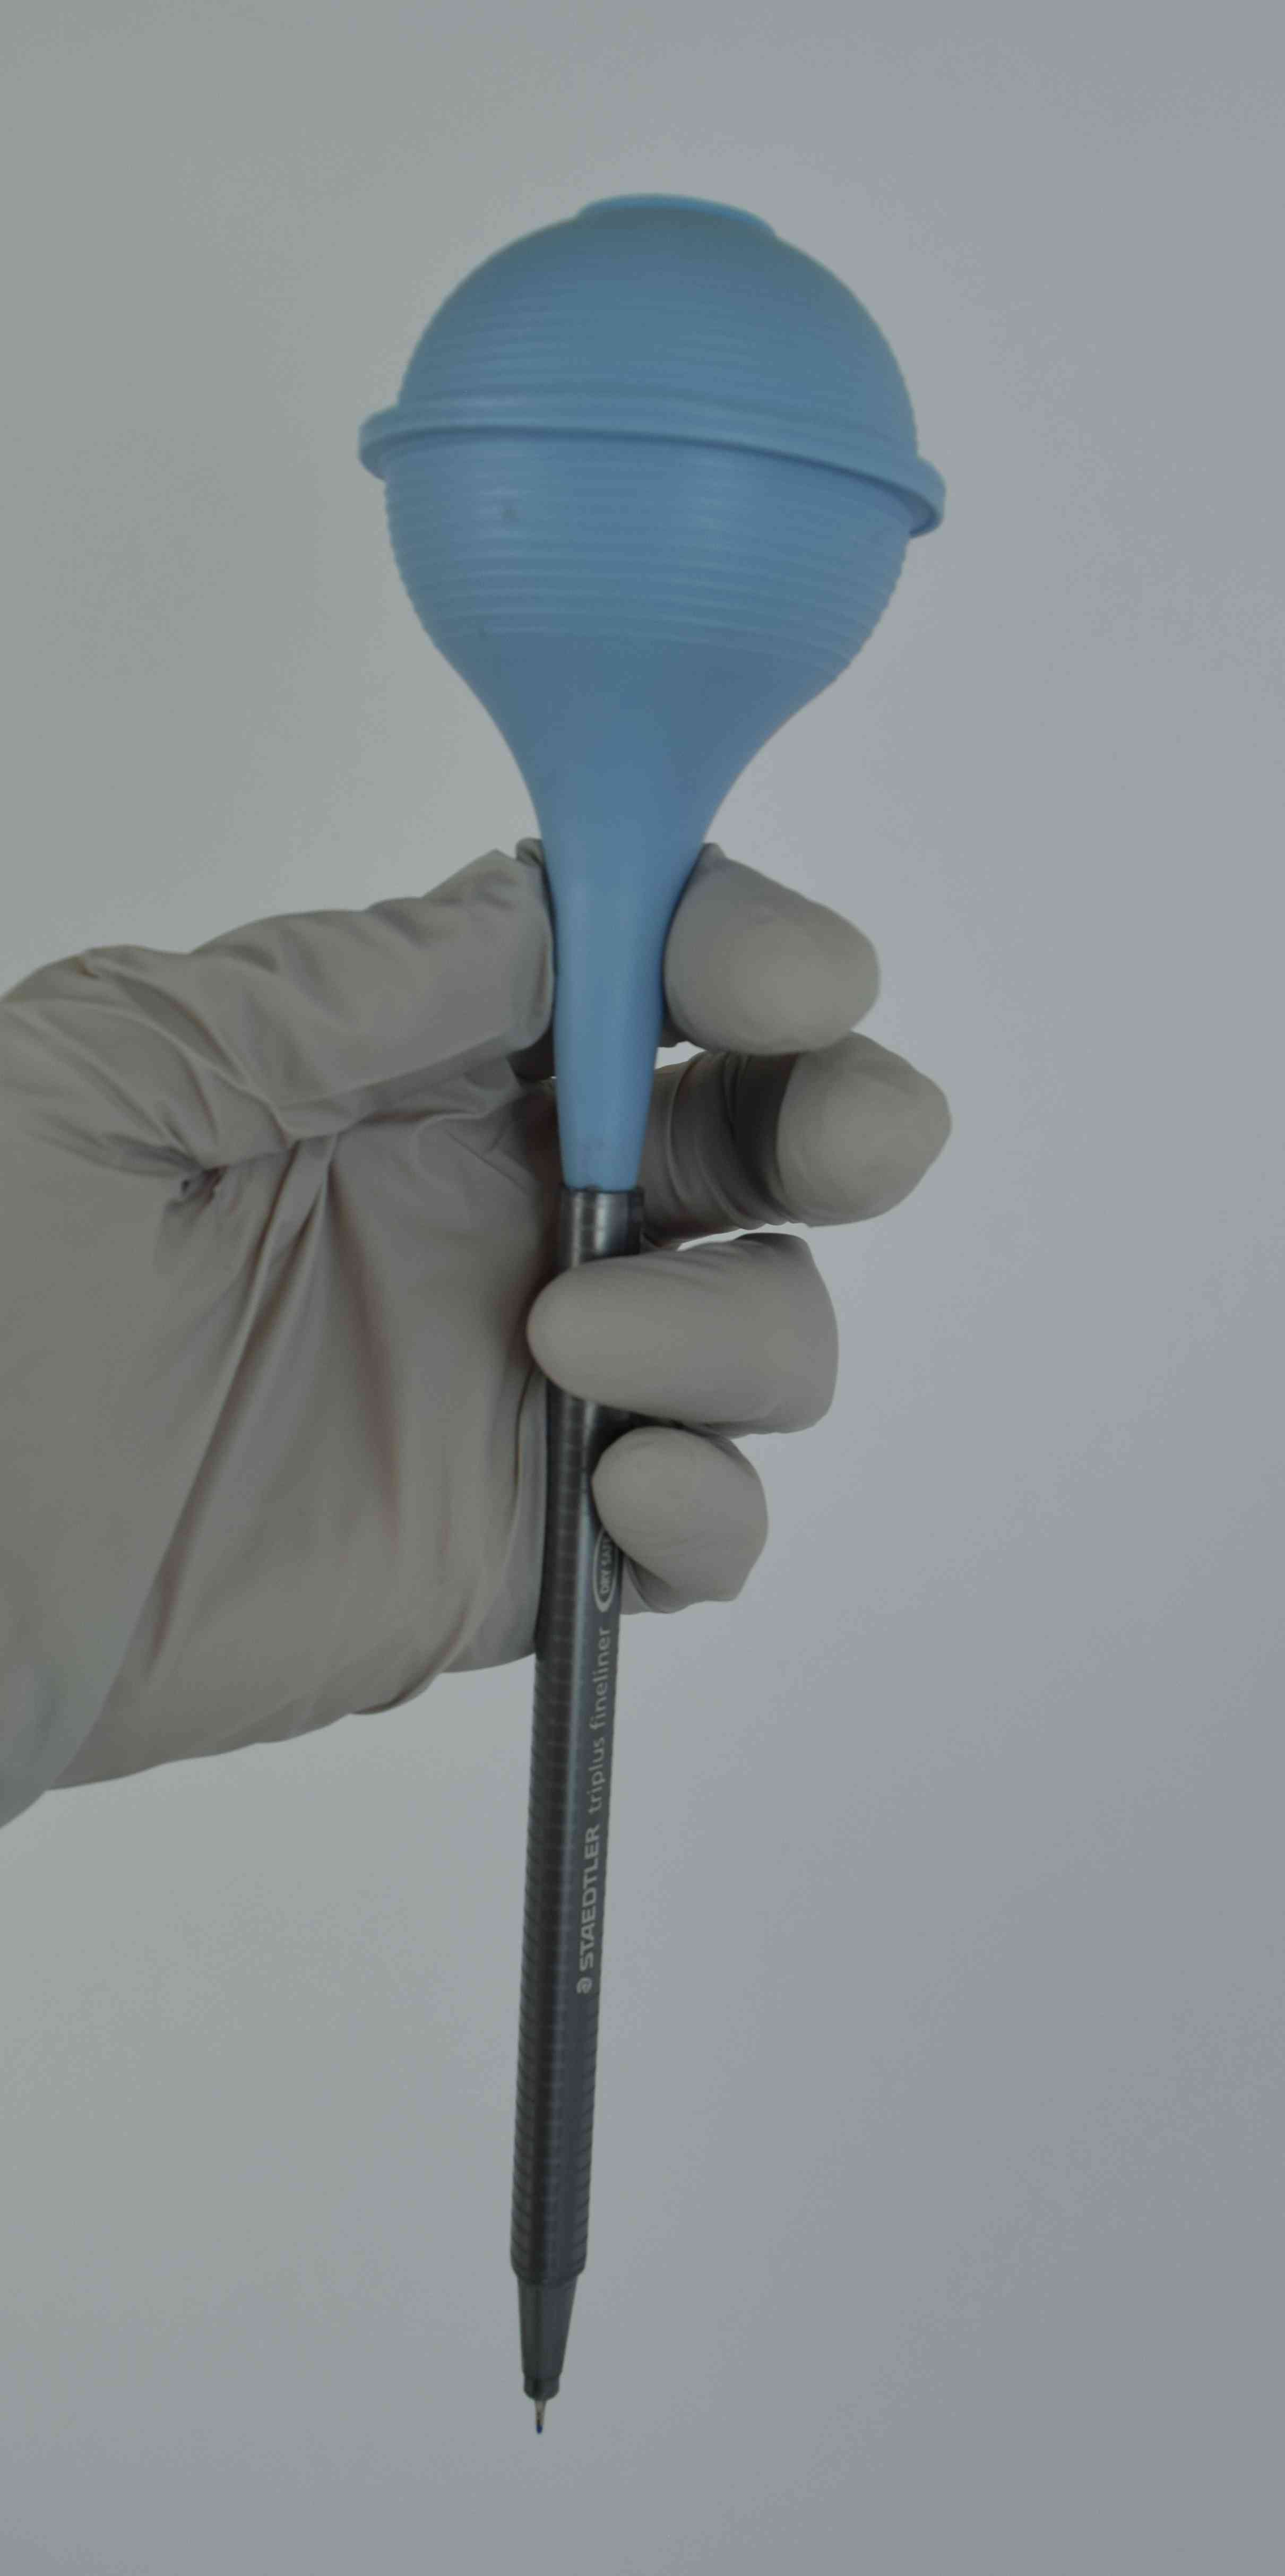
Staedtler Triplus Fineliner
Staedtler Triplus Fineliner pens come in many colors, so you can match Crayola colors to the pen colors and make a whole set of washable pens. The original ink in these pens is almost washable, and some of the colors can be flushed out of the pen tip with just water.

You will need:
Staedtler Triplus Fineliner Pen*
Crayola Fine Line Ultra-Clean washable marker*
Pen flush (see recipe above). You may not need this for some pen colors.
Disposable gloves (or just make sure to wash your hands well before and after touching the ink)
Bulb syringe
Pair of large, sharp scissors
Paper towel
Use your large, sharp pair of scissors to remove the end cap from the Staedtler pen. Close the scissors around the seam at the base of the end cap and hold them just tight enough to get a good grip on the end cap. Wiggle and pull off the end cap, trying not to damage it too much.

Fill the bulb syringe with lukewarm water. Hold the body of the pen vertically with the tip near the bottom of a sink. Insert the bulb syringe into the open end of the pen, and squeeze to force water through the pen. When the water starts to run clear, hold your fingers over the vent holes where the metal tip joins to the plastic pen body as best as you can to force water out of the tip of the pen.
When the pen tip looks white/clear, dab it on a paper towel to see if ink comes out. If there is still a little ink coming out of the pen tip, flush out the pen some more using pen flush, then rinse it with water. If some ink still comes out, soak the pen in pen flush for an hour or two, then flush it again. Some of the colors clean out with just a couple of squirts of plain water, and others will need soaking in pen flush.

Remove the ink reservoir from the Crayola marker.
The Crayola marker ink reservoir is longer and smaller in diameter than the Staedtler triplus reservoir.

Use scissors or a razor knife to cut the spacer attached to the end cap 1.5 cm shorter to keep the total length of the ink reservoir plus end cap the same.

Place the Crayola ink reservoir inside the pen and push the end cap on firmly. Dab the tip of the pen on a paper towel until the ink flows out.
Label your new washable fabric pen.

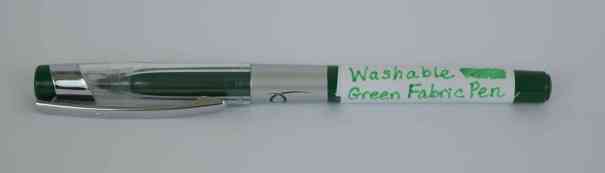
Paper Mate Flair Ultra Fine Fineliner Pen
Paper Mate Flair UF pens are my least favorite pen to convert. They are hard to pull apart and put back together, and the tips are quite fragile. I wanted to figure out how to make them work, though, since they are a common pen you might already have on hand. After ruining a couple of pens, I did figure out how to make the conversion work. The original ink in the green pens is fairly washable, so you could actually use a green pen as a washable fabric marking pen if you like (see more discussion on this at the end of this post). Make sure to store these pens point down for best ink flow.
You will need:
Paper Mate Flair Ultra Fine Pen*
Crayola Fine Line Ultra-Clean washable marker*
Pen flush (see recipe above)
Disposable gloves (or just make sure to wash your hands well before and after touching the ink)
Bulb syringe
Two small pieces of grippy shelf liner
Hair dryer
Tape
Metric ruler
Paper towel
Remove the cap from the Paper Mate pen. Heat up the center part of the pen with a hair dryer. Grip each section of the pen with a piece of grippy shelf liner, and pull the two parts of the pen apart. It may help to twist the pen as you start to pull.

Remove the ink reservoir from the pen.

Take your pen over to a sink. Wash out the cap and back end of the pen, shake out the excess water, and set them aside.
Suck up some lukewarm water into the bulb syringe. Firmly insert the tip of the bulb syringe into the open end of the tip section of the pen. With the pen held vertically with the tip near the bottom of the sink, squeeze the bulb to flush water through the pen. Water will shoot out sideways from a vent hole near the tip. Once the water starts to run clear, hold your finger over the vent hole as you squeeze the bulb to force water out through the tip.

When the water runs mostly clear, switch to flushing out the pen with pen flush as you did with water until the tip appears white/clear. You may need to soak the tip in pen flush for an hour or two if you still see some ink in the tip. Rinse by flushing water through the tip. Dab the tip on a paper towel to verify that no more ink is flowing out of the tip.
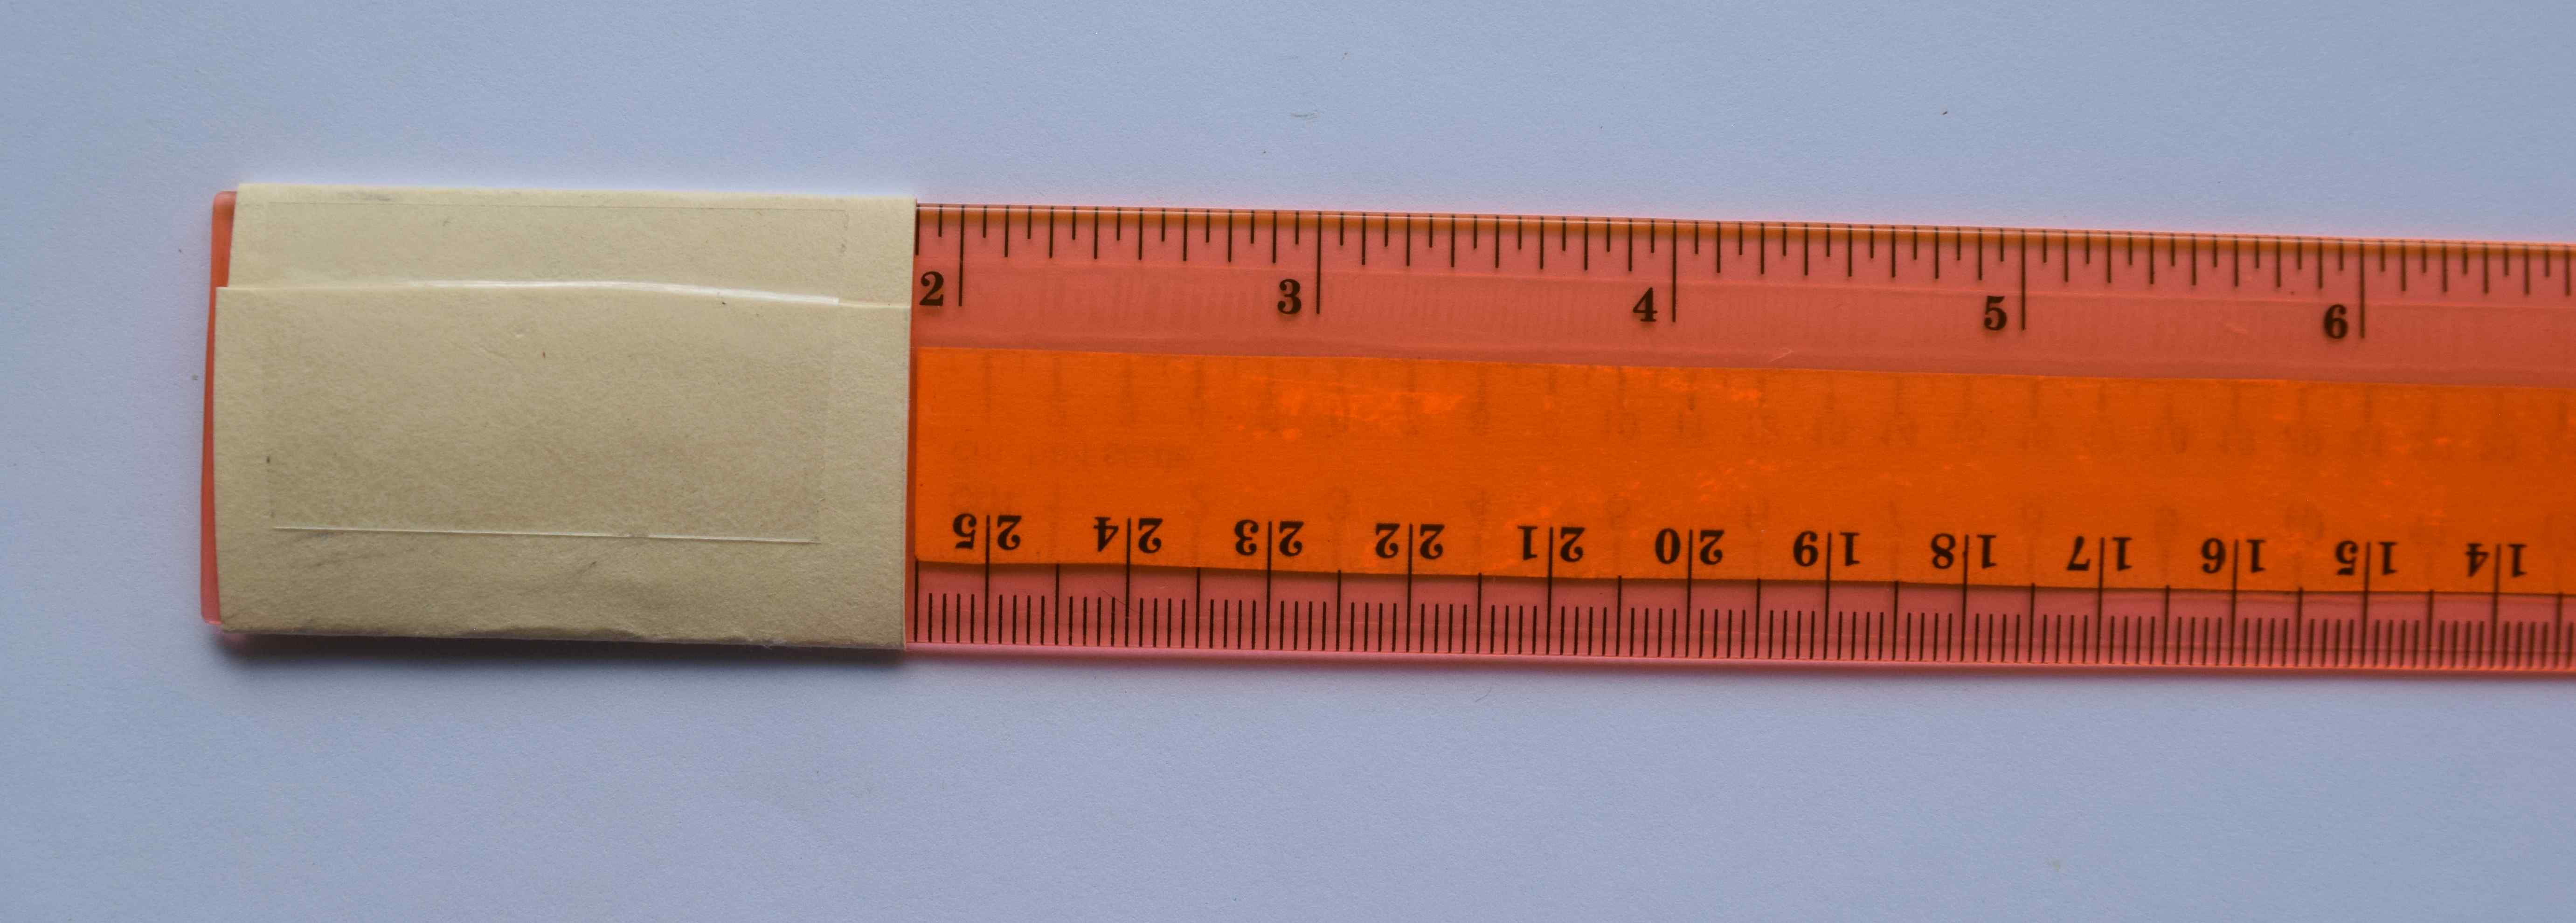
Remove the ink reservoir from the Crayola marker.
The Crayola marker ink reservoir is longer and smaller in diameter than the Paper Mate reservoir, but you can get it to fit in the Paper Mate pen. To get the ink reservoir to stay in the right place inside the pen, wrap a piece of tape with one edge exactly 4.5 cm from one end of the Crayola ink reservoir, as shown below. Wrap the tape until it is the right diameter to fit snugly inside the tip section of the pen. The tape wrapped ink reservoir should fit snugly enough inside the pen to keep the ink reservoir in position, but it should not be so tight that you crush the reservoir as you insert it.

Insert the ink reservoir so that exactly 4.5 cm of the ink reservoir is inside the tip section of the pen. The edge of the tape will be flush with the edge of the pen section.

Push the back end of the pen onto the tip section. Hold the tip section of the pen with a piece of grippy shelf liner, being careful not to touch the tip, and bang the back end of the pen on a table until it snaps completely into place. You may need to heat the back end of the pen with a hair dryer first.
Dab the tip of the pen on a paper towel until the ink flows out.

Label your new washable fabric pen.

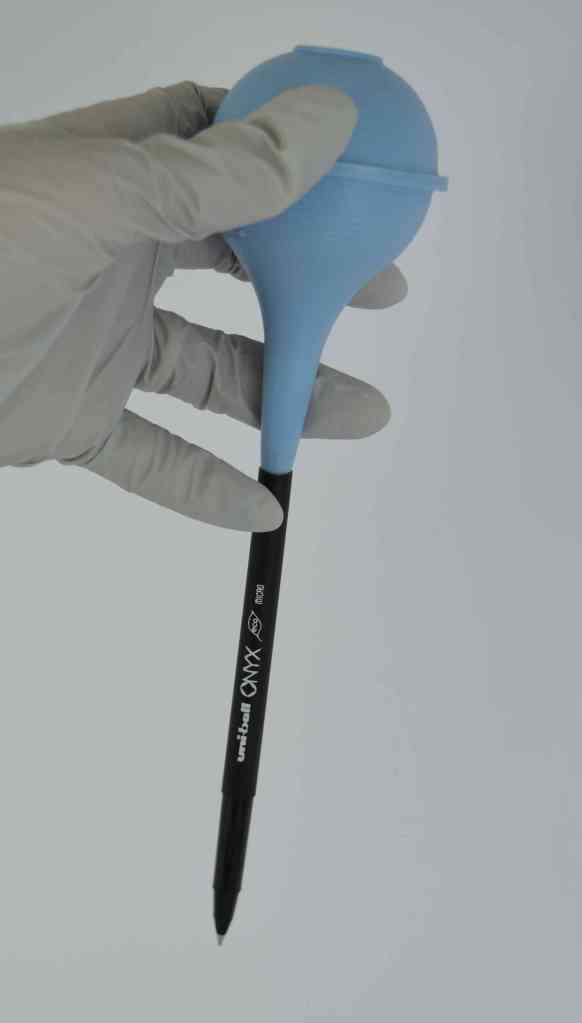
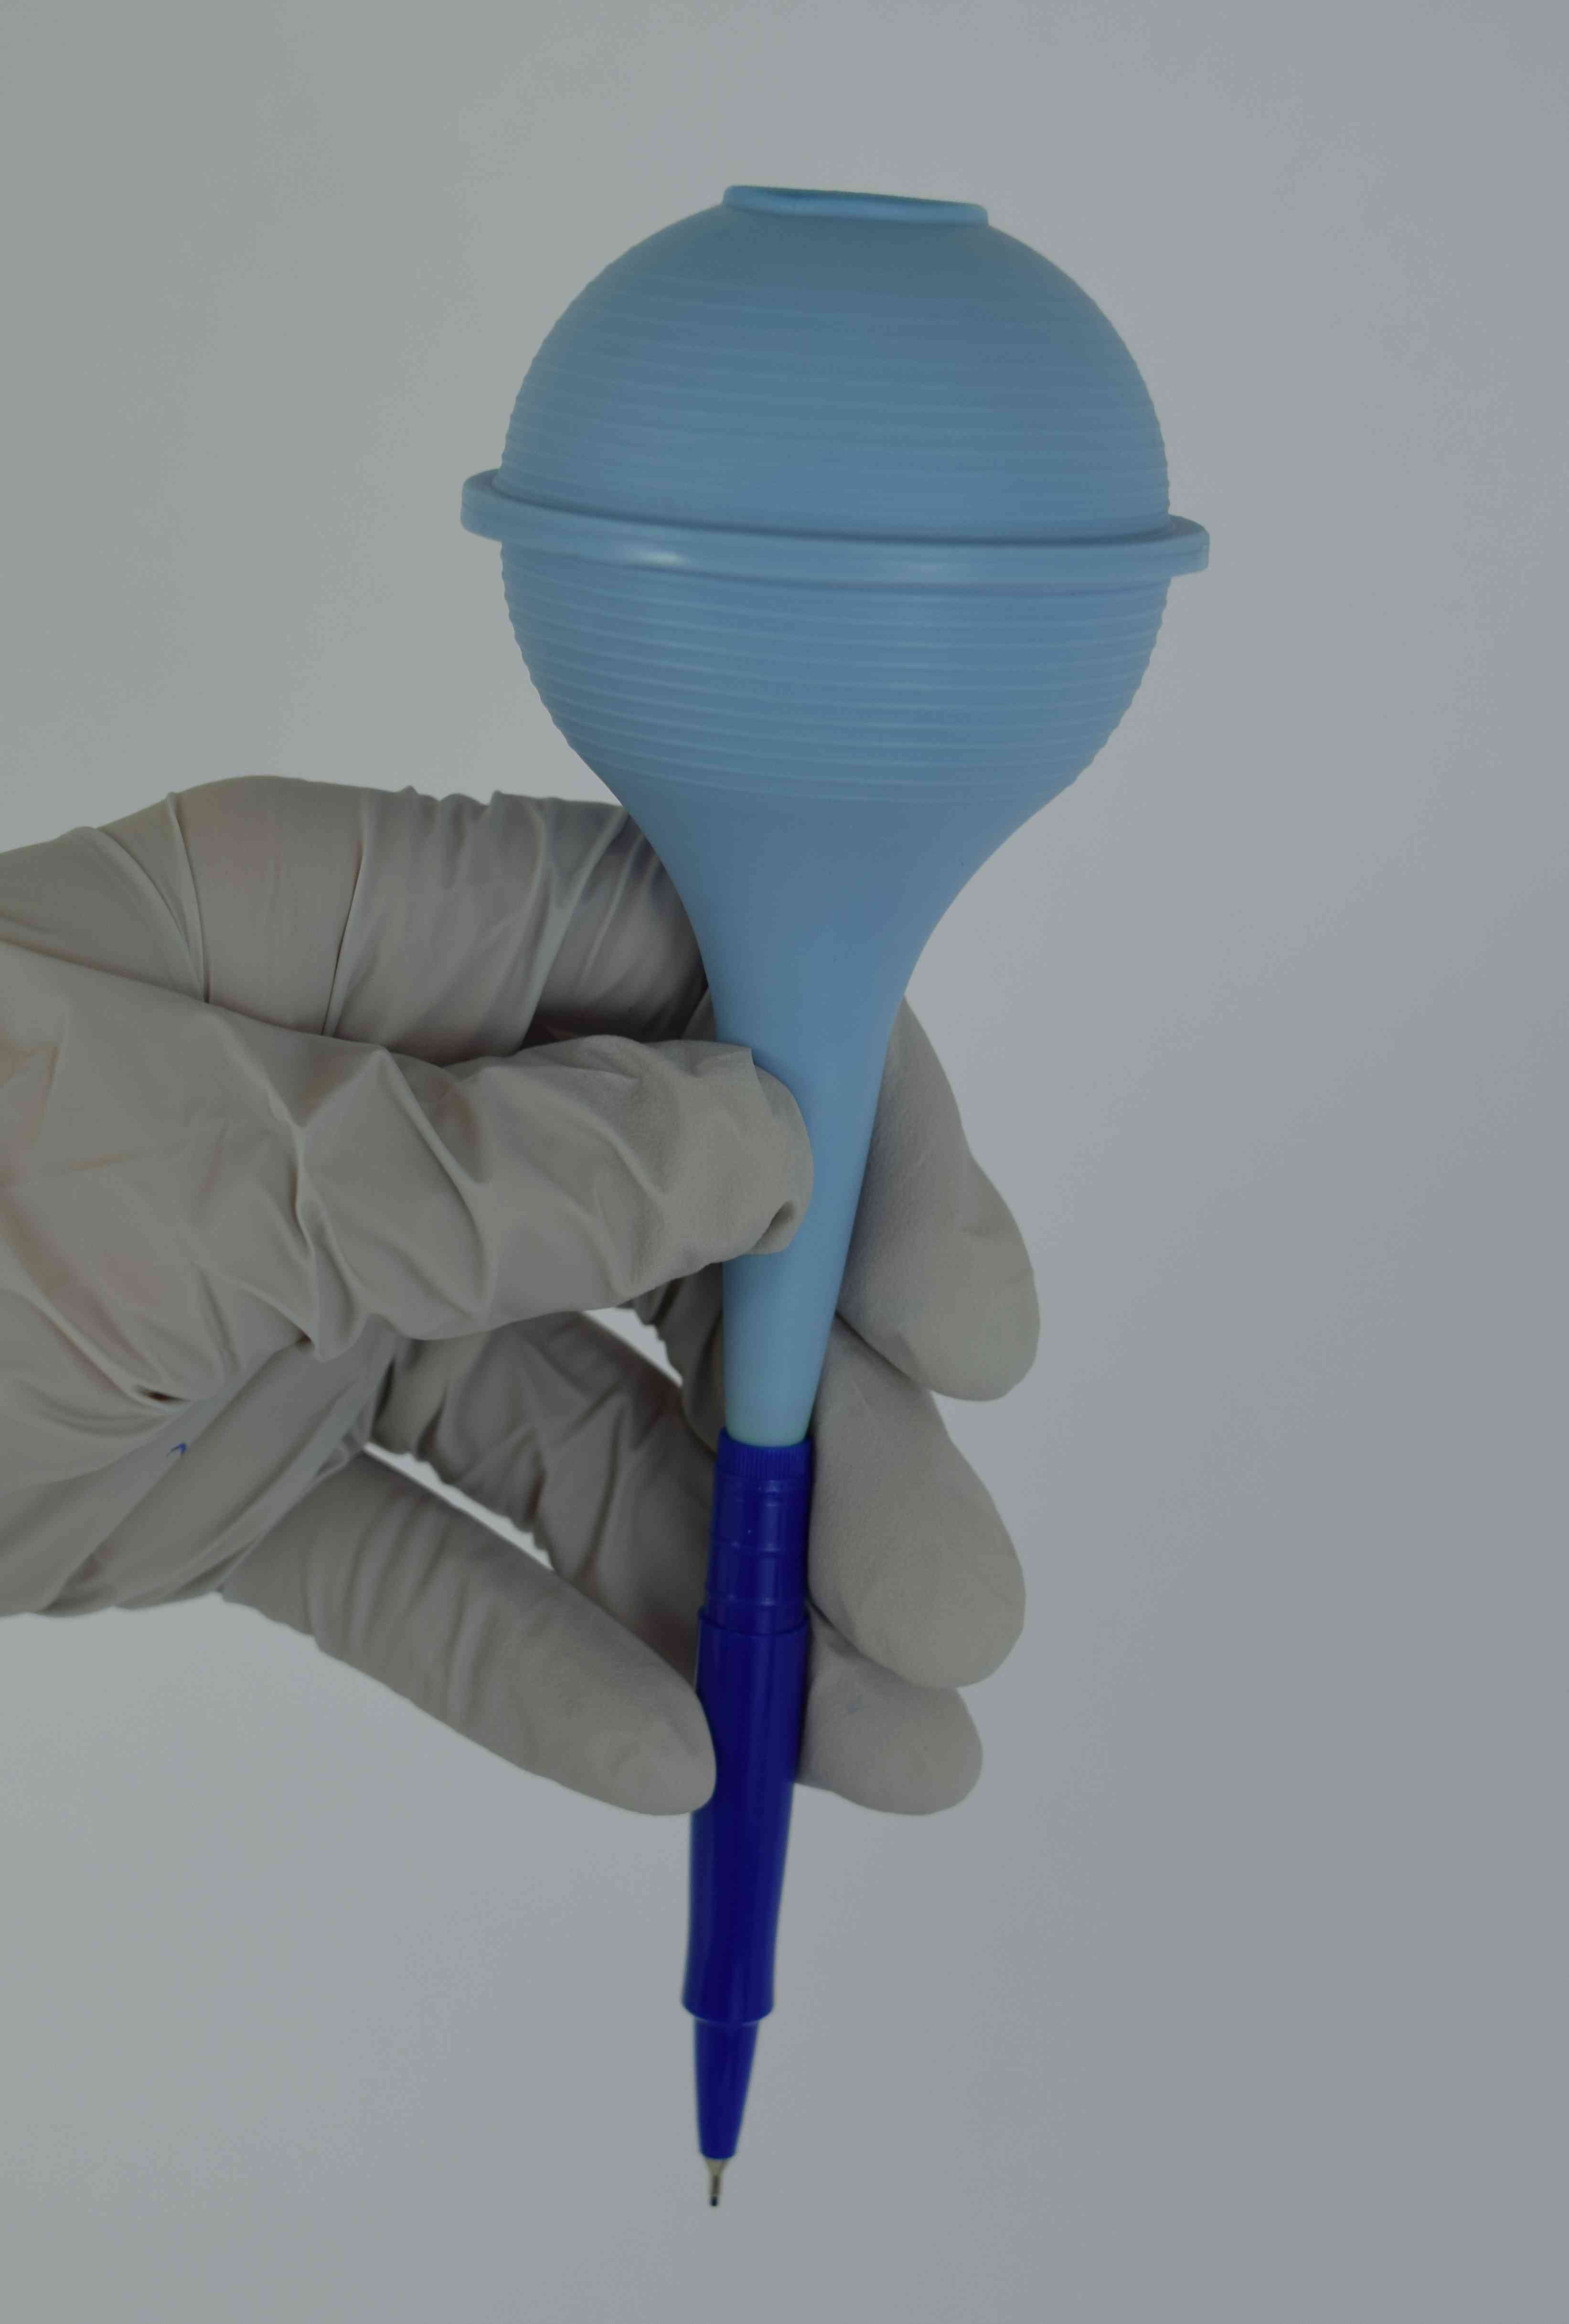
Uni-ball Onyx Eco Micro Point (0.5 mm) Rollerball Pens
Uni-ball Onyx micro point pens are rollerball pens, which have a metal rolling ball tip similar to ball point pens, but they use liquid ink in a marker style fibrous reservoir, so they will write well on most fabric. They require just a little more pressure to write with, though, and will not write quite as well as fineliner pens on really stretchy or flimsy fabric.
Note that I am specifically recommending the eco version of this pen, because the recycled plastic is softer, making it easier to get the end cap off. The tips on these rollerball pens are sturdier than the plastic point fineliner tips, so if you tend to write with a lot of pressure, or drop your pens a lot, these might be the best option. They write with a slightly finer line than any of the other pens.
You will need:
Uni-ball Onyx eco micro point (0.5 mm) rollerball pen*
Crayola Fine Line Ultra-Clean washable marker*
Pen flush (see recipe above)
Disposable gloves (or just make sure to wash your hands well before and after touching the ink)
Bulb syringe
Awl or similar pointy object
Scissors or razor knife
Paper towel
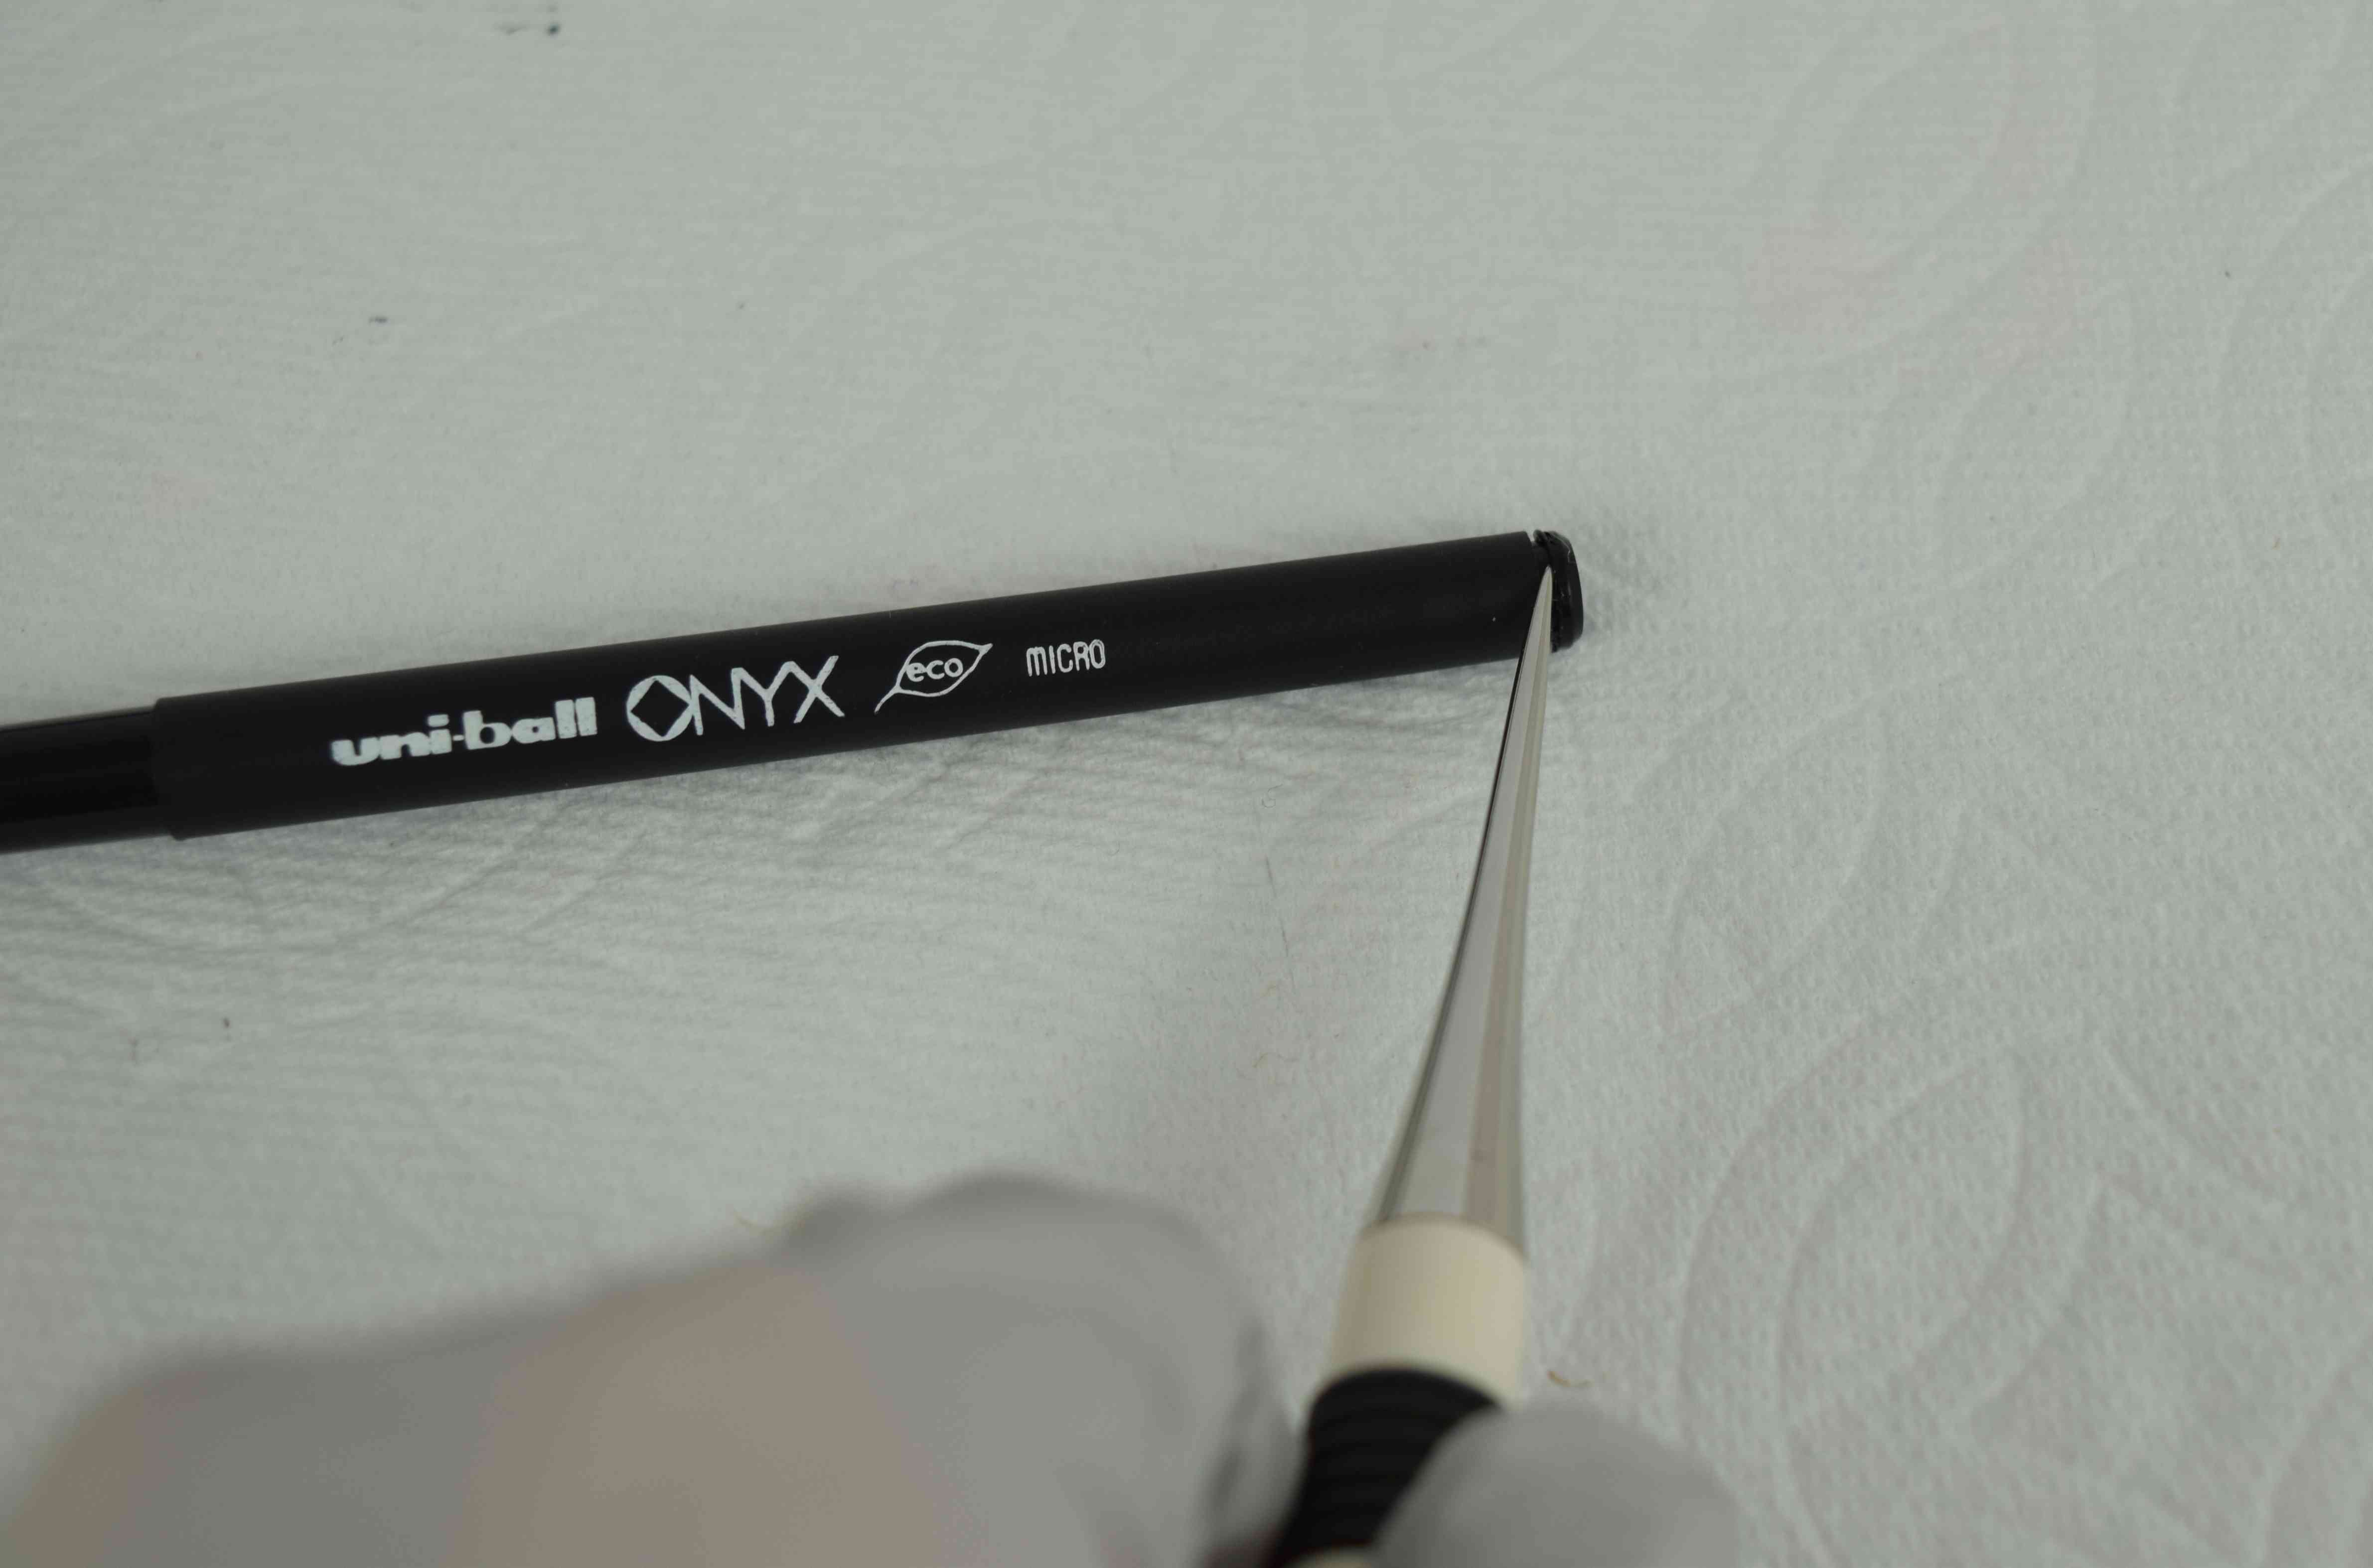
Use an awl to carefully pry off the end cap from the Uni-ball pen.

Remove the ink reservoir and set it aside, but don’t discard it yet.

Take the pen over to a sink. Wash the pen cap and end cap, shake off the excess water, and set them aside.
Fill a bulb syringe with lukewarm water and push it into the open end of the pen. Hold the pen vertically over the sink, with the pen tip near the bottom of the sink, and squeeze the bulb to force water through the pen. Water will shoot out sideways from the vent hole near the tip of the pen.
After flushing some water through the pen, suck up some pen flush into the bulb syringe. Force some pen flush through the pen. When the liquid coming out of the pen is mostly clear, use your finger to block the vent hole near the tip so liquid is forced out through the tip of the pen.
Only a tiny amount of liquid can come out of the tip at a time, so just keep up a steady pressure on the bulb while covering the vent hole with your finger. Eventually a drip will come out. It can help to dab the tip onto a paper towel as you do this so you can see that a little liquid is indeed coming out. Keep this up until the pen flush coming out of the tip is completely clear. It will take a few minutes.
Dab the pen tip on a paper towel to verify that only clear liquid is coming out. Flush out the pen with plain water, then shake out the excess water.
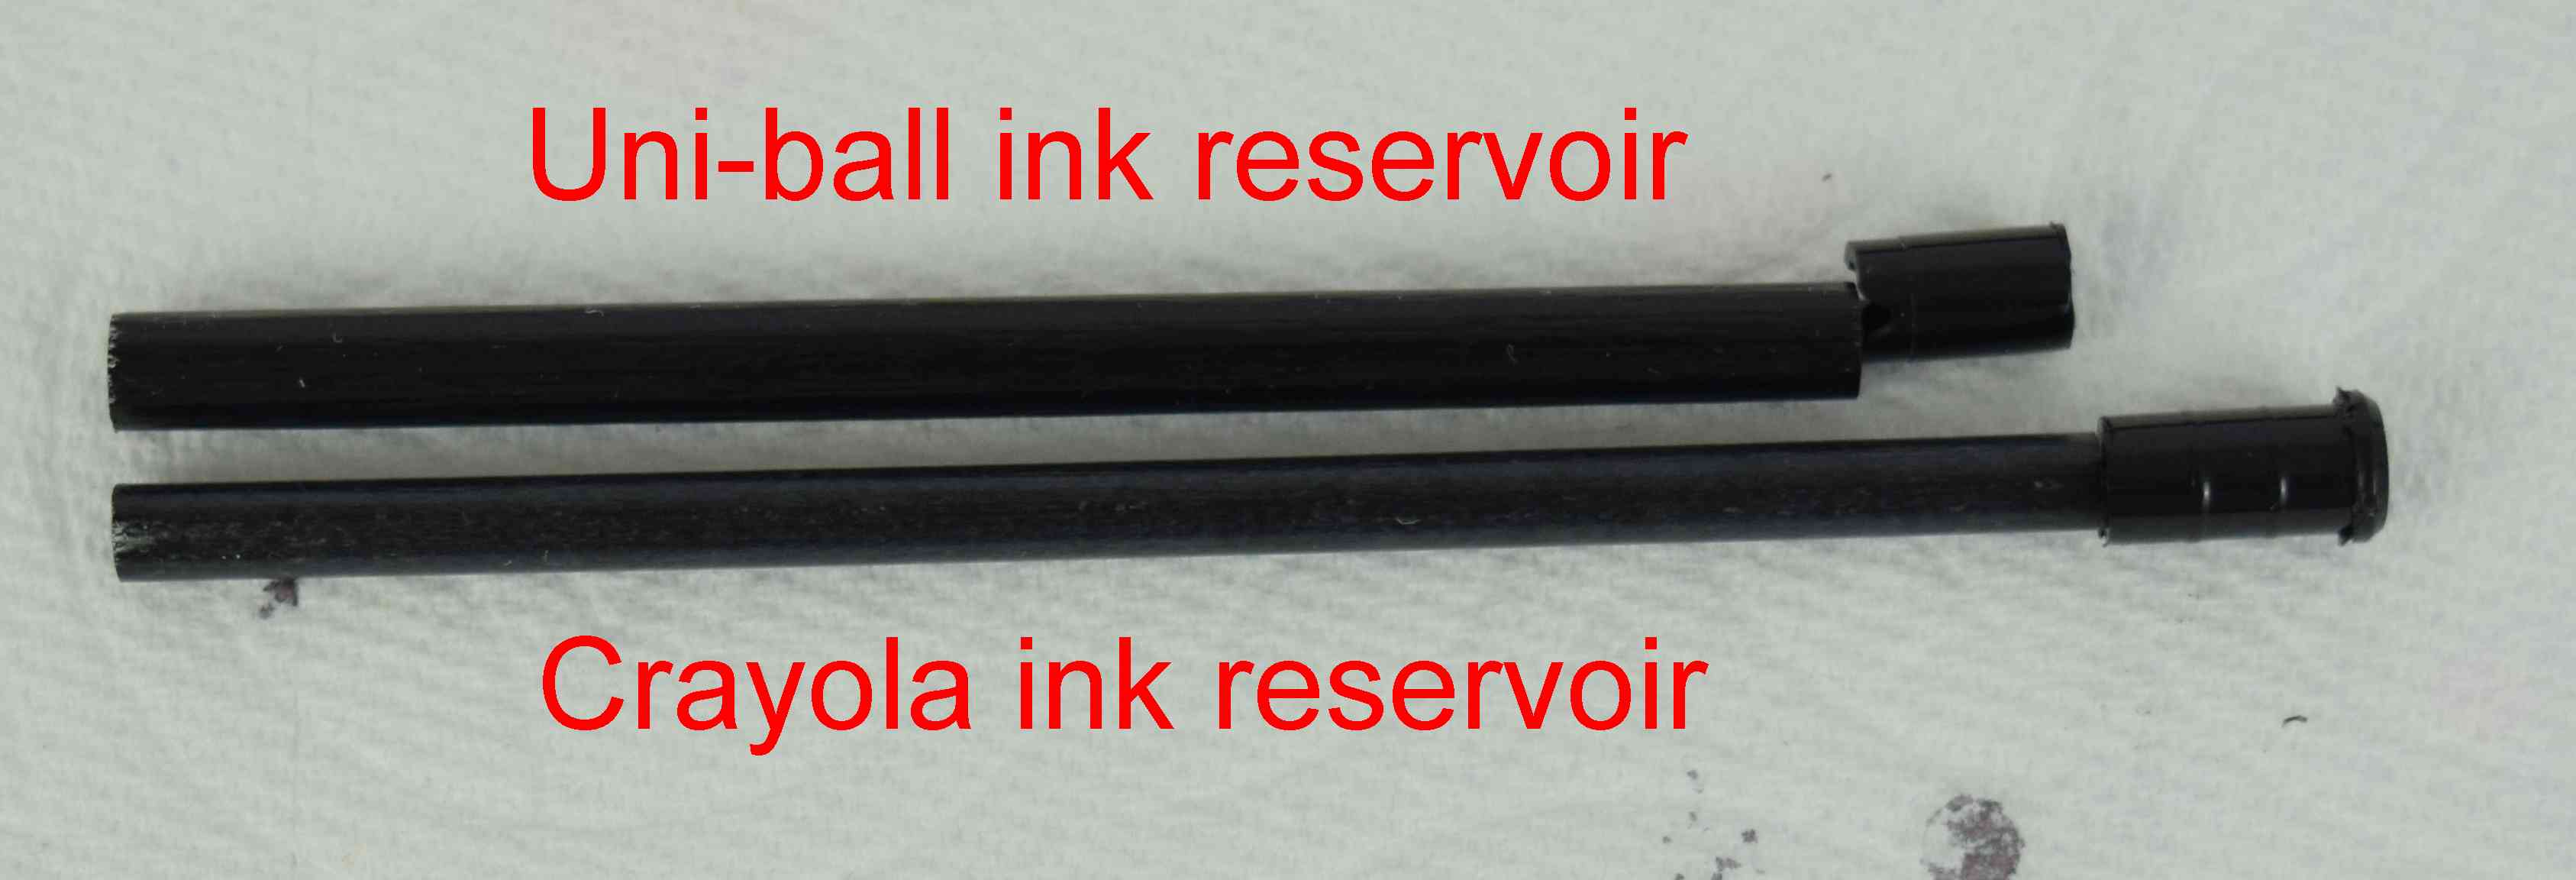
Remove the ink reservoir from the Crayola marker.
The ink reservoir from the Crayola marker is longer and smaller in diameter than the Uni-ball ink reservoir, but it will work fine if you shorten the end cap.
Line up the Uni-ball ink reservoir and the end cap. Set the Crayola ink reservoir next to it, aligned with the end of the Uni-ball ink reservoir. Cut off the bottom of the end cap at the point where it is aligned with the end of the Crayola ink reservoir. It is made from soft plastic and can be cut easily with sharp scissors or a razor knife. You need the total length of ink reservoir plus end cap to remain the same.

Place the Crayola ink reservoir inside the pen and push the end cap on completely.
Dab the pen tip on a paper towel until ink comes out. The water comes out slowly, so this will take a while. You might also need to scribble on a piece of paper. Eventually the ink will start flowing out.

Label your new washable fabric pen.

For the record, here are the other pens I tried first before transplanting Crayola Ultra-Clean washable marker ink into fineliner pens. Nothing else I tried worked as well as a pen with Crayola Ultra-Clean ink, but some of the other pens I tried might be an option for you if you don’t want the hassle of putting together your own pen.
The first thing I discovered was that my perfect fine-line fabric marking tool needed to be a pen, not a pencil, since pencils will not mark on stretchy knit fabric. I tried all of the various fine point pens in my house, and the only ones that marked well on all types of fabric were porous plastic point fineliner pens and liquid ink rollerball pens. Of course, none of them had washable ink.
The first type of washable pen I tried was putting “washable” fountain pen ink* in a refillable rollerball pen*. Unfortunately, I discovered that washable fountain pen ink isn’t actually all that washable, and it can bleed a lot when used on some fabric. While you can wash most of the ink out, it leaves stains, especially after being ironed. My first thought when looking for a fine point washable ink pen was that I would mostly want it for marking stitching lines on a muslin. Then I could wash the fabric and re-use it, so slight stains would be OK. This pen/ink combination would actually work for that, but the more I thought about it, the more I realized I wanted a truly washable pen for marking finished garments, too.
This fountain pen ink experiment did lead to me picking up fountain pens as another hobby, though, and I’m having lots of fun with them. They write so much smoother than even a high quality rollerball pen. If you want to try writing with a fountain pen, I would suggest starting with a Pilot Kakuno* or Pilot Metropolitan* with a size medium nib. They do require some upkeep. The cleaning techniques I learned for my fountain pens (flushing with pen flush using a bulb syringe) helped me figure out how to clean the ink out of a fineliner pen, too, so at least that project wasn’t a wasted effort.
After deciding washable fountain pen ink wasn’t what I wanted for marking fabric I did some research to see if my perfect pen was something that had recently come out on the market and I’d just missed it. I tried ibotti washable fabric marking pens*, which sounded like exactly what I wanted, but after testing them I discovered that the ink in these pens is set in by the heat of an iron. A second heavy duty wash with hot water and lots of oxygen bleach did finally get the stains out of my sample fabric, but these pens are not nearly as washable as Crayola Ultra-Clean washable markers, and I would hesitate to use them on the right side of a garment. I might use these to mark the stitching lines and other marks on a muslin so I could wash the fabric and re-use it to make another muslin. You could probably use them on the wrong side of your garment fabric, as long as it’s not thin fabric or white fabric, and you mark lightly. And if you won’t be ironing over the marks, they would work OK. These pens make a wider line than the fineliner pens I altered, so they don’t really offer any advantage over Crayola fine line washable markers, which wash out better. I don’t recommend these pens.
I saw that you can get air erasable and water erasable extra-fine point pens, but neither of these are what I want. I don’t want marks that are going to disappear before I’m done with them. Air erasable and water erasable pens contain a chemical that becomes transparent when exposed to water or water vapor in the air, so you never know how long the marks will last—it depends on the current humidity. I tried Dritz air-erasable markers many years ago, but they dried up so quickly I quit using them.
I bought a Clover extra-fine point air-erasable pen*. I actually bought mine specifically to see if I could convert it to a washable ink pen, since it has a super fine plastic tip, but I thought an air-erasable pen might be handy on occasion, too. These look like a good marking pen to use when you only need temporary marks. The directions say to wet the marks with plain water or let them disappear over time before ironing or washing with detergent, or the marks can set in permanently. I tested this on muslin. Ironing with steam made marks that had disappeared come back, but they still washed out on my muslin test sample. So ironing might or might not be an issue. You’ll have to test that yourself. There could be a lot of factors affecting how well the ink washes out, such as fabric type, how dark your mark is, iron temperature, what laundry products you use, etc.
Clover air-erasable pens are a nice special purpose marking tool, but they have two major drawbacks: 1) the marks fade with time and can disappear before you are done with them and 2) they dry up quickly. They are also relatively expensive. And although I haven’t had a problem yet, some people say that sometimes the marks set in and are hard to get out. They are nice for some tasks but are still not my perfect everyday fabric marking tool. The cool thing about these pens is that after the original ink is used up your pen doesn’t need to go to waste! Extra-fine Clover air-erasable pens are the perfect pen to flush out and put Crayola Ultra-Clean washable ink in. I bought two Clover pens. I converted one to use washable ink, and I wrapped up the original ink reservoir in plastic wrap and foil so I could save it to use to refill the second air-erasable pen when it runs dry. That way I get to use both types of pens, and I’m not throwing away any expensive ink.
Heat erasable pens, such as Frixion pens*, aren’t what I want either. All of the other brands of heat-erasable pens* I looked at that are specifically intended for use on fabric made wider 1 mm lines (about the same as a Crayola fine line marker), which is too wide for my purposes. The marks don’t actually go away when heated, they just change color, usually to off-white, so they can leave slightly visible marks, even after washing, especially on dark fabric. People often refer to this as “bleaching” on dark fabric but it is actually just a white ink stain.
I have found that marks from heat erasable pens only wash out completely if they have not been ironed (which is also what happens with most washable markers—the stains are set in by heat). Also, I nearly always end up accidentally ironing my marks away while I still need them. Another drawback is that if the marks don’t wash out all the way, they can return to their original color if they are exposed to below freezing temperatures. I’m not sure why heat erasable and air/water erasable pens are so popular. In my opinion, neither of these types of pen are good for marking fabric for garment sewing. I’m sure they are good for certain specific things, but neither work for me as everyday fabric marking pens.
I found references to quilters using green (only the green!) Papermate Flair pens to mark the stitching lines on their quilt tops. I bought some Ultra-Fine point Flair pens* to try, and I found that the green pens really are surprisingly washable (I verified that the other colors are not washable). I would say the green Flair pens are more washable than the ibotti pens, since in my test the green Flair pen marks did not seem to be set in by the heat of an iron. Green Flair pens are not as washable as Crayola Ultra-Clean markers, but they are better than other pens I tried. When I marked on muslin, light marks washed out with a single cold wash, but the darker marks left faint stains. A second heavy-duty wash with warm or hot water and oxygen bleach would probably get the darker marks out. I would consider using green Flair pens sparingly on the right side of a garment (but probably not on white fabric) if I hadn’t come up with better options. The downside to using Flair pens is that only the green pens are washable, so you only have one color to use.
Staedtler Triplus Fineliner* pens claim to “wash out of most fabric” so I gave them a try. I tested them on white cotton jersey first. I ironed half the marks. After one cold wash, I wasn’t impressed. Significant stains were left, especially where I ironed over the marks, and I wondered how they could possibly claim that these pens were in any way washable. I tested again on muslin, and again there was significant staining after one cold wash. However, after a second wash on a heavy-duty hot wash cycle with lots of oxygen bleach, all but the red washed out completely. I would classify these as almost washable. I wouldn’t recommend using these pens to mark fabric.
Crayola Take Note Washable Gel Pens* Since these are gel pens, not liquid ink pens, they require more friction on the tip to write and will only write on stable woven fabric. You can put a few dots on knit fabric, but you can’t draw a continuous line. Some colors (mainly red and colors with red dye in them such as purple, orange, and pink) are set in by the heat of an iron. All of the colors washed out if they were not ironed, and were washed in cold water. I don’t suggest that you buy these for the purpose of marking fabric, since there are better options, and many of the colors stain if ironed, but if you have some already, you could test and see if some of the colors are washable enough (maybe light green and light blue). Make sure to iron your test marks, since ironing sets in many of the colors.
Crayola Take Note Felt Tip Pens* These are labeled as washable, but the ink is set in by ironing. They also make a broader mark on fabric than Crayola Fine Line markers. I don’t recommend these for marking fabric.
One last thing: Since laundry products can affect how well the marks wash out, I’ll let you know what I use in case it makes a difference. I only use Charlies Soap Powdered laundry detergent*, which I dissolve in hot water before adding to the washing machine (like any powdered detergent, it can cake up in cold water). This is the best laundry detergent ever, and every time I mention it I have to restrain myself from writing several paragraphs on how great it is. It cleans your clothes, then completely WASHES OUT, which is necessary for those of us with sensitive skin, and for washing items that need to remain absorbent and residue-free, like cloth diapers and cloth menstrual pads. Most laundry detergents intentionally leave all kinds of chemical residue on your clothes (optical brighteners, fabric softeners, scent, etc.). Sometimes I use pure Sodium Percarbonate* (the active ingredient in oxygen bleach). I never use laundry products that leave a residue on clothes, which includes most laundry detergents, fabric softeners, oxygen bleaches, and dryer sheets. In addition to irritating sensitive skin, those residues can help hold in stains, which is why I’m mentioning it. Crayola Ultra-Clean washable marker ink is so washable I doubt your choice of laundry products will matter, but it might be a factor if you try other washable pens.
* Links in this post identified by an asterisk (*) are Amazon affiliate links. If you click through and make a purchase, I will earn a commission (at no additional cost to you). As an Amazon Associate I earn from qualifying purchases.


 One of my readers was inspired by my


 GrowYourOwnClothes Etsy Shop
