
A year or two ago I came across a tutorial for dividing serger thread onto empty spools to avoid having to buy so many cones of thread for small projects, and I thought – “What a great idea! Why didn’t I think of that?” I was able to remove the bobbin winder stopper on my Janome machine’s bobbin winder and stick an empty thread spool upside down right onto the bobbin winder without having to mess with attaching a bobbin to the spool. The spool didn’t fit on my older Singer’s bobbin winder, though. I filled a couple of spools and used them on my overlock machine, and it worked pretty well, but I ran into a couple of problems.
The first problem was that the thread built up too much twist as it unwound off of the small spools. After sewing for a while, the thread would kink up quite a bit. The other problem I had is I didn’t have any more empty spools, and I couldn’t find a source to buy any inexpensively. I tend to use serger thread in my sewing machine a lot of the time, so I don’t empty a lot of small spools. I know, I know, some people say using serger thread for general sewing is bad … but if it was causing my garments to fail, I’d stop doing it, wouldn’t I?
To solve these problems, I decided to make paperboard cones about the same size as the serger cones, so there would be less twist added to the thread as it unwound off the top of the spool. Since I am one of those irritating engineering types, I carefully calculated out the geometry and drafted out a pattern to make a perfect cone. I made a couple of these, with a cut-out circle of paperboard glued on at the bottom to keep the thread from going off the end as I wound the thread on. My solution for winding the thread wasn’t the greatest, but it sort of worked: I cut a piece of firm packing foam to fit inside the cone and hot glued a bobbin with the top broken off into a hole in the center of the foam. Well, not quite the center – it wobbled a bit when I used it on my sewing machine’s bobbin winder.

Here’s my original cardboard thread cone with the foam and bobbin thingy.
One day after making these spools I was eying the pile of toilet paper tubes that I’d been saving for kids’ craft projects, and I thought gee, those look sort of like the serger cones I spent all that time making. I cut slits most of the way down opposite sides of the cardboard tube, overlapped the upper edges about 1/4” (6 mm), and then glued and taped it back together. I traced around the bottom of the tube on a cereal box, then cut just inside that line and 1/4” (6 mm) outside of it to make a ring to fit on the bottom. I set the cones upside down and ran a bead of glue on the underside of the rings to keep them in place. In a few minutes, I’d made a half dozen cones. I felt kind of stupid for spending so much time designing and making the previous version.

Cut slits in the tube on opposite sides, stopping 1/2″ (1.3 cm) from the bottom. Glue edges.
Overlap the cut edges 1/4″ (6 mm) or more.
Tape it all together, but don’t tape on the lower 1/2″ (1.3 cm)
Set the cardboard tube on some paperboard (like a cereal box) and trace around the bottom.

Cut 1/4″ (6 mm) outside of the line, then just inside (not on) the line.
Slip the ring onto the bottom of the tube and apply glue around the underside of the ring. Leave it upside down to dry.
To avoid having too much twist (or too little, depending on which way your thread is wound) build up in your thread, you need to unwind the thread from the original cone from the side, not the top. Here’s one way to do that:
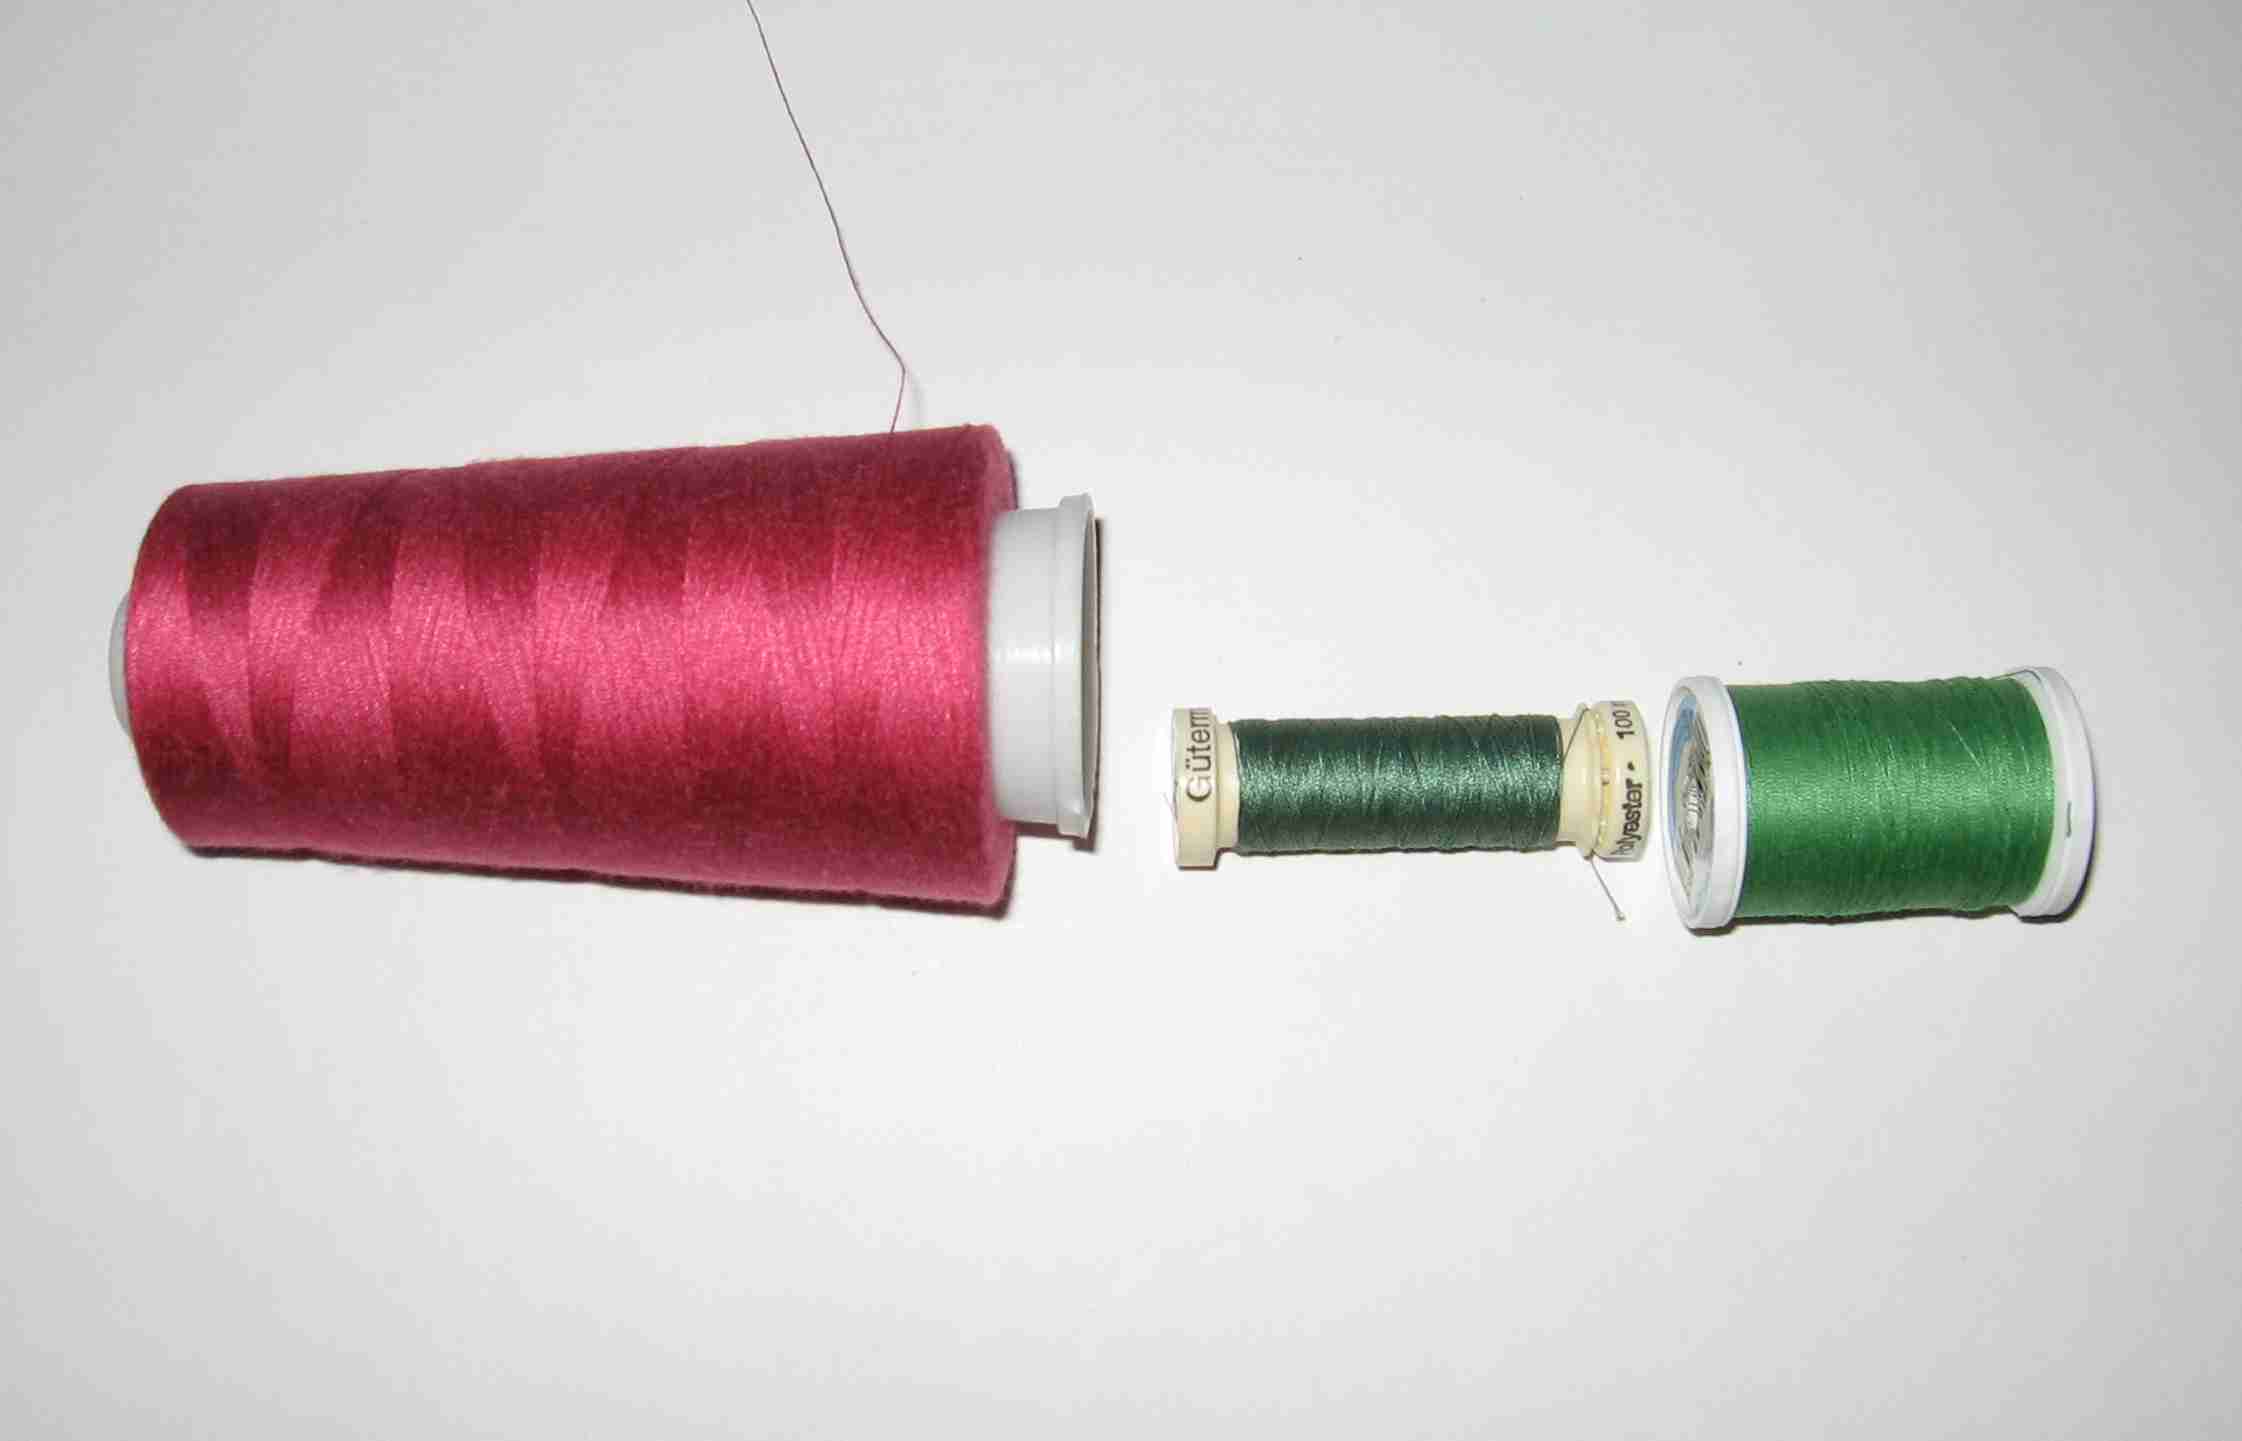
Find two thread spools that fit inside the serger thread cone and push them tightly inside it. A bobbin might work for the narrow end. It’s OK if the larger spool sticks out of the end of the thread cone.
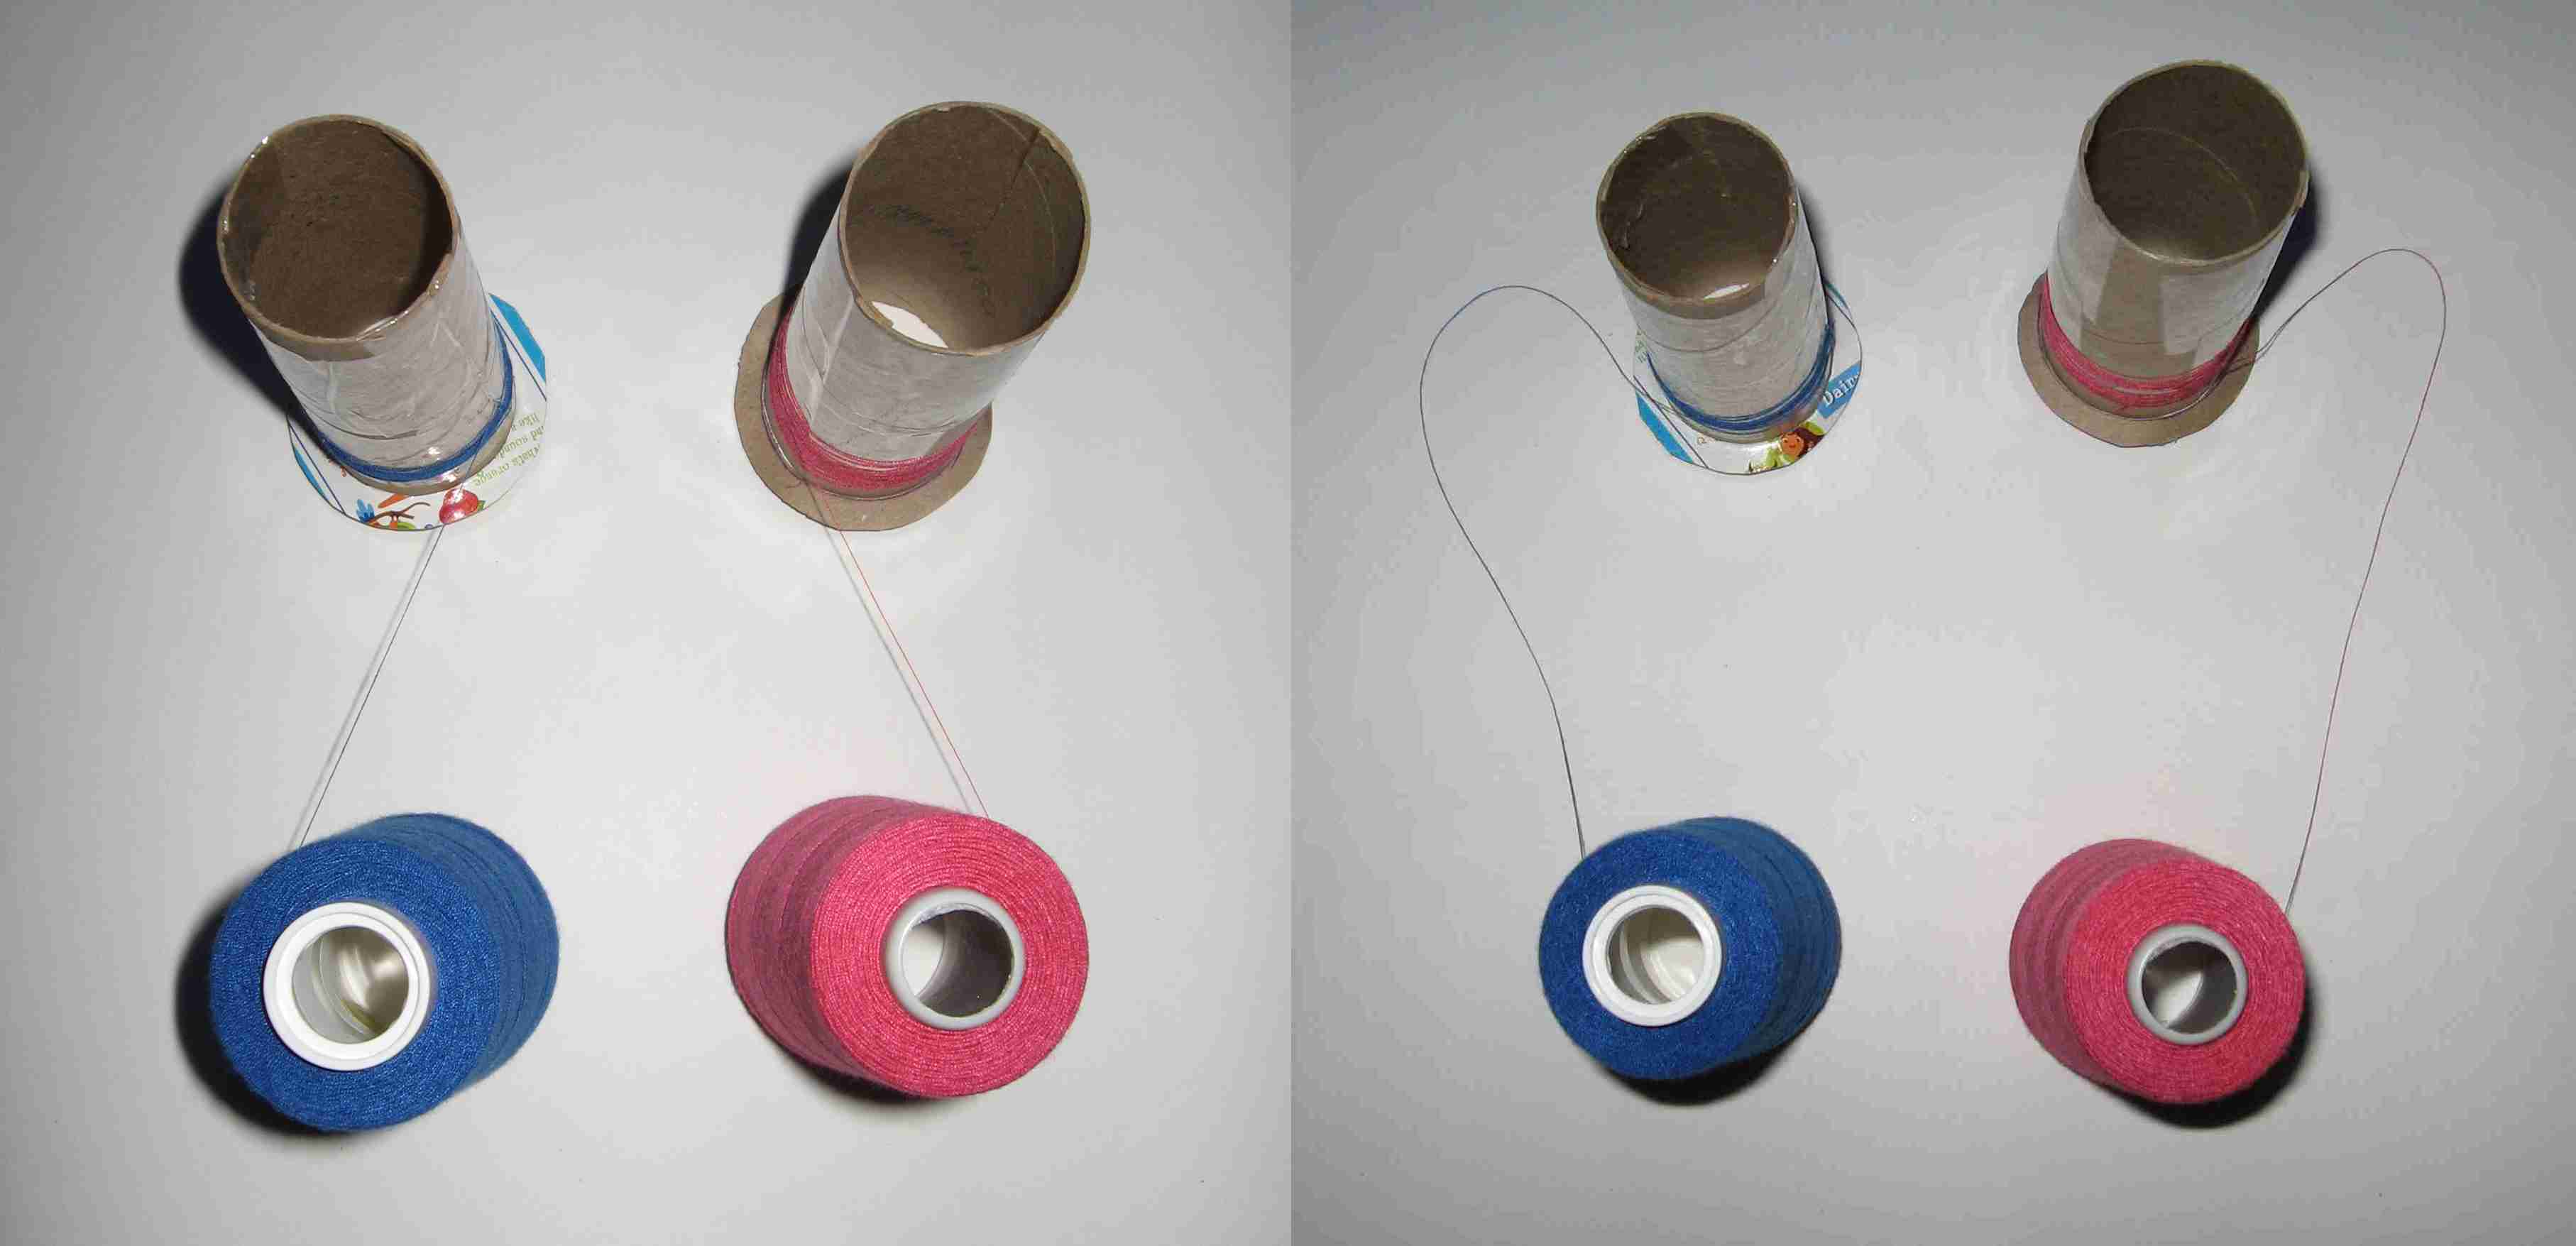
Hand wind some thread onto the new cone in the same direction it is wound on the original cone.
My toilet paper roll spools didn’t fit on the foam and bobbin contraption, so I slipped them over the chuck on my drill and wound them that way. It worked really well. If you don’t have a drill, you can try winding the thread with a kitchen mixer. To wind the new cone, unwind the thread off the side of the original cone and wind it onto the new cone in the same direction than it is wound on the original cone. Looking at my serger cones, I noticed some are wound one way, and some the other way, so check each time which way the thread is wound. Another tip is to to use your hand to move the thread quickly back and forth as you guide the thread onto the new spool so the threads are criss-crossed. Otherwise you’ll end up with a tangled mess if tight outer threads get embedded underneath looser inner layers.

Mount the thread cone on a knitting needle poked through the sides of a small box. I used a drill to wind the thread. Use your hand to guide the thread back and forth onto the new spool.
The cardboard spools are lightweight and don’t fit tightly on my overlock machine’s thread holders, so I wrap scraps of fabric around the thread holders until the spools fit tightly.
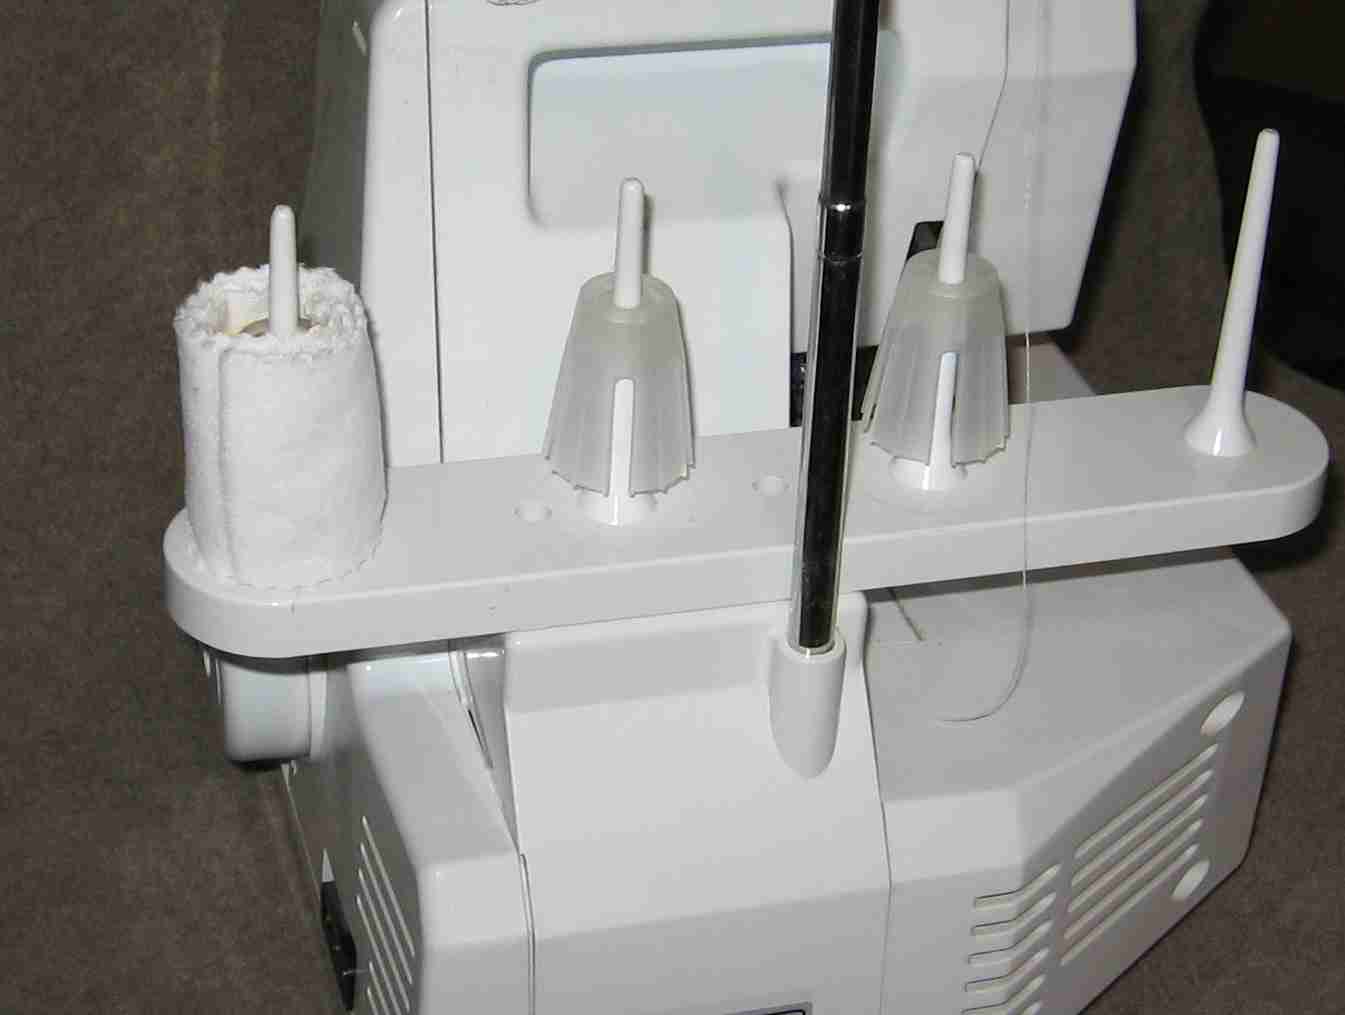
I wrap fabric around the spool holders to keep the lightweight cardboard tubes from jumping around.

Here they are, finished! And yay, I only had to buy one spool of fushia thread, which I will probably never use up.
 GrowYourOwnClothes Etsy Shop

This is total genius! I hate having to buy four spools of each color serger thread, knowing full well that I’ll never use them up. And I certainly have a big enough collection of toilet paper tubes! Can’t wait to try this out! Thank you!! 🙂 Lisa
LikeLike
no you don’t. Just buy the correct colour for the cones that thread your needles…these are the ones that might show on your garment…these others can go rainbow…helps spread the cost !!!!
LikeLike
Thanks so much for this! There are a million tips about how to use serger cones with a regular sewing machine but so few on how to create your own serger cones =) In my case I want to be able to use my old thread that is now on regular spools, can’t wait to try this out.
LikeLike
My serger came with spool caps to put on regular thread spools, so if you have some of those, you could use the regular thread spools without winding them onto a cone. Winding the thread onto a home-made cone works too, though.
LikeLike
I was very happy to come across your website. (Probably more than) a few years ago, I purchased some bargain-priced serger thread in a neutral color at JoAnn Fabrics. Recently, when I went to use it, I found the cone the thread was wound on was literally crumbling as I touched it. I was pleased to find this way to salvage the thread without the disintegrating cone coming anywhere close to my machine!
LikeLike
I have a couple of those crumbling cones, too. I just stuck rolled up piece of cardboard inside the cones to stabilize them, but putting the thread on a different cone sounds like a better idea.
LikeLike
[…] Home Made Serger Thread Spools […]
LikeLike
This is perfect for those spools of polyester wooly that I have trouble using because they’re conical on both ends and the thread gets caught up on the bottom and pulls out of the overstitch looper. I thought I was stuck using up bobbins for those.
LikeLike
Funny to think that I have never emptied a serger cone! But now when and if I ever do, i will have a reason for saving the empty cone, as I invariably will.
LikeLike
I came across some empty sturdy paper cones while going through some things. They may have come from some things I/we got from my MIL 10 years ago. I googled and found this website, as I really do not want to just throw them away. There are about 30 of them if anyone here is interested. LMK
LikeLike
LMK if you have a use for these!
LikeLike
I don’t have a use for them, but thanks.
LikeLike
I have 2″ high plastic spools. How would I wind them since they do not fit on my sewing machine’s bobbin winder? Thank you.
LikeLike
You would probably have to rig something up with a drill or something like I did to wind the cones. I was thinking about trying this manual bobbin winder https://www.etsy.com/listing/247713450/handcrafted-maple-weavers-shuttle-bobbin, but it is rather expensive. From reading the reviews, it looks like it would work for that purpose.
I have an antique hand drill that I am going to try to clamp to a table to use to wind spools. I think it would be more controllable than an electric drill.
LikeLike