

I’ve had my Brother 2340CV cover stitch machine for about a year. I wanted a cover stitch machine that could make wide cover stitches, narrow cover stitches, and could use a binder attachment. Buying a cover stitch machine was already a bit of a financial stretch for me, so I only looked at cover stitch machines at the lower end of the price range. The Brother 2340CV was the only stand-alone cover stitch machine that met all of my requirements.
I live out in the middle of nowhere, and unfortunately the nearest Brother dealer is a three hour drive away, so I had to order my cover stitch machine without testing it out. The Brother 2340CV gets mixed reviews, so I was a bit nervous about taking a chance on it. You can find reviews ranging from “This is the greatest machine ever and I’ve never had any trouble with it,” to “No matter what I try I can’t get it to work and I want to throw it out the window.” I read every review I could find, I read a bunch of advice from people on the Patternreview forum, and I decided to take a chance on it. I thought I’d use the machine for a while, get the machine figured out, then write a quick blog post with tips for sewing with the Brother 2340CV. Ha.
The tips I found for using this machine were all over the place. I found some good ideas, some useless suggestions, and some really bad advice. Plenty of people gave different advice about the same problem. For every bit of advice I give, you can probably find someone else that suggests doing the opposite. I know it is easy to get confused when troubleshooting this machine. I kept thinking I’d found a solution to a problem, only to later realize that the real solution was something else entirely. There are a lot of variables involved in keeping this machine from throwing temper tantrums.
Well, I’ve had my cover stitch machine for a year, and I JUST NOW feel like I have this machine’s little quirks figured out. I spent more money on this machine than any other sewing machine I have, and unfortunately it’s the wimpiest, most finicky one of the bunch. I’ve never wanted to throw it out the window, but I did spent quite a bit of time being frustrated with all of the skipped stitches, broken needles, and broken thread. I really, really wanted to like this machine, so I persevered, and I eventually figured out how to keep it happy. I can’t say I love my Brother 2340CV, but I can get it to do what I need it to most of the time. I do love having beautiful strong, stretchy hems and topstitching on my knit garments. That makes me happy.
Links in this post identified by an asterisk (*) are affiliate links. If you click through and make a purchase, I will earn a commission (at no additional cost to you).
Now that I’ve gotten my Brother 2340CV* figured out, I don’t know how I ever lived without a cover stitch machine. I’m writing this post for anyone who has this machine and is in the “I’m about to throw it out the window” category, for anyone who has just purchased one, and for those of you considering buying one. You CAN make it work. It just takes some knowledge and effort.
This ended up being a ridiculously long blog post, but I wanted to get all this information out there in one place. Here’s a table of contents in case you want to jump to a different section:
The bottom line: Would I buy a Brother 2340CV again?
My additions and corrections to the manual
Accessories for the Brother 2340CV
Other cover stitching resources
The bottom line: Would I buy a Brother 2340CV again?
If I was given a choice between the cover stitch machines that were on the market at the time I bought mine? Yes, I would buy the Brother 2340CV again. If I could choose between the cover stitch machines on the market now? No, I wouldn’t.
Soon after I bought my Brother 2340CV, Juki came out with the MCS-1500* cover stitch machine. It costs a bit more than the Brother, but it’s still a fairly reasonable price compared to many other brands, and it’s getting really good reviews. I absolutely love my Juki MO-654DE serger*, which is reliable and just works no matter what—and that’s what people are saying about the MCS-1500 cover stitch machine. Also, it sounds like the Juki MCS-1500 will handle thicker fabrics than the Brother 2340CV does. I would have saved up longer and gotten the Juki instead if it had been on the market when I bought my cover stitch machine. If I ever upgrade my cover stitch machine, it will likely be to the Juki MCS-1500.
My recommendations: If you need a cover stitch machine right now, you don’t need to sew thick fabric with it, and you only have enough money to buy the Brother 2340CV*, go for it. With the information in this blog post, you should be able to use it successfully. If you can afford the Juki MCS-1500* or can wait a little longer until you can save up for it, look into the Juki MCS-1500.
If you plan on doing a lot of topstitching on the interior of a garment (more than just shoulder seams and necklines) you might want to look at the Janome CoverPro 1000CPX*, since it has a large harp space. Like the Brother 2340CV, the Janome cover stitch machines get mixed reviews. Some people love them and some people have nothing but trouble with them. I read that one of the common mistakes people make with Janome cover stitch machines is using the wrong needles. The Janome cover stitch machines use ELx705 needles, not regular household sewing machine needles. I looked at Schmetz ELx705 needles, and it looks like the ball point version might be hard to find. I only saw Schmetz ELx705 needles for sale with a universal point (also called “light ball point” or “slight ball point”), although apparently Schmetz does make the medium ball point version. Universal point needles punch holes in many knit fabrics (especially cotton), so you’ll want to get some ball point ELx705 needles, too. Organ makes them*. Look for “ELx705 SUK”. SUK is the code for medium ball point, which is what you want to use for most knit fabrics. Some of my tips for the Brother 2340CV, such as using strong thread in the needles, making sure the thread is unwinding smoothly, making sure your tension is not set too high, hammering seams before you sew over them, and using smaller needles, might help with the Janome machines as well.
Other machines to consider
Here is a list of the cover stitch machines I found at the lower end of the price range. If you have more to spend, you have even more choices for stand-alone cover stitch machines, or you could buy a serger/cover stitch combo machine. If you need a really reliable machine, and have the money and space for it, consider getting an industrial cover stitch machine.
Consew 14TU858*: This is the least expensive cover stitch machine I saw. It only does a two-needle cover stitch and a two thread chain stitch, and it has a plastic piece that looks like a serger knife cover taking up the harp space to the right of the needle. This machine might be OK if you only want to use it for hemming and topstitching very near the edge of the fabric. It doesn’t look like you can use a binder attachment with it. I couldn’t find a single review for this machine.
Singer 14T968DC*: This is a serger/cover stitch combo machine, not a stand-alone cover stitch machine, but it is priced low enough that you could buy it just for the cover stitch feature. It gets surprisingly good reviews considering its low price. Most of the complaints are that it is a complicated machine and it takes a while to figure out how to use it.
Brother 2340CV*: This machine does a wide two-needle cover stitch, a narrow two-needle cover stitch, a three-needle cover stitch, and a two thread chain stitch. This machine gets mixed reviews.
Janome CoverPro 900CPX*: This machine has a lot of harp space for easy topstitching down the middle of a garment, but only does a wide two-needle coverstitch and a two thread chain stitch. I consider having the option of a narrow cover stitch an essential feature in a cover stitch machine. Like the Brother 2340CV, this machine gets mixed reviews.
Janome CoverPro 1000CPX*: This machine does a wide two-needle cover stitch, a narrow two-needle cover stitch, a three-needle cover stitch, and a two thread chain stitch. Like the 900CPX, it has a large harp space. This machine is popular, but gets mixed reviews.
Juki MCS-1500*: This cover stitch machine appears to be a clone of the Bernina L220, just with a different brand name and a 50% lower price. It does a wide two-needle cover stitch, a narrow two-needle cover stitch, a wide three-needle cover stitch, and a two thread chain stitch. It gets very good reviews. It sounds like a reliable, high quality machine. I would like to upgrade to this Juki cover stitch machine some day.
My additions and corrections to the manual
Overall, the Brother 2340CV manual is inadequate. It’s actually 90% good, useful information, although it’s poorly translated into English and is sometimes hard to understand. Unfortunately the other 10% is just wrong. Also, there is a lot of missing information that you will need. If the manual is your only source of information for how to use this machine you will probably never be successful with it. But lucky for you I’m going to tell you the other stuff you need to know.
I’ll go over each section of the manual and add my clarifications, additions, and corrections. You can download the Brother 2340CV manual if you don’t have a copy of it and you’d like to follow along.
The manual starts out with the usual warnings – don’t use your sewing machine while in the bath, etc. Basically, don’t sue Brother if you do something stupid.
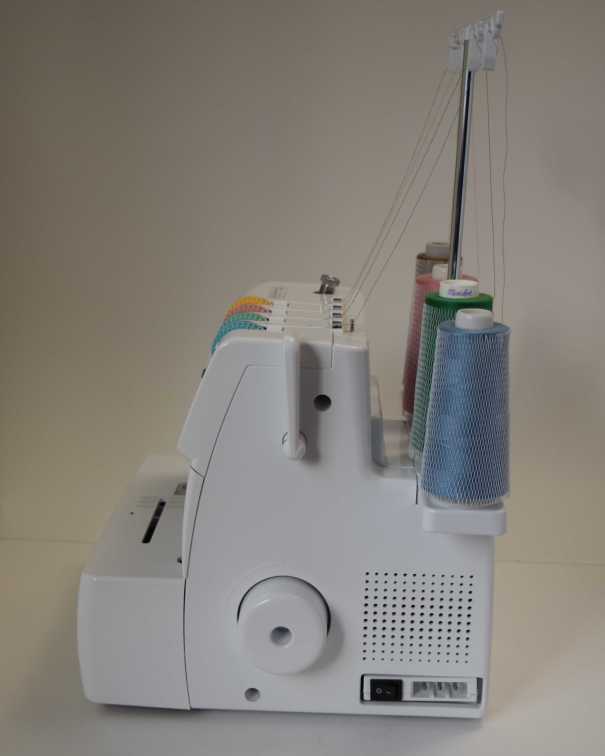
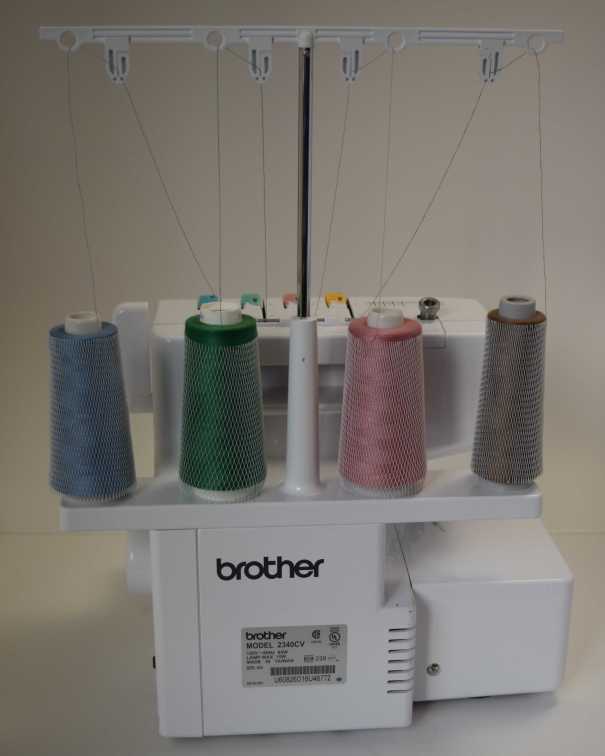
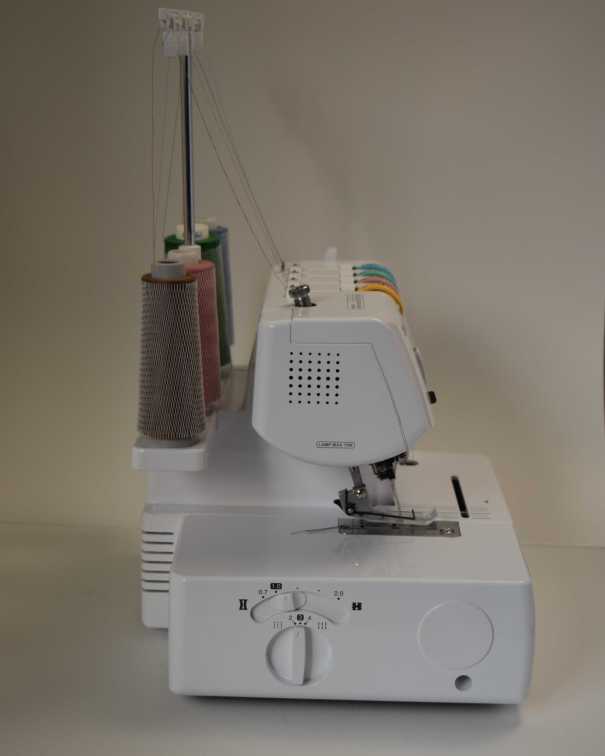
Pages 3 and 4 describe the parts of the machine. Read that.
Now onto Page 5. Stitch length: I usually leave the stitch length at 3 mm. I read some advice suggesting setting the stitch length shorter, so I tried that, but it ended up not helping anything. Shorter stitches leave you with a lot of thread bulk on the under side, so don’t shorten them unless you have a good reason to. I would not recommend setting the stitch length longer than 3 mm.
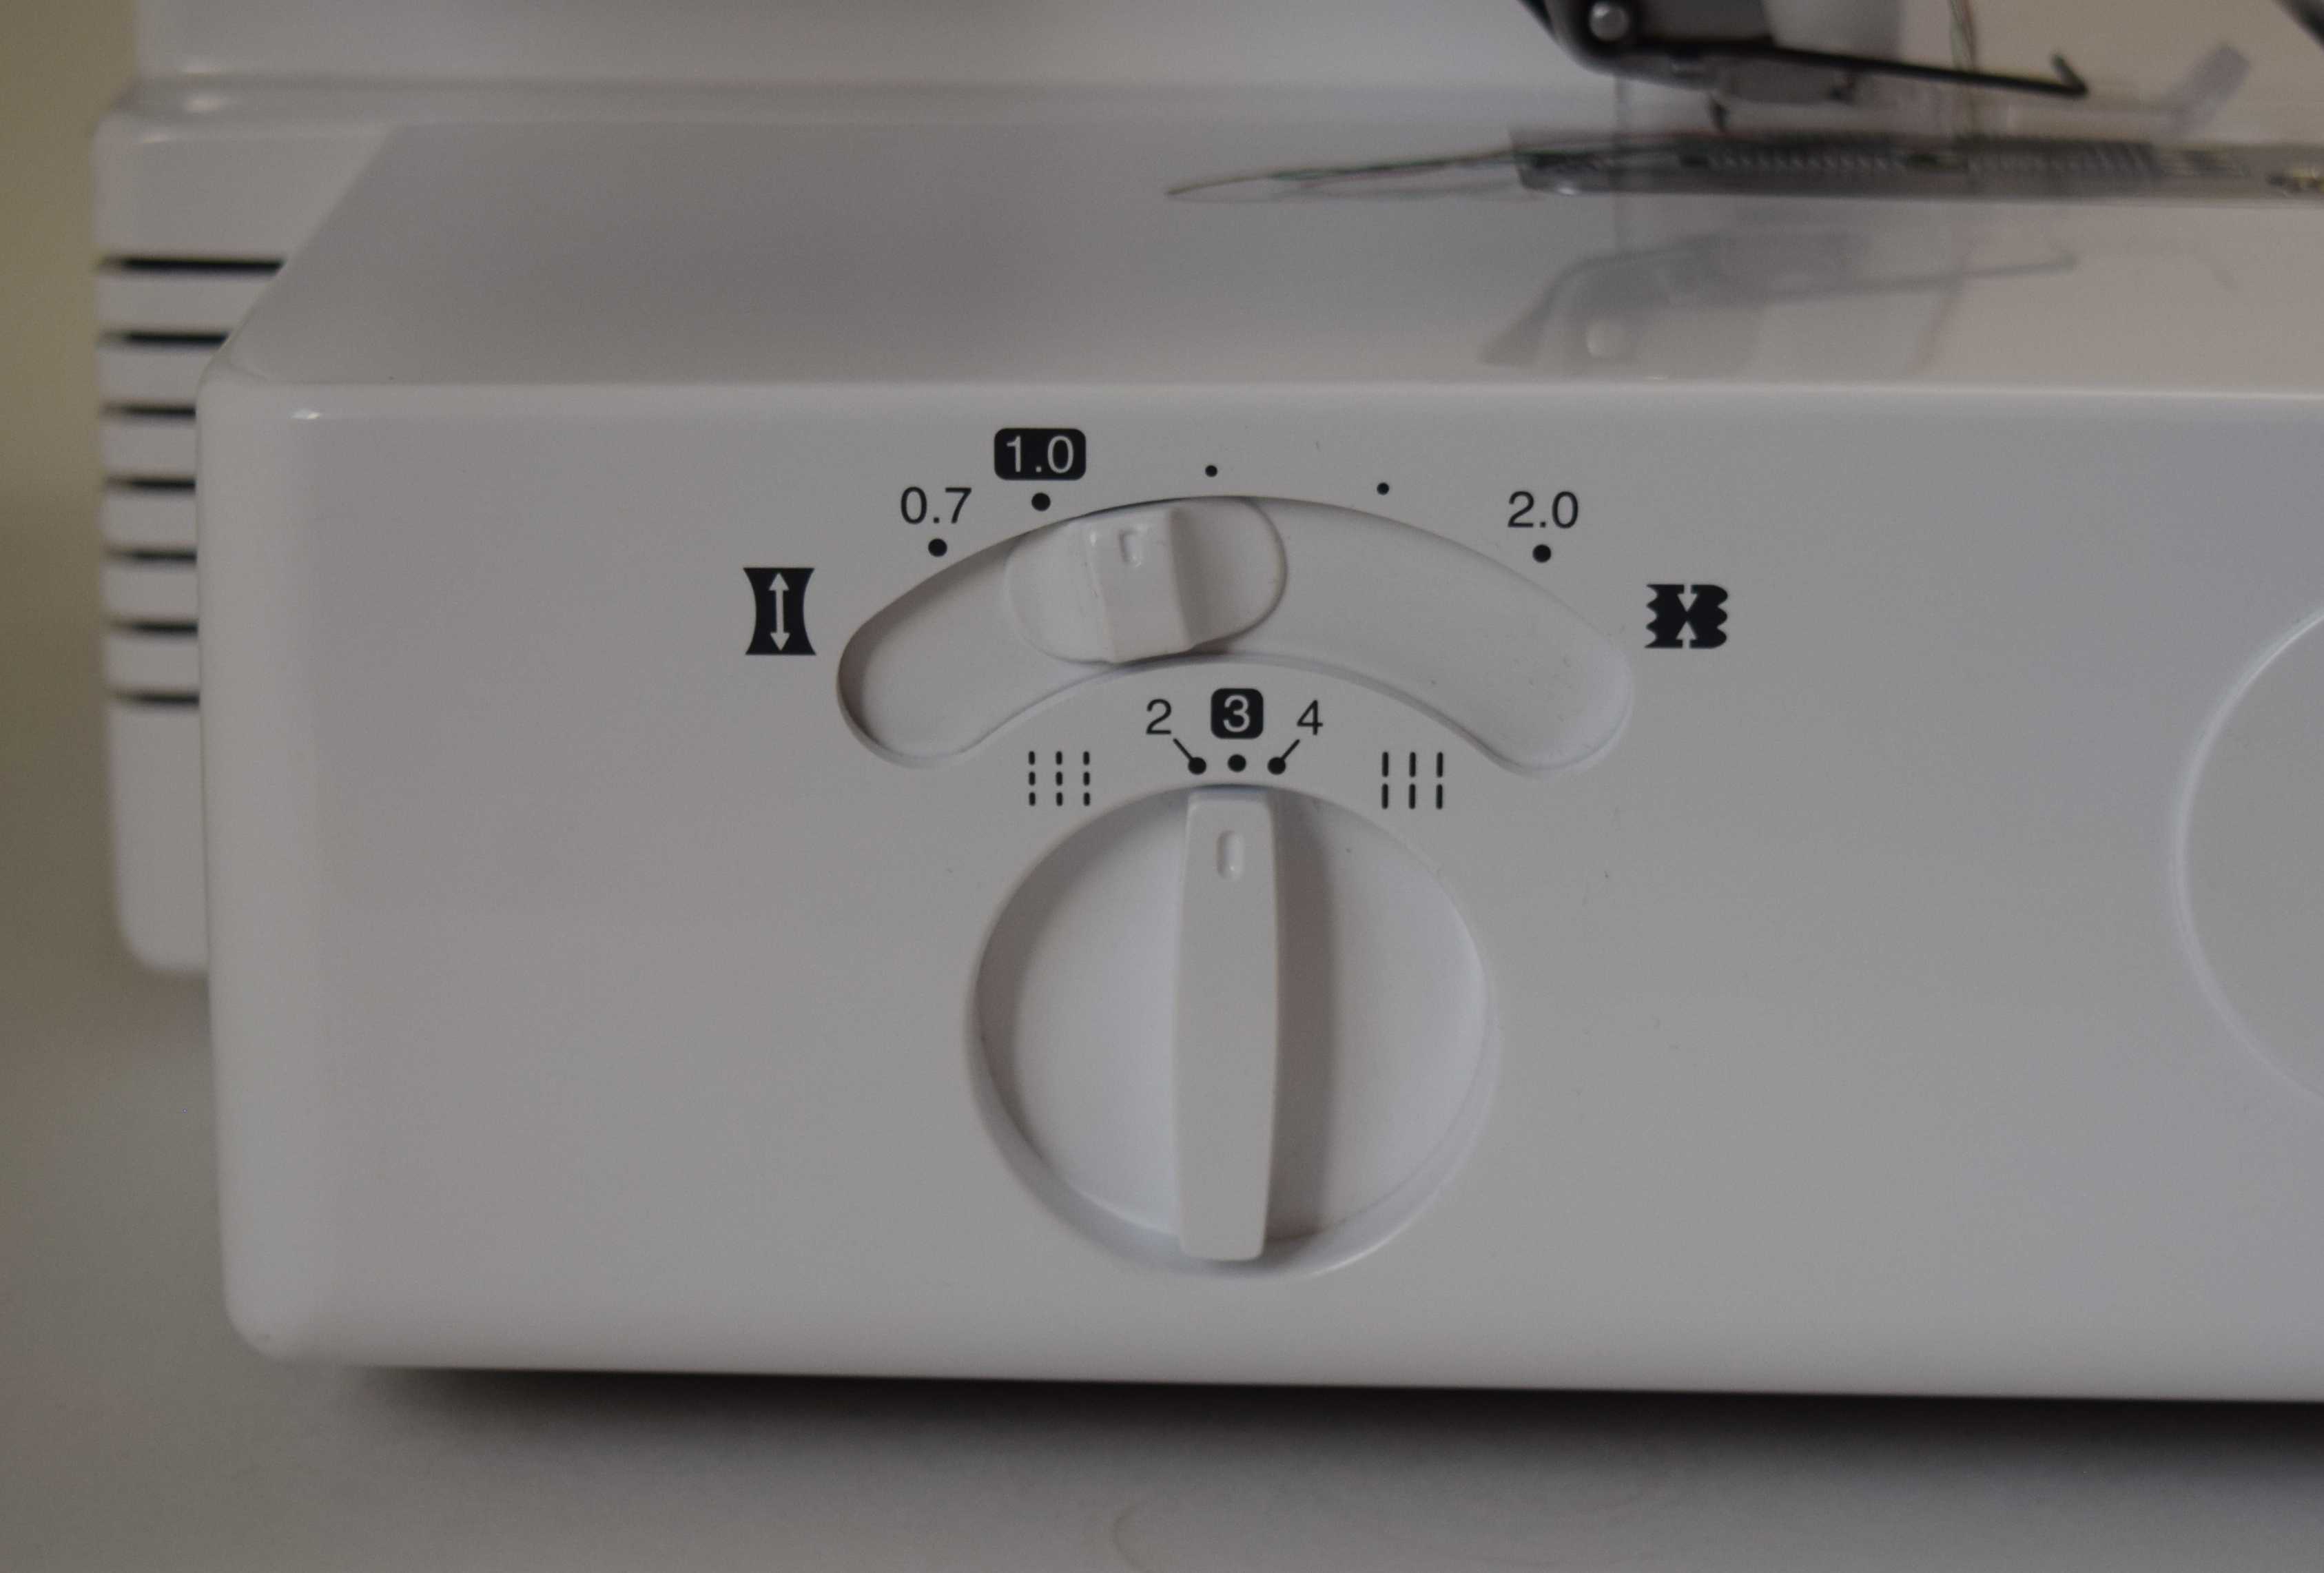
Differential Feed: Most of the time I leave the differential feed set to one click past the 1.0 mark (about 1.1). This seems to work well for most knit fabrics.
Page 6. Presser foot pressure: I haven’t actually changed mine. I did read that increasing the pressure might help prevent skipped stitches, but with everything else I figured out, I hardly ever get a skipped stitch any more. If you want to change your presser foot pressure, use a permanent marker to make matching alignment marks on the knob and the sewing machine. Count how many turns you make and make a note of it so you can get the pressure back to the default setting later.
Page 7. Needles. Pay attention here, because this is one of the places where the manual goes horribly wrong. It suggests a size 90/14 needle. DO NOT EVER use a size 90/14 needle in this machine. If you ignore my advice and try it, please wear safety glasses. The needles will break frequently. I had a chunk of needle hit me on the nose, and I was very glad that I wear eyeglasses.
This machine takes regular home sewing machine needles. Size 75/11 is best (for all fabric, no matter how thin or thick), but you can use size 80/12 if that’s all you have on hand. I found that both Schmetz and Organ needles work fine in this machine, but Singer needles don’t work as well. If you are sewing on woven fabric, fleece, dense knit fabric, or thick knit fabric (such as sweatshirt fleece), use universal point needles. Also, stick to size 75/11 needles for thicker fabric, since the needles will pierce the fabric more easily (I know, your gut is probably telling you to use bigger needles for thicker fabric. Don’t). Use ball point (jersey) needles for most knit fabric, including fabric with spandex in it. I don’t think stretch needles are necessary with this type of machine. Ball point needles work fine for me.
It may seem counterintuitive that smaller needles are less likely to break. I think the problem is that it takes a lot of force to push two or three large needles through fabric (Try pushing two size 75/11 needles through a piece of fabric by hand. Now try two size 90/14 needles. You can feel that it takes a lot more force to push the larger needles through the fabric). For size 90/14 needles, the force needed to push the needles through the fabric is almost as large as the force needed to break them. Size 75/11 needles are small enough to slip easily through the fabric, so they rarely bend or break.
Removing or inserting needles: Before step 1 listed in the manual, place a scrap of fabric under the presser foot and lower it. This will give you more room to work and the fabric will keep you from dropping a needle down inside the machine.
Page 8. Thread spool. Cross wound thread, whether on cones, tubes, or spools (such as Gütermann or Mettler spools), unwinds straight off the top and does not need a thread cap. Stack wound thread spools (such as Coats) needs to be used with a spool cap. Bobbins are also stack wound and need spool caps. I find that I can just jam a Gütermann spool down on the post and it stays in place on its own. The commercial sized Gütermann thread that Wawak sells needs a little help to stay in place. For now, until I come up with a better solution, I just put a ball of poster putty* on the top of the tube, and it keeps it in place.
-
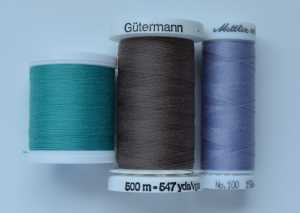
- Stack wound (left) and cross-wound thread (center and right)
-
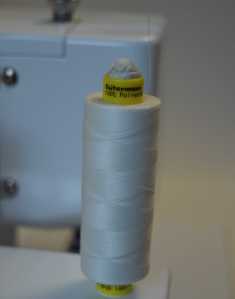
- Poster putty holding a tube of thread in place
Use thread nets whenever possible to get better quality stitches. Check your spool or bobbin for any rough spots or cracks the thread could catch on. Rough spots will cause the thread to break. After you have your cone or spool set up on the thread stand, put it through the thread guides 1 and 2, then pull some thread out to check that you have it set up so the thread will pull off smoothly. Even the slightest snag can cause the thread to break.
Lets talk about thread selection. For the looper thread, any semi-decent quality serger thread is fine. Don’t use old rotten thread or cheap black thread (black thread breaks more easily – use dark gray instead if you can). I tend to buy whatever serger thread is on sale, so I have a mix of Maxi-Lock, SureLock, and Toldi-Lock. I compared the breaking strength of the three brands. Maxi-Lock was the strongest, and Toldi-Lock was the weakest, but they all work OK in the cover stitch looper. Just to see what would happen, I tried using the weakest thread I could find in my stash (it was black Toldi-Lock) in the looper. I sewed for several yards, and the thread broke once. That was the only time I’ve ever had the looper thread break. I threw that thread away, because it was probably not strong enough to use in my serger, either.
If you want a softer looper thread that isn’t as scratchy (especially when topstitching necklines) use textured polyester thread such as Polyarn* in the looper. Textured polyester thread looks similar to wooly nylon, but do not use wooly nylon thread! Wooly nylon shrinks like crazy, and you will end up with a horrible puckered mess after you wash your garment (ask me how I know).
Textured polyester thread is widely used in the garment industry – it was used on over half of the ready-to-wear t-shirts I checked – but so far it is not widely available to home sewers (in the US, anyway). Polyarn is available from Superior Threads and through Amazon*. It is a bit on the expensive side, but if you only use it in your looper when you are topstitching necklines or shoulder seams, you really only need one or two colors, since it won’t show on the right side at all. The only other textured polyester threads I’ve seen available to home sewers (Prolock and Gütermann E382) are thicker than Polyarn, so they are probably not the best choice for coverstitch looper thread, as they would be more bulky.
Another benefit of using Polyarn in the looper is that your needle threads are less likely to break. This is because you will have the looper thread tension set low. For some reason, lowering the looper tension, not just the needle thread tension, reduces needle thread breakage.
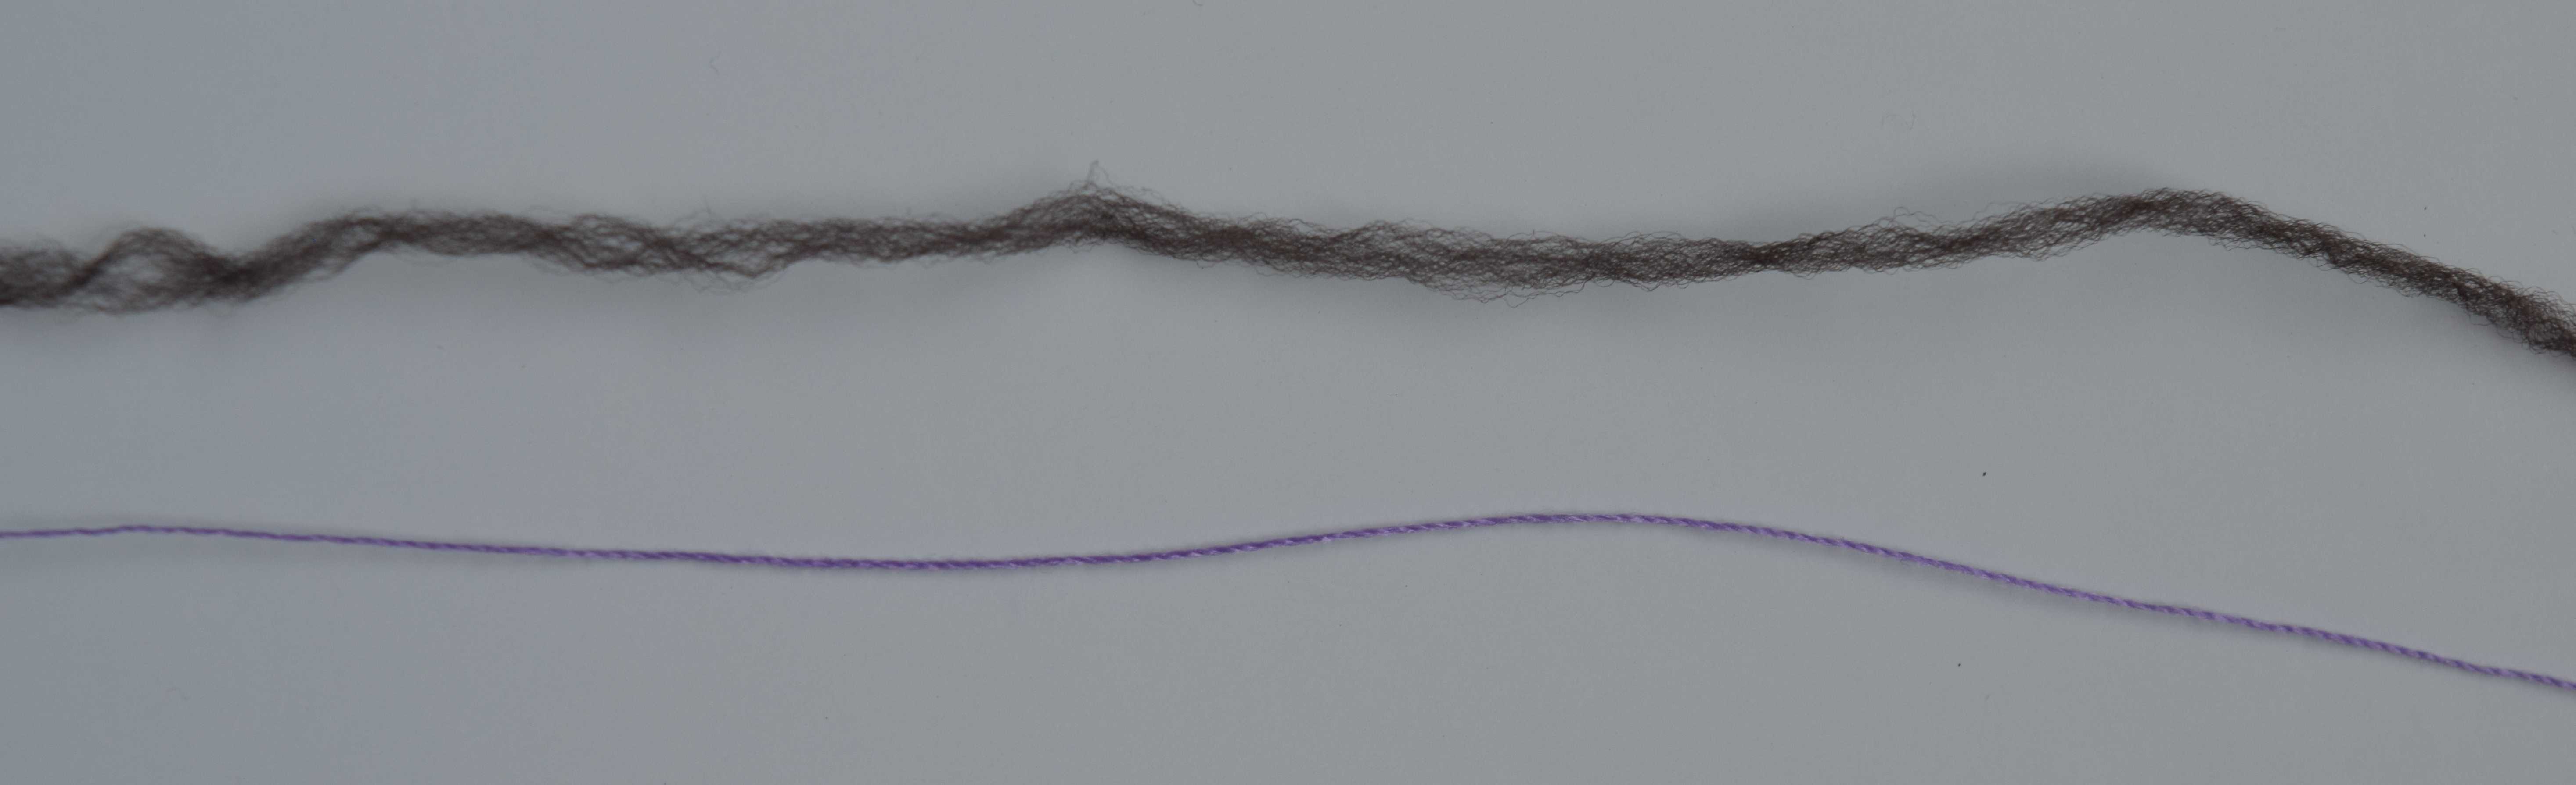
Here’s a close-up of a strand of Polyarn (top) and some all-purpose thread for comparison:
When you are threading textured thread in the looper, skip thread guide #2 and the second part of thread guide #3. See the note box on the bottom of page 10 of the manual. Set the looper tension lower than usual. I set mine all the way to zero. Be sure to use a thread net on the thread cone.

This machine is very picky about needle thread. The needle thread is under a lot of tension, so it is best to use strong thread. I recommend Gütermann Sew-All polyester thread for the most trouble-free sewing. Mettler Metrosene is OK, too, but I don’t think it’s quite as strong. Coats All-Purpose thread is strong, but rather thick and wiry, so it leaves large loops on the under side, which can be scratchy if the stitches are in direct contact with your skin, especially around necklines.
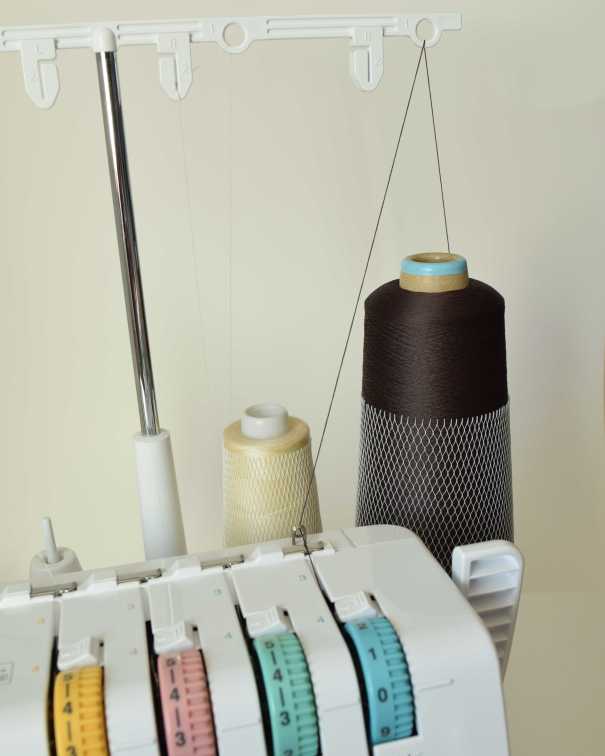
If you only have one spool or cone of needle thread, you can wind thread for the other needle(s) onto bobbins. I haven’t had the greatest luck with this, probably because my bobbin winder doesn’t wind perfectly. The bobbin needs to be wound smoothly under even tension for it to work well. Wind your bobbin at the lowest speed possible. As you wind the thread, try pinching the thread between your thumb and finger a few inches past the spool (but before the tensioner) to add more tension and keep the tension more even. Your bobbin also needs to be perfectly smooth around the edges. Use a thread cap with bobbins.
Another option to split up a single spool is to wind some thread onto a cardboard cone or an empty serger thread cone. This way you can use a thread net on the cone to get better quality stitches. You have to wind the thread under an even tension, wind evenly, and swipe the thread quickly back and forth as you wind it for as close to a cross-wound effect as you can get. Your cone or cardboard tube needs to be smooth, with nothing for the thread to snag on. It does take some skill to wind the thread properly. Much to my surprise, my homemade toilet paper tube cones have been working well for me for needle thread.
If you use thinner thread, such as serger thread, in the needles, you get better looking stitches with smaller needle thread loops that lie flatter and are thus not as scratchy. Serger thread breaks frequently, though. I have to admit, a lot of the trouble I’ve had with my cover stitch machine has been because I stubbornly keep trying to use serger thread in the needles. I did figure out that if I lower both the needle AND looper tensions by about a number, I can sometimes get away with using serger thread. The needle thread still breaks now and then, but I figure that’s the price I pay for being too cheap to buy good thread. I did just buy a box of assorted Gütermann thread*, so with more thread colors on hand, hopefully I’ll be less tempted to use serger thread in the needles.
In the picture below, the top row was sewn with serger thread in both the looper and needles. The bottom row was sewn with Coats thread in the needles and serger thread in the looper.

Here’s a close-up of the stitches. The Coats needle thread is on the left; serger thread in the needles is on the right. Even with the needle tension lower while using serger thread in the needles, smaller loops are formed. The larger loops really stick out and feel scratchy against my skin. The loops can’t be made much smaller by increasing the tension – the thread just breaks when the tension is set too high.

Back to the manual. Pages 9-10 are about threading the machine. I think the manual makes it pretty clear how to thread the machine. I didn’t have any problems. This machine is harder to thread than a regular sewing machine, but easier than a serger.
You should completely re-thread the needle threads when you change threads. Don’t tie on the new needle thread and pull it through, because the needle threads follow the same path at one point and the threads could get twisted together. This is another potential cause of thread breakage.
Tying on the looper thread is fine, though. Cut the old thread near the cone, put the new cone in place, tie the end of the new thread to the old thread, then hold down the tension release button while you pull on the end of the old thread to pull the new thread through. It’s a quick and easy way to change the looper thread.
Pages 11-14. Types of stitches: With this cover stitch machine you are probably not going to get perfect looking stitches that look like the drawings in the manual. I find that no matter what I do, the left needle thread loops tend to be larger and irregular in size. Using thread nets helps a lot, but the stitches are never perfect on the under side. Regardless of how the under side looks, the stitches look fine from the right side, though. Also, when you are using needle and looper thread that matches, you won’t notice any slight irregularities in the needle loops on the wrong side.
When I first got this machine, I kept turning up my tension trying to get the needle loops to be smaller, until my tension would be too high and my thread would break, but my needle thread loops still weren’t as small as they show in the drawings in the manual. My stitches always look more like the “Needle thread is too loose” pictures in the manual. Like I mentioned when talking about thread, using thinner thread will give you smaller needle thread loops, but thinner thread is more prone to breaking. If you want absolutely consistent, perfect looking stitches, this is not the machine for you.
The manual says the normal tension setting is 4 (except for chainstitching). I suspect that the tension dials are not adjusted consistently at the factory. This could be one of the reasons some people have so much trouble with this machine and it works fine for others. When I first got my machine, with my tension settings at 4 I would get broken needle thread no matter what thread I used. Turning the tension down to 3.5 stopped the thread breakage. Remember that having the looper tension too high also causes the needle thread to break, even if the needle tensions are reduced enough.
Here’s how I would suggest you check your thread tensions. (If your threads are not breaking and your stitches look good, your tension settings are fine, so don’t mess with them.) Using whatever type of thread you usually use, thread your looper and all three needle thread paths (with different colors in each, if possible), but don’t thread the needles. Set your tension dials to 4 to start with. With the needle threads coming out from under the last thread guide before the needles, pull on each needle thread one at a time and then pull on the looper thread. If the thread pulls out smoothly and your thread doesn’t feel like it is about to break, your tension is probably fine. If you can barely pull out the thread and/or it jerks or breaks as you pull it out, the tension is set too high. Adjust the tension dials until the tension on each thread feels about the same, then thread the needles and try sewing on a double layer of knit fabric. If the needle thread loops on the underside are big and sloppy, increase the tension slightly on each thread. If one needle obviously has lower or higher tension, adjust the tensions as needed. Keep in mind the left needle thread loops just tend to be larger, especially if you are not using thread nets. If your needle thread is breaking, lower every single tension knob, including the looper, 0.25 at a time until your thread stops breaking. When you have figured out the tension settings that work well, write them down or note them on stickers on your machine.
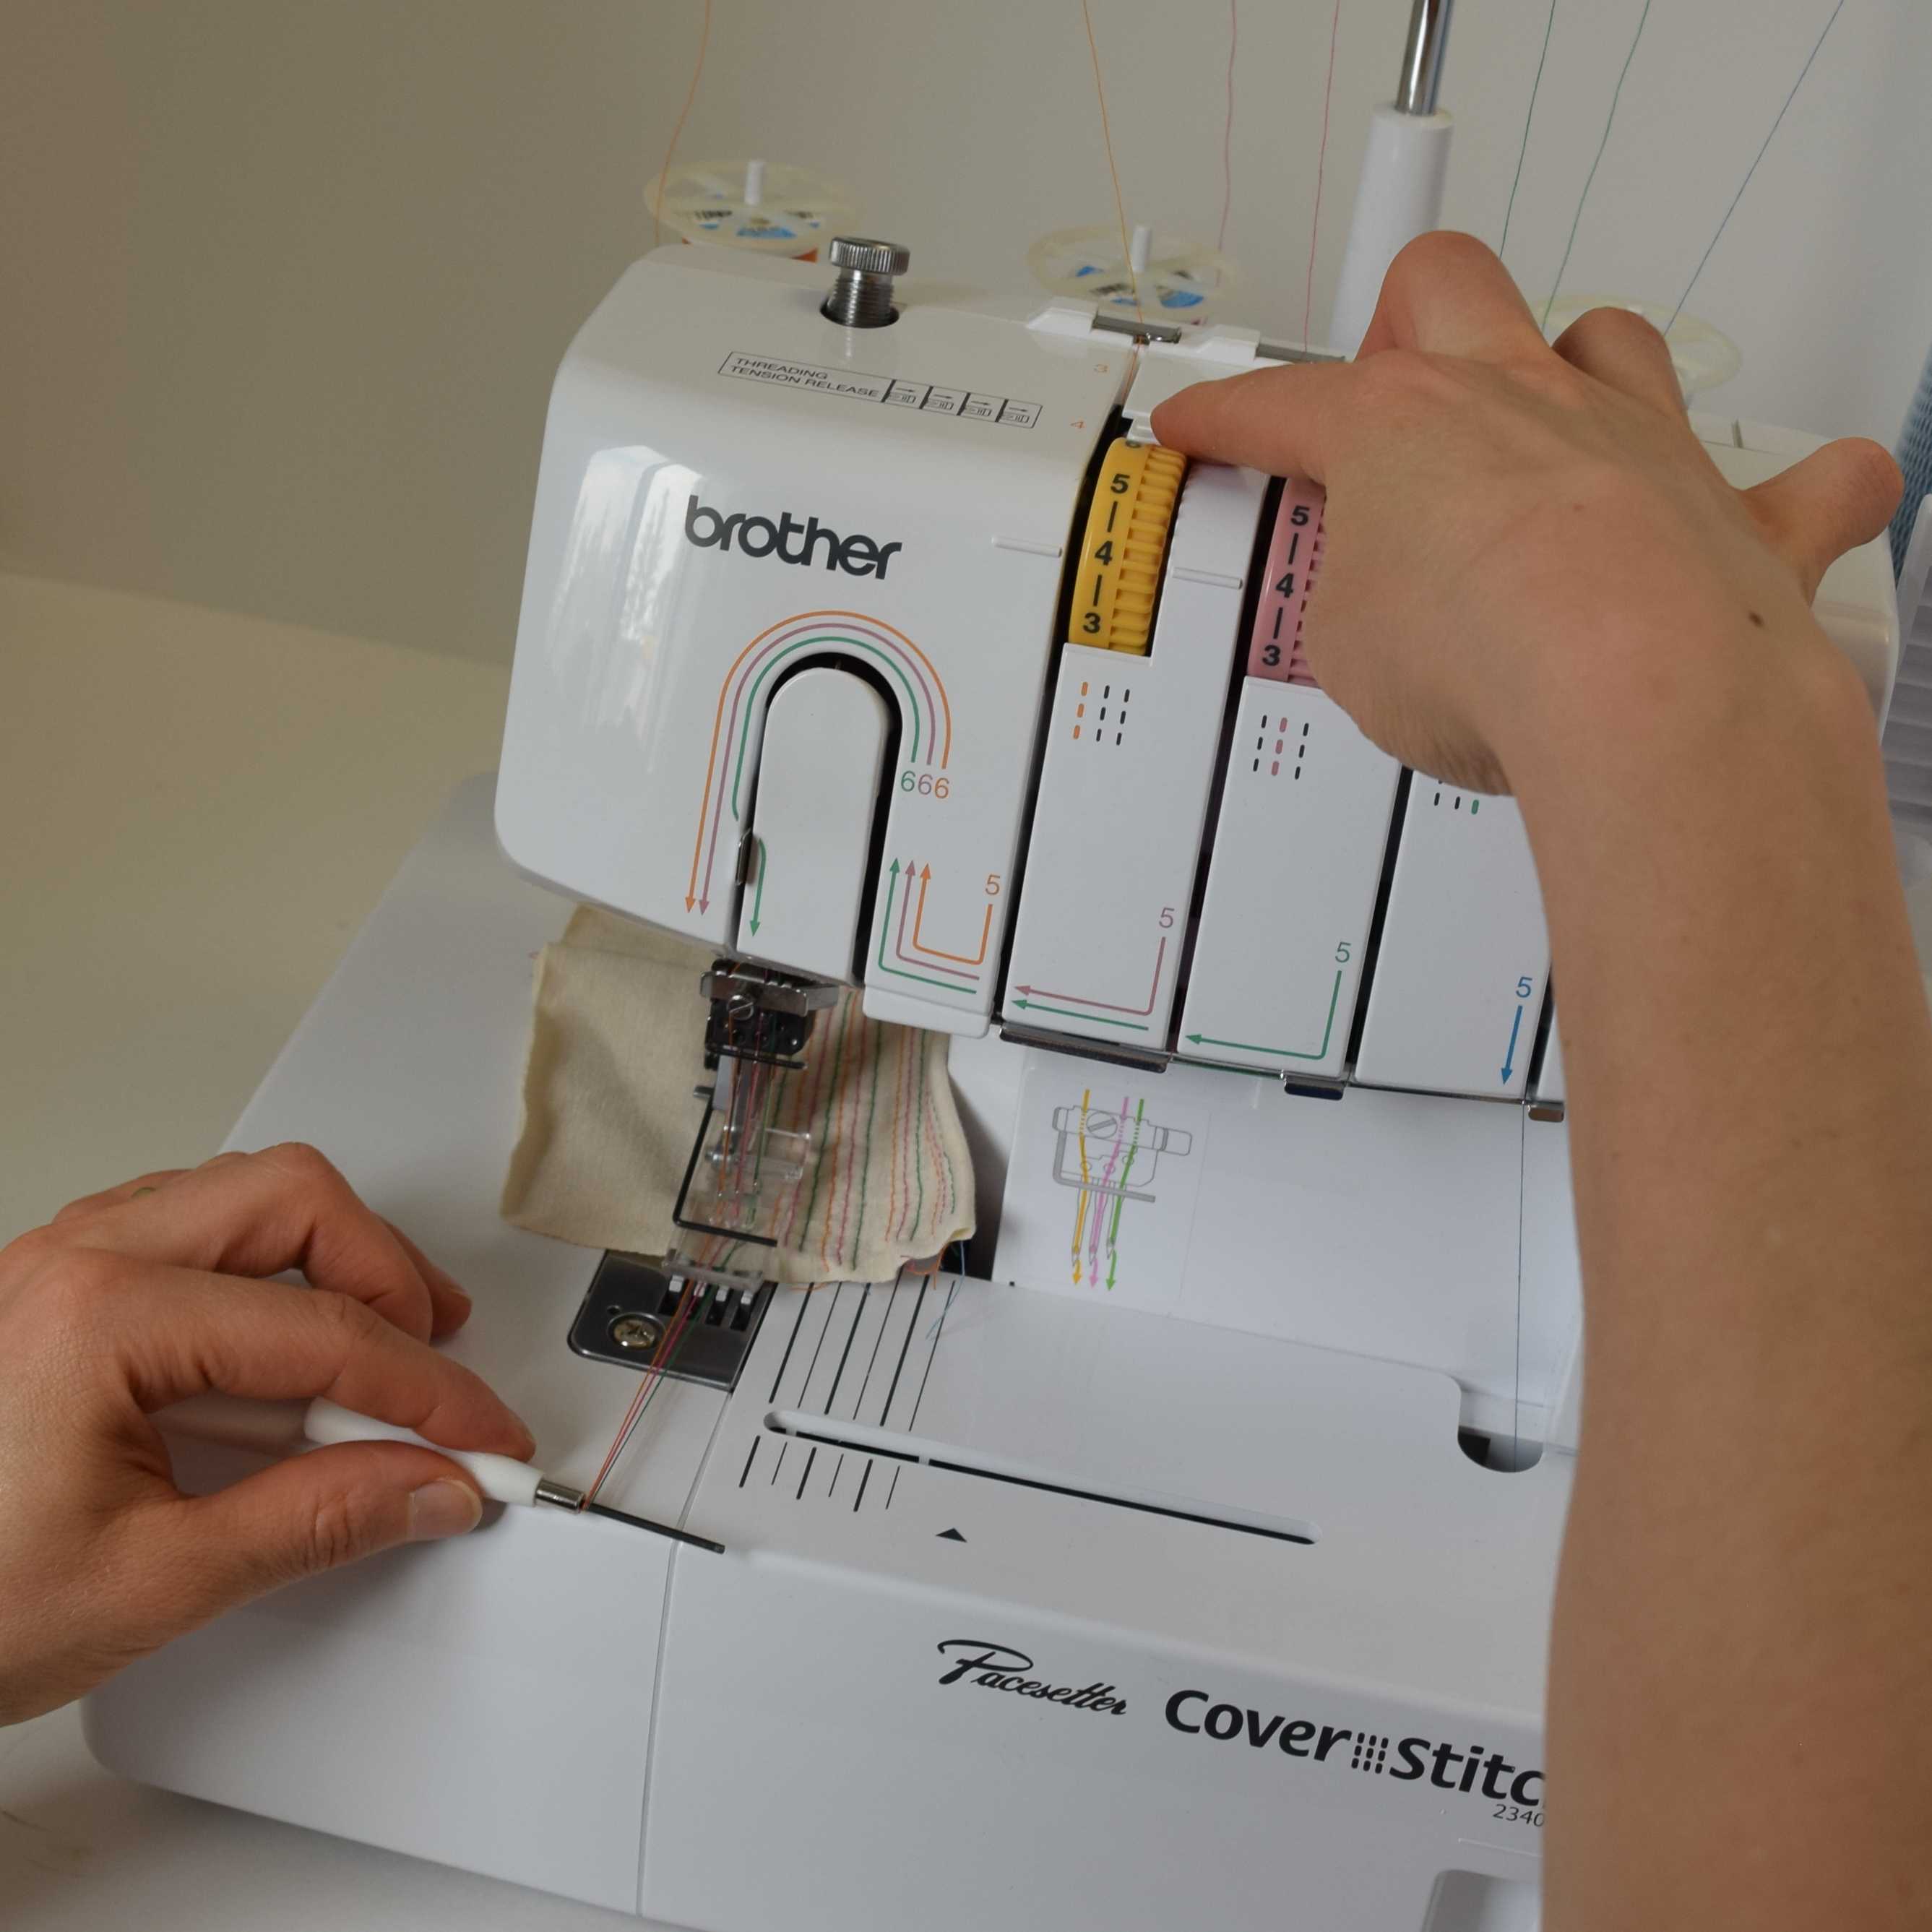
If it bothers you that 4 is not the default tension, or your tension dials are way off, the tension dials can be adjusted so that “4” is the normal tension. You should be able to have your dealer adjust the tension dials. I don’t live near a dealer, so I found a copy of the Brother 2340CV service manual online, and it describes how to adjust the tension dials. Here’s an example of which way to turn the dial: If the tension is correct with the dial set to 3, turn the tension knob to 4, use a thin hook (I used a 1.5 mm crochet hook, which just barely fit – the service manual shows using a 0.5 mm thick flat hook) to pull up on the plastic tab on the right side of the tension knob, and while the tab is still pulled up, turn the tension knob to 5. Release the tab. Now when the dial is turned to 4 the tension will be correct. Another example: If your correct tension was with the dial set to 5.5, you would adjust the dial from 4 to 2.5 while holding the plastic tab out. If you have a large adjustment to make, you will have to do it in a couple of steps. Just keep in mind that if you damage your machine by working on it yourself, you will void the warranty. There are some very thin, flimsy looking plastic parts inside the tension dials, so be very careful if you choose to adjust them yourself.
Page 15-16. Removing the fabric from the machine: Do not attempt to read the instructions in the manual. Draw a big red X through these instructions. Not only is the translation incomprehensible, the method described does not work well. The machine also comes with alternate fabric removal instructions provided on a loose sheet of paper. That method doesn’t work well, either.
There are good ways to remove the fabric and release the thread, however. I made a cheat sheet of the fabric removal instructions below that you can print out and slip into your manual. If you print at actual size and cut along the rectangular border, the sheet will be the same size as the manual.
Here are two good ways to remove the fabric and release the thread:
Fabric Removal Method 1:
This is the usual method when ending a hem or seam. It pulls the needle threads to the back of the fabric so that the seam does not start unraveling as you remove it from the machine. This method seems complicated when you read about it, but once you get the hang of it, it only takes about five seconds. It works every time, and there is virtually no chance of your thread breaking, unlike with the methods shown in the manual.
If you are sewing in the round, overlap the starting point of your stitches by about 1.5 inches (4 cm). If you are sewing up to the edge of the fabric, stop at least a stitch length away from the edge of the fabric.
Pull out some slack on the needle threads after thread guide 2. If you do not have nets on your needle thread, you might be able to skip this step.

Raise the needles to the highest position. Push back on the presser foot lifter to raise it to the extra-high position while you insert a thin, narrow tool (the needle screwdriver will work) behind the needle threads under the presser foot. Let go of the presser foot lifter.

Hold down the needle thread tension release buttons while you use the tool to pull the needle threads out to the front edge of the machine.
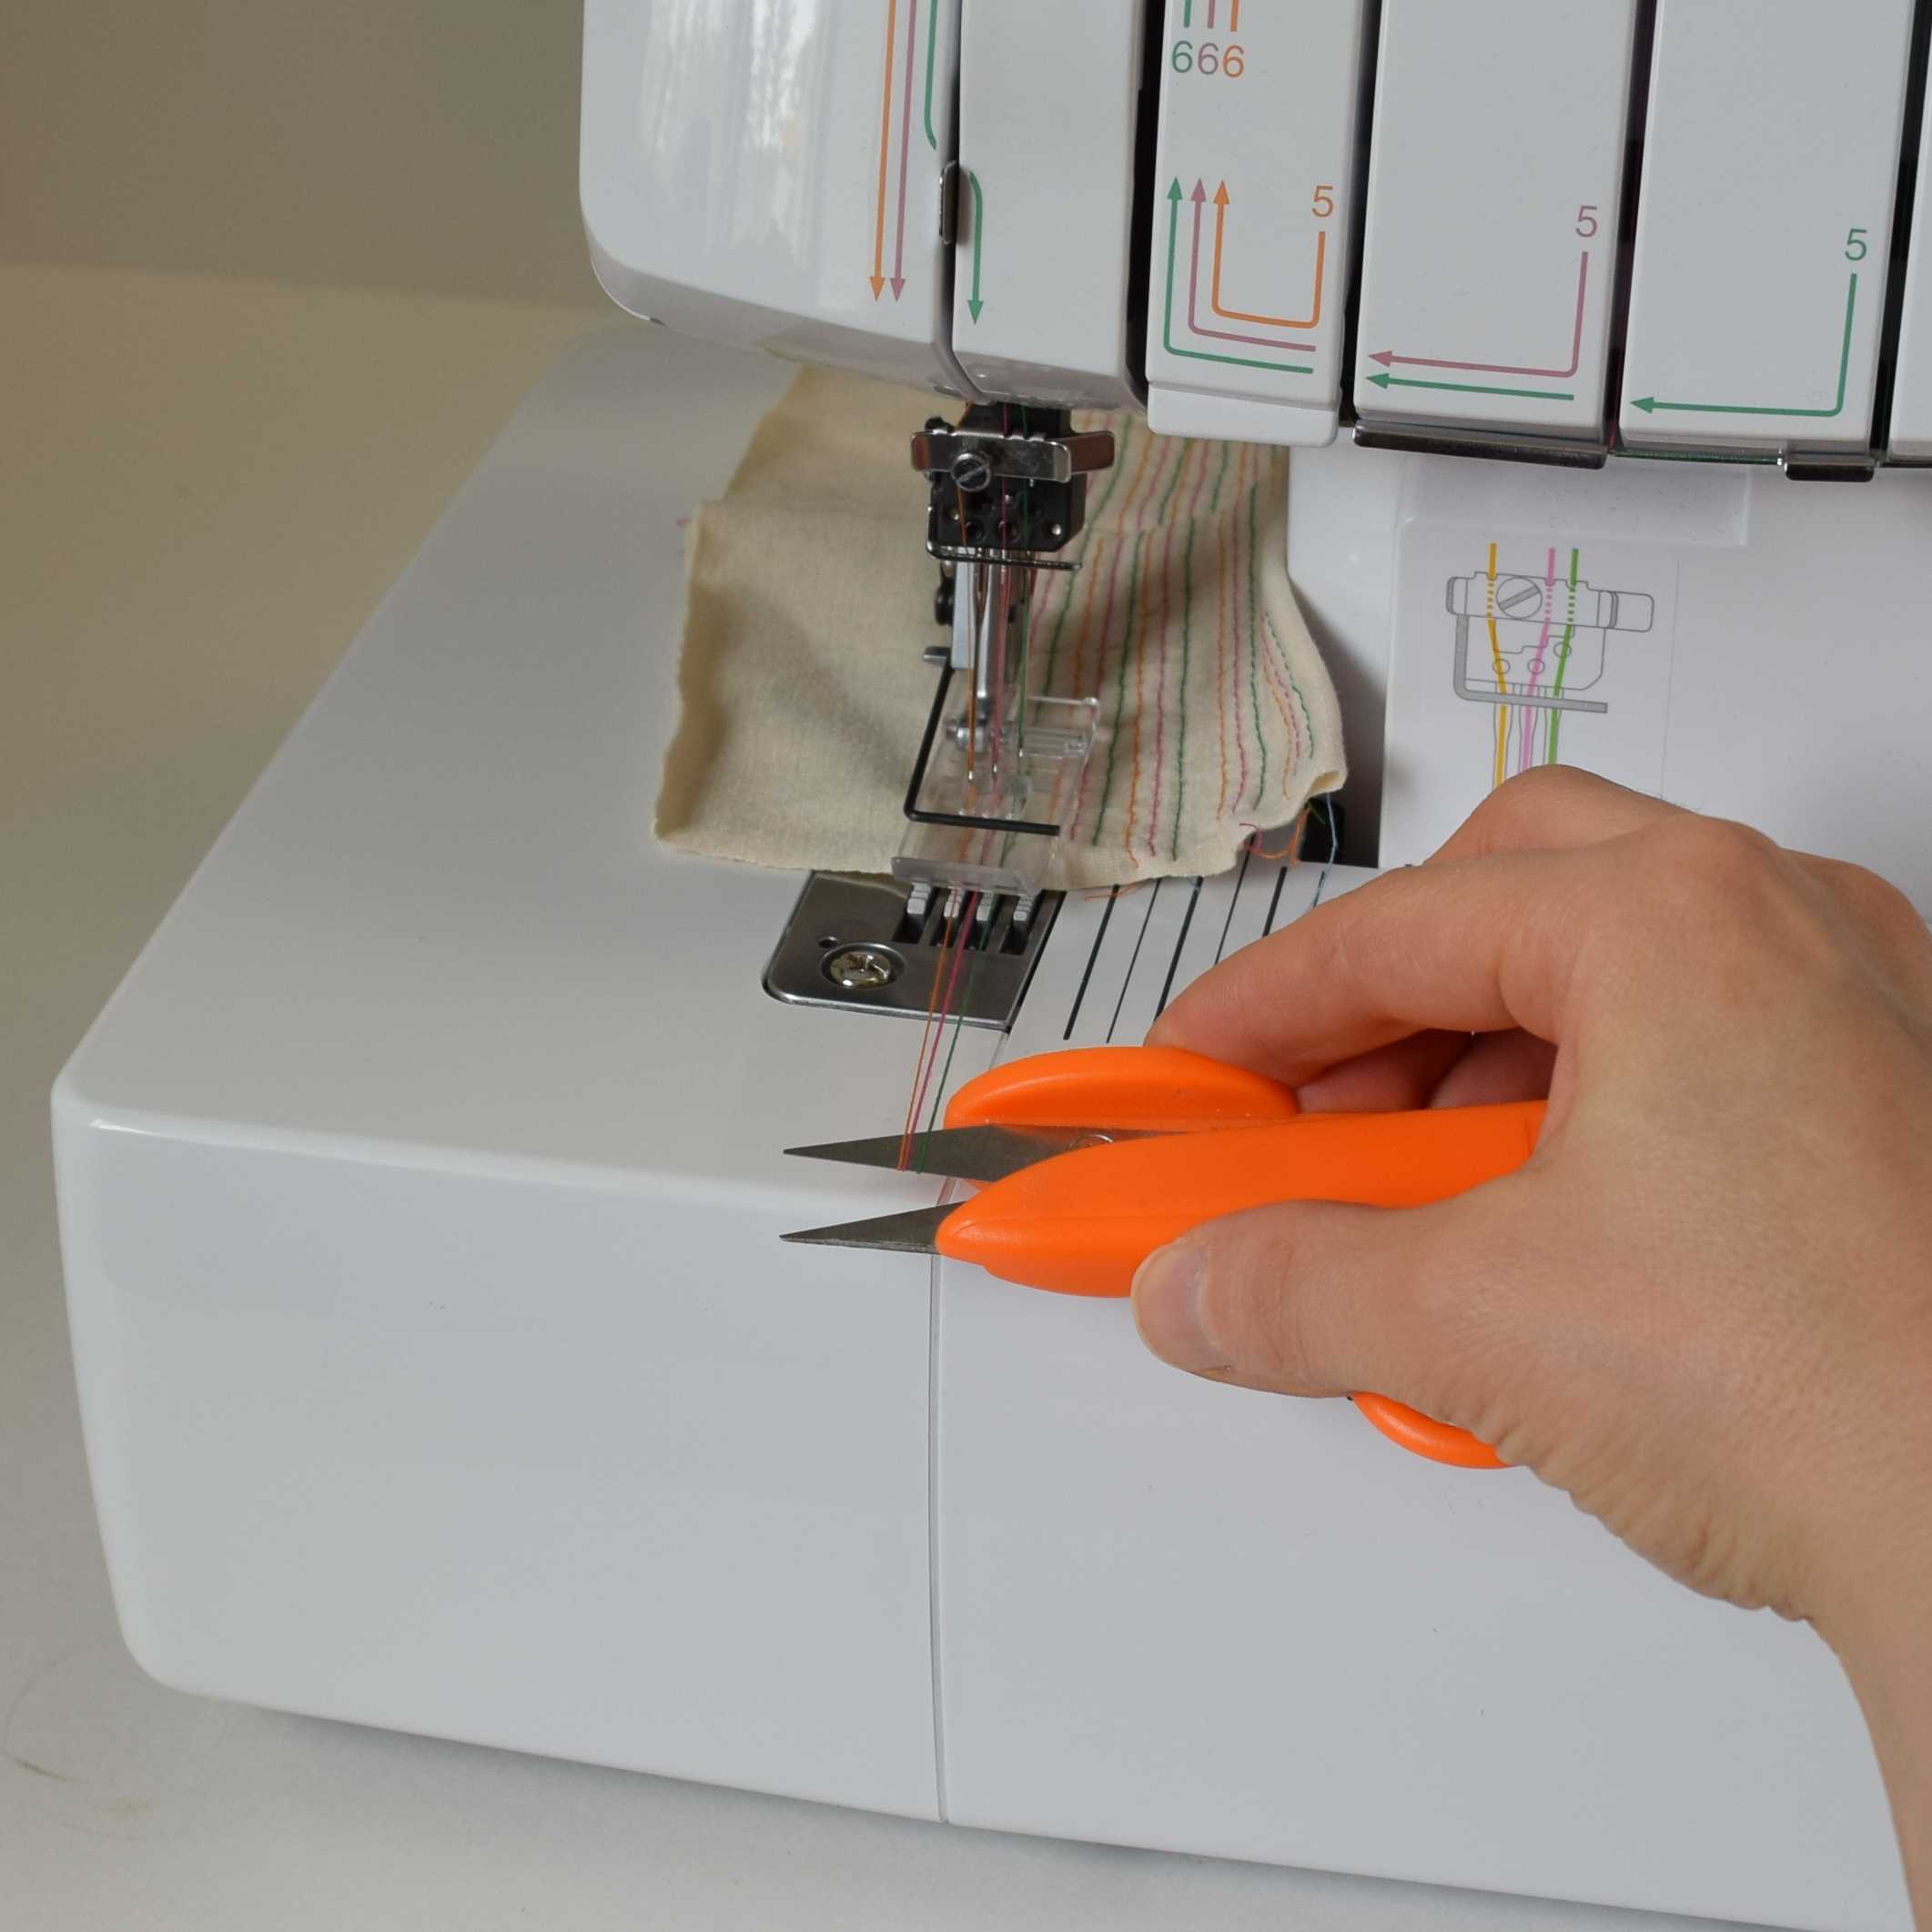
Transfer the needle thread loops onto a pair of scissors and clip the needle threads at the edge of the machine.
Hold down the looper thread tension release button while you pull your fabric straight to the back.
Cut the looper thread, leaving a tail on the fabric.
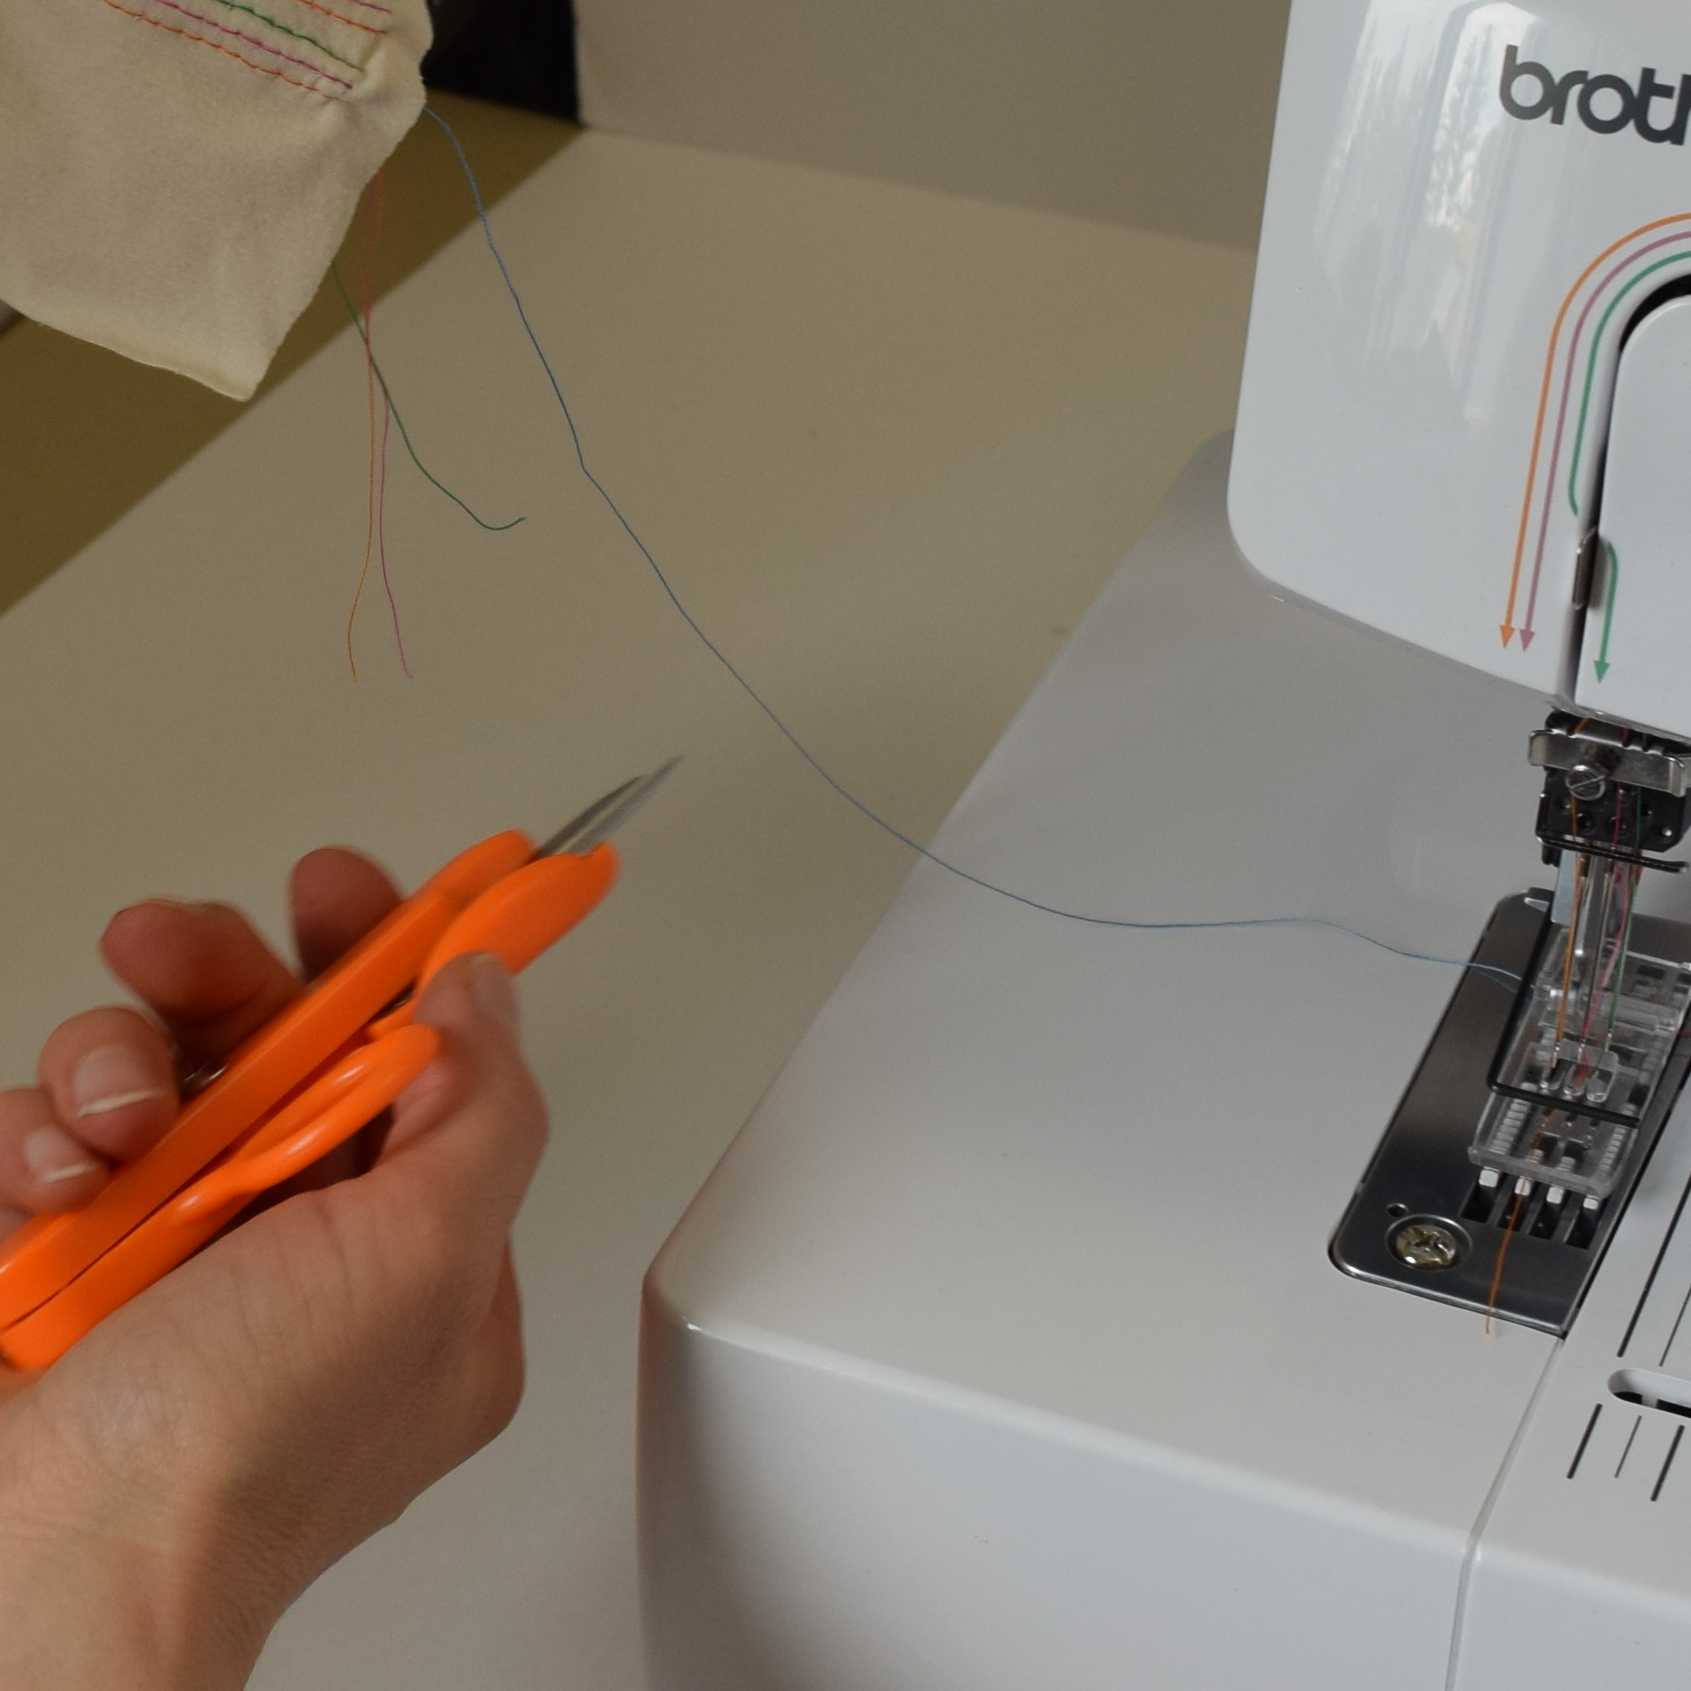
The needle thread is now magically pulled to the back, and you have thread tails that you can tie in a knot to secure them.
Note: The tension dials sometimes turn a little when you push the tension release buttons, so check that you did not inadvertently change your tension settings as you removed the fabric. Yes, this is an annoying “feature” of this machine.
Fabric Removal Method 2:
This method does not secure the needle threads, so the stitches might start unraveling as you remove the fabric. This method is useful if you mess up and want to remove your stitches, or if your thread breaks or jams.
Open the door on the front of the machine to expose the looper. Pull the looper release knob to move the looper to the right. If you have a thread jam you might need to gently push the looper to the right while you pull on the knob.
Hold down the needle thread tension release buttons while you pull back on your fabric. Check that your tension settings are still correct.
Push the looper back into place and close the front cover.
Cut the threads.
Miscellaneous tips and tricks
Starting a seam: Right when you start a hem or seam, the machine tends to skip a couple of stitches. To prevent these skipped stitches, gently pull back on the needle thread tails as you start sewing.
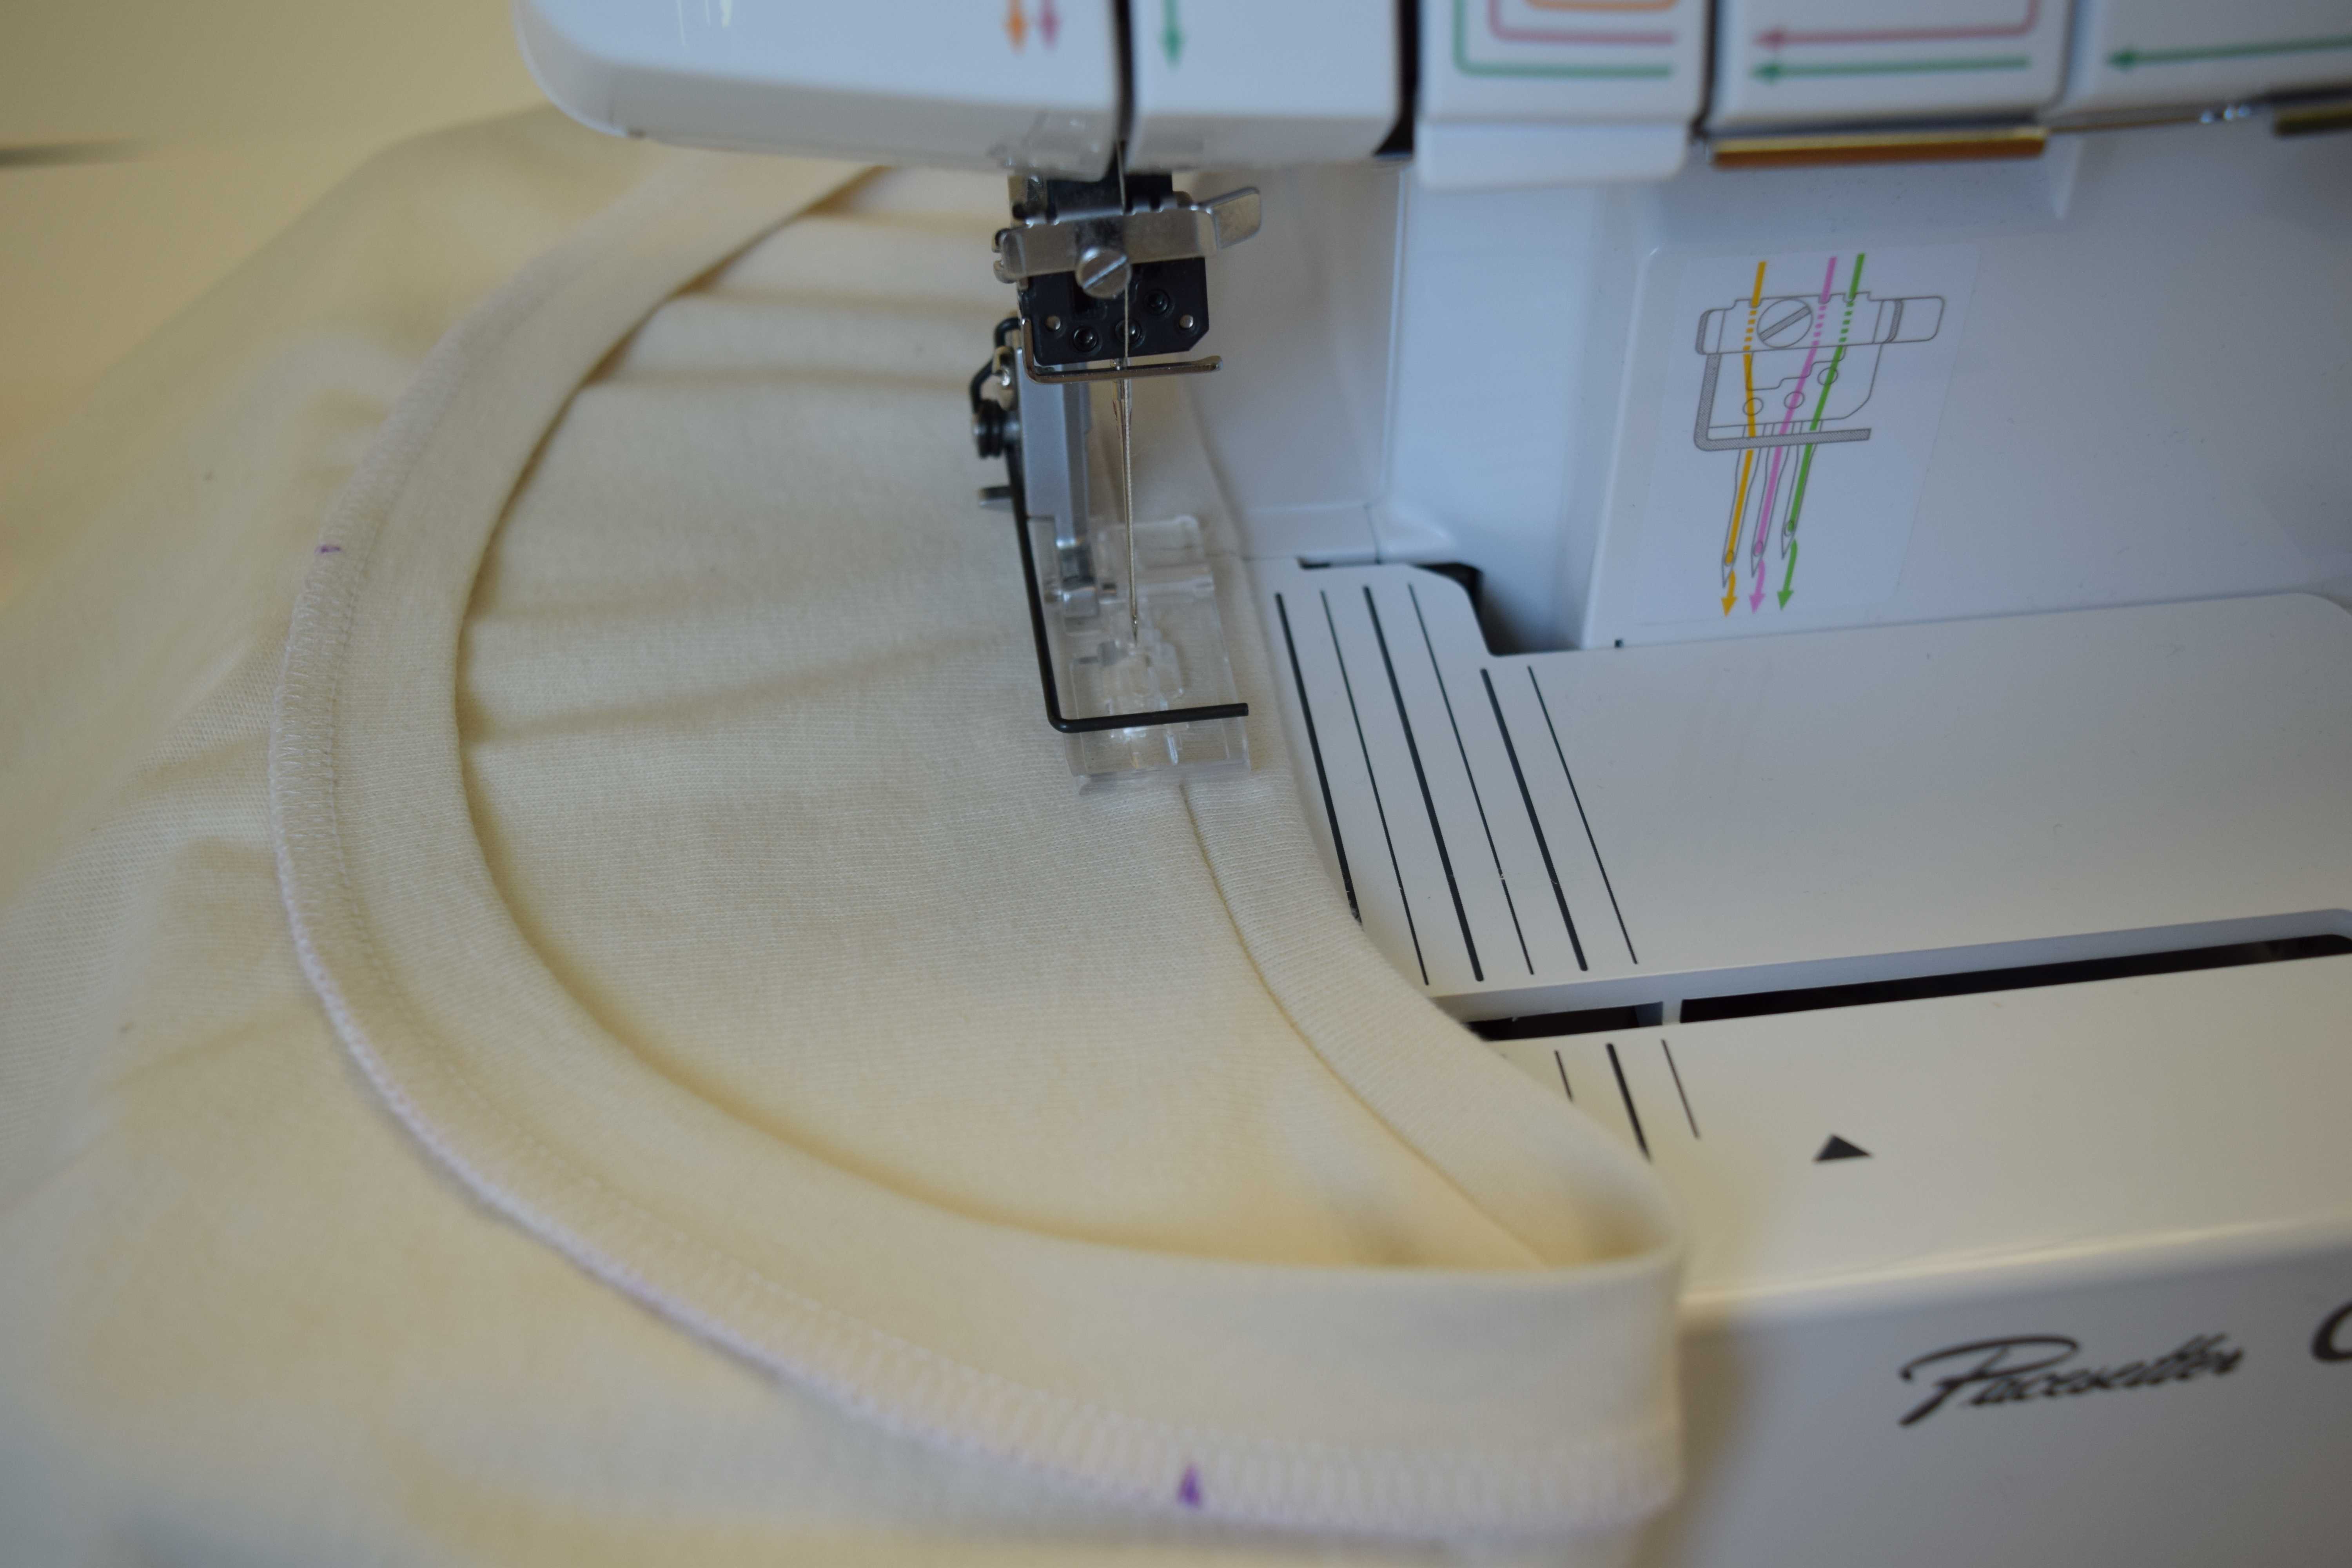
Hemming: On a coverstitch machine, you have to sew a hem from the right side, which takes a bit to get used to. Here’s how I sew a hem.
Before sewing anything, I mark the hem on the right side of the fabric with washable markers* or a chalk tracing wheel* on dark colored fabric. The hem needs to be marked accurately, so I use a quilting ruler to measure it.
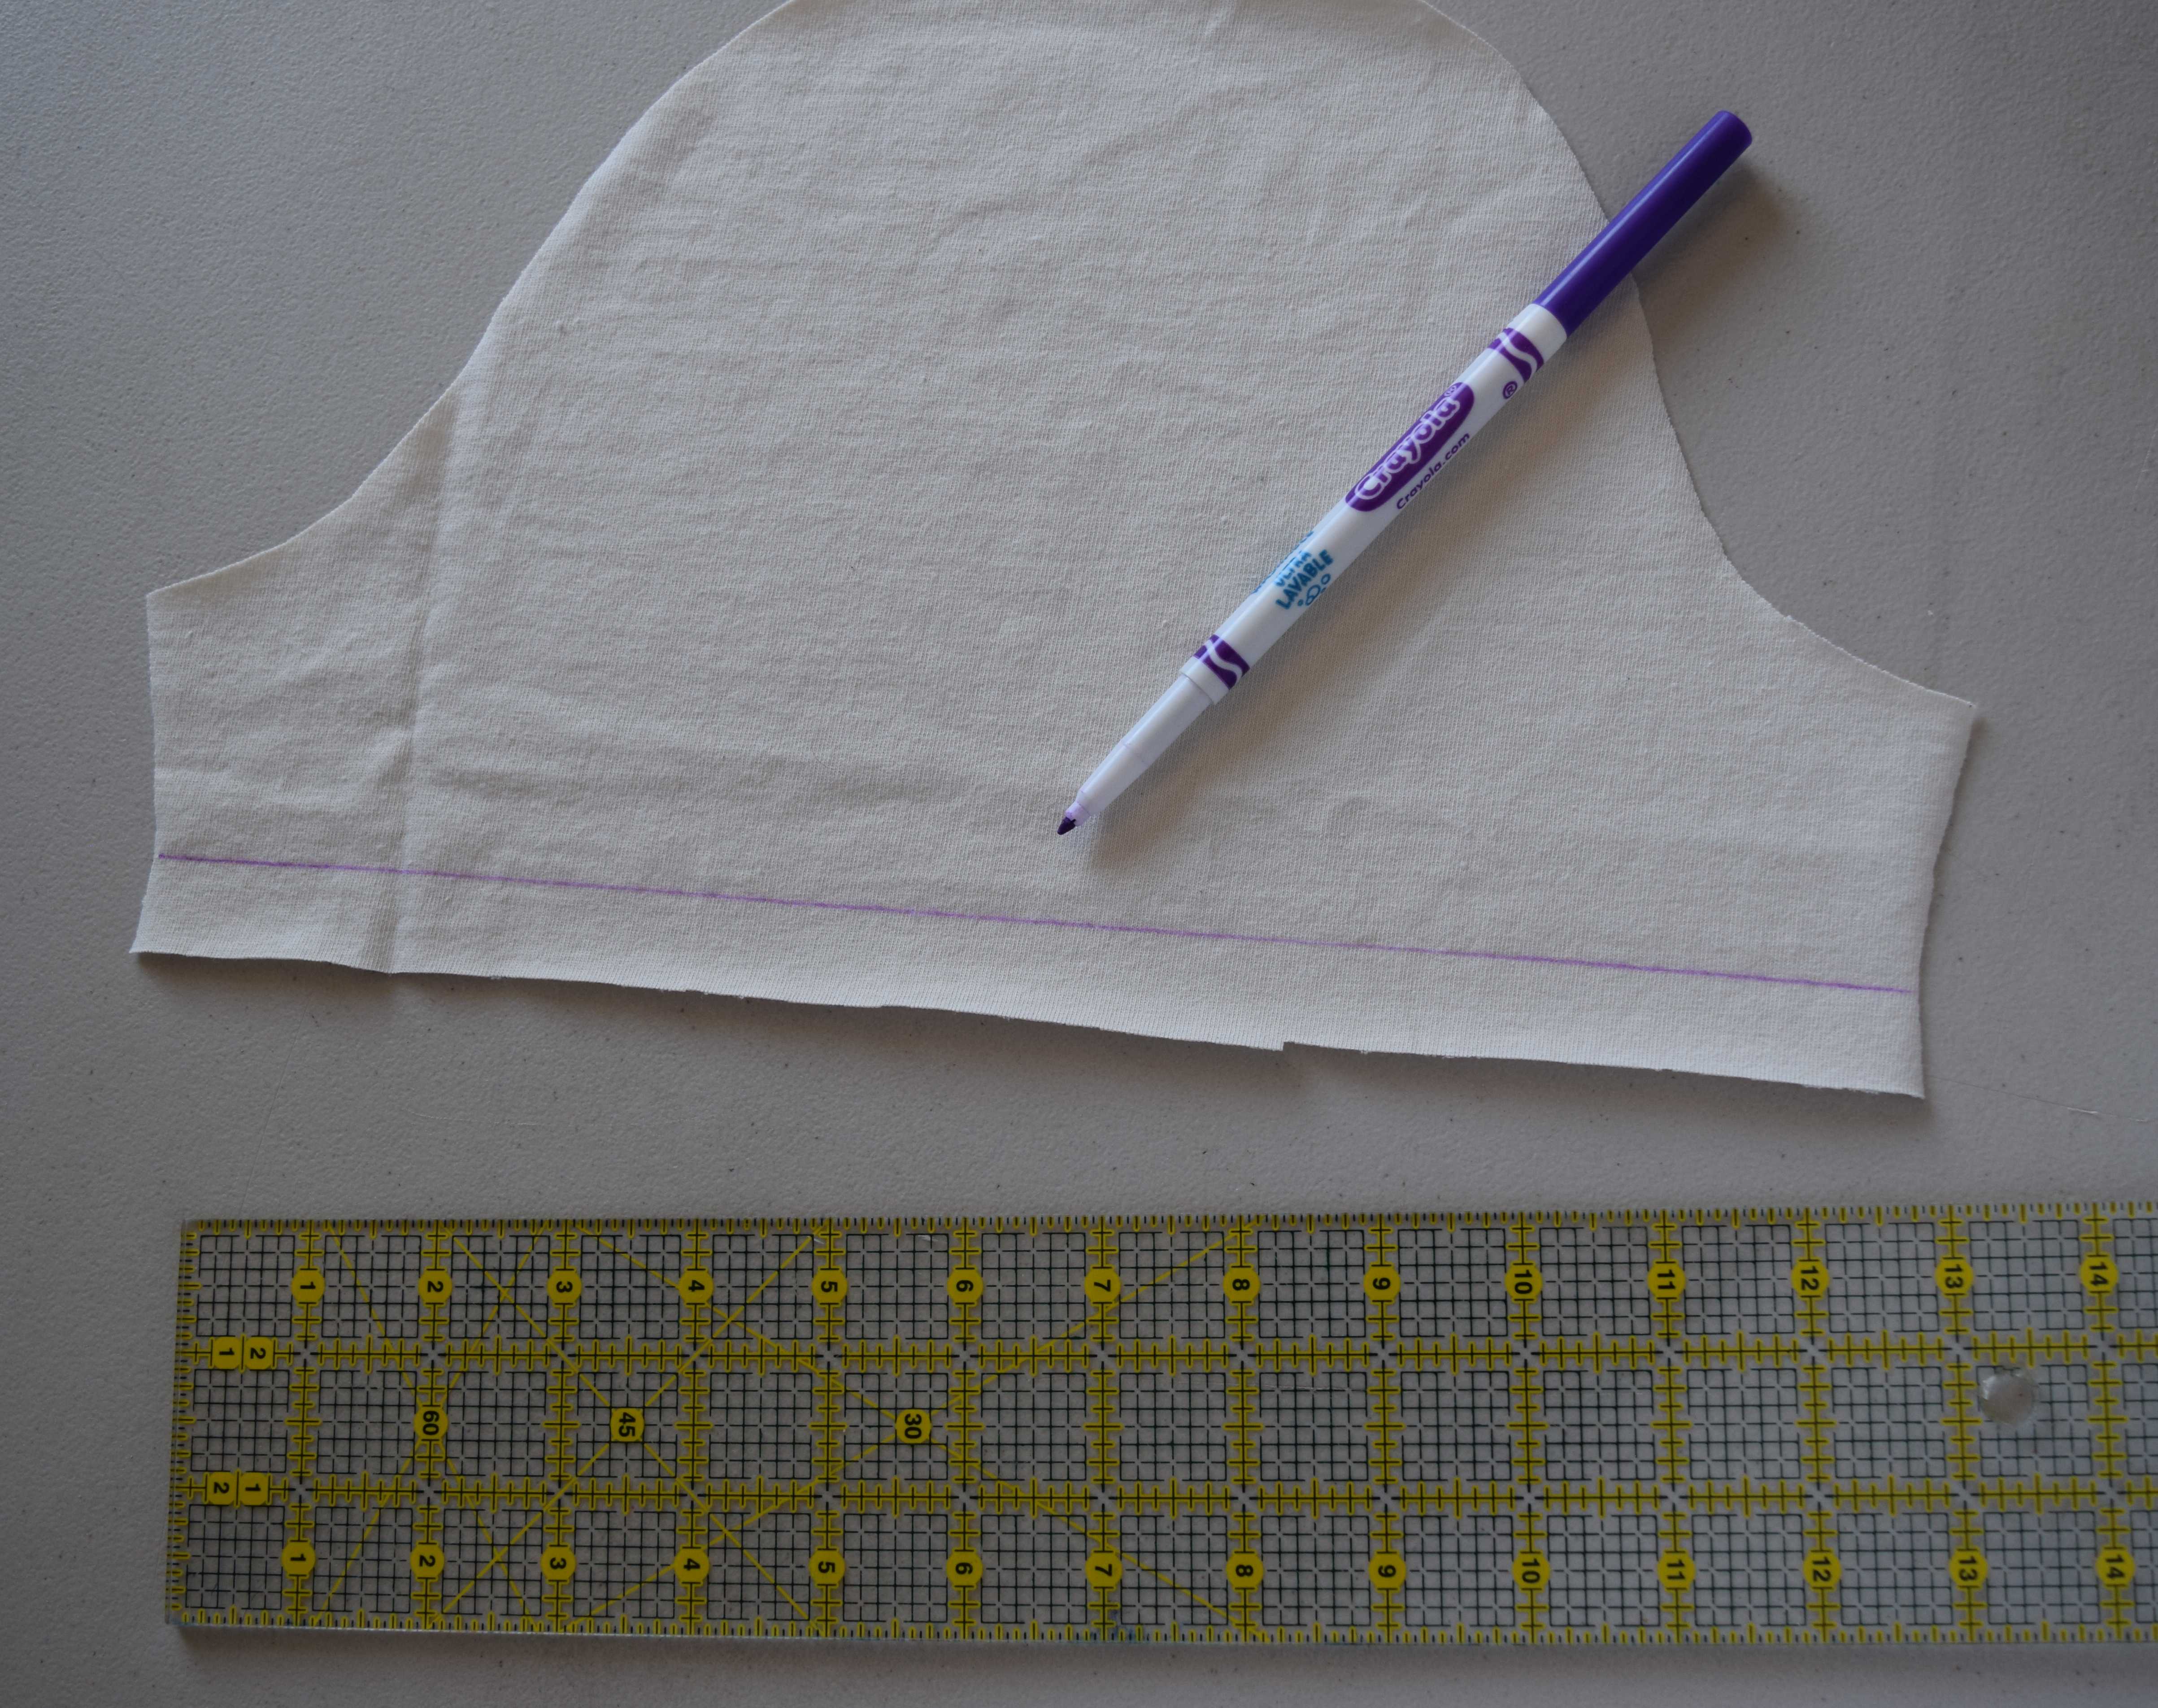
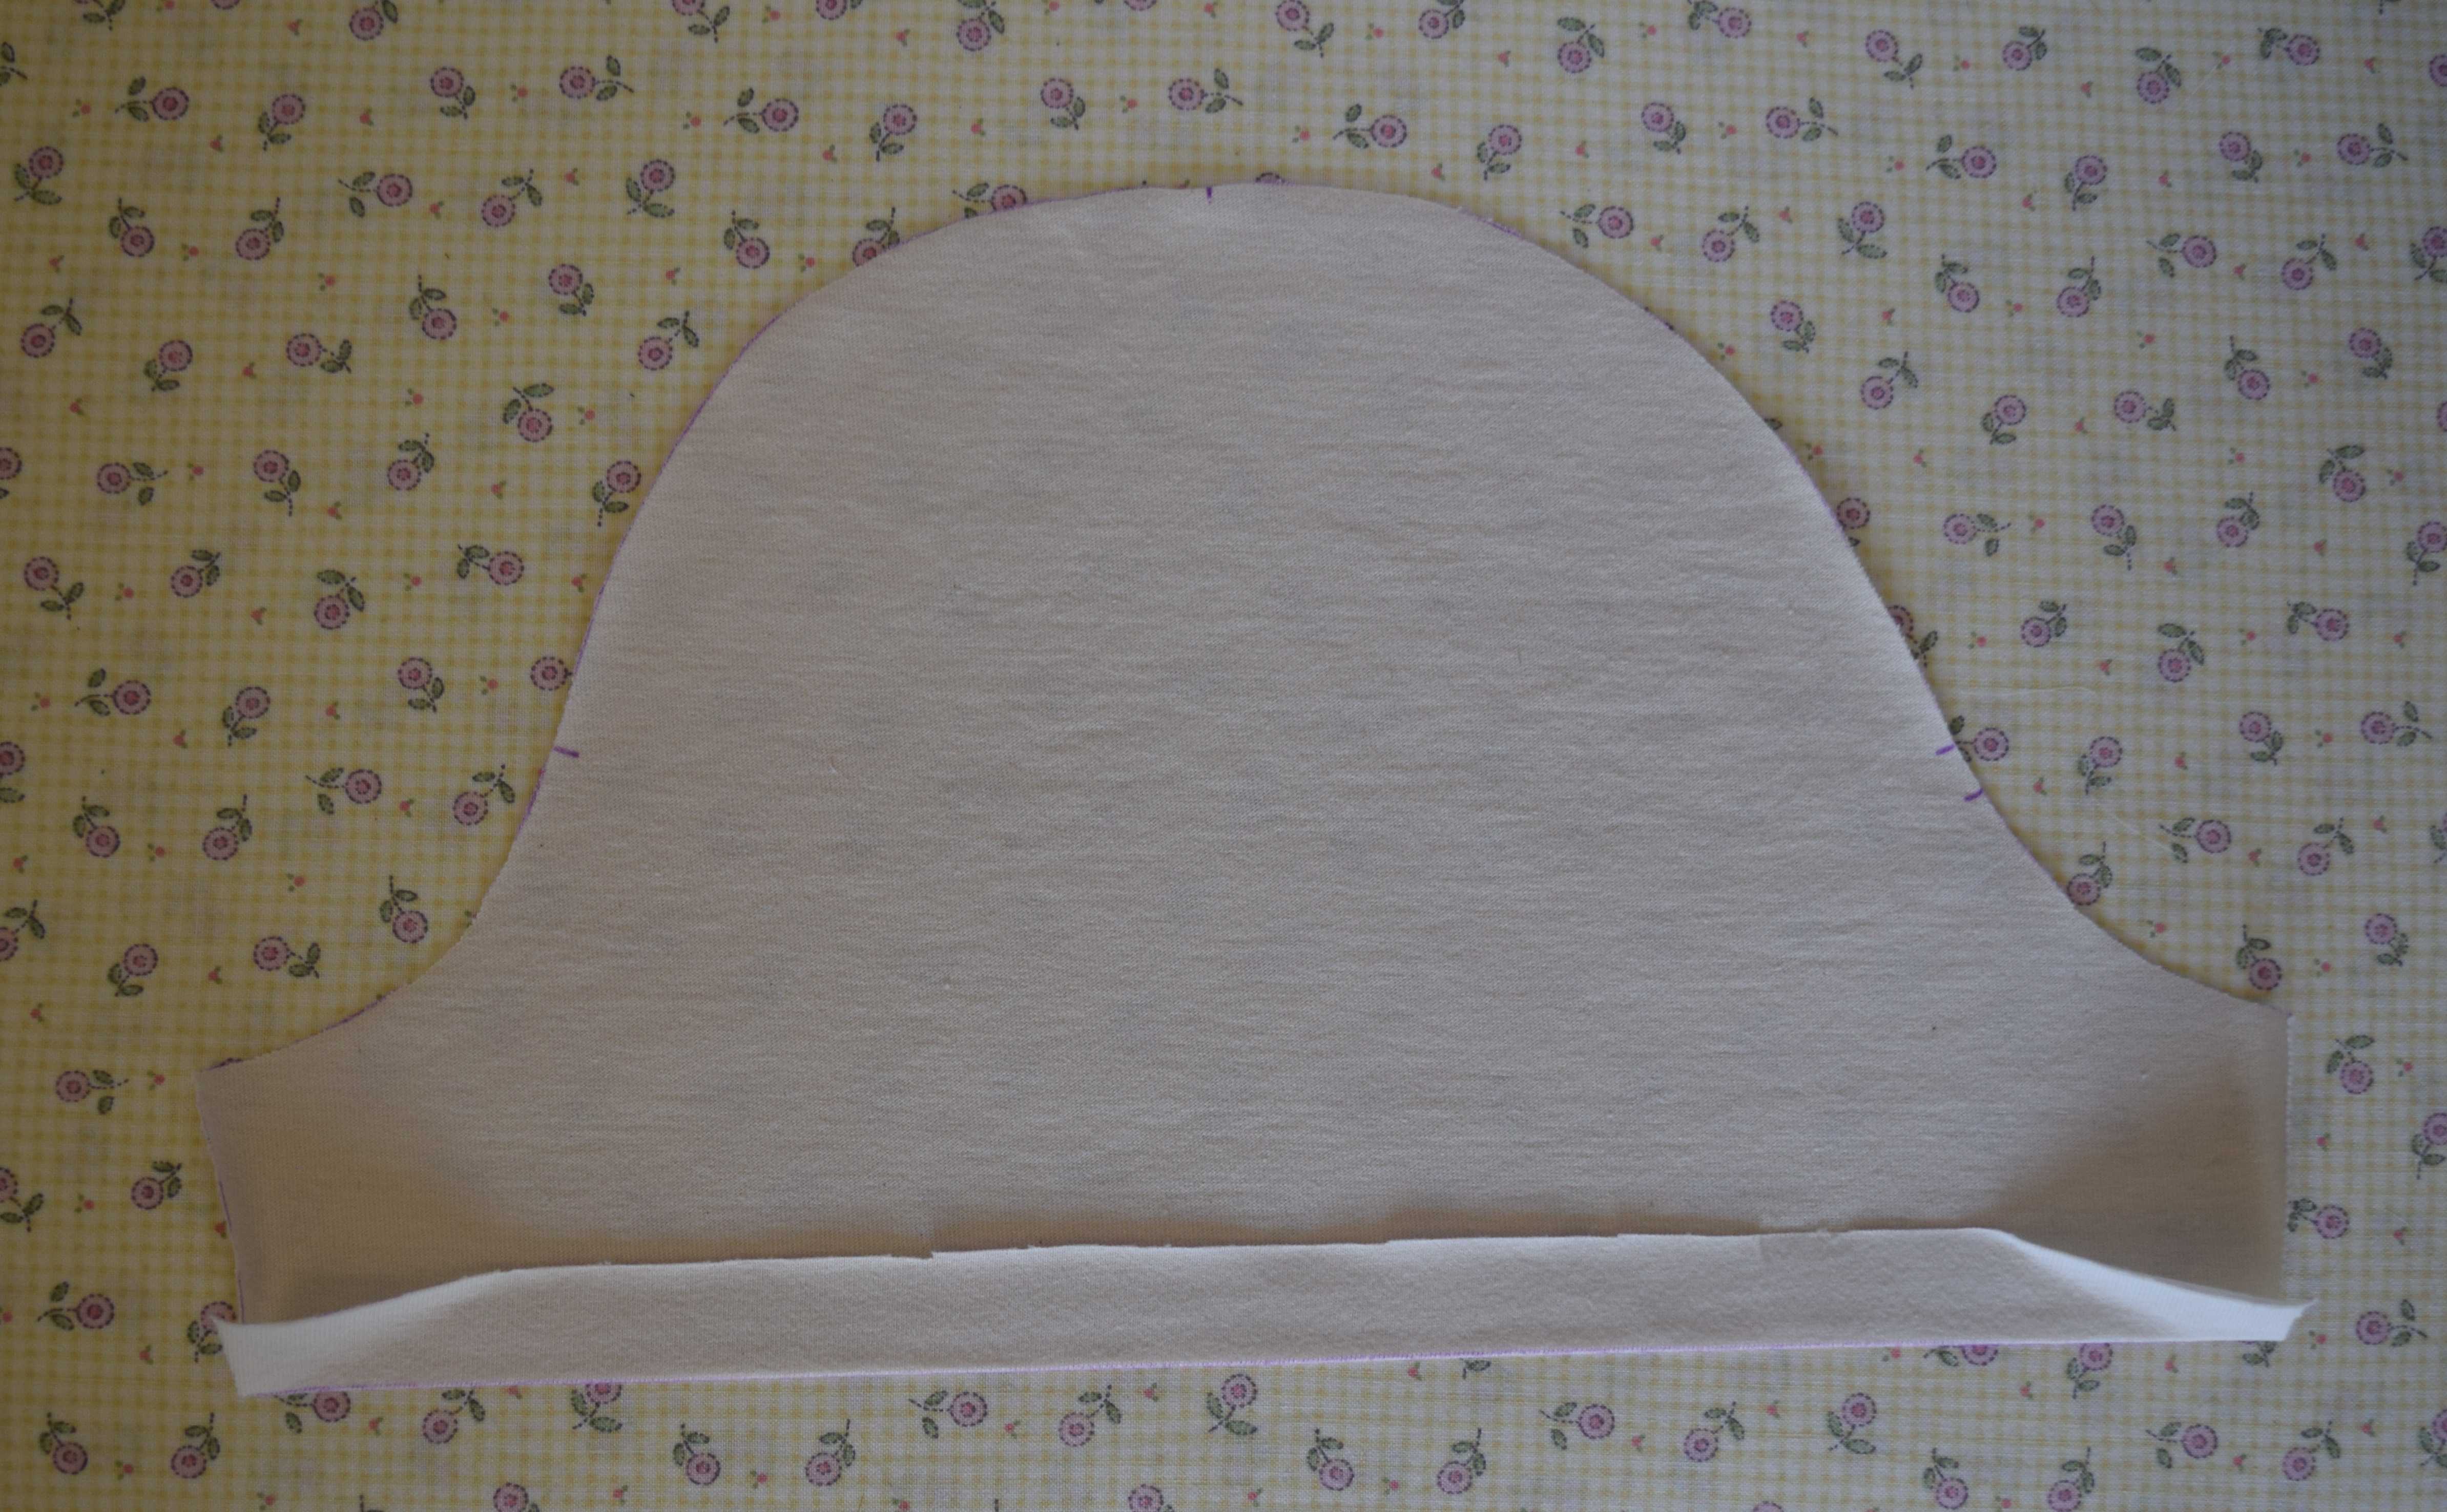
I press up the hem along the marked line.
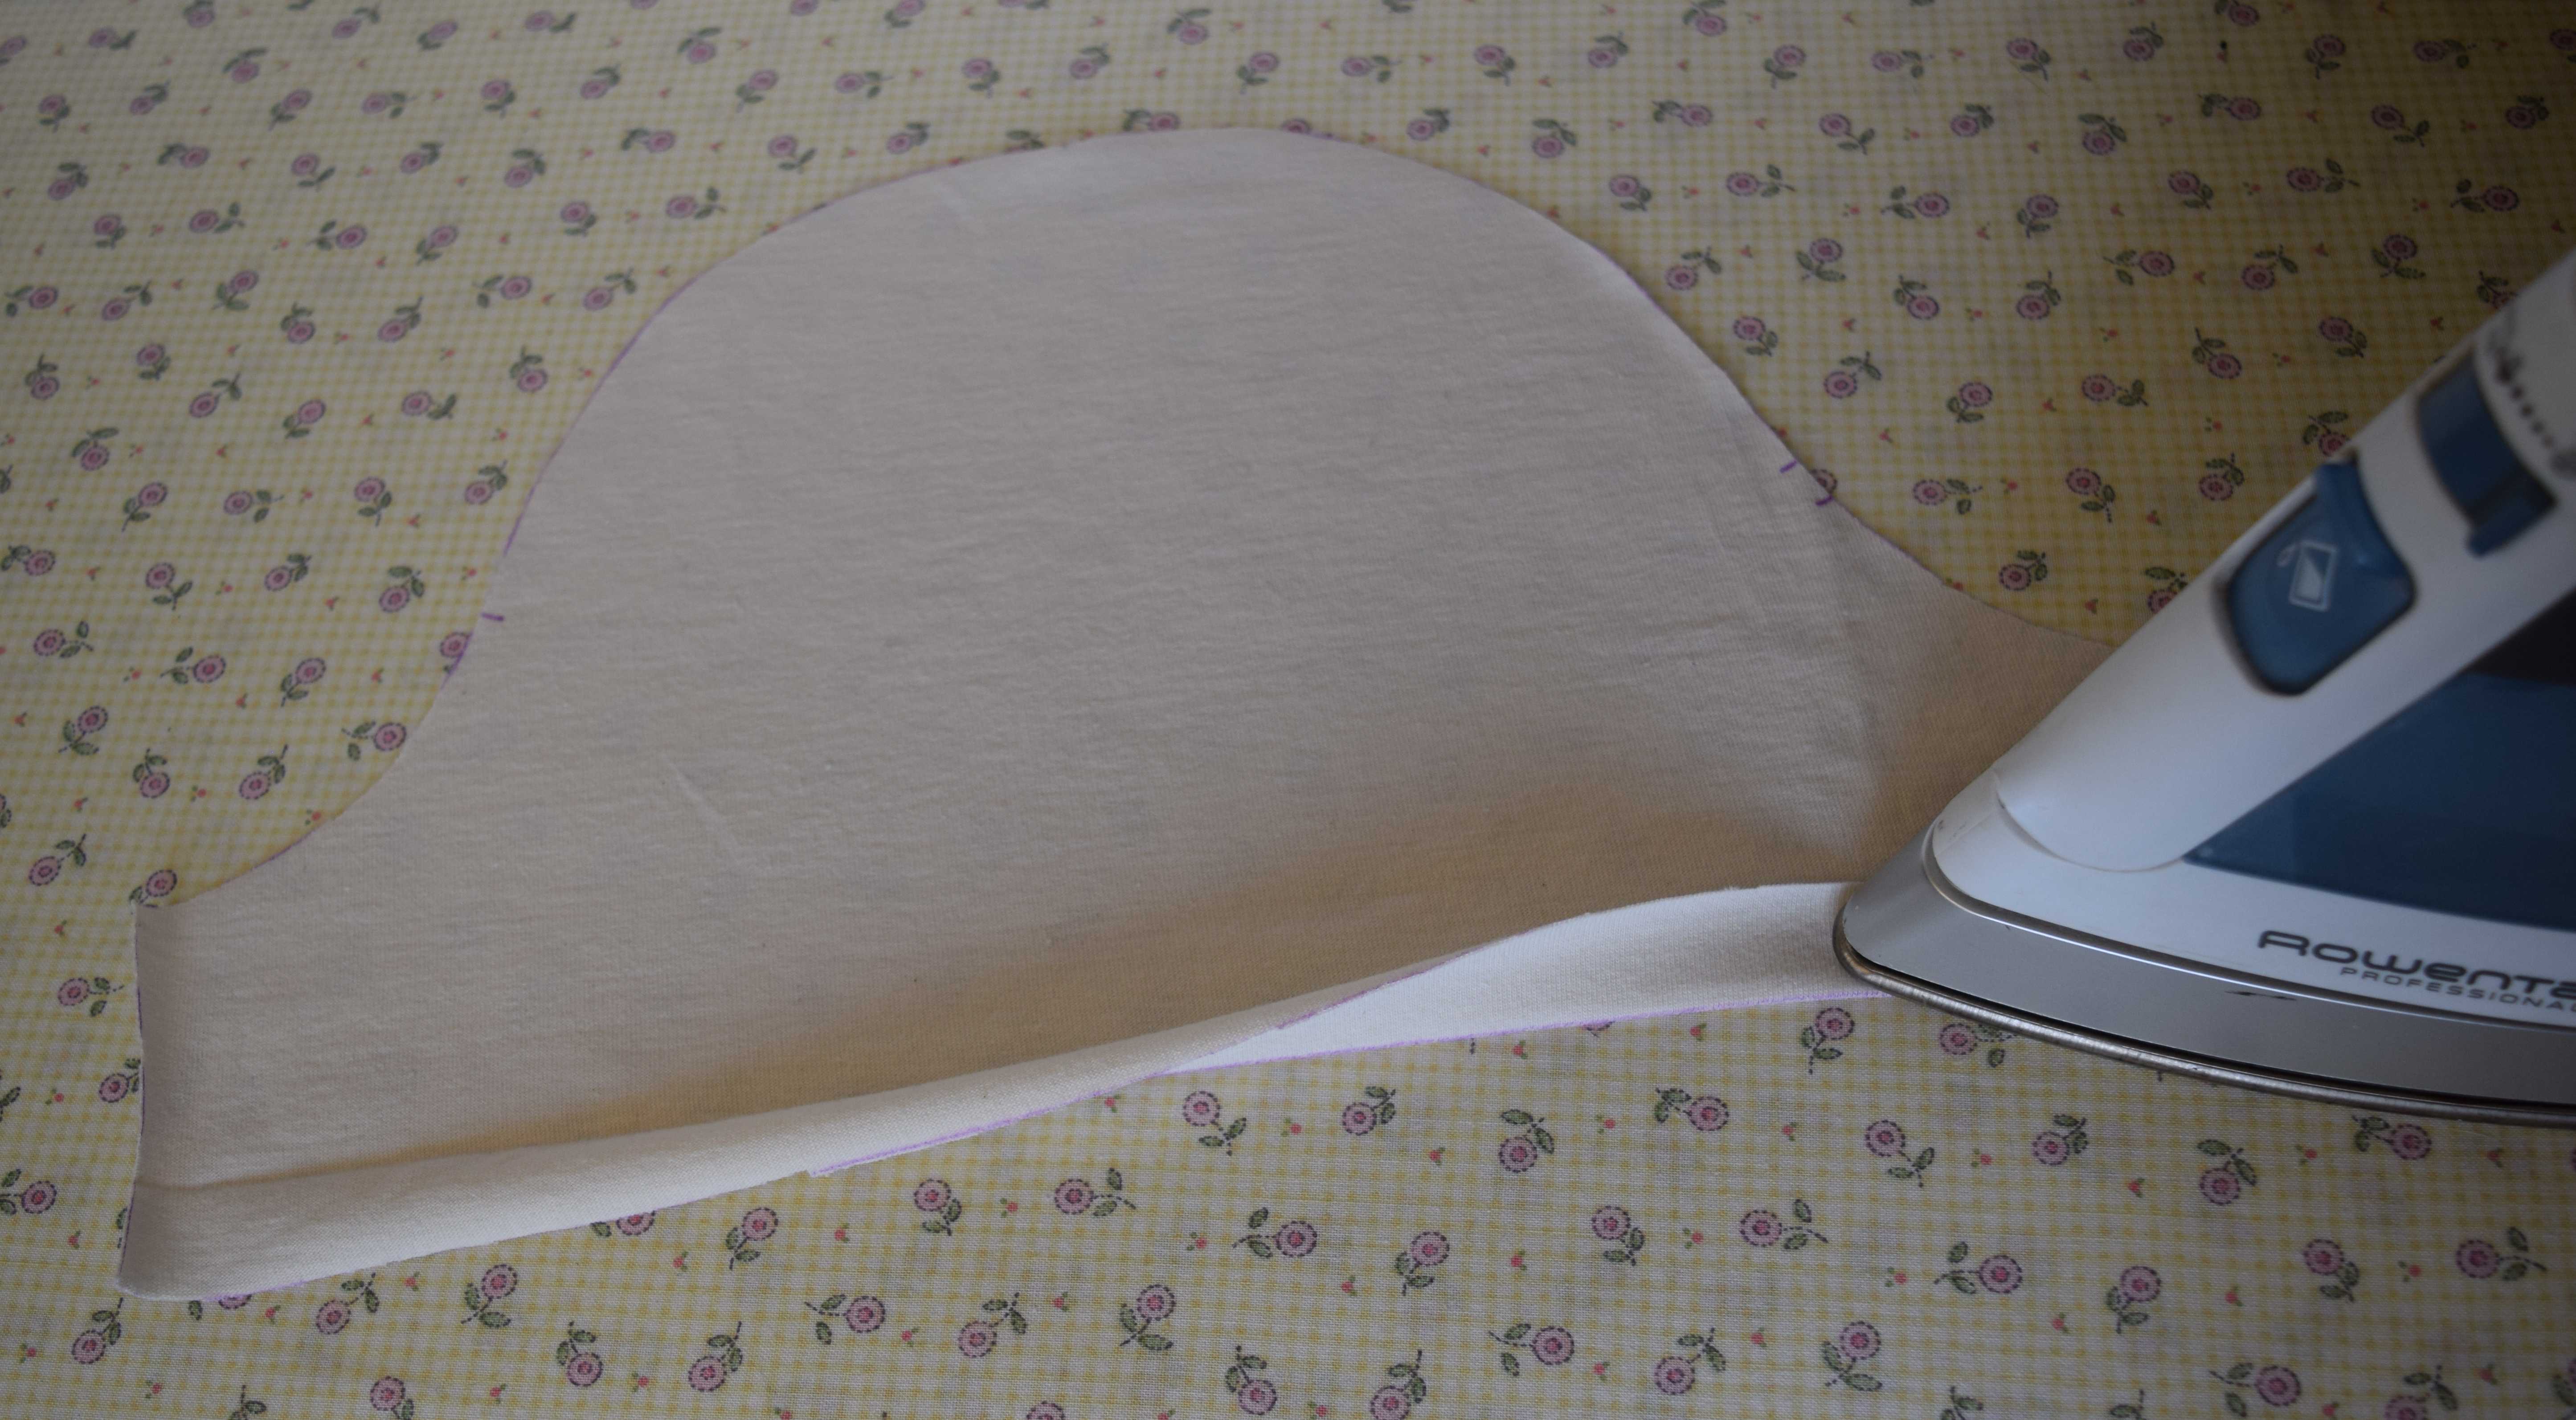
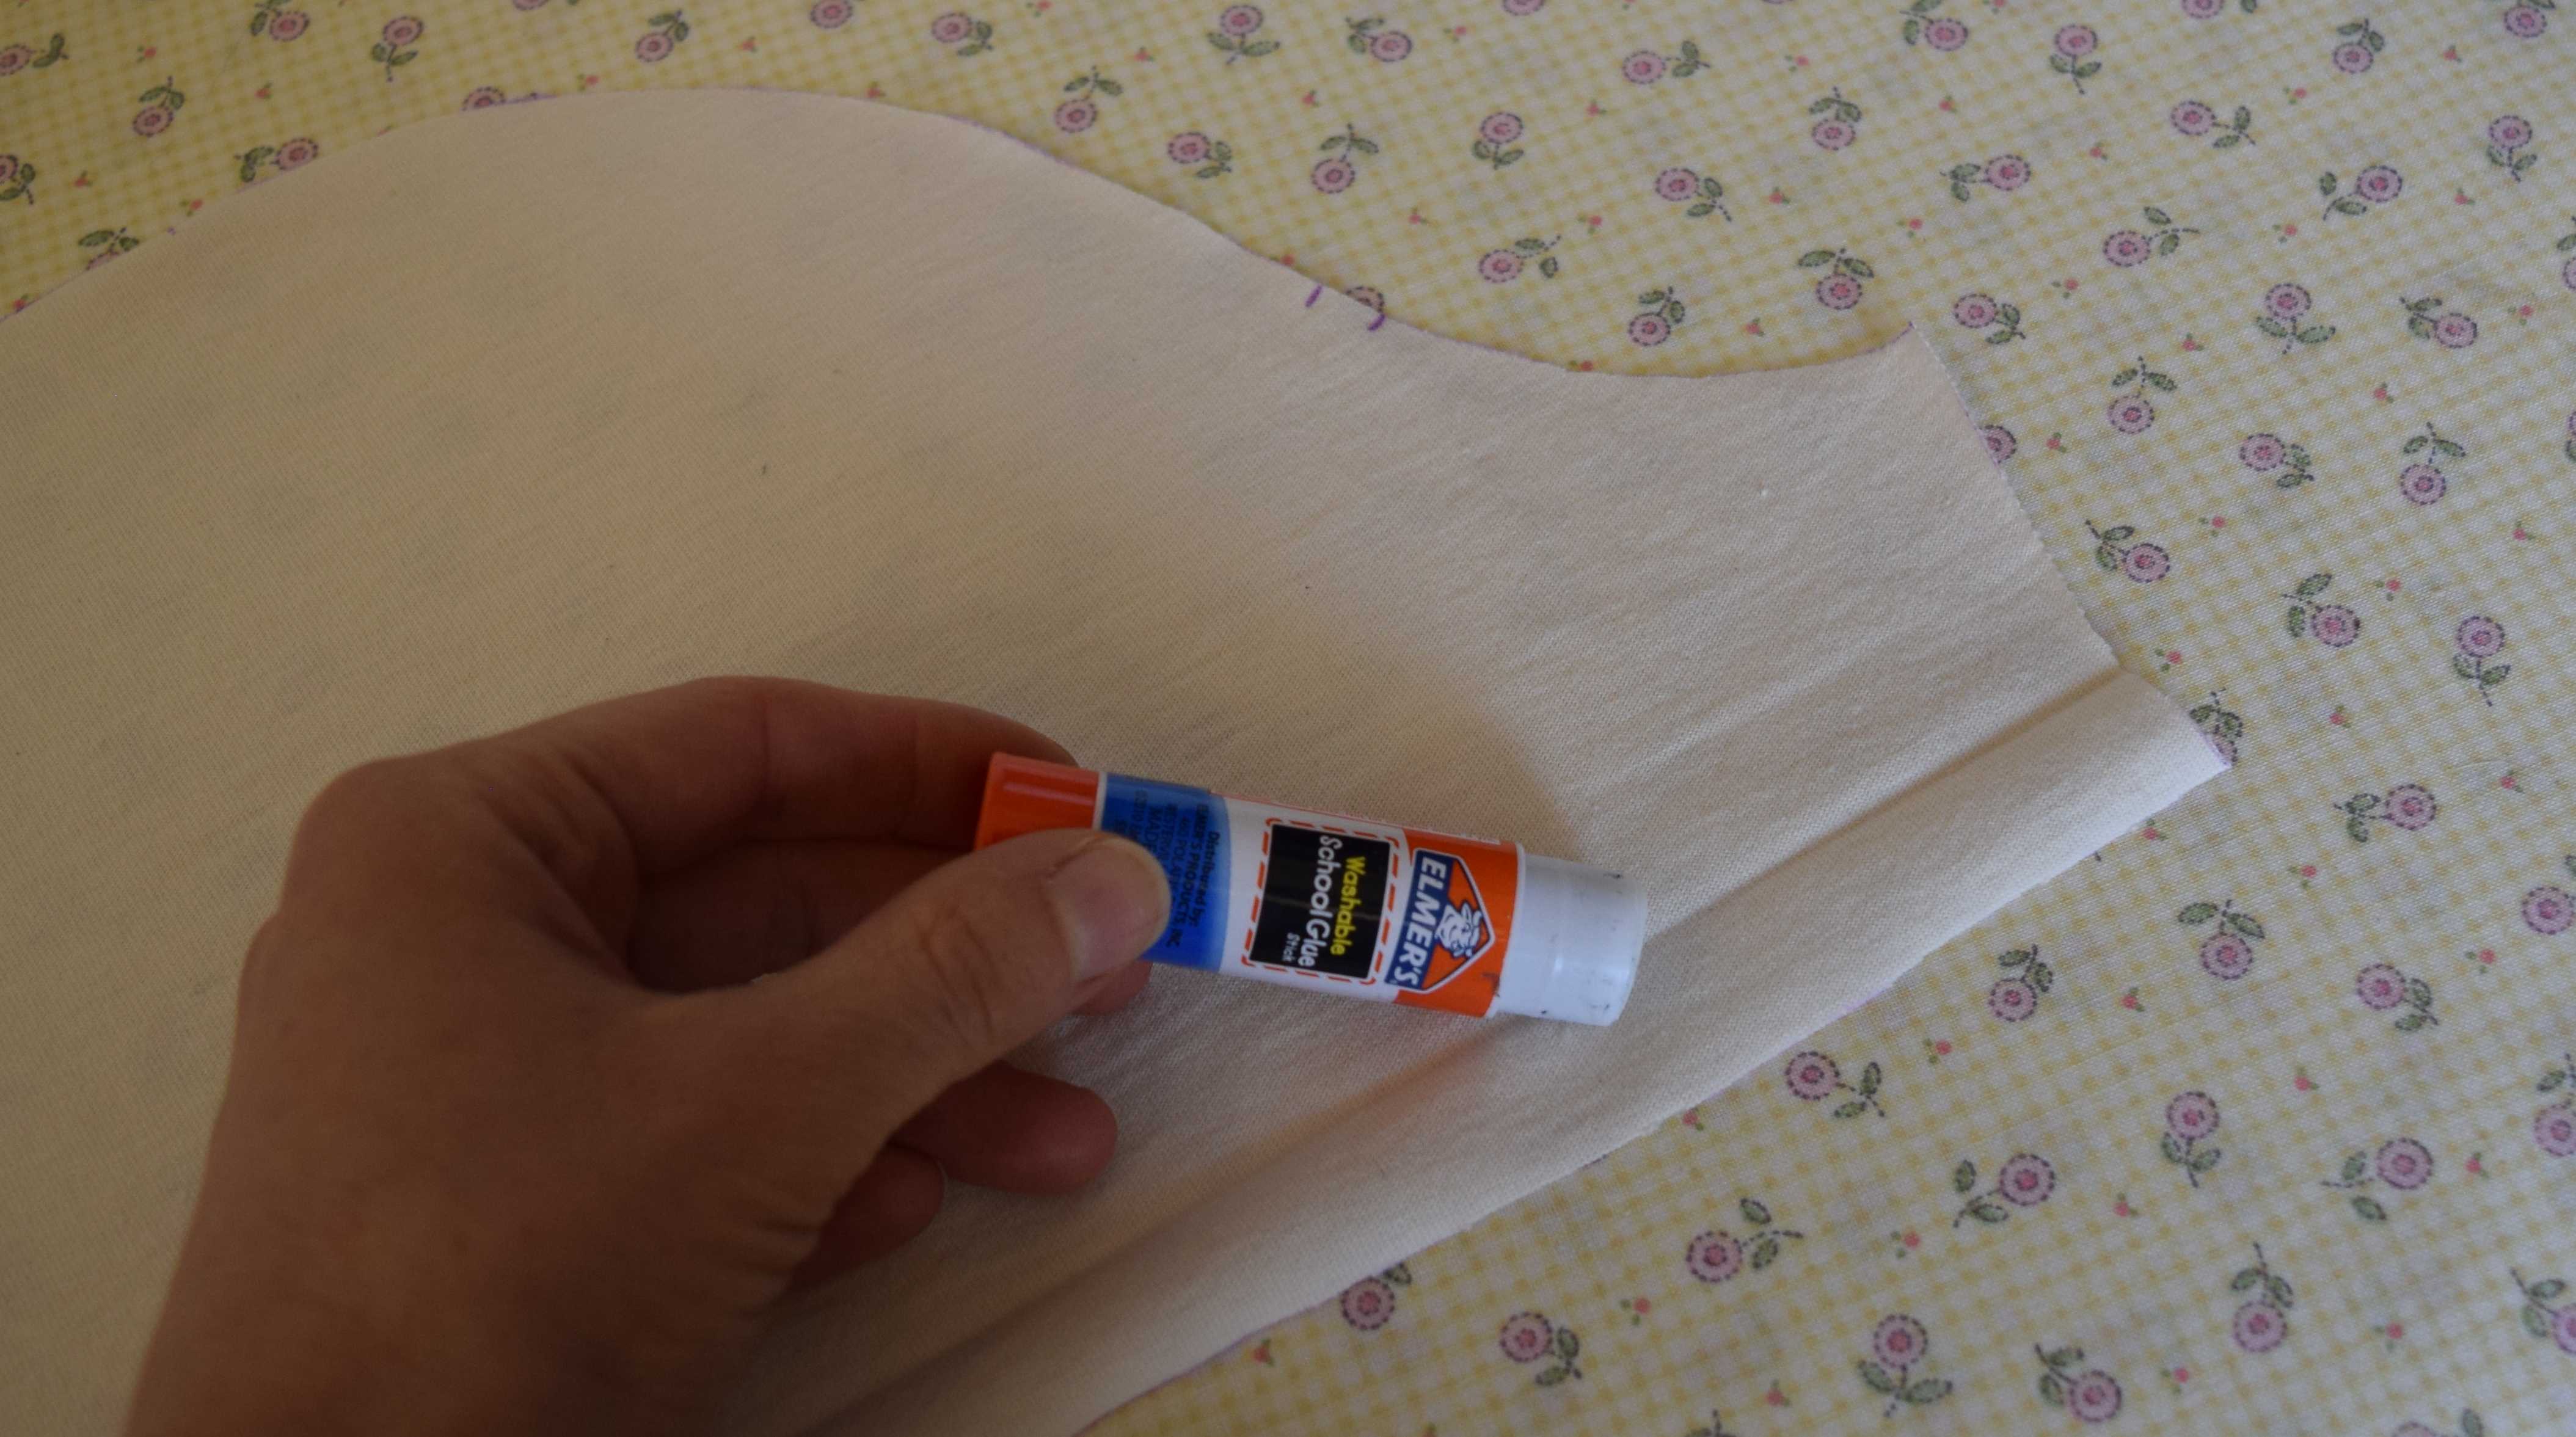
I hold the hem in place with washable glue stick*. I stop gluing 2 to 3 inches away from the fabric edges where the seams will be so I will be able to sew the seams. I try to keep the glue close to the fold and out of the area where I will be stitching, but a thin layer of glue doesn’t usually cause problems. To set and dry the glue, I press with steam, then without steam. If I have a long hem, I only apply glue to a small area at a time so the glue does not dry before I can get it pressed in place.
Then I sew the seams in my garment. I press up the hem in the seam areas, and use more glue stick to hold the hem in place if needed. I use a hammer to flatten the seams. I recommend getting a soft face hammer* and keeping it in your sewing area. You can also use a regular metal hammer, but you will need to be careful not to hit your fabric too hard with it, or you will damage the fibers. Hammers aren’t just for sewing jeans and cover stitching – I use mine all the time, and it’s amazing what a difference it makes. I almost never need to shim up my presser foot to sew over a bump, and the stitches stay the same length, even when sewing over fairly thick seams.
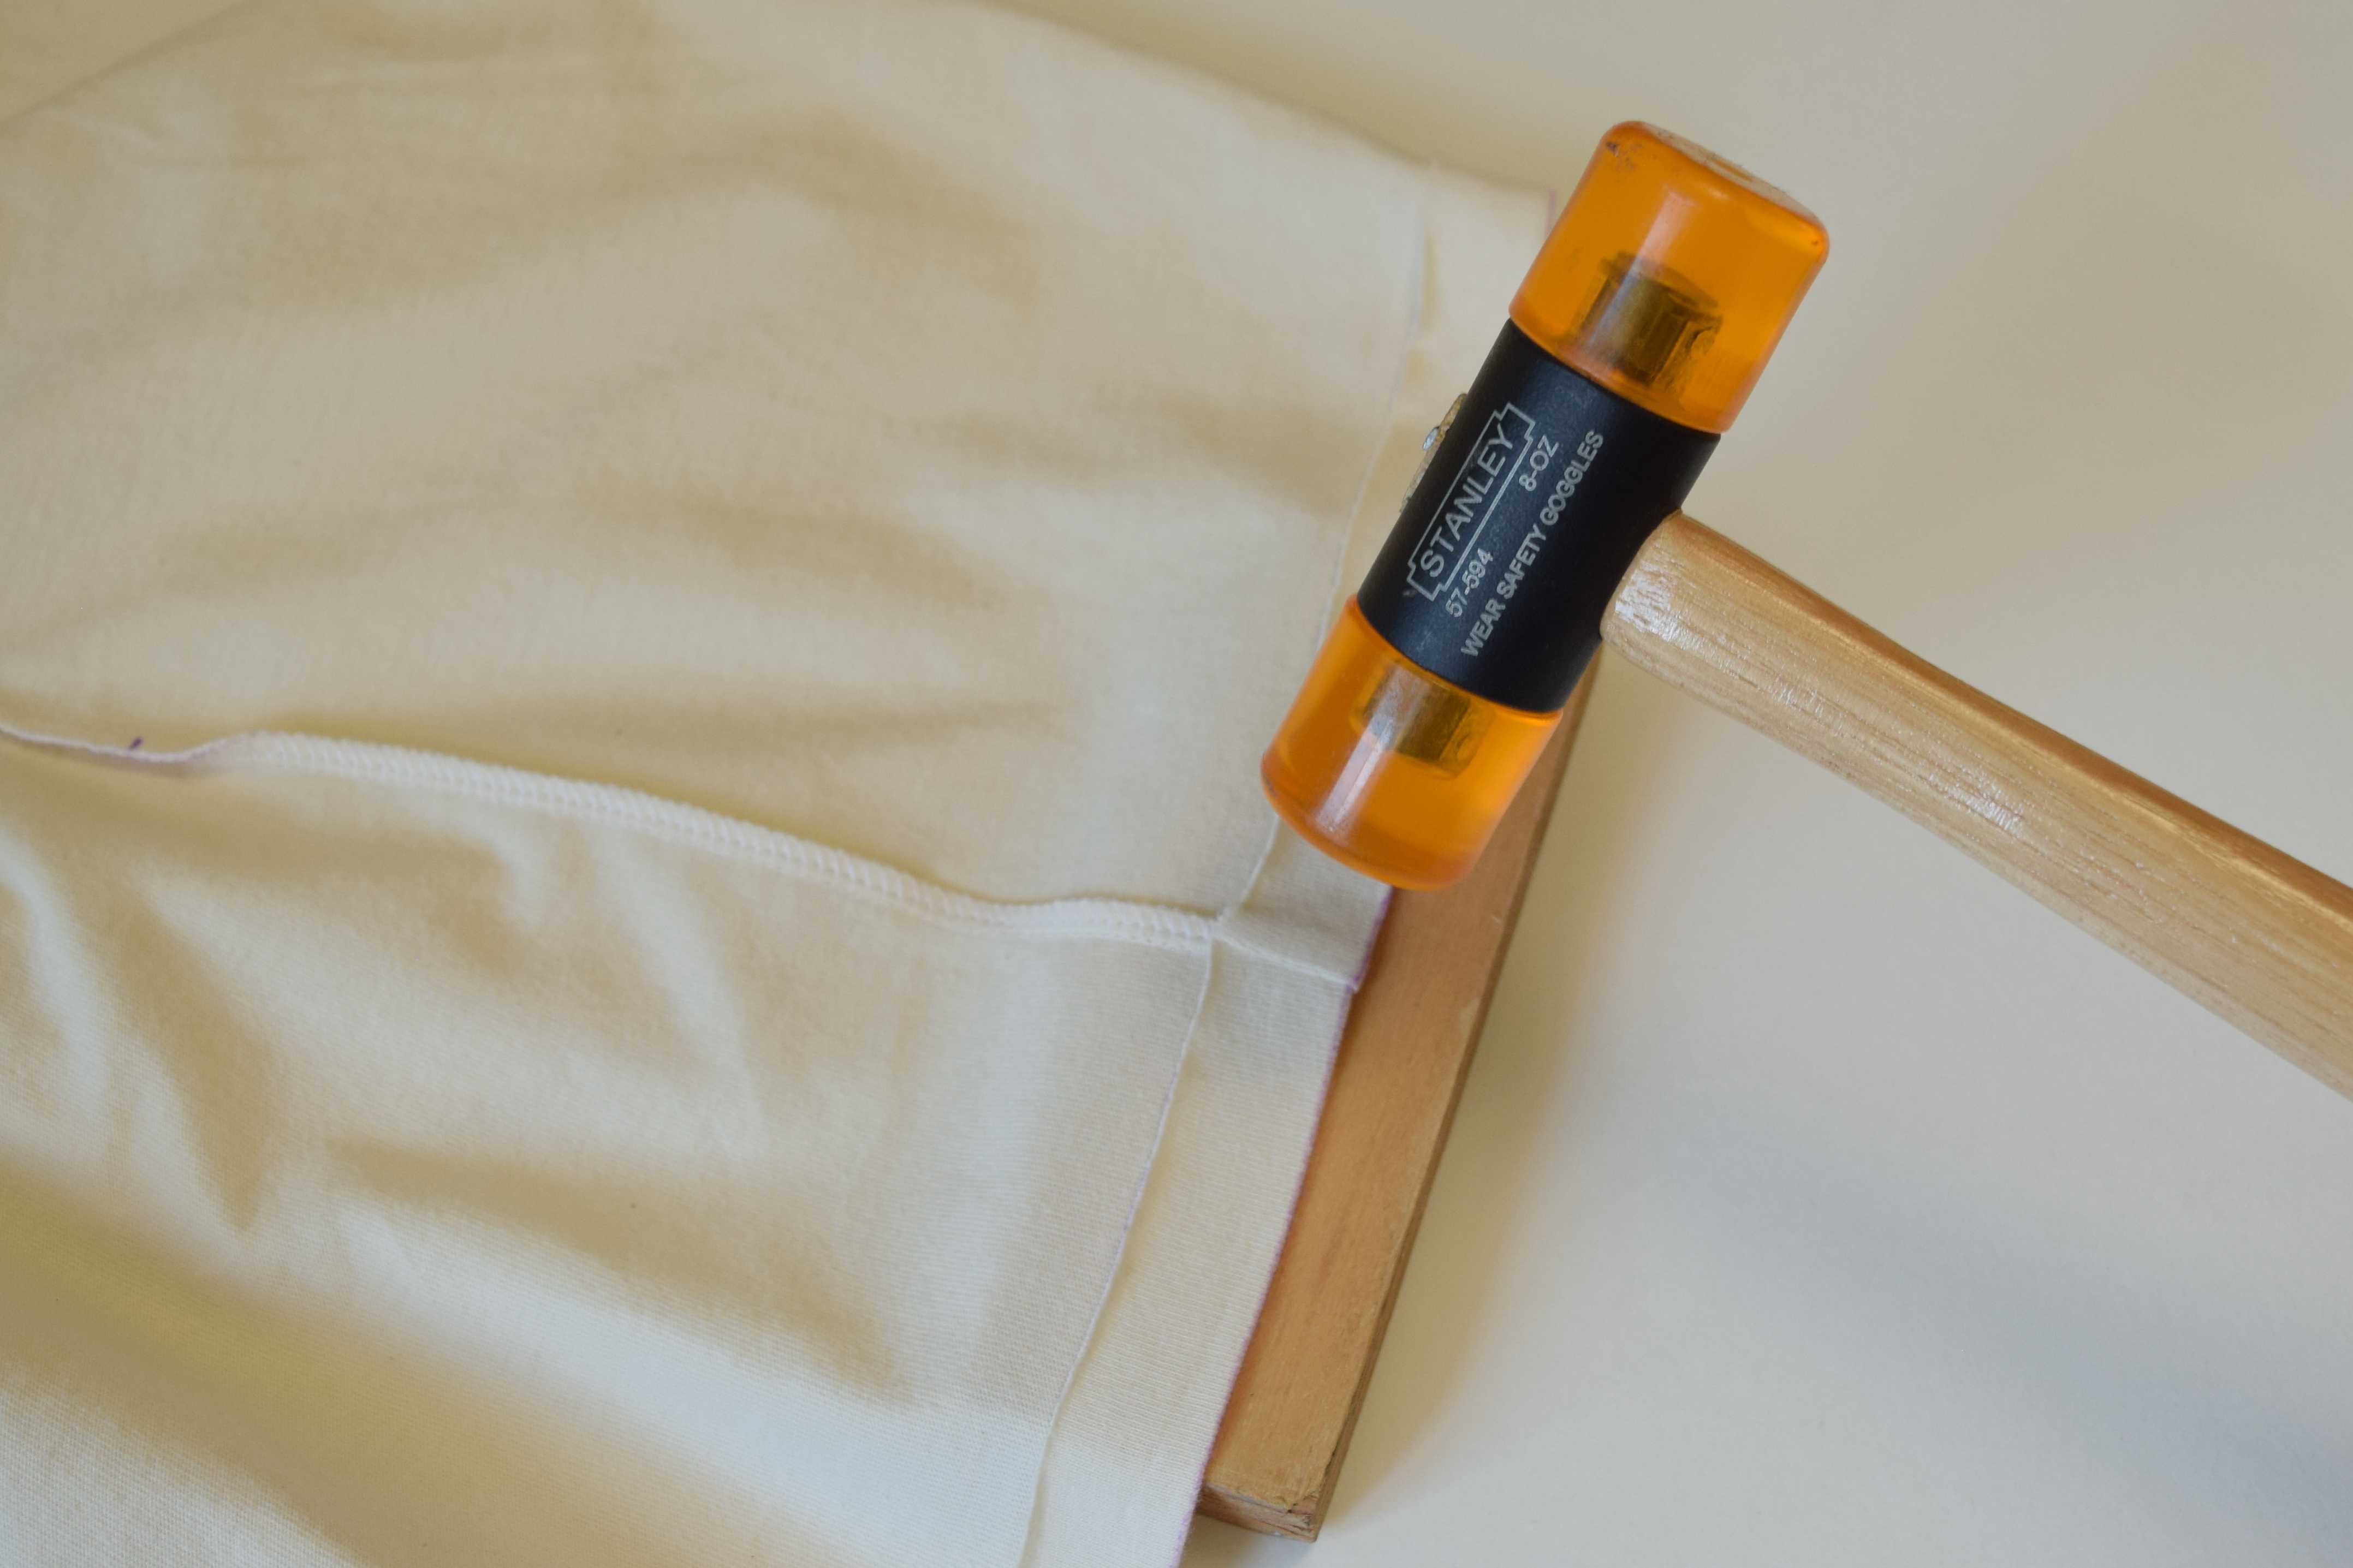
With the Brother 2340CV, hammering your seams greatly reduces skipped stitches, broken needles, and broken thread. It also keeps the stitch length consistent as you sew over a bump. The machine just glides over it like it’s not even there. I recommend hammering your seams even on lightweight fabric. On thicker fabric, it’s absolutely necessary.
It helps to use an edge guide. Some people recommend peeling off the backing from a stack of sticky notes and using them for an edge guide. I have a short piece of quilting ruler that I accidentally broke off that makes a perfect edge guide. I hold it in place with poster putty*. With the wrong side of the garment up, I position the edge guide so the left needle is right on the edge of the fabric. Then I flip the fabric over and sew the hem from the right side.
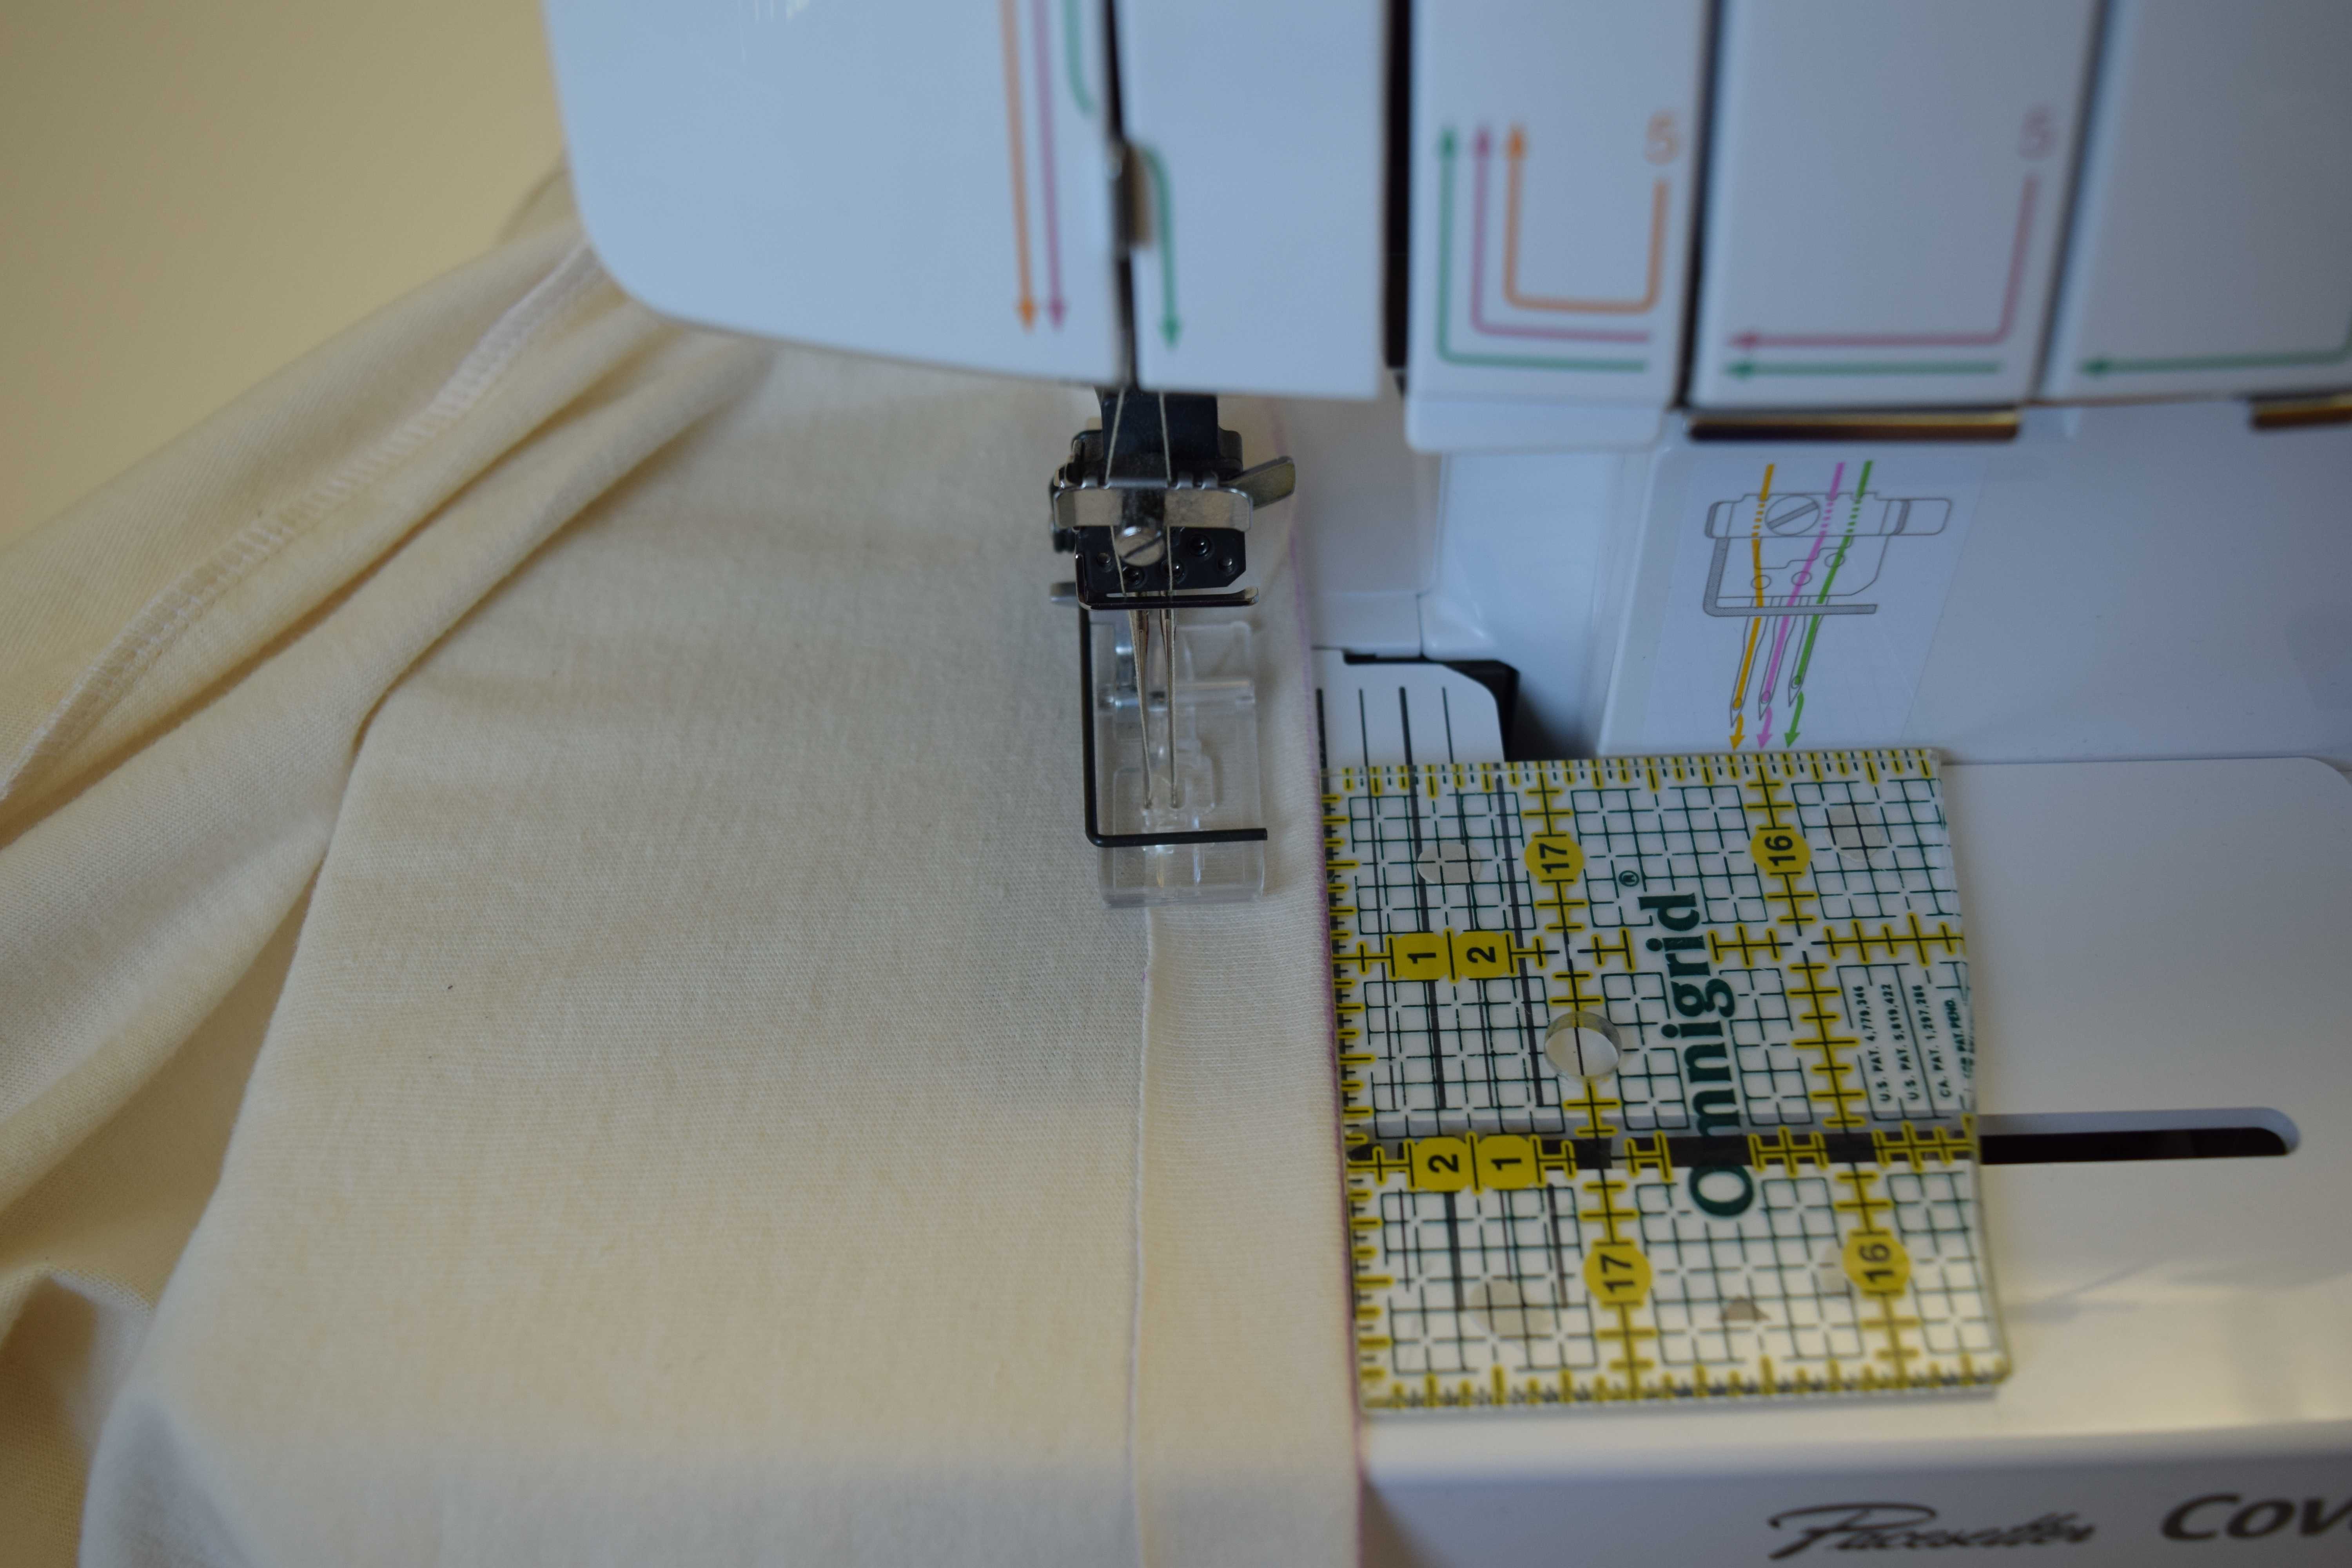
If you want to have the edge of the fabric marked on the right side for added insurance, you can use wax-free tracing paper* and a tracing wheel to mark it. The marks tend to brush off, so make them right before you sew the hem.
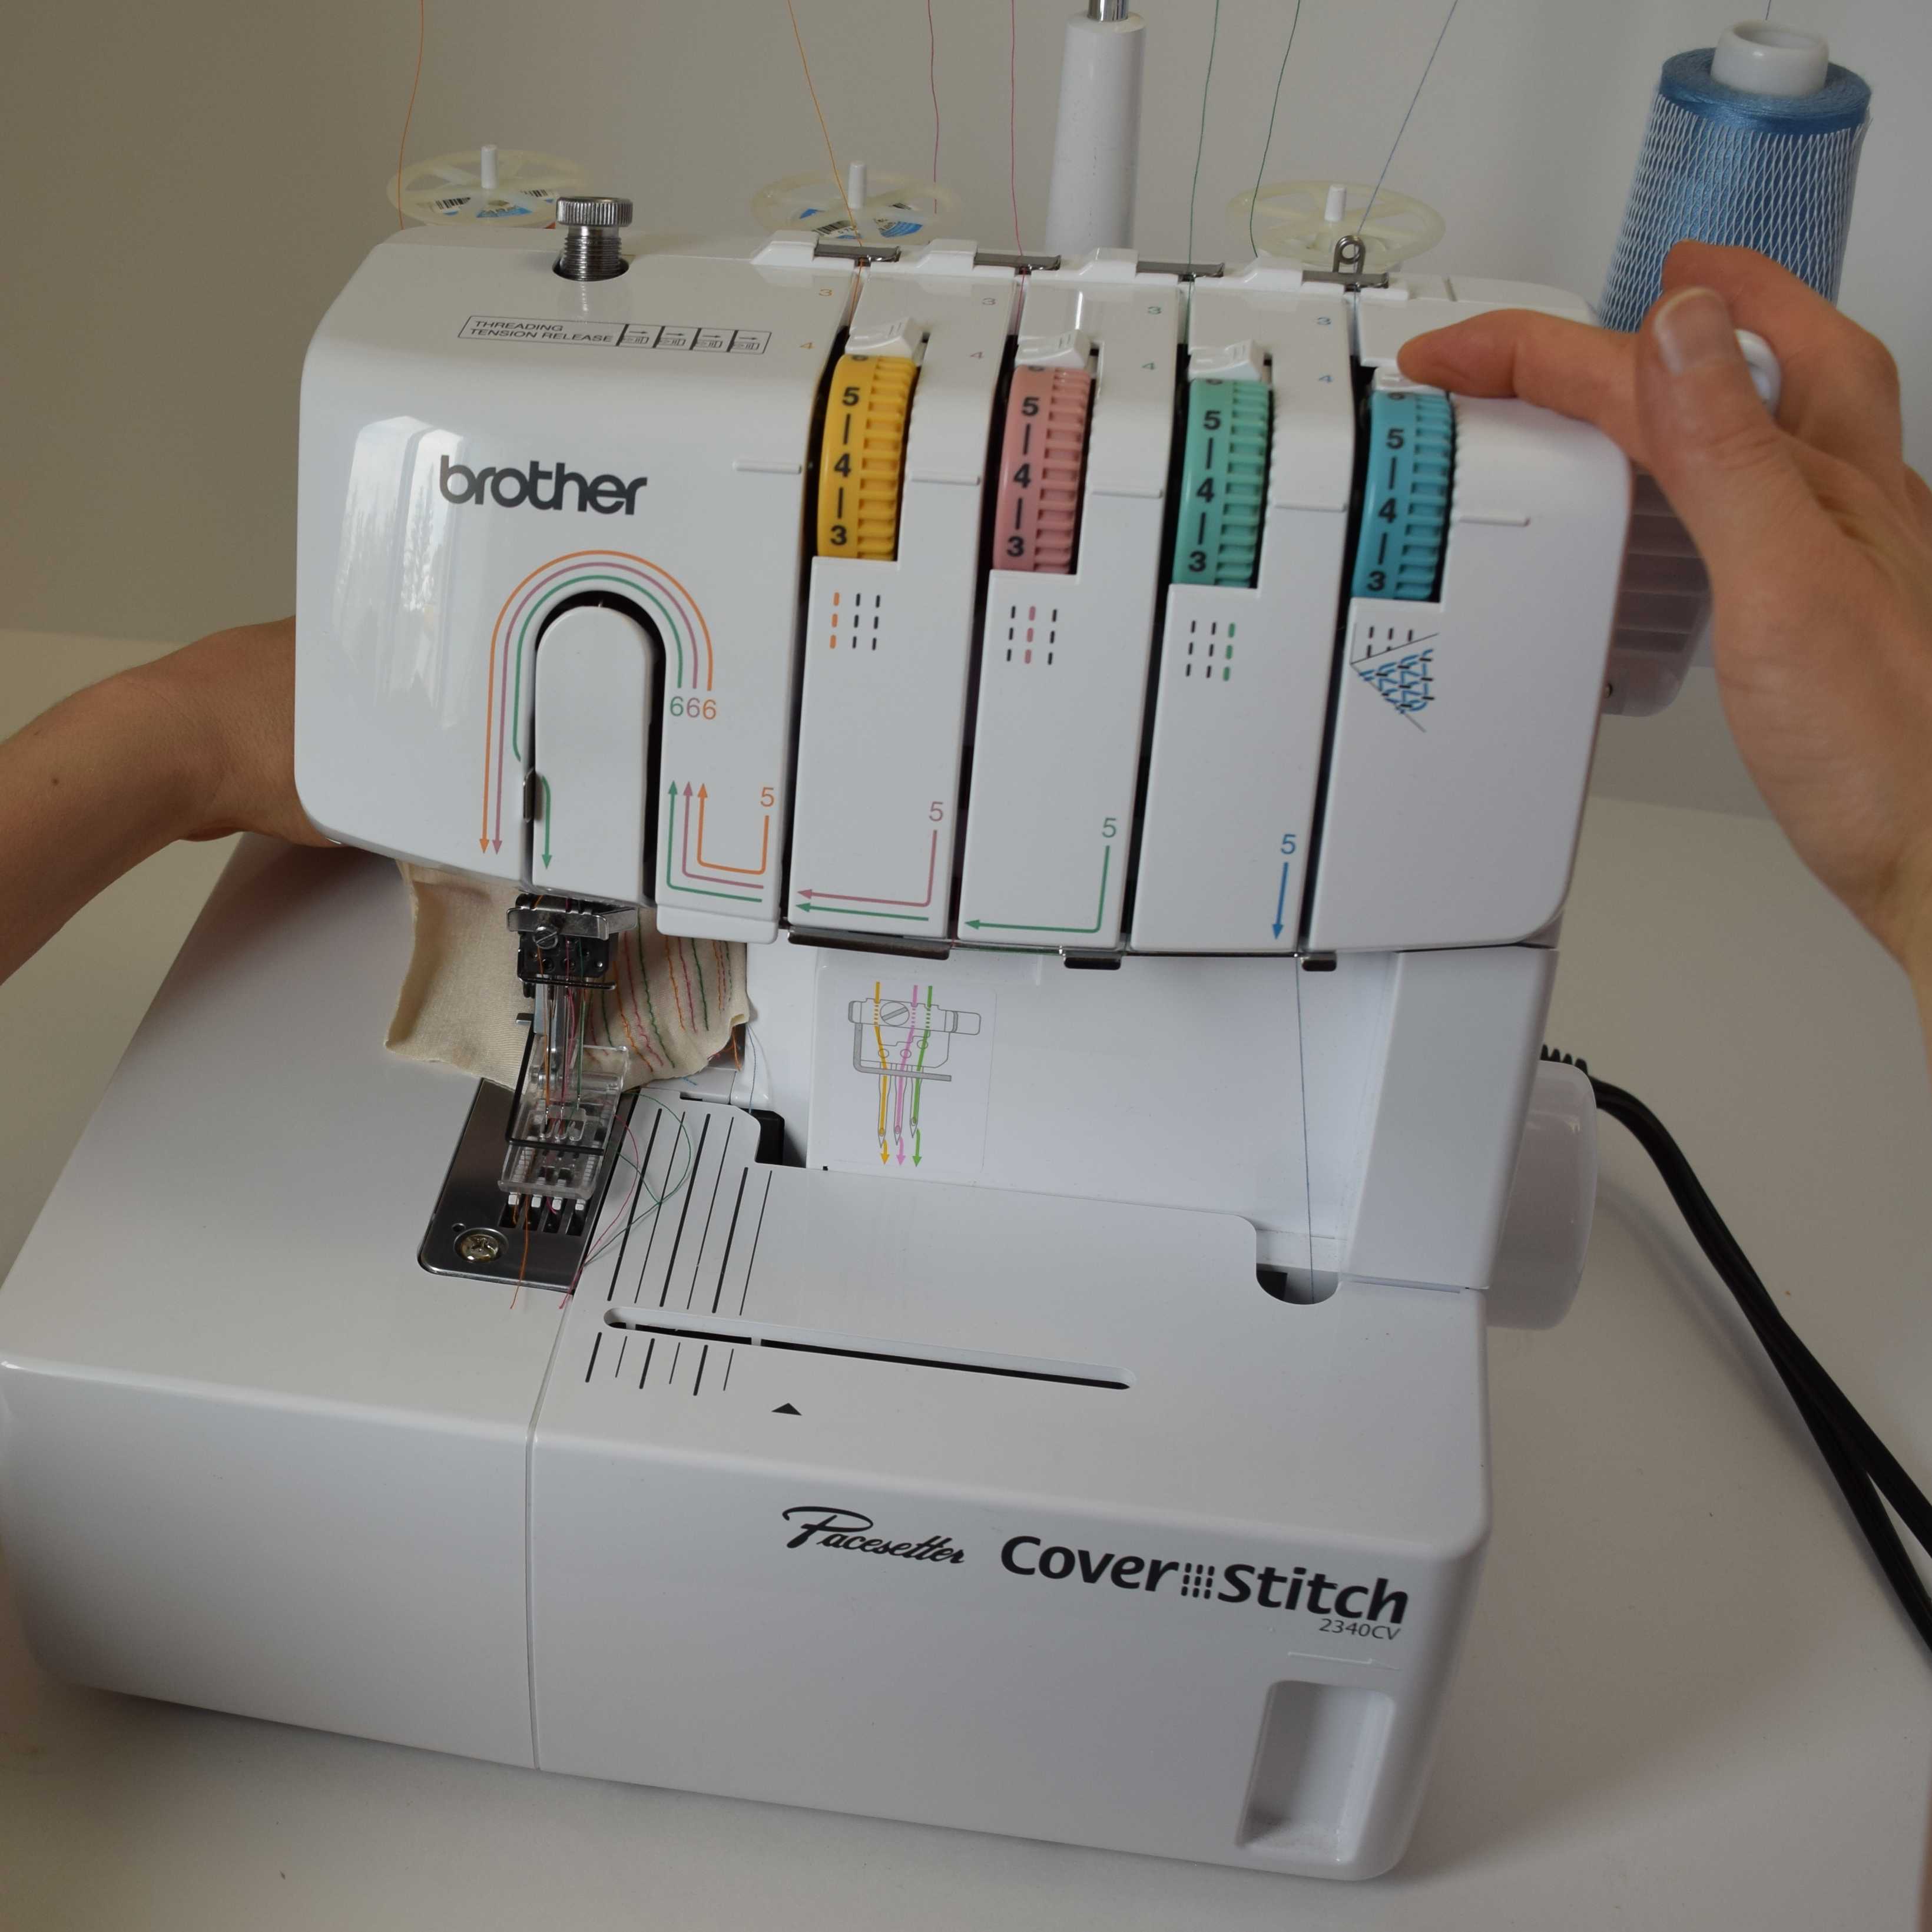
Accessories for the Brother 2340CV
When I bought my Brother 2340CV, I got a package deal that included all of the accessories. Of these, there are only two that I think are worth getting: The topstitch foot set and the binder.
With the topstitch foot set*, you get two clear feet. They have a groove on the under side that sits over a seam to help you sew a straight line of topstitching. There are two feet included – one for thick fabric and one for thin fabric. I recommend getting these feet if you do a lot of topstitching.
 .
.

Brother only makes one size of binder* for this machine. It creates a half inch wide finished width binding, with the edges folded under on both the top and bottom. It comes with the “TB” binder foot to use with the binder attachment.
The binder works pretty well, but it is way overpriced. You can get about four generic industrial binders for the same price. The Brother 2340CV does not have the standard screw holes for attaching a generic binder, but you can tape the generic binder onto the machine bed with blue painter’s tape, which works just fine.
The binder foot is a little shorter than the standard presser foot, and it has an edge guide on the right side. It works well, and I’m glad I have it, but the machine comes with an “LC1” presser foot that is the same length as the binder foot, but narrower and without the edge guide, and it seems to work OK with a binder, too.
The only way to get the binder foot is to buy it along with the Brother binder. If you don’t want the size of binder that Brother offers, but you want the binder foot, if you bought the binder foot set you would be paying an awful lot to get a plastic presser foot that probably costs a few cents to manufacture. I’d suggest trying a generic binder in the size you want (you can find them on ebay) and trying it out with the “LC1″ presser foot or maybe even the standard presser foot. If it works for you, just skip buying Brother’s binder kit. In my experience, you can not use a binder that does binding any narrower than 3/8” (1 cm) on this machine, or the feed dogs won’t line up right on the fabric and the fabric won’t feed. If you want more information about binders, Debbie Cook wrote up some good info on cover stitch binders.
I read through the instructions for the other accessories, but they sounded so ineffective I didn’t even try them out. The belt loop guide* requires you to pre-press under 1/4″ along the edge of the fabric. RIGHT THERE, at step #1, using the belt loop guide is more difficult than the method I use to make belt loops without a coverstitch machine. I serge one edge of the fabric strip, fold the raw edge to the middle (by eye) and press, fold the serged edge over not quite to the other side and press, then edgestitch on my sewing machine using a blind hem foot as an edge guide. Plus the Brother 2340CV is a light duty machine, so it might not work on denim or other heavy fabric that I make pants out of. And who knows what would happen if I used topstitching thread, which would require a size 14 topstitching needle. I’m worried I’d break my cover stitch machine just testing it out, so I’m not even going to try it.
The hemming guide* sounds equally superfluous. Again, step #1 is to press up your hem. If you have to press your hem anyway, what’s the point of the guide? It seems like it would be likely to stretch out and skew your hem. Just use some sort of edge guide, like a stack of sticky notes, instead.
The bias tape binding set* looks like it would probably work fine. I don’t know when I’d ever want to apply ready-made bias binding with my cover stitch machine, though. This attachment only works with pre-pressed bias tape.
The bias tape folder* is for stitching pre-pressed bias tape down flat onto a piece of fabric – I guess to cover a seam or make a stripe? It’s just not something that I would use.
Other cover stitching resources
Brother 2340CV reviews on Patternreview
Brother 2340CV reviews on Amazon*
How to unpick a cover stitch seam
General advice on cover stitch machines and binders (lots of good information here!)
A Guide to Coverstitch Machines
Coverstitch binder attachment tips & tricks
* Links in this post identified by an asterisk (*) are affiliate links. If you click through and make a purchase, I will earn a commission (at no additional cost to you).
As an Amazon Associate I earn from qualifying purchases.
 GrowYourOwnClothes Etsy Shop

Good point on needles! I noticed the following about Singer 15×1 overlock needles: 1) Singer claims that ELx705 and 15x1SP are the same needles – both IDs are printed on one and the same packet. However, both Schmetz and Organ claim that these are different needles, and sell both types. I am not sure what’s going on. 2) Singer needles are thicker than should be. The metric sizes such as 75, 80, 90, etc. refer to the needle diameter in hundredths of mm, so for example size 80 means that the needle should be 0.8mm thick. Schmetz and Organ needles are true to size, but Singer needles are consistently 0.05mm thicker, so size 80 is 0.85mm thick and is really size 85, and so on. So since your Brother coverstitch likes thin needles, then Singer needles are just too thick for it.
LikeLike
Regarding those thin needles. I had the same problem with an AEG 760 overlocker (Juki) – it required thin needles even for thick materials. Turns out, its needle bar was set too low, and after I raised it, normality was restored: thin needles for fine fabrics, thick needles for heavier ones (see my blog post “The third overlocker” https://vintagesewingmachinesblog.wordpress.com/2017/05/05/the-third-overlocker/). May be something similar is happening with your Brother? I only raised the needle bar by less than a millimetre, but it made such a huge difference.
LikeLike
This machine seems to form stitches just fine with larger needles. The needles just shatter frequently, especially when sewing over a seam. The needles make a “thunk” noise as they enter the fabric because it takes so much force to push them through. The fact that they shatter might have to do with them being set an an angle instead of vertical. Babylock has the needles vertical on their coverstitch machines, which they say is better.
I’m glad you got me thinking about needle bar height though – I bet that’s what’s wrong with my old serger. It’s had me stumped and I’d like to get it working to have as a backup.
LikeLiked by 1 person
I also have a Pfaff 4850 Cover Style machine which is an overlock/coerstitch combo, and the needles are slanted like on your Brother and on all my Juki overlockers. None of them makes any kind of noise. I think the noise may be indicative of the needles touching the loopers, which they shouldn’t. But it’s all so precise there, that even a small difference in needle thickness or needle length can be important. Because thicker needles are also longer!
LikeLike
That was a fascinating read and I don’t even have a coverstitch machine!
LikeLike
Wow, what thorough research! If I ever buy a coverstitch machine, this is where I will come back to! Thank you for sharing! They are unknown in this part of the world, really…I do not know one person who owns one, but I am becoming increasingly fascinated…
LikeLike
[…] the fabric I could buy with that money. Ultimately, I couldn’t stop obsessing about getting a coverstitch machine, so I finally saved up and bought […]
LikeLike
I am so glad I found this! I have had this machine for 4-5 years. I haven’t used it in 2+ years, just because I didn’t have time for sewing, but I was having trouble with it when I stopped sewing. It was great for quite a while when I first got it, then started skipping stitches. So, I got frustrated trying different settings etc. I was probably using the size 14 needle because I looked at my stash and that’s the only size I had left. I also had the problem with skipped stitches while going over seams and thicker areas. I got to where I would kind of ‘push’ the fabric through to keep it from stalling and the thread bunching up underneath. It would even tear my fabric sometimes, which is maddening! Anyway, thanks so much for all the tips! I’m going to start sewing again and will print it all off for reference!
LikeLike
I hope these tips work for you, too. I’m not sure which of the things I tried (or which combination) stopped the skipped stitches, but I don’t get them any more! I was just using my cover stitch machine today, with no problems.
LikeLike
Muchísimas gracias por sus tips, me han ayudado bastante, tenía la máquina en abandono total, no podía manejarla, gracias
LikeLike
Thank you very much for this info. I’m looking to buy a coverstitch, and you just convinced me to get the Juki. I hope you can too 🙂
LikeLike
I’m glad I could save you the frustration I went through. I hope you love your Juki coverstitch as much as I love my Juki serger.
LikeLike
It just boggles my mind as to why anyone uses glue sticks or irons before they hem. I’ve had my Brother 2340CV for 2 years,I never press before nor use any glue sticks or wonder tape. I fold over and use the guide lines and am able to cover the raw edges without wasting the time to glue or iron. I found when I got the machine that a few adjustments in tensions and more specifically the needles were needed. I bought new needles, made the adjustments and this machine hums right along with little to no adjusting even after 2 years. I use this machine daily on knits and wovens and it produces beautiful professional looking finishes to the garment.
LikeLike
I iron and use glue sticks because I find it gives me more consistent results and prevents the hem from being skewed, especially on flimsy knits. We all like to sew differently, and the nice thing is you can choose which method works best for you!
I’m curious, what size/type/brand of needles are you using?
LikeLike
The 2340CV has been a source of frustration for the past year that I have owned it- this is in contrast to my Brother LP6800 and Babylock Enlighten which simply work no matter what fabric/needle/thread you throw at them.
Oddly enough my needle experience has been the opposite to what is written above. Using Microtex size 14 needles has been the only way to get reliable stitches without breaking thread. The tension disks not being preset is another good point. I get identical results setting needles & looper to 2-3. But anything above that is asking for trouble. Also for some reason the left needle path has a lot of extra tension. The typical approach of finishing by pulling on both threads with the screwdriver does not work well. It’s more reliable to pull them one at a time (because more force is needed on the left one).
LikeLike
Be careful using microtex needles. Sharp needles can punch holes in knit fabric, especially natural fibers, and can sometimes even perforate the seam enough that it tears apart.
I add the step of pulling slack in the needle threads just after the thread guides to avoid the problem of having too much force on the needle threads when I pull them forward under the feet (see the steps above in the blog post). That way I don’t have to pull the threads one at a time.
LikeLike
Should the machine be oiled before using?
LikeLike
The manual doesn’t mention oiling the machine at all, and you can’t get to most of the machine to oil it. It probably wouldn’t hurt to put a drop of sewing machine oil on the metal rod that comes out of the machine to run the looper, but other than that, I don’t see any user-servicable areas to oil.
LikeLiked by 1 person
Thank you so much for all the info! The only question I have (right now) is, when done treading the looping thread where do I put\bring the thread after step 14 and before I close the front? Do I need to pull it up through like you do with a bobin on a regular sewing machine? I’ve tried a few different ways and when I’m done testing I can’t take my fabric out unless I open the front and release the needle (as in step 11) I’ve tried both methods for removing the fabric and nothing works the thread just won’t move. (yes I triple checked that I held the tension disk off.) thank you for your help!
LikeLike
After you thread the looper, you leave a 4 inch thread tail, then push the looper back into place. You do not need to bring up the thread – it just dangles down inside the machine. What I do after threading is to sew a few stitches on a piece of scrap fabric, then I use my first method to release the threads, which pulls them into the proper place.
Before you remove the fabric, are you pulling out some slack just above the thread spools first? I especially need to do that if all three needles are threaded. Otherwise the threads are just under too much tension to pull them out all at once from under the presser foot. Another thing you can do is to pull out the needle thread loops one at a time so you don’t have to pull as hard on the thread.
LikeLike
Thank you so much for your generosity in sharing your time, knowledge and experience in this post. It’s immeasurably helpful for those of us new to the coverstitch machine. I’m considering the Brother CV3550 which I am hoping has improved upon this model and ironed out the kinks. If you or anyone has any advice about this model, I’d be grateful to receive it
Thanks again for such an informative post.
LikeLike
Thank you so much. I just bought my brother and I can not wait for use it. I let you know my thoughts.
LikeLike
I really appreciated what you have written to help all of us. Thank you.
LikeLike
I just bought this “thing”. I’ve been trying to sew just a hem. The green thread keeps breaking. It seems to get stuck on the silver metal guide. I rethread it and same thing again and again. Doesn’t matter woven or knit. Any ideas? You’re right manual is terrible
LikeLike
First pull out some thread manually, grabbing it just after the first thread guide, to make sure it is coming off your thread spool or cone freely. Check and make sure that there are no nicks around the top edge of the spool if you are using a spool.
After that my only two suggestions are to keep loosening that tension knob until the thread doesn’t break, and make sure you use high quality thread. I recommend Gütermann all-purpose thread for the needle thread. I think sometimes the thread tension is not calibrated right at the factory, so don’t worry if you have to set the number lower for just one thread, as long as your stitches are coming out looking OK.
LikeLike
Thank you so much this was a good send today. I have had my coverstitch for about 5 years and I really need it but I never use it because the left needle constantly skips stitches. I have alterations that need done today and I have spent the last 2 hours rethreading and troubleshooting. Then I decided to look on line and this pops up. I changed everything to what you suggested,used the thread net and swapped to my normal gutterman thread I use in my regular sewing machine. I tried it and not a single skipped stitch. Thank you thank you thank you. Now I can use my machine that has just been sitting unused.
LikeLike
LikeLike
The first thing to check is that your thread is completely seated in the tensioners: Set the tension to 0 and pull on the thread, then turn the tension back up. Second, adjust the tension to whatever number works for your thread and don’t worry about the number setting. One issue with lower end machines like this is they are less likely to be calibrated perfectly at the factory. So just adjust the tension to whatever number works, and write down your default tensions for each tensioner. Or it could be that your particular thread and fabric combination needs a different tension setting than the default.
Another thing to consider (I can’t tell without seeing your stitches) is this machine will never make the perfect stitches that you see from industrial machines on ready-to-wear clothing, so it could be that your stitches are already as good as this machine can make, and your expectations are too high. I can never get the left and right threads to look exactly the same on the underside, and I can never achieve the tiny needle-thread loops like industrial machines make. If I try to make the tension tighter to try to get nicer looking stitches, the thread breaks.
LikeLike
[…] Brother 2340CV Cover Stitch Machine Survival Guide | Grow Your … The Ultimate Guide To Coverstitching – The Last Stitch […]
LikeLike
[…] Brother 2340CV Cover Stitch Machine Survival Guide | Grow Your … […]
LikeLike
[…] Brother 2340CV Cover Stitch Machine Survival Guide | Grow Your … Guide to sewing machine needles for knits – The Last Stitch […]
LikeLike
[…] Brother 2340CV Cover Stitch Machine Survival Guide | Grow Your … […]
LikeLike
[…] Brother 2340CV Cover Stitch Machine Survival Guide | Grow Your … […]
LikeLike
[…] It’s known for its good stitch quality when properly set up, but be prepared for a learning curve; some users report initial difficulties (Source). […]
LikeLike
[…] the right needle size options can help prevent such […]
LikeLike