
This is the last post in a five part tutorial for making a paper tape dress form that truly matches your measurements and body shape.
Part 1: Introduction and Materials List
Part 2: Preparation
Part 3: Taping the Outer Form
Part 4: Making the Final Form
Part 5: Marking the Form and Making a Cover
Marking reference lines on your dress form and making a cover are completely optional. Making a woven fabric cover like I did is quite a bit of work, so it won’t appeal to everyone. An easy alternative to sewing a cover is to put a tight T-shirt onto your dress form to give you something to pin to.
Marking the Dress Form
Here are the reference lines I marked on my dress form:


Links in this post identified by an asterisk (*) are affiliate links. If you click through and make a purchase, I will earn a commission (at no additional cost to you).
I marked all of the lines in pencil first, then traced over them with a permanent marker. I am not perfectly symmetrical, so I didn’t worry too much about getting the left and right sides exactly the same, since that’s not possible to achieve anyway.
First I marked the horizontal lines at bust and hip using my laser level*. For the waist, I marked around where the bottom edge of my waistband was (which was not level), then I marked two level lines at the waist; one passing through my back waist point, and one passing through my front waist point.
The horizontal lines on the armholes are where the original edge of the dress form was – right up at the top of my underarms. I marked a point 1 inch (2.5 cm) down from this line and blended a smooth curve through that point to draw the armholes. This is where the armhole would be on a closely fitted garment.
For the center front, center back, and side seams, I attached a small weight to a piece of thread to make a plumb line and held it up to the dress form. I did use my laser level to project a vertical line over the plumb line to make tracing the line easier, but you can’t use a laser level alone here because if the dress form is turned even slightly to the side, you will not get a straight line projected onto the dress form due to the body curvature. It worked out for me to draw the side seams straight down from the shoulder point, but I imagine that won’t work for everyone. A better strategy might be to determine a plumb line that cuts the body in half visually from the waist down, then draw a straight line (which may not be plumb) from the underarm to meet the lower side seam at the waist.
I used a ball chain necklace to determine the neckline.
I measured the distance between my bust points on my actual body, then used this measurement to locate the bust points on the dress form.
The princess lines took me a while to figure out. I think the princess lines usually go through the mid-point of the shoulder seam. On women, they go through the bust point on the front. For men, I’m not sure what the width at the front chest should be. I’d just blend a smooth line from the waist to the mid-shoulder seam point, and stand back and see if it looks right.
On the back, the princess lines should go through (or near) the most prominent part of the shoulder blade, but this can be adjusted a little to make a smoothly curved line from mid-shoulder to waist.
But at the waist and hip, I was less sure where I should put the princess lines. I’ve discovered that having your front waist darts in the wrong location can look really terrible. Pattern making books often say to place the waist darts “at the princess lines on the dress form.” Simply forming the darts where they fit my tummy shape best, like Don McCunn suggests in his book How to Make Sewing Patterns*, looks awkward and unflattering on me (I would have short darts close to center front). Good pattern making involves adjusting a standardized shape to fit around an individual body, not just copying the shape of the body.
So that’s why I wanted to get my princess lines as close as possible to where they would be on a commercial dress form. The only reference I found for locating waist darts in a standardized location on a human body was in the book Practical Guide to Patternmaking for Fashion Designers: Juniors, Misses and Women* by Lori Knowles.
Here are her formulas, if you want to try them. Waist width is measured as a straight line from side to side, not around the body. Measure out the calculated amount from the center line at the waist to find the waist dart location (where the princess line would go through).
If your waist circumference is 25″ or less, add 3/8″ to one fourth of the waist width
If your waist circumference is 26″ to 30″, add 1/2″ to one fourth of the waist width
If your waist circumference is 31″ to 35″, add 5/8″ to one fourth of the waist width
If your waist circumference is 36″ or larger, add 3/4″ to one fourth of the waist width
These formulas did not seem right to me (One fourth plus a varying fixed amount? That just sounds like she’s using the wrong fraction), plus they don’t address where the princess line should be located at the hip line. I think the princess line to center line distance at the waist and hip should just be a fraction of the body width. So instead of using the formulas above I found some pictures of commercial dress forms online and took measurements off of them, and compared this to what using the golden ratio would produce.
Here’s what I came up with [edited 3/24/2018]:
Measure the body width at waist and hip (do yourself a favor and measure this in metric units). At front and back waist, measure out 0.31 × [waist width] from the center line. At front and back hip, measure out 0.31 × [hip width] from the center line. These calculations are what you get using the golden ratio to determine the proportions.
This should at least get you in the ballpark for an hourglass or semi-hourglass figure. For other figure shapes, I’d suggest you just tape narrow ribbons to the dress form along approximate princess lines, stand back and look at them, and adjust them until they look good. You can probably stick to using 0.31 × [hip width] at the hip, then just adjust the waist location by eye. Make sure the princess lines are not too close to the center lines – that just looks funny, like having really closely set eyes.
At this point you probably think I’m crazy for putting so much effort into locating my princess lines, but trust me, it really makes a huge visual difference in your garments when you locate princess lines and waist darts well. It’s the sort of thing that takes your garment from “Oh, you must have made that,” to “Wow, that looks amazing on you.”
Making the Cover
With reference lines marked on my dress form, I was ready to make a cover for it. I made a woven fabric cover, placing seams at the marked reference lines.
Making the cover was a lot of work. I had a couple of “What the heck have I gotten myself into” moments, but I kept working at it and got it done, and now I’m really glad I finished it.
The first thing I did was number each section of the body that would be a pattern piece. I wrote the numbers right on the dress form to make it easy to remember how to sew the pieces together. I needed to make separate pattern pieces for my left and right side, since they are not the same.
Then I draped pattern pieces for each section. I started off using Press’n Seal* to make the patterns for the neck and the curvy pieces on the underside of the bust. I was running out of Press’n Seal, though, and it’s hard to work with on the larger pattern pieces anyway, so I switched to using exam table paper* for the rest of the pattern pieces.
I stuck the tracing paper onto the dress form with little dots of poster putty*, which didn’t damage the dress form like tape did. Then I traced the lines from the dress form onto the paper. This worked really well.

I added quarter inch seam allowances to my pattern pieces and marked where I wanted the zipper.
I placed the zipper between the center back line and princess line, since I wanted to be able to put pins into the cover exactly at center back. I suggest using a zipper long enough to go up a little higher than mine did – I had a hard time getting the cover on.

I made the cover using some sturdy cotton twill fabric. I interfaced the neck, armhole cover pieces, and under the zipper area. I just sewed the zipper right onto the outside of the fabric. After the zipper was sewn on, I cut a slit in the fabric underneath it to allow the zipper to open. This was a lot less bulky than inserting the zipper into a seam.

I stitched along all of the reference lines that were not seam lines to mark them on the fabric. Then I sewed the horizontal seams on the front and back pieces, and basted the shoulder seams, princess lines, and side seams together with wrong sides together and tried it on the dress form. I took it in a little in a couple of places, but for the most part, the fit was pretty good.
I stitched the final seams, pressed them open, and topstitched over the seams with a decorative stitch.
Then I sewed a casing along the lower edge, inserted a draw string, and put it on the dress form. To get the cover on, I put a slippery piece of plastic cut from a clear trash bag over the dress form, pulled the cover on and straightened it, then pulled out the plastic and closed the zipper.


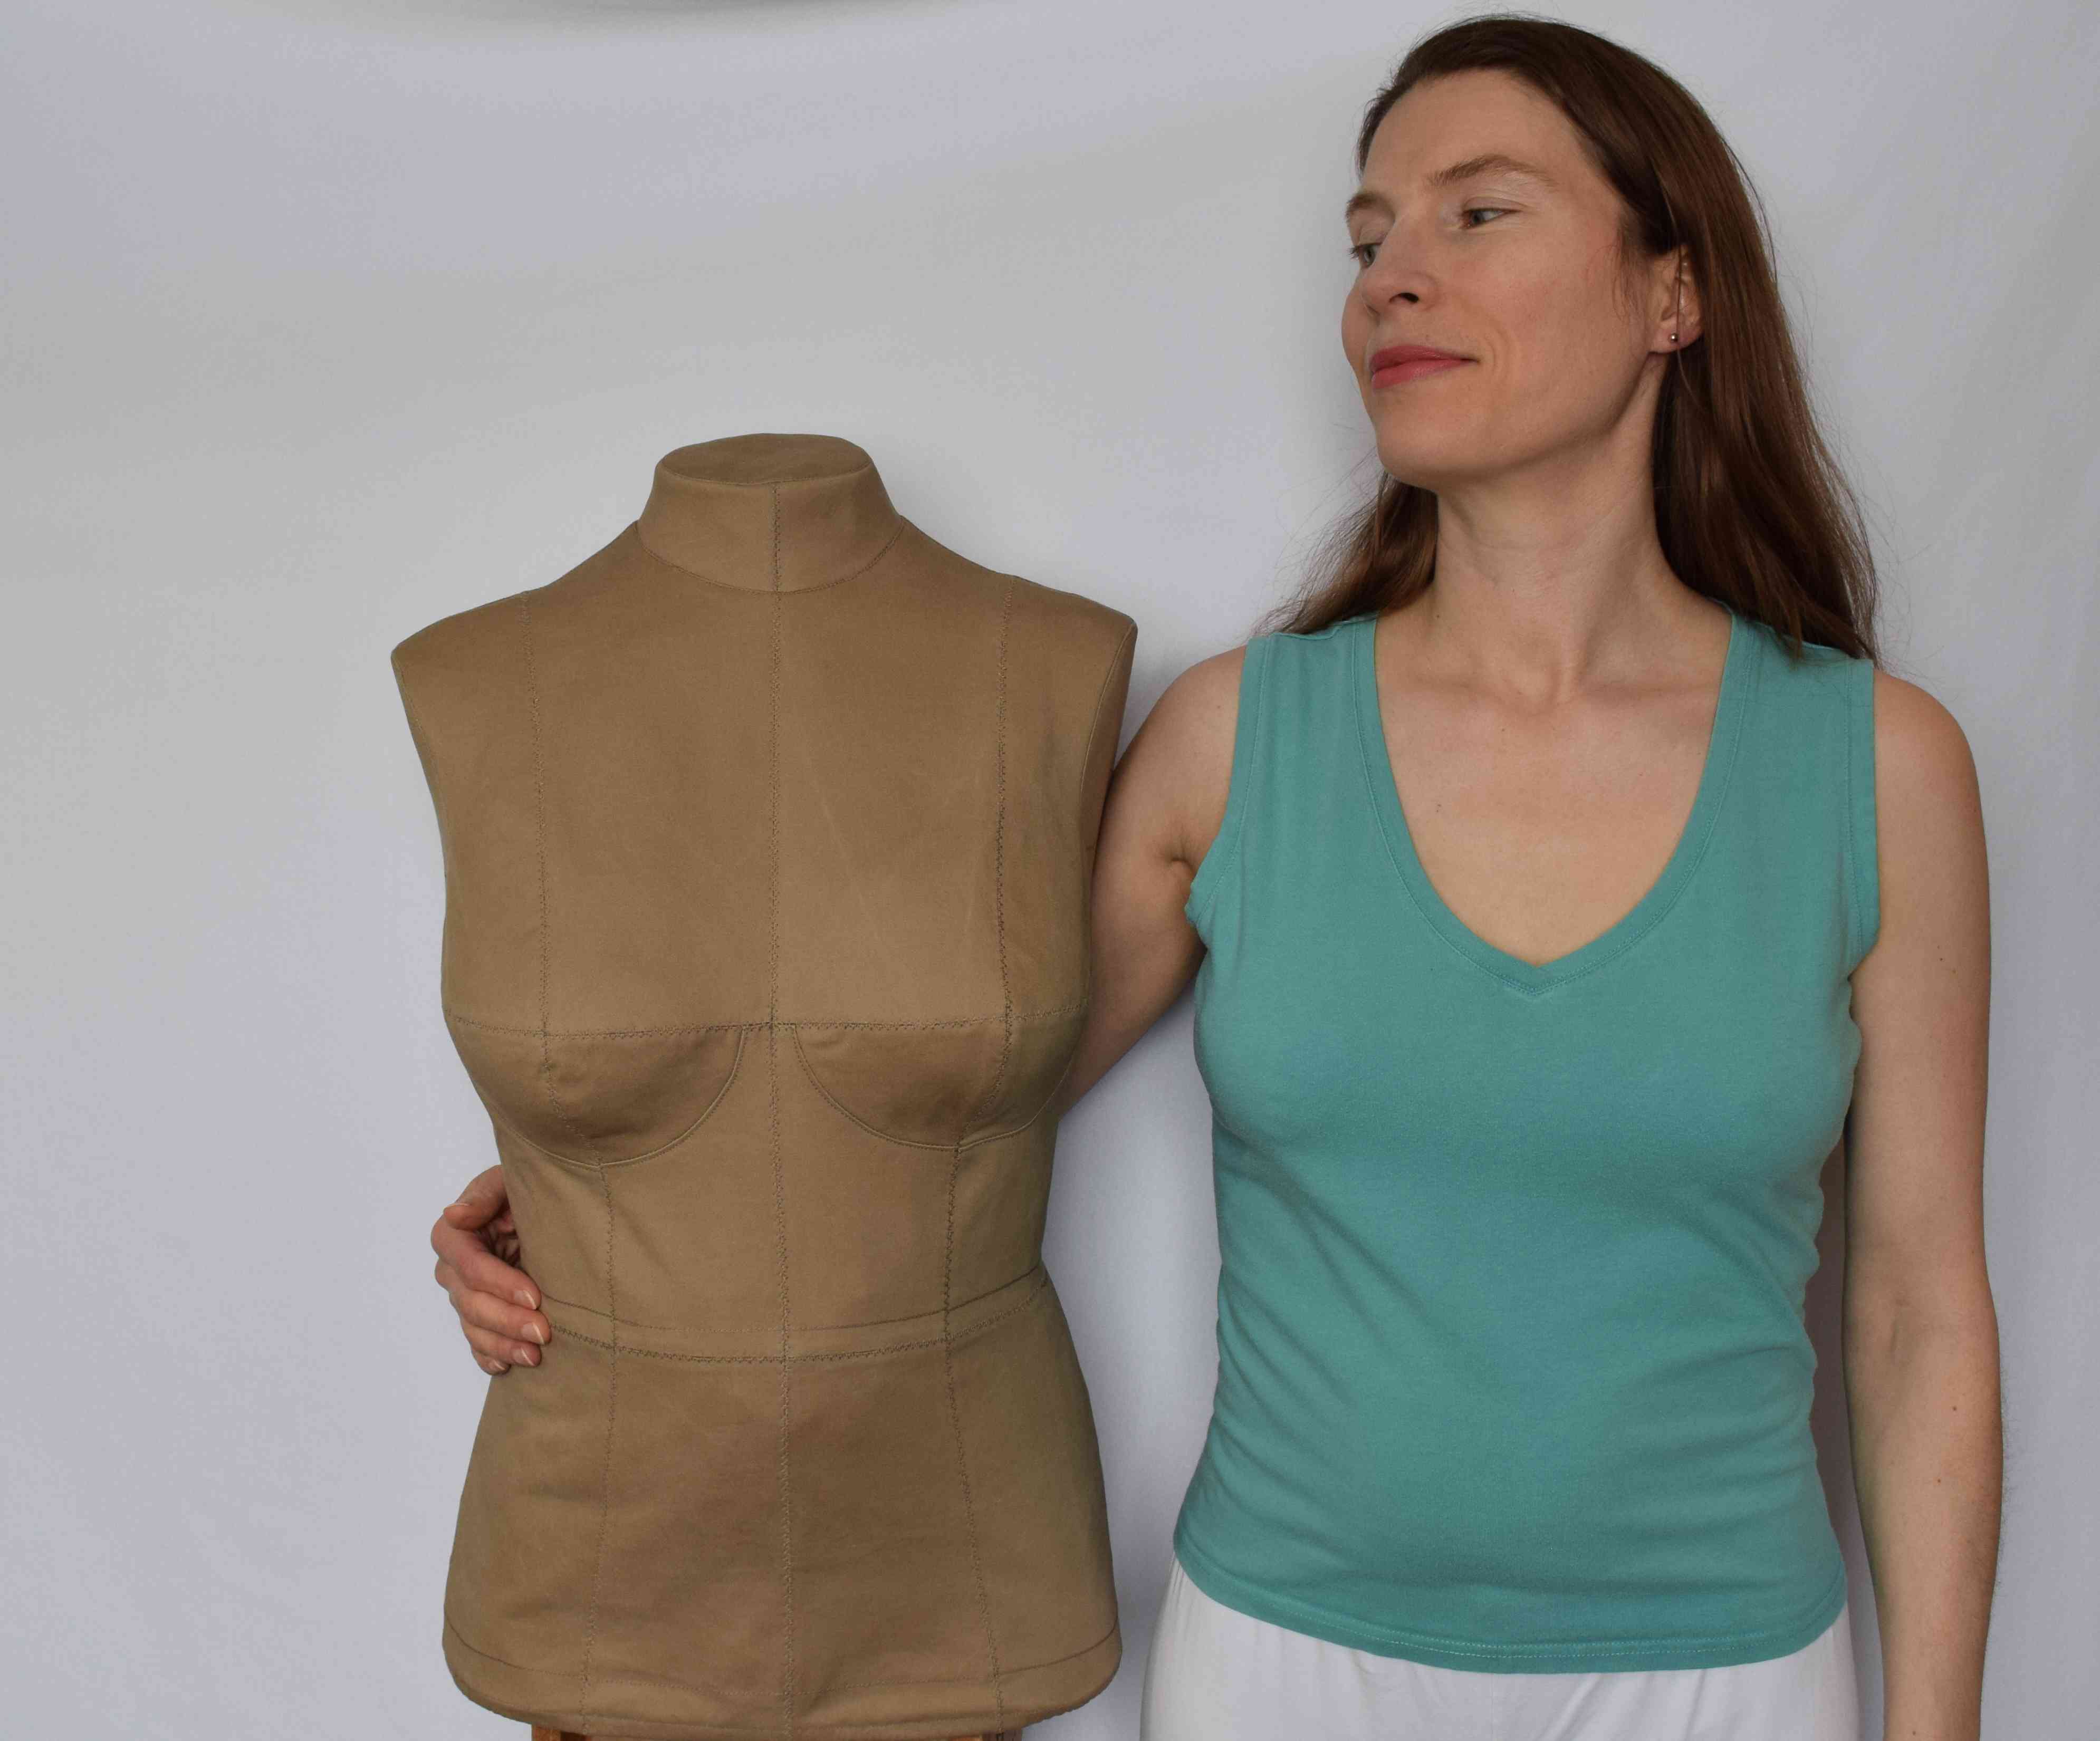
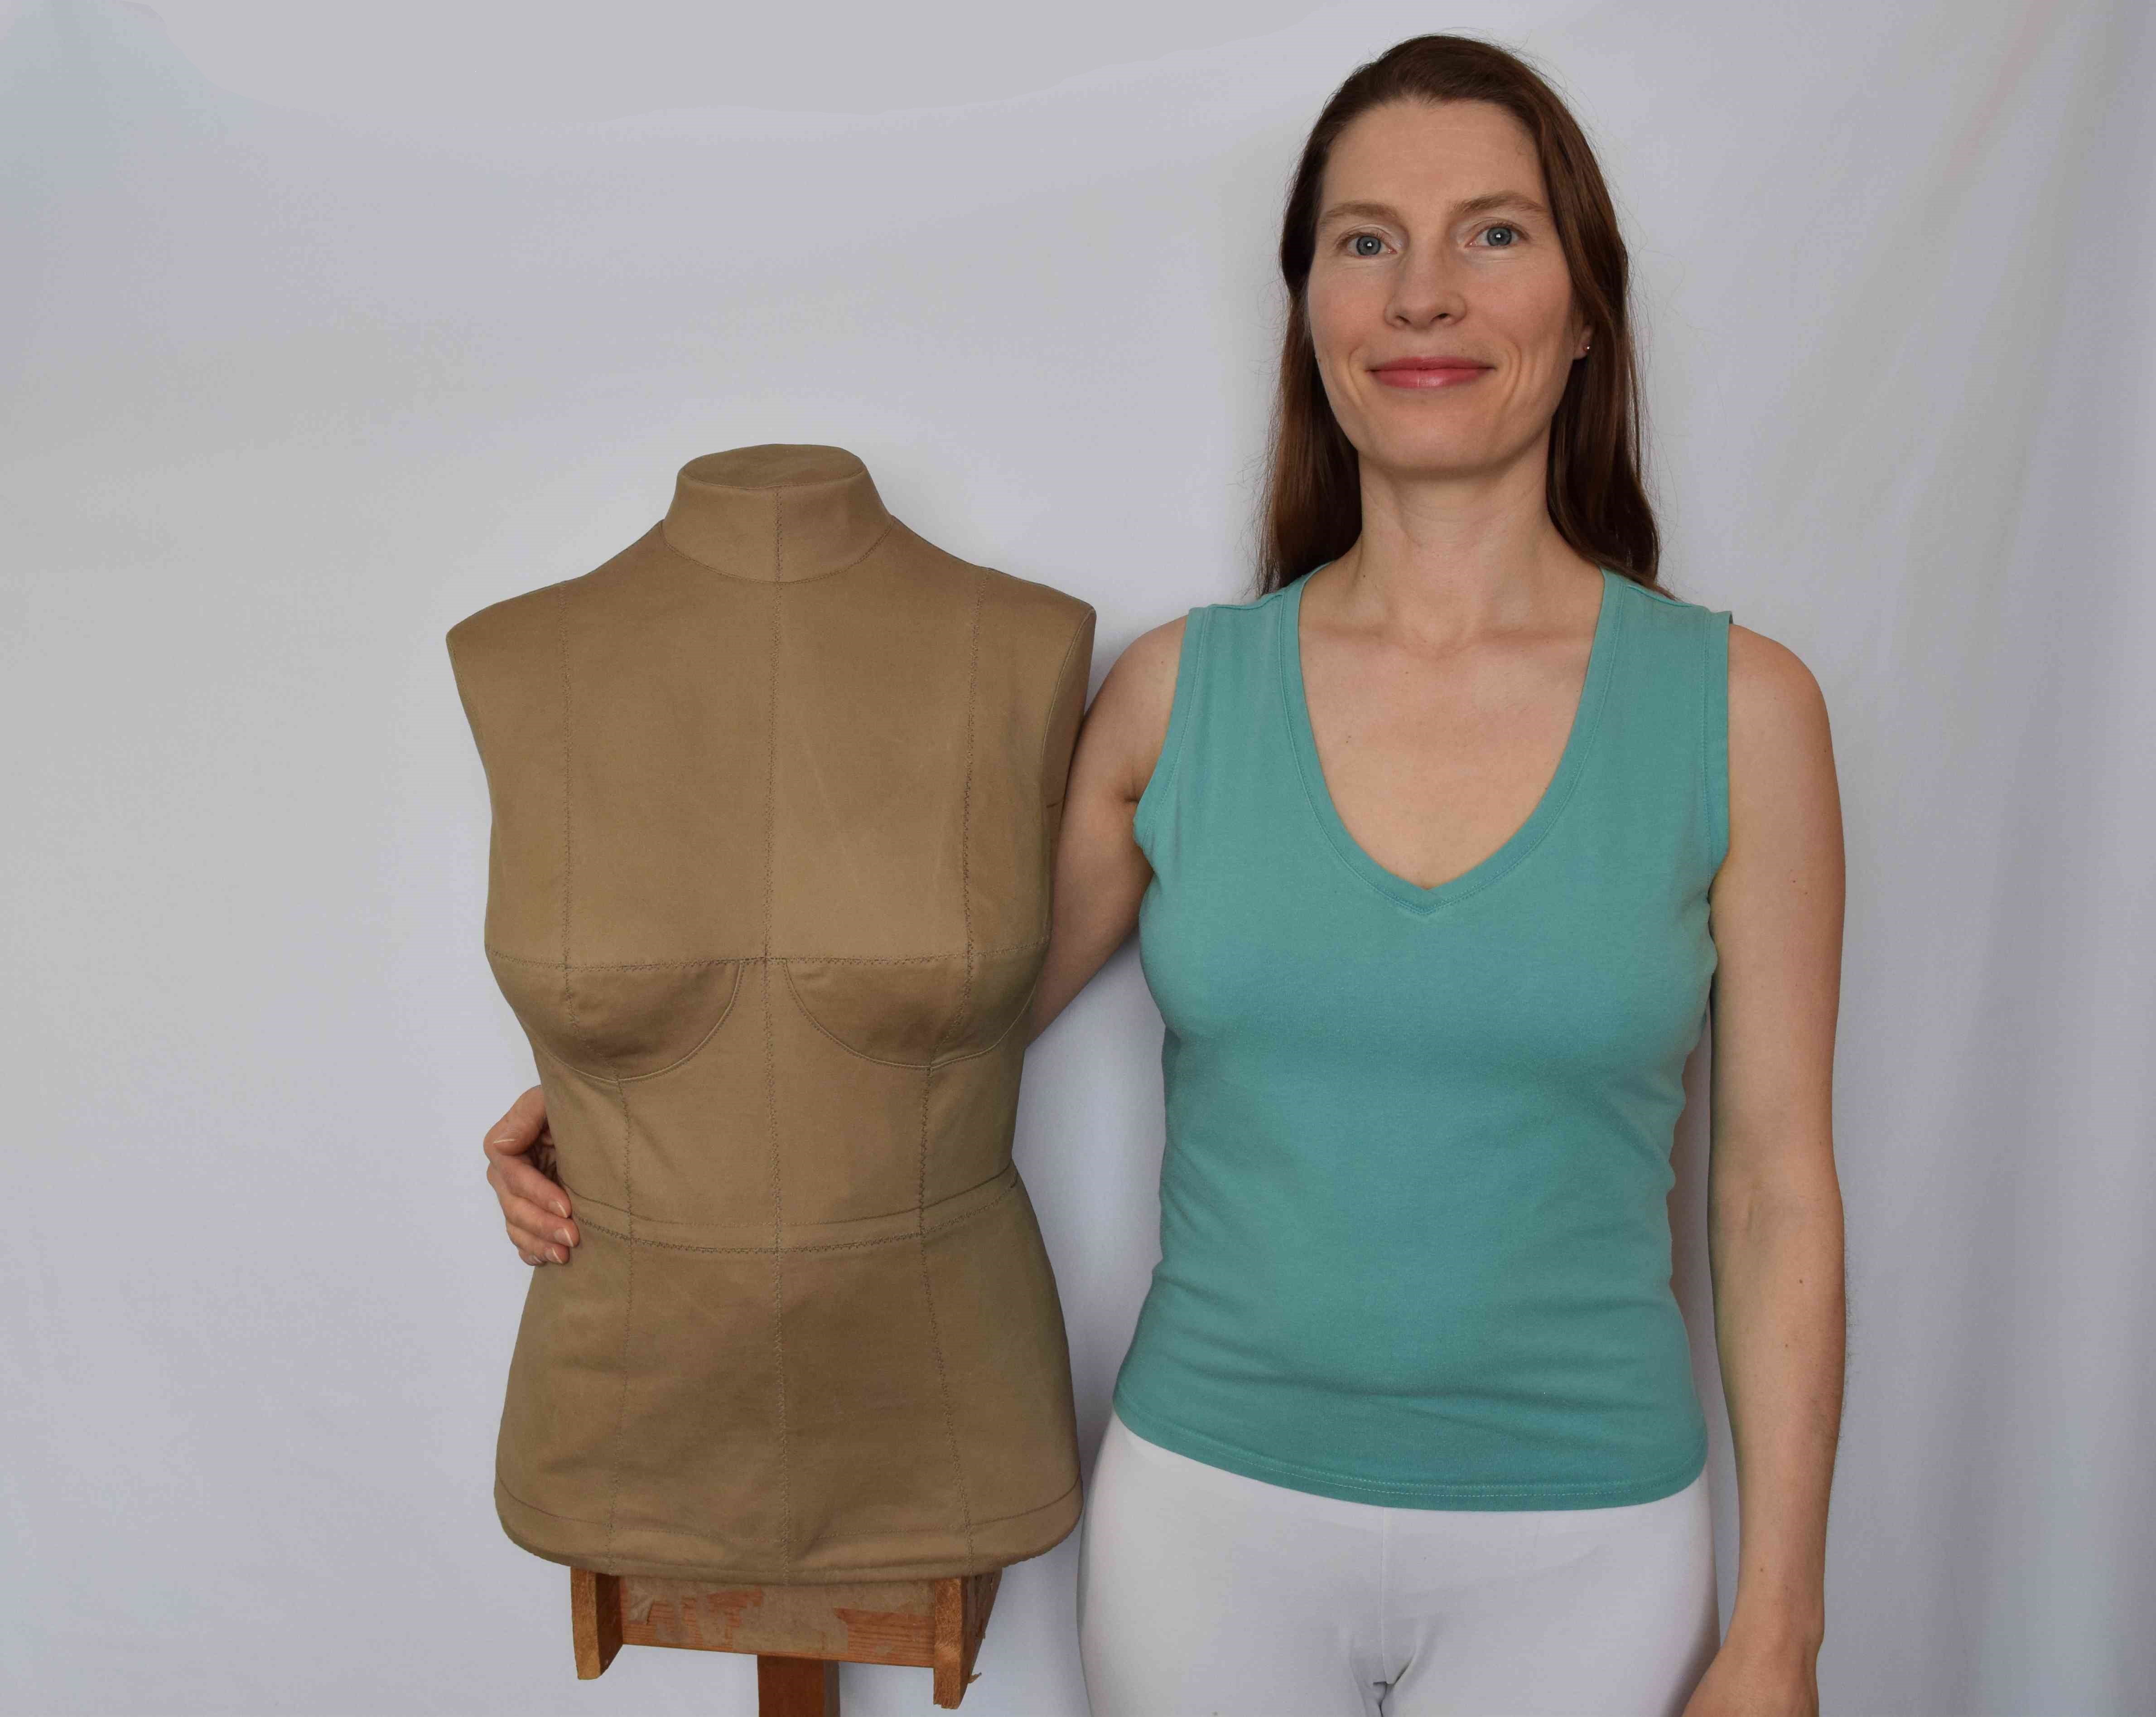
And here we are – me and my new dress form. With the cover on, the bust, waist, and hip measurements on the dress form match mine exactly!
* Links in this post identified by an asterisk (*) are affiliate links. If you click through and make a purchase, I will earn a commission (at no additional cost to you).
 GrowYourOwnClothes Etsy Shop

Wow! This is the most impressive DIY (plus helper-taper) I have ever seen. It is a lot of work but the result looks not only amazing, but also seems very accurate.
LikeLike
Amazing. This is the most accurate, functional and professional looking DIY dress form I’ve seen, and your description of the process is so clear! I have to admit I am intimidated by the work involved, but one of these days I have a feeling I am going to commit to the effort. Thank you so much for the time you spent to explain all the details. This is an exceptional resource!!!
LikeLike
Hi! I am making a dress form following your INCREDIBLY helpful instructions! Today I’ll put in some expanding foam. My inside form is 4 layers thick. I’m hoping that I won’t need to add any more paper tape after using the foam and cutting off the outer form/shell. Is another layer always necessary?
LikeLike
I mostly put the layer of tape on the outside because the sticky side of the tape is facing out. If you put a T-shirt or a fabric cover over it, it should be fine without another layer. If it’s humid, or you touch it with your hands, the water activated tape adhesive feels sticky. But maybe that might help fabric not slide off of it! It’s totally up to you.
LikeLike
Makes perfect sense! I just finished my form and cut it out of the outer shell. I’m so happy! The outer shell was at least an inch too big all over. Weirdly the inner form is about 1.5 inches too small. Do you think that was caused by tape being too wet? It’s not a problem- she’ll just be padded out!
LikeLike
It could have been the tape was too wet. Maybe your tape shrunk more than mine. I imagine there are variations in different brands/manufacturers. Congratulations on getting this far. Mine helped me figure out some fit issues with the back side of my body I’d been struggling with. The solutions seem so much simpler when you can just get to your own back!
LikeLike
So I’ve completed the dress form and made a cover. My first cover attempt was using Kenneth King’s The Moulage- it really helped having a written text to follow. I did a second moulage attempt following Suzy Furrer’s Craftsy course. Doing both moulages taught me SO much! I didn’t take your advice and stabilize the neck and armholes, and now they are stretched out. I really don’t want to cut out another moulage for a cover but looks like I’ll have to. The shoulders on the dress form are wonky- it was really difficult to get these right. I’ve now corrected them with shoulder pads. You’re right- this is a LOT of work. But I’ve started a drawing class and NEED a form. Your tutorial is excellent! Thanks so much!
LikeLike
I have a sincere question that has been eating me for time I can’t figure it out I’m trying to make a DIY curve measuring ruler that can be helping to deal with curves but the issue at hand is I want it to a 360° or in other words to be in a circular form but with measurements on the edge around the Circumference of my form curve ruler I don’t how I can i make 30cm in a circular form just like the way you with your French curve and hip form curve if you don’t mind would you help me with that please wait for your favourable consideration I’m try to do this in Adobe illustrator 2023
LikeLike
I haven’t used Adobe Illustrator, so sorry, I can’t answer how to do it in that program. I used Inkscape (free software) to put measuring lines on curved lines. Here’s how I do it in Inkscape: Draw a circle, convert it to a path (from the menu, Path > Object to Path), select the path, then from the Path menu, choose Path Effects, click “+” to add an effect, then choose Ruler. Now edit the parameters as you like to get the right units, etc. I made two rulers on top of each other to get more variety of lengths of measurement lines (for example, a heavier line for whole centimeters, a middle length for half cm, and a short, fine line for mm), since the ruler tool only has 2 lengths for the measurement lines (major & minor). I made the first ruler, duplicated it, then edited the parameters to get different line lengths for the second one.
LikeLike