
Links in this post identified by an asterisk (*) are affiliate links. If you click through and make a purchase, I will earn a commission (at no additional cost to you). I was provided this pattern at no cost to me.
Bootstrap Fashion sewing patterns has a pattern for a made-to-measure DIY dress form that you sew and stuff. They have a missy version* and a curvy version* of the pattern. If you are not familiar with Bootstrap Fashion patterns, you put in your measurements on their website and they generate patterns made to fit you, which you receive in just a few minutes.

Last year I noticed that someone from Bootstrap Fashion had purchased my Mini Stuffed Dress Form Pattern, and I wondered what they were going to use it for. Then a few months later I saw Dawn’s blog post about her Bootstrap Fashion dress form, and I thought, wow that looks really similar to my mini dress form. I went to Bootstrap’s web site, downloaded the pattern instructions for their DIY dress form, and noticed that there are many similarities to my mini dress form in the inner structure and assembly process. Aha, so that’s what they were doing with my pattern – using it as inspiration and research for their pattern.
I’ve had a few people ask me about altering my Mini Stuffed Dress Form pattern to match their measurements, which really isn’t easy to do, unless you are only making minor alterations. I thought the Bootstrap Fashion dress form might be a good pattern to refer these people to, but I wanted to try it first. I also wanted to make it because I thought it would be handy to have a soft, pinnable custom dress form that wouldn’t be ruined by steam or a little moisture, so I could use it to steam garments on or hang damp garments on to dry. My other custom dress form is a paper tape form, which would be damaged by moisture.
I’ve made a full scale version of the Bootstrap dress form, a half scale version, and the arm for the dress form. For the half scale version I made some changes to the pattern to make it easier to sew on a small scale, so that will get its own blog post. A post on sewing the arm is also coming up.
This post is about the full scale dress form, but here’s a sneak peek of the arm and half scale form:

Before I cut out any fabric, I decided to check the front and back profile against my actual body shape. I traced the shapes onto cardboard, cut them out, and held them up to my body. The front, while it didn’t match my every curve, was overall about right, so I left it alone. When I checked the back, I saw I needed to make some changes. Most of the problem was because I should have marked my waist at a higher location, located by tying a string around my waist. I’d recently taken my measurements for a pattern making system that puts your waist a little lower, so I didn’t think about that when I input my measurements for the dress form. I changed the center profile support pattern piece to match my shape, and it still all sewed together fine. I was actually surprised at how close the profile shapes were to my shape. The “bum protuberance” is about right.

The other change I made was to flatten the tummy. After comparing their pictures to my profile shape when I put in my measurements, I picked the smallest tummy shape that wasn’t flat, but after printing the pattern pieces I noticed that they did not look right. I realized that my tummy would naturally almost be flat, but sticks out into a rounded shape due to my swayback, and their pattern pieces were going to give the dress form a tummy further down below my waist, which I don’t have. I just straightened out the front princess lines between the waist and hip, and this gave me something closer to my actual shape.
After I sewed up the form, I noticed that my hip level was a little too low, so I’d suggest checking the vertical position of your waist and hips against the pattern and altering it if needed.
The scary thing about making this dress form is that you can’t just make a quick muslin and try it on. The dress form has negative ease and it changes shape as you stuff it, so even if you added extra ease to the side seams, I don’t think it would work to try it on your body.
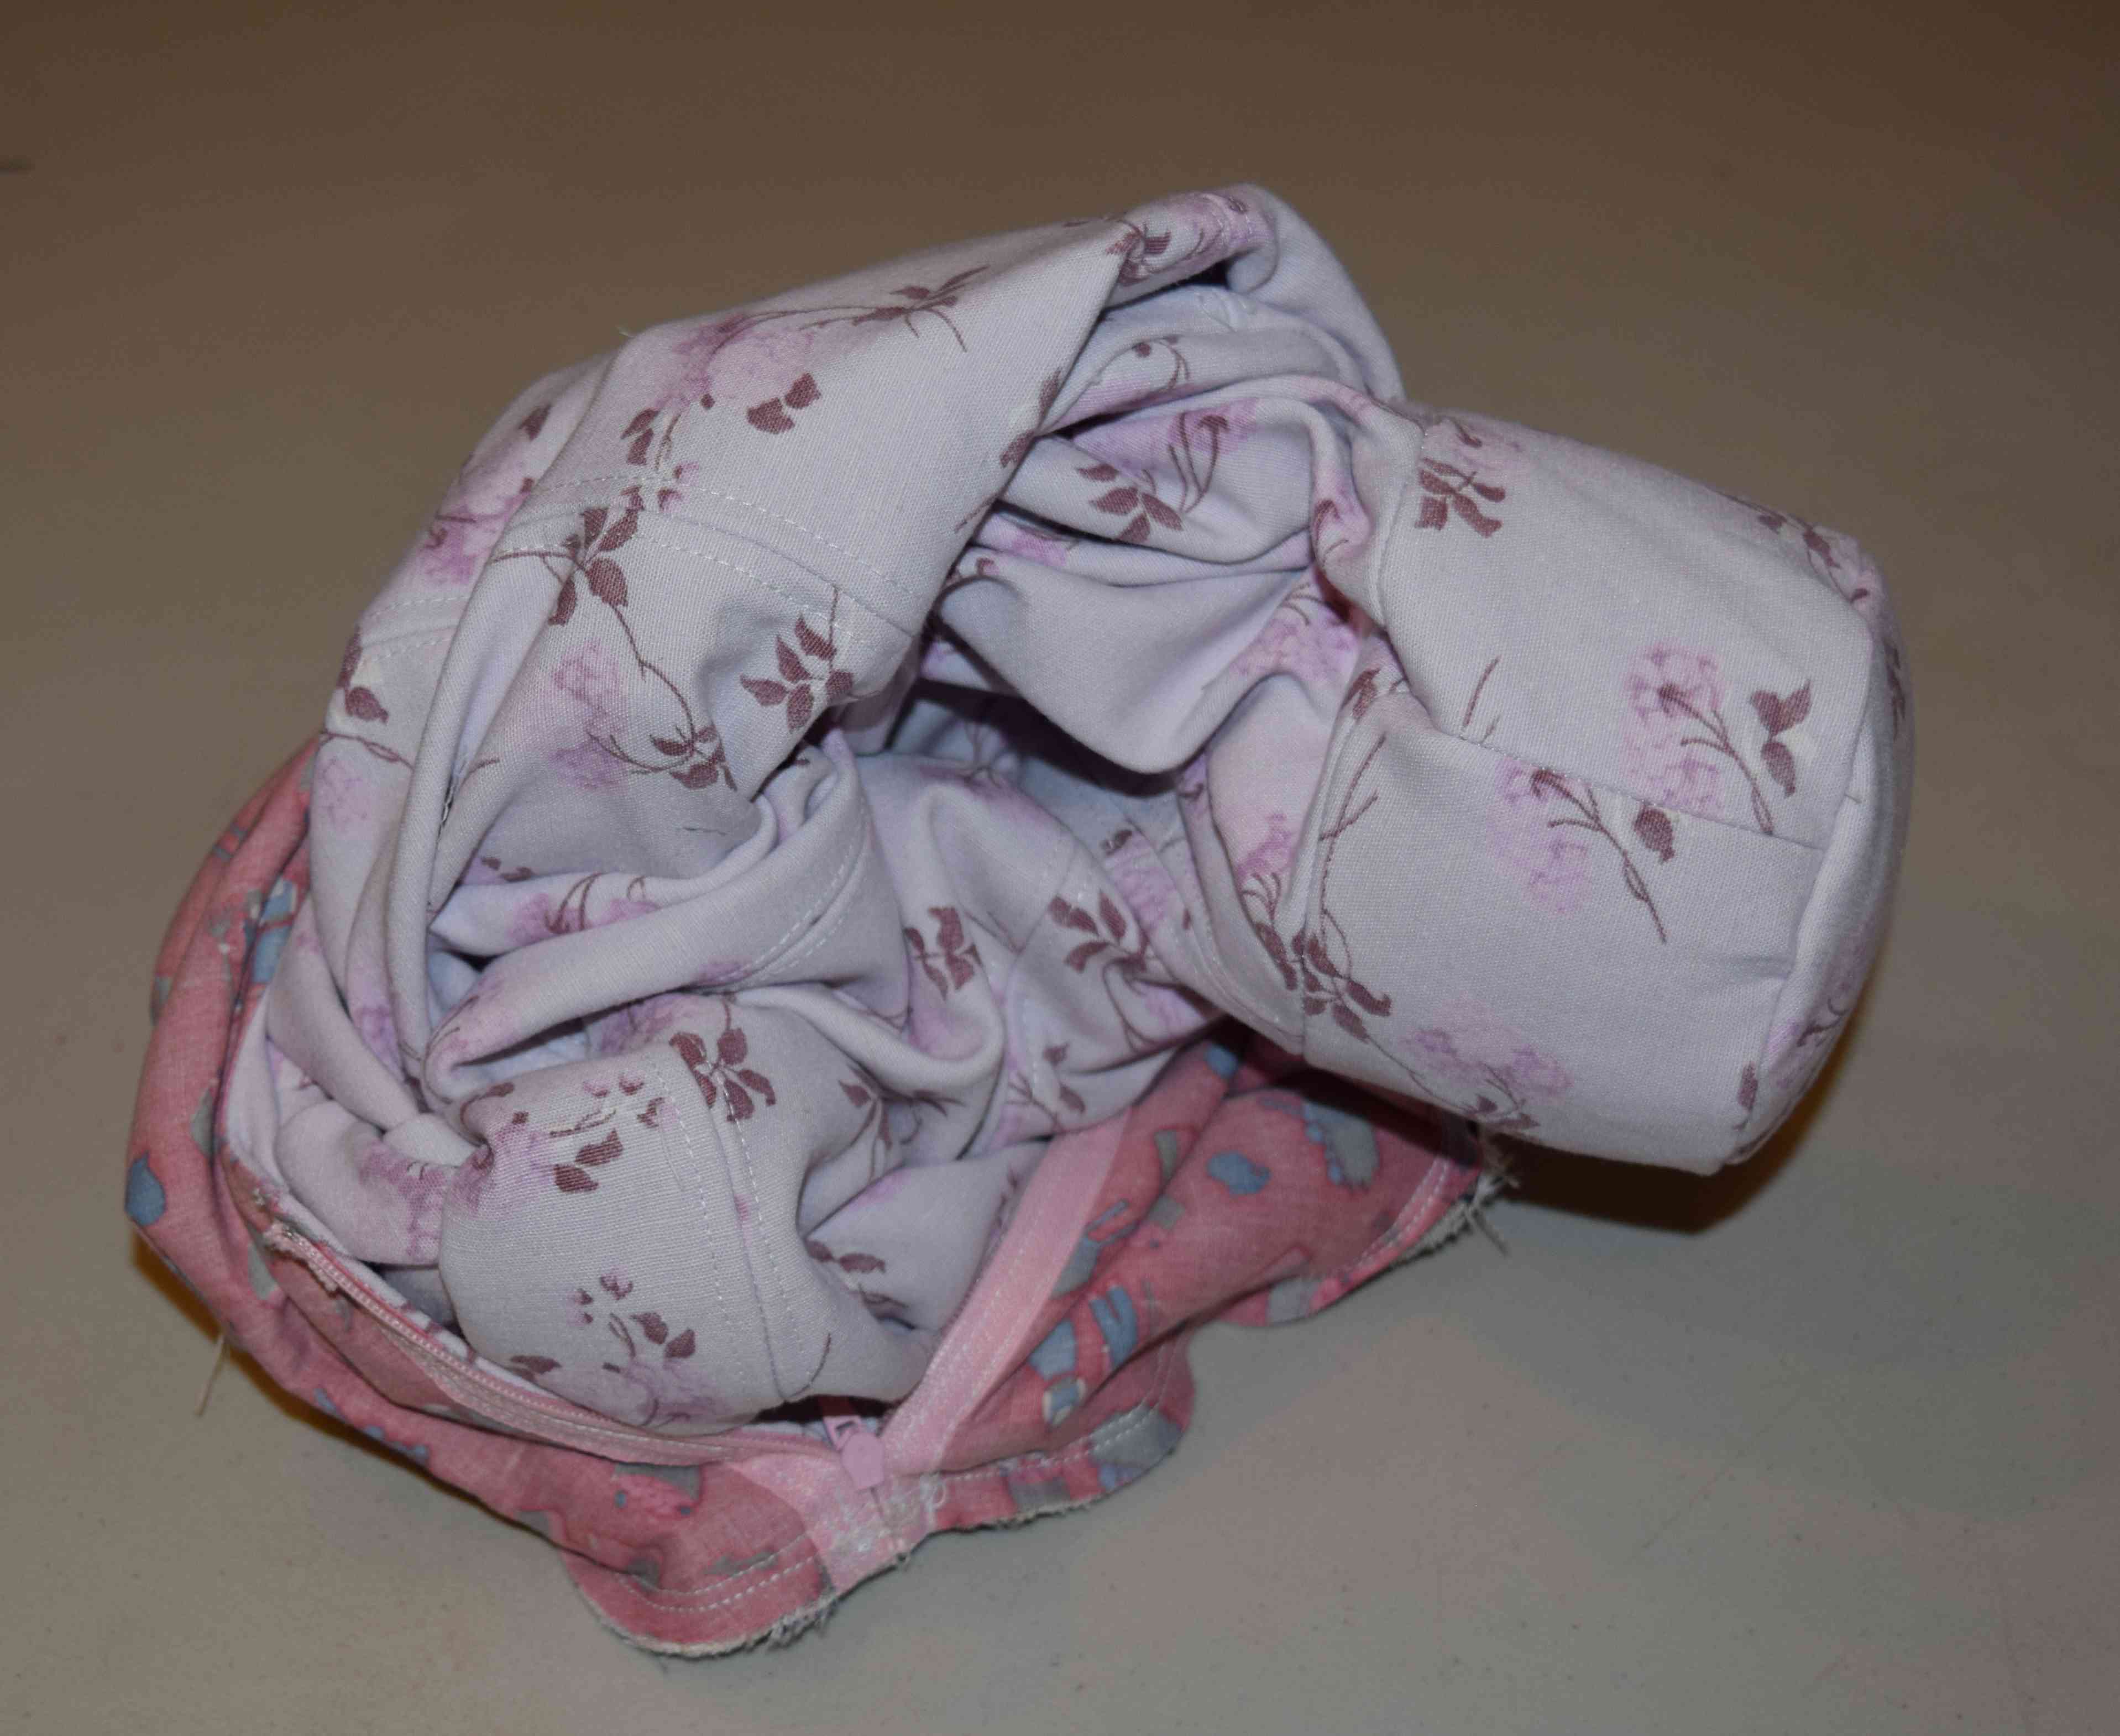
The dress form is sewn from interfaced stable fabric. I wanted to use some linen fabric for the dress form, which is not very stable and stretches out, so I both interfaced the linen and underlined it with some stable home dec fabric. This made for some pretty thick layers, but my Singer 201 treadle sewing machine handled it just fine. This is something to think about, though, if you are sewing the dress form on a typical modern home sewing machine – choose fabric and interfacing that are very stable, but not too thick. You might also consider cutting the pattern on the cross grain so that the more stable direction of the fabric is going around the body.
Fusing interfacing on all that fabric took so long. Thankfully I used Pellon SF101 interfacing*, which fuses relatively quickly and easily compared to other woven interfacing I’ve used in the past. Finally I got smart and downloaded an interval timer app so I could set my phone to ding every ten seconds and I’d know when to move my iron. Every time I fuse interfacing I wish I had a steam press. I’ve had my eye on this small steam press*, but so far it hasn’t made it to the top of my sewing wish list (there are always a lot of things on that wish list!). At least I have an old iron without auto-shutoff to use for fusing interfacing.
Here are the cardboard support pieces and fabric pieces, all fused, cut, and ready to sew.

As I was sewing the dress form, I found Wonder Clips* worked well to hold the pieces together, since they were too thick for pins. I sewed the dress form together with upholstery thread for extra strength, since I did not topstitch over the seams with a zig-zag stitch as is suggested in the instructions.

Here’s the dress form wrong side out, mostly sewn together:

After that the center profile support piece is sewn on.

Then the bottom cover gets sewn on. I think the instructions have you sew on the bottom cover after turning the dress form right side out, but I sewed it on first, which works too. A note about the bottom cover – the pattern pieces are labeled “cut 2” but even on my vintage sewing machine it would have been too many layers of fabric to sew at the ends of the zippers if I did that. I cut the inner lining for the bottom cover from some thin fabric instead of the same fabric I used for the rest of the dress form, and that worked better.
The zippers are a nice touch – no hand sewing needed to close up the dress form!


The neck is stuffed with a sponge/foam piece, and then the dress form gets turned right side out. It kind of looked like it was giving birth to itself.

I actually stuffed this dress form three times. The first time, I stuffed the bust just firmly enough to keep it filled out, but it was still 2 cm (3/4″) to large. I thought it might be OK, but after trying my clothes on the dress form, I decided that it wasn’t going to work. The bust was also up too high, and the back neck to bust point measurement was 1 cm shorter than the number I had put in (I print-screened the page where I put in my measurements, so I’m sure I put it in right).
For the second try, I stuffed the bust just enough to match my measurements, which left the bust wrinkly, but still up too high. It looked awful, and the wrinkles showed through clothes. I also noticed that the shoulders sloped too much, and I wondered if that was because I had stuffed the shoulder area so firmly.

I decided to try to alter the bust. I clipped out the extra fabric to see how much fabric I needed to take out. Then out came all the stuffing. Again.

I unpicked the underbust seams, trimmed off 2 cm (3/4″) from the lower bust seams, and re-stitched them.
The third time, I thought I would try stuffing the form mostly with old T-shirts supplemented with polyester fiber fill around the edges instead of just fiber fill. My thought was that the fabric stuffing would not exert as much pressure on the dress form, and might not stretch out the fabric as much and pull the shoulders down so much. It worked OK, though my dress form is a now a bit lumpy, the shoulders still slope too much, and it’s pretty heavy.
If I was to stuff it again (nope, not gonna do that!), I’d probably just use fiber fill. Adding old clothes or fabric scraps is a good way to save on using so much stuffing, though. Just keep the fabric scraps in the center so lumps won’t show. Inserting chunks of Styrofoam or something similar into the center would also work to reduce the amount of fiber fill needed, and would be especially useful for a larger size form.
The dress form now matches my measurements pretty closely. The altered bust is a bit droopy looking, but I’ll take that over being too large or having awful wrinkles. It’s still a little too high and the bust points are too close together now, which I couldn’t fix.

Here’s how this dress form compares to my actual body shape. The tan custom made dress form matches my size and shape almost exactly. The bust, waist and hip measurements are the same on both forms, but you can see that the shape is different. The tan dress form’s shoulders extend out a little past my actual shoulder points, which is part of the reason they are so much wider.

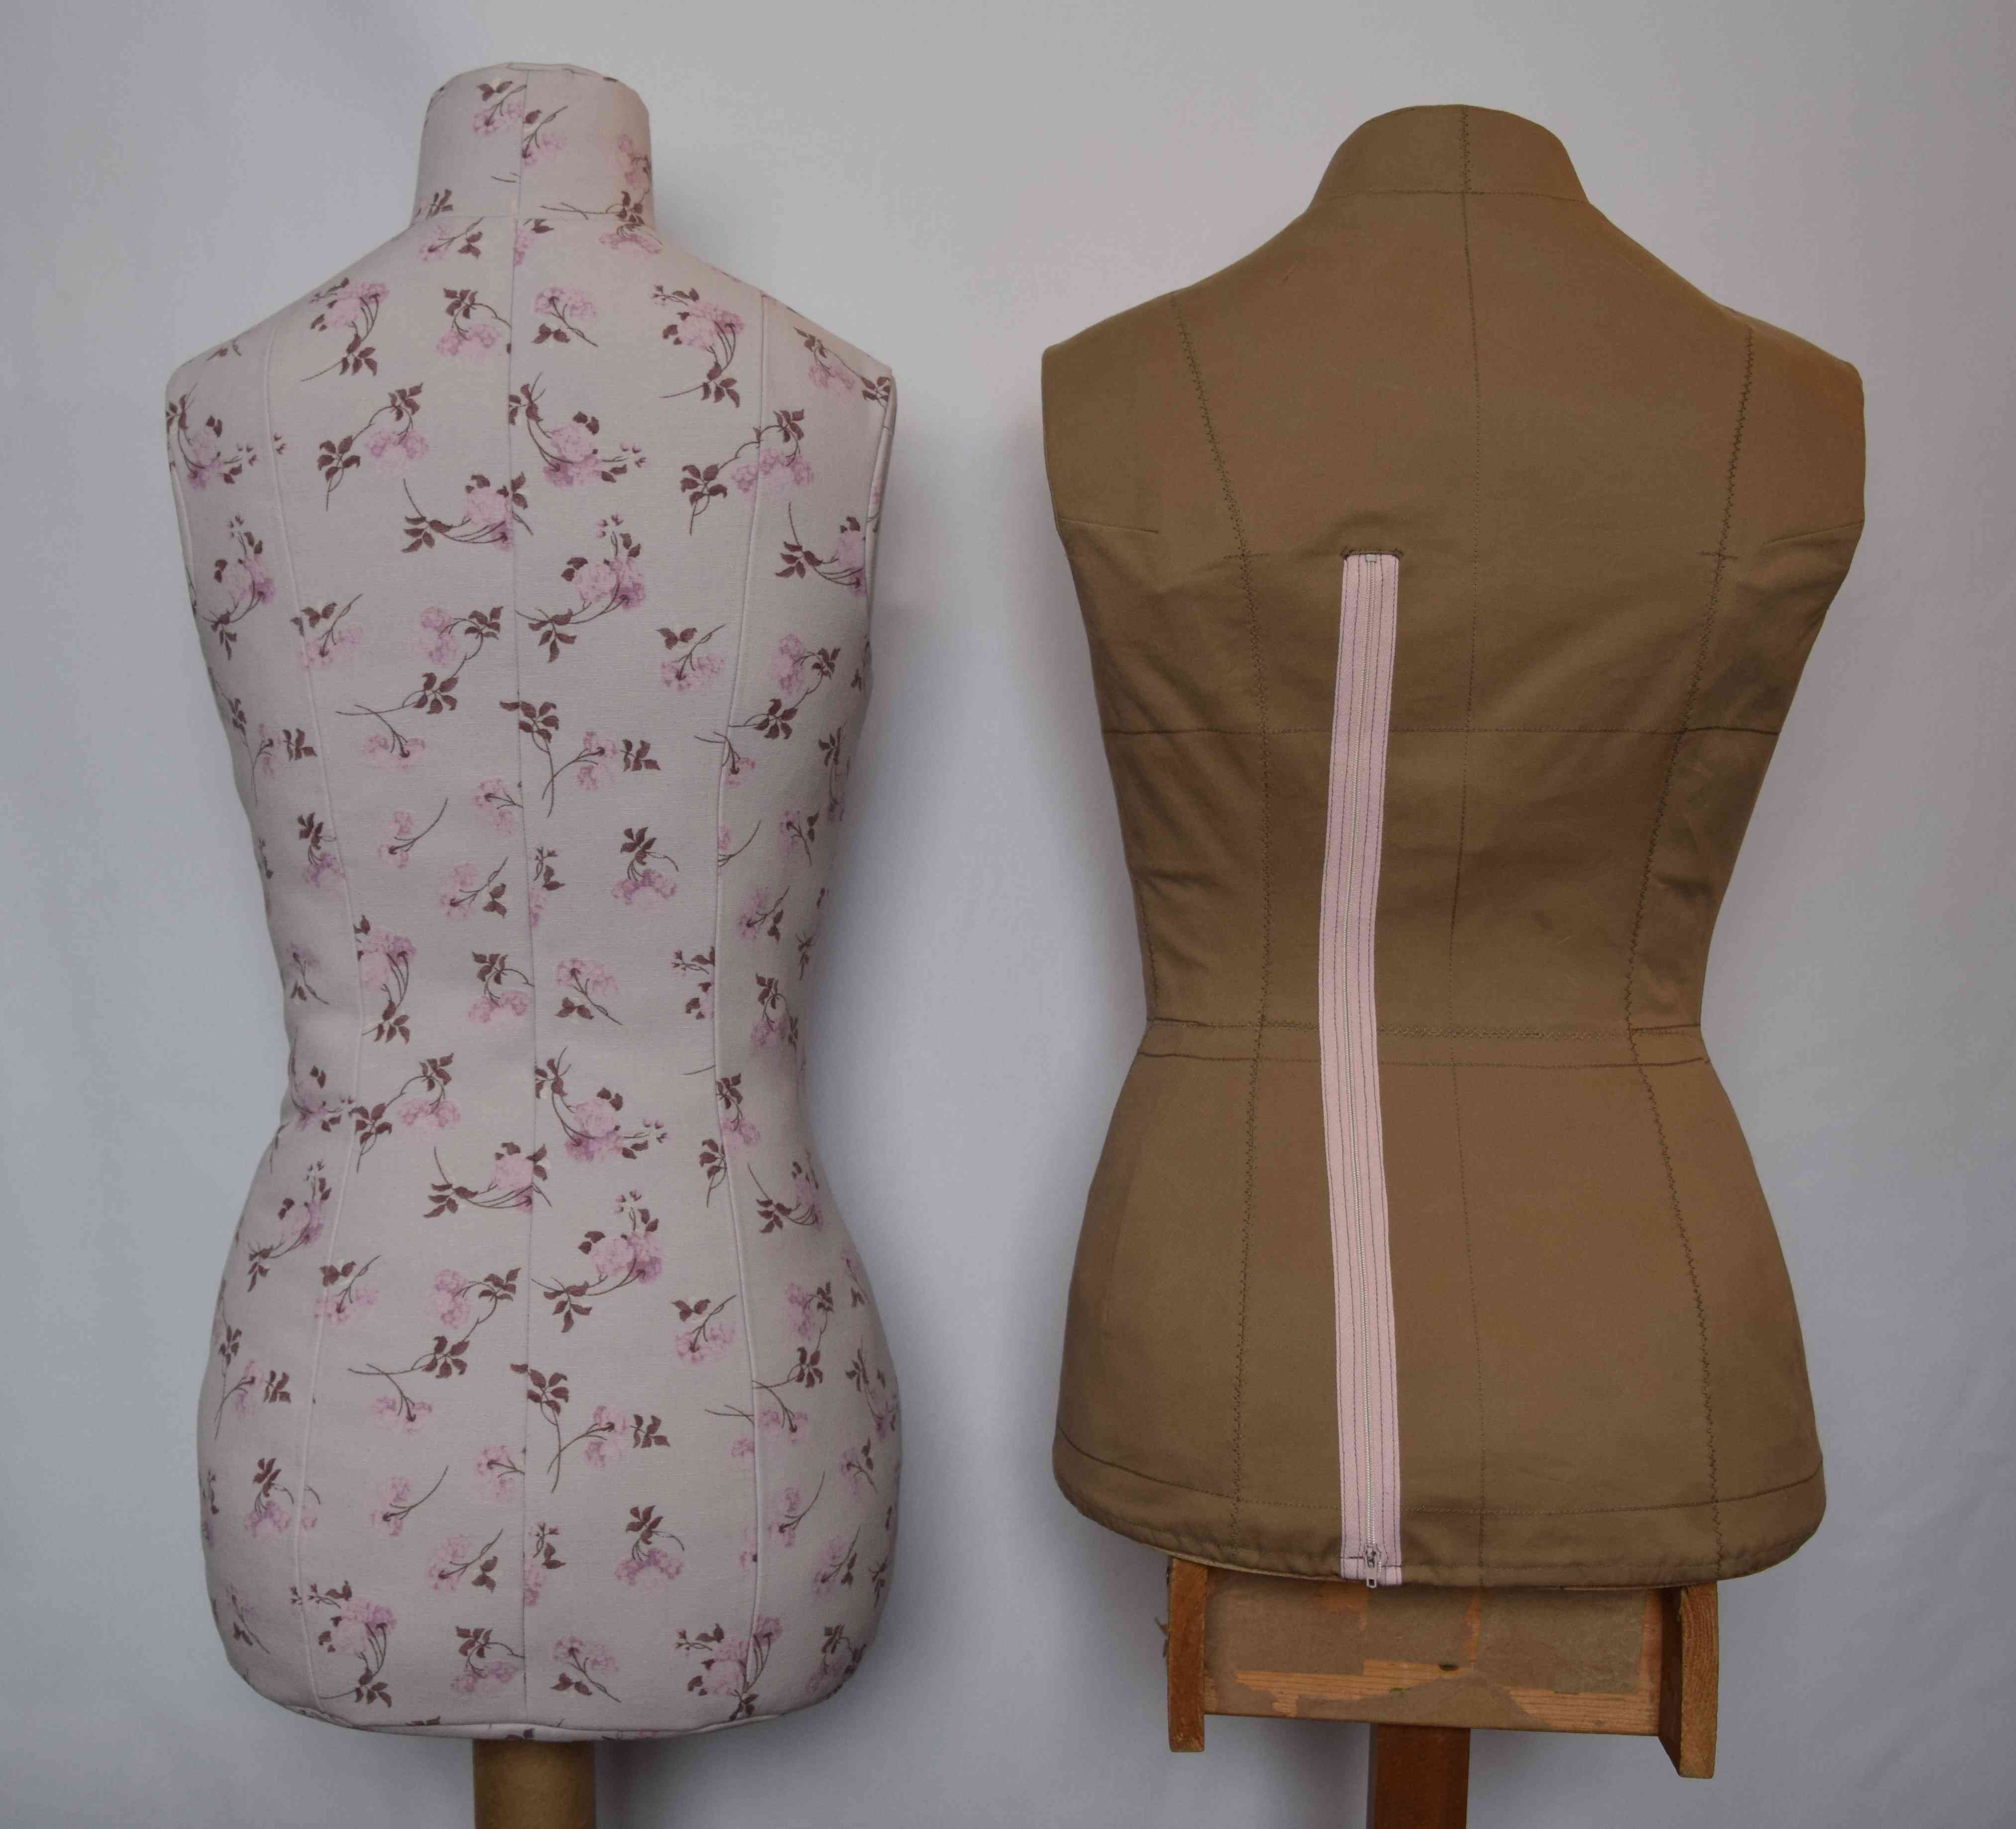

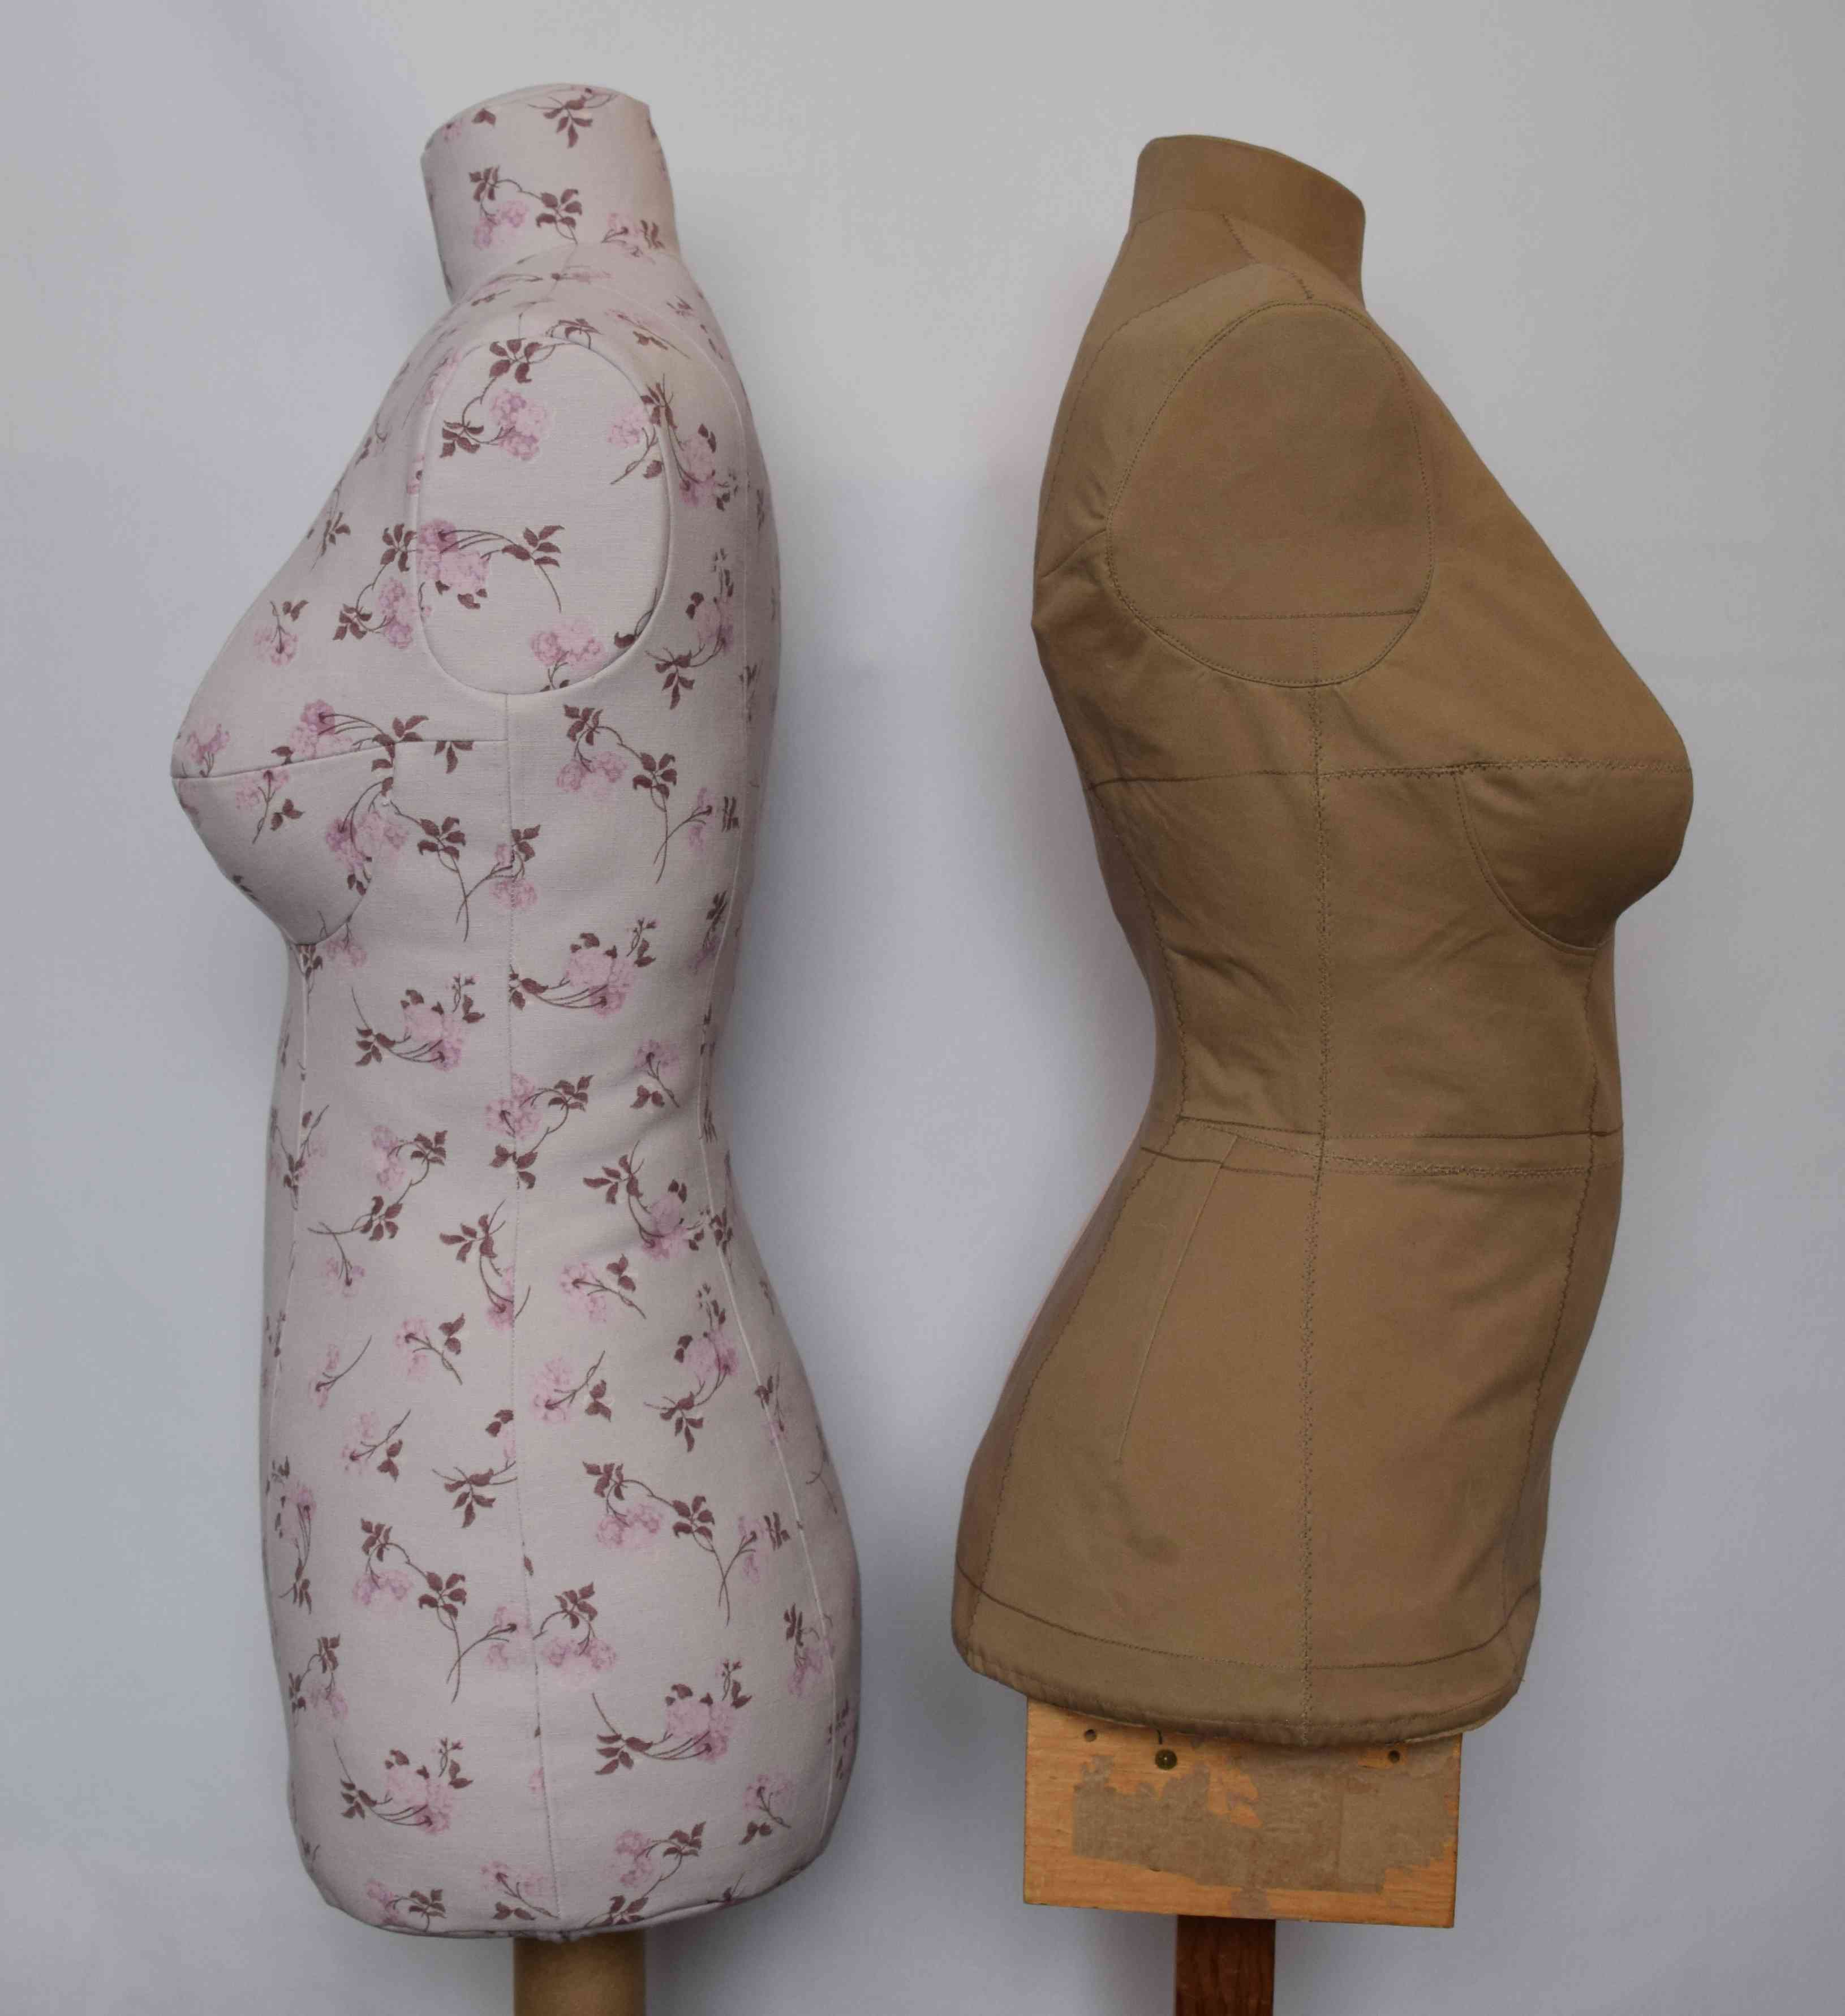
Since the shoulders are too sloped, I pinned some shoulder pads onto the form to get it to match my shoulder slope. The shoulder pads also allowed me to give the dress form forward shoulders like I have.
The dress form will work for me for the uses I have planned for it (steaming garments, primarily). It’s about my size, but it doesn’t match my body shape exactly. If I didn’t have my other custom dress form, I think I could use this form for initial fittings, but I would still need to make final alterations on my body.
When I started this project, I really wasn’t expecting the bust to come out perfectly, but I sewed it as-is for testing purposes. The bust is a really complicated shape of the body to try to reproduce the shape of, it varies in shape from person to person, and the shape changes as you stuff the dress form. If I was making this as my only dress form, I would have made the bust smaller than mine and then put a stuffed bra on the form to give me more control over the size, location, and shape of the bust.
If you want to use this dress form for fitting and your bust is larger than a B-cup, I suggest substituting your underbust measurement plus 6 inches (15 cm) for your actual bust measurement when you put in your measurements. This way your dress form will have a bust smaller than yours so you can put a bra on the dress form and stuff it, allowing you more control over the location, size, and shape of the bust.
I experimented with inputting an even smaller bust measurement to try to make a completely flat chest, but judging by the pattern preview, this distorted the body shape and did not result in a flat chest. So if you are a B-cup or smaller and want to reduce the size of the bust, I’d suggest putting in your actual measurements, then manually altering the pattern to have a smaller bust. If you are not confident making this alteration, you could sew up the pattern as-is, stuff it, and if the bust is not right, cut it open, pull out some stuffing, hand sew it shut, and put a stuffed bra on the form.
Here are the links to the dress form patterns, if you want to try making one for yourself.
Missy Dress Form*
Curvy Dress Form*
* Links in this post identified by an asterisk (*) are affiliate links. If you click through and make a purchase, I will earn a commission (at no additional cost to you).
I was provided this pattern at no cost to me.
 GrowYourOwnClothes Etsy Shop

[…] has to be one of the best things the internet and technology offered to mankind — Bootstrap Fashion! If you’re not familiar with it, Bootstrap Fashion is a website that generates patterns that […]
LikeLike
I have curve problem with my back if I buy dress with zipper then you see not flat but bubble..which I don’t like …it at all…then I can’t wear that dress
LikeLike