
This is the second post in a five part tutorial for making a paper tape dress form that truly matches your measurements and body shape.
Part 1: Introduction and Materials List
Part 2: Preparation
Part 3: Taping the Outer Form
Part 4: Making the Final Form
Part 5: Marking the Form and Making a Cover
Making the T-shirt
Most people suggest either taping over a T-shirt or a plastic bag when making a tape dress form. I’ve tried both, and neither work well. A loose fitting T-shirt adds too much bulk and the fabric gets bunched up under the arms. A tight T-shirt can distort the body shape and causes the dress form to buckle after it is removed from the body. Plastic against the skin is very uncomfortable, and it makes me feel like I’m going to faint. Also, if you use plastic, you won’t have a layer of fabric as part of the dress form, so it won’t be as rigid and you will need to apply more layers of paper tape. You wouldn’t think a layer of knit fabric would make the dress form more rigid, but it really does.
The solution I came up with is to draft and sew a simple custom fit T-shirt from 100% cotton rib knit fabric. It fits closely under the arms, goes up the neck, and stretches easily to fit the body without compressing it. If you have some cotton/spandex knit fabric on hand, you can use that instead of rib knit fabric, but don’t use synthetic fabric or cotton/polyester blend fabric, because the paper tape will not stick to it well.

Here’s how to draft the T-shirt. I recommend you take the measurements in centimeters, not inches, to make the calculations easier.
Measurements to take:
_______ Neck circumference
_______ Neck length
_______ High bust. The high bust measurement is taken around the body just above the bust. For figures without a bust, substitute the chest measurement for the high bust.
_______ Bicep. Measure around the fullest part of the upper arm.
_______ Side neck to waist. Measure from the point where the shoulder seam meets the neckline straight down the back to the waistline.
_______ Waist
_______ Hip
_______ Waist to hip. Measure the vertical distance between the waist and hip.
_______ Hip to desired length of T-shirt. Measure vertically from the hip line down to where the bottom edge of the T-shirt will be. I suggest making the T-shirt at least mid thigh length.
Make the following calculations. If your measurements are in inches, make the following substitutions in the formulas below: 3/8″ for 1 cm, 3/4″ for 2 cm, 4″ for 10 cm.
A = [Bicep]÷2 + 2 cm = _______
B = [Neck circumference]÷4 + 1 cm = _______
C = [Neck length] = _______
D = [High bust]÷4 = _______
E = 10 cm
F = [Side neck to waist] = _______
G = [Waist]÷4 = _______
H = [Waist to hip] = _______
I = [Hip]÷4 = _______
The front and back will be cut from the same pattern piece.
Draw a long vertical line for the center front/center back line (or use the edge of your paper for this line).
Draw a line representing the shoulder slope. For shoulders with average slope, mark a point on the center line, then measure out 40 cm and down 16 cm to locate a second point. Draw a line through the two points. If the model has especially square or sloped shoulders you can hold up the paper to the model and sketch in the slope instead. It does not have to be exact.

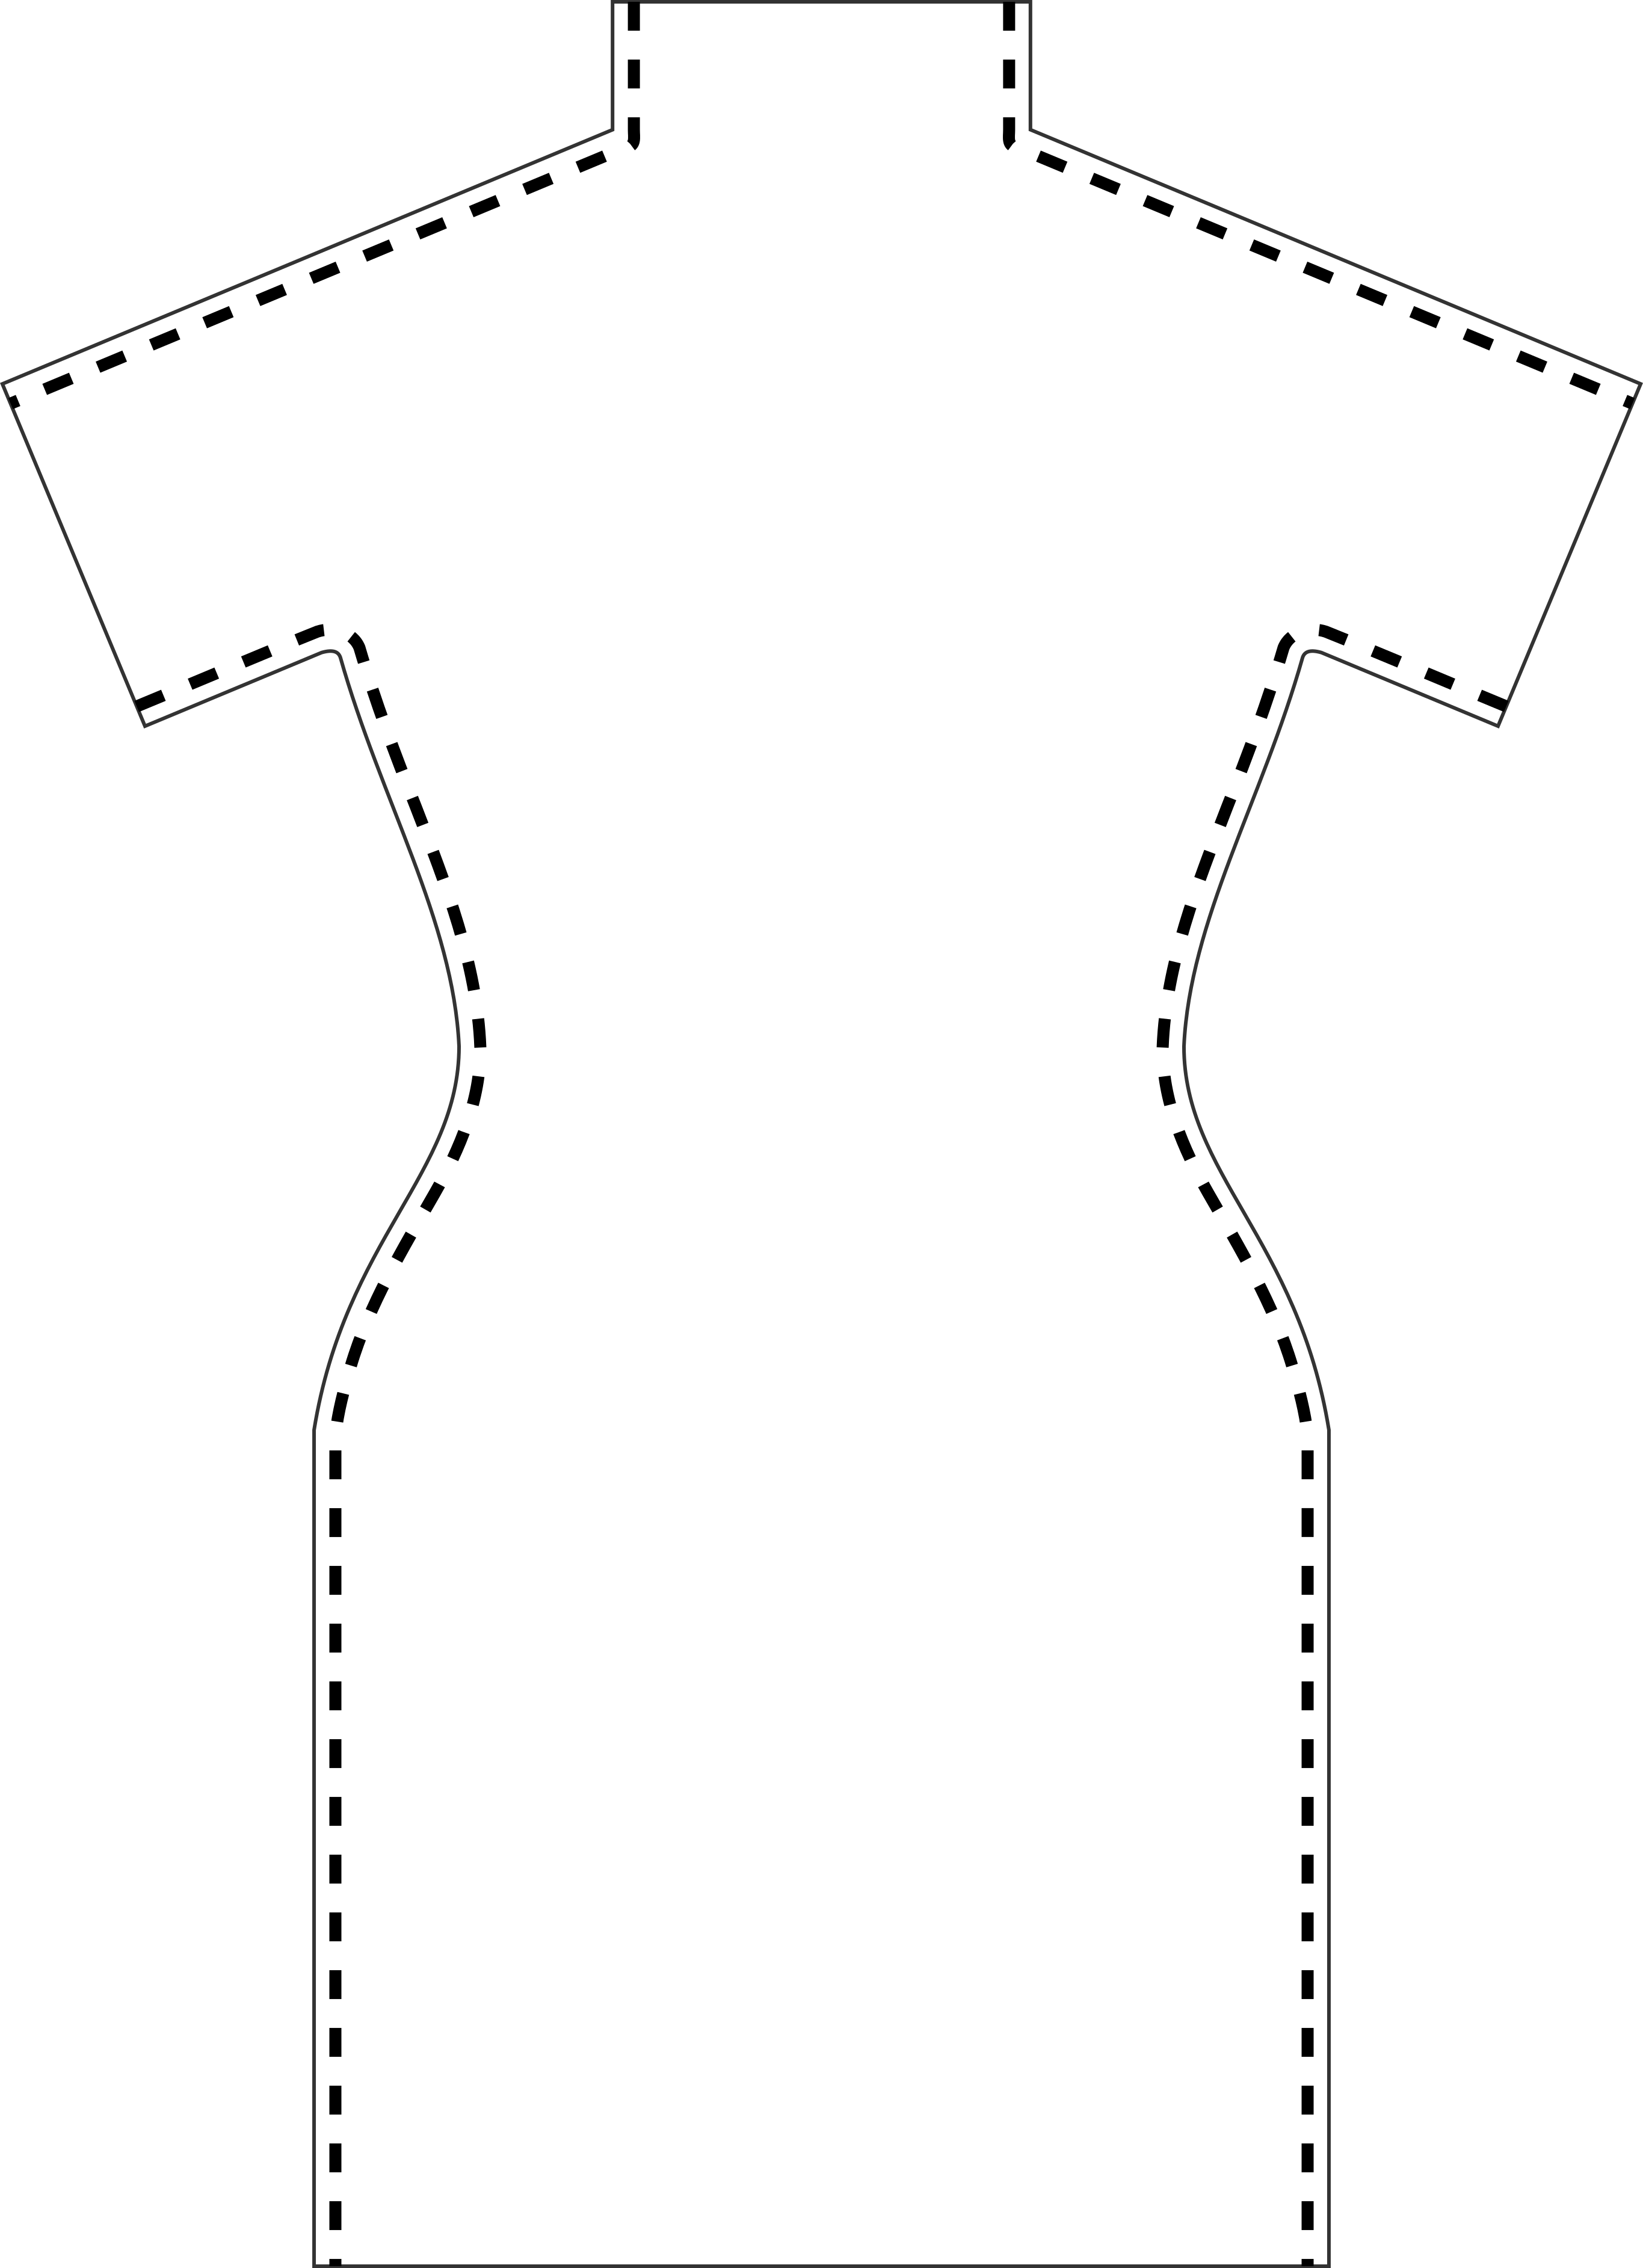
Refer to the figure below for the following steps:

Draw a line parallel to the shoulder line that is a distance A below it.
For the neck, draw in a line parallel to the center line a distance B out from the center line.
Measure up from the side neck point a distance C and square off the top of the neck.
Measure out D to locate the underarm point.
From the underarm point, measure out E for the length of the sleeve, and square off the end of the sleeve. This is an arbitrary length – you can make the sleeve a little shorter if your fabric is not wide enough. Having the sleeve there just keeps the model warmer and keeps deodorant/sweat/hair out of the tape.
From the side neck point, measure down F to locate the waist line. Measure out G on the waist line and make a mark.
From the waistline measure down H to locate the hip line. Measure out I on the hip line and make a mark.
Draw a fairly straight line from the underarm point to the waist, then curve out to the hip.
Extend the pattern down straight below the hip line to the desired length.
Mark “cut on fold” on the center front/center back line, and cut out the pattern. 1 cm (3/8″) seam allowances are already included on the pattern, so you don’t need to add seam allowances. Cut 2 on fold, with the direction of greatest stretch of the fabric going around the body.

Cut a vertical slit down the center of the neck on one of the pieces of fabric. This will be the front.
Place the T-shirt front on the model’s body to locate the bust points and draw cross marks on the bust points. Remove the fabric from the body and cut on the marked lines. (If your model has a small bust or does not have a bust, skip this step.)


Using a serger or zig-zag stitch, stitch the T-shirt front to the back at the shoulder/neck seams, then the underarm/side seams, with 1 cm (3/8″) seam allowances. If you sew the seams with a zig-zag stitch, trim the seam allowance close to the stitching.
Using Water Activated Paper Tape
The person or persons who will be wetting and/or applying the paper tape should practice using it on inanimate objects before the actual dress form taping session. Cover a curved object such as a soda bottle with plastic wrap, apply two layers of tape to the object, overlapping each piece of tape, and let it dry. When the tape is dry, it should not bubble up or peel up on the edges. When the tape is removed from the object, it should hold its shape.
The first thing you need to think about is the humidity in the room you will be making the dress form in. If you live in a very dry climate, the tape will dry before you can apply it, so you need to raise the humidity, either by running a humidifier or doing the taping in a bathroom after the shower has been used.
Links in this post identified by an asterisk (*) are affiliate links. If you click through and make a purchase, I will earn a commission (at no additional cost to you).
If the humidity is high, you will need to run a dehumidifier or air conditioner to lower the humidity so the tape will dry. You can also use a hair dryer to help the tape dry. If your climate is very humid, I’m not sure how well a paper tape dress form will hold up over time, so this method of making a dress form might not be the best option for you. If you use expanding foam on the inside, let the form dry completely in a dry room, then spray or paint on a moisture resistant sealer (such as Krylon Acrylic Spray*) after the tape is dry on the final form, it might be fine in a humid climate, though (I live in a pretty dry place, so I’m just guessing).
Making a paper tape dress form can take several hours, which can be tiring for everyone involved. To speed up the process, pre-cut a large pile of tape pieces, and if possible, have two helpers to do the taping and two people cutting and wetting tape. In my experience, it takes 3 to 4 hours to tape up the model with only one person doing everything, so you may be able to get the process done in an hour or so with more helpers.
The people doing the taping don’t need to know anything about sewing. Good attention to detail, the ability to follow directions, and a reasonable amount of dexterity are all that is required.
You will get the best results if you cut the tape lengthwise into narrower strips. Cut several long pieces, stack them up and cut them together, then cut them into shorter pieces. If your tape is more than 2 inches wide, cut it lengthwise to reduce the width of the tape. If you use pieces that are too wide, these areas tend to warp and ripple, don’t stay flat, and flex more. I think this is because the paper tape shrinks a little as it dries. Narrow pieces of tape are necessary if your model is small and/or has a lot of curves.
There are some tricks to using paper tape. If you don’t wet it correctly, the tape will not adhere properly, so the dress form will be too flexible and the tape will peel off. If you do not get the tape wet enough, the tape will not adhere well and it will peel off. If the tape is too wet, it may initially look like it adhered fine, but after it is dry it will bubble and peel up.
This really isn’t as hard as I’m making it sound, but I’m going into a lot of detail on this because this is all stuff that I wish I knew years ago when I first started using paper tape. Even if you don’t wet and apply the tape perfectly, you’ll still get a usable dress form. It just won’t be quite as firm and the tape will peel up around the edges, so don’t freak out and decide it’s too hard before you even start!
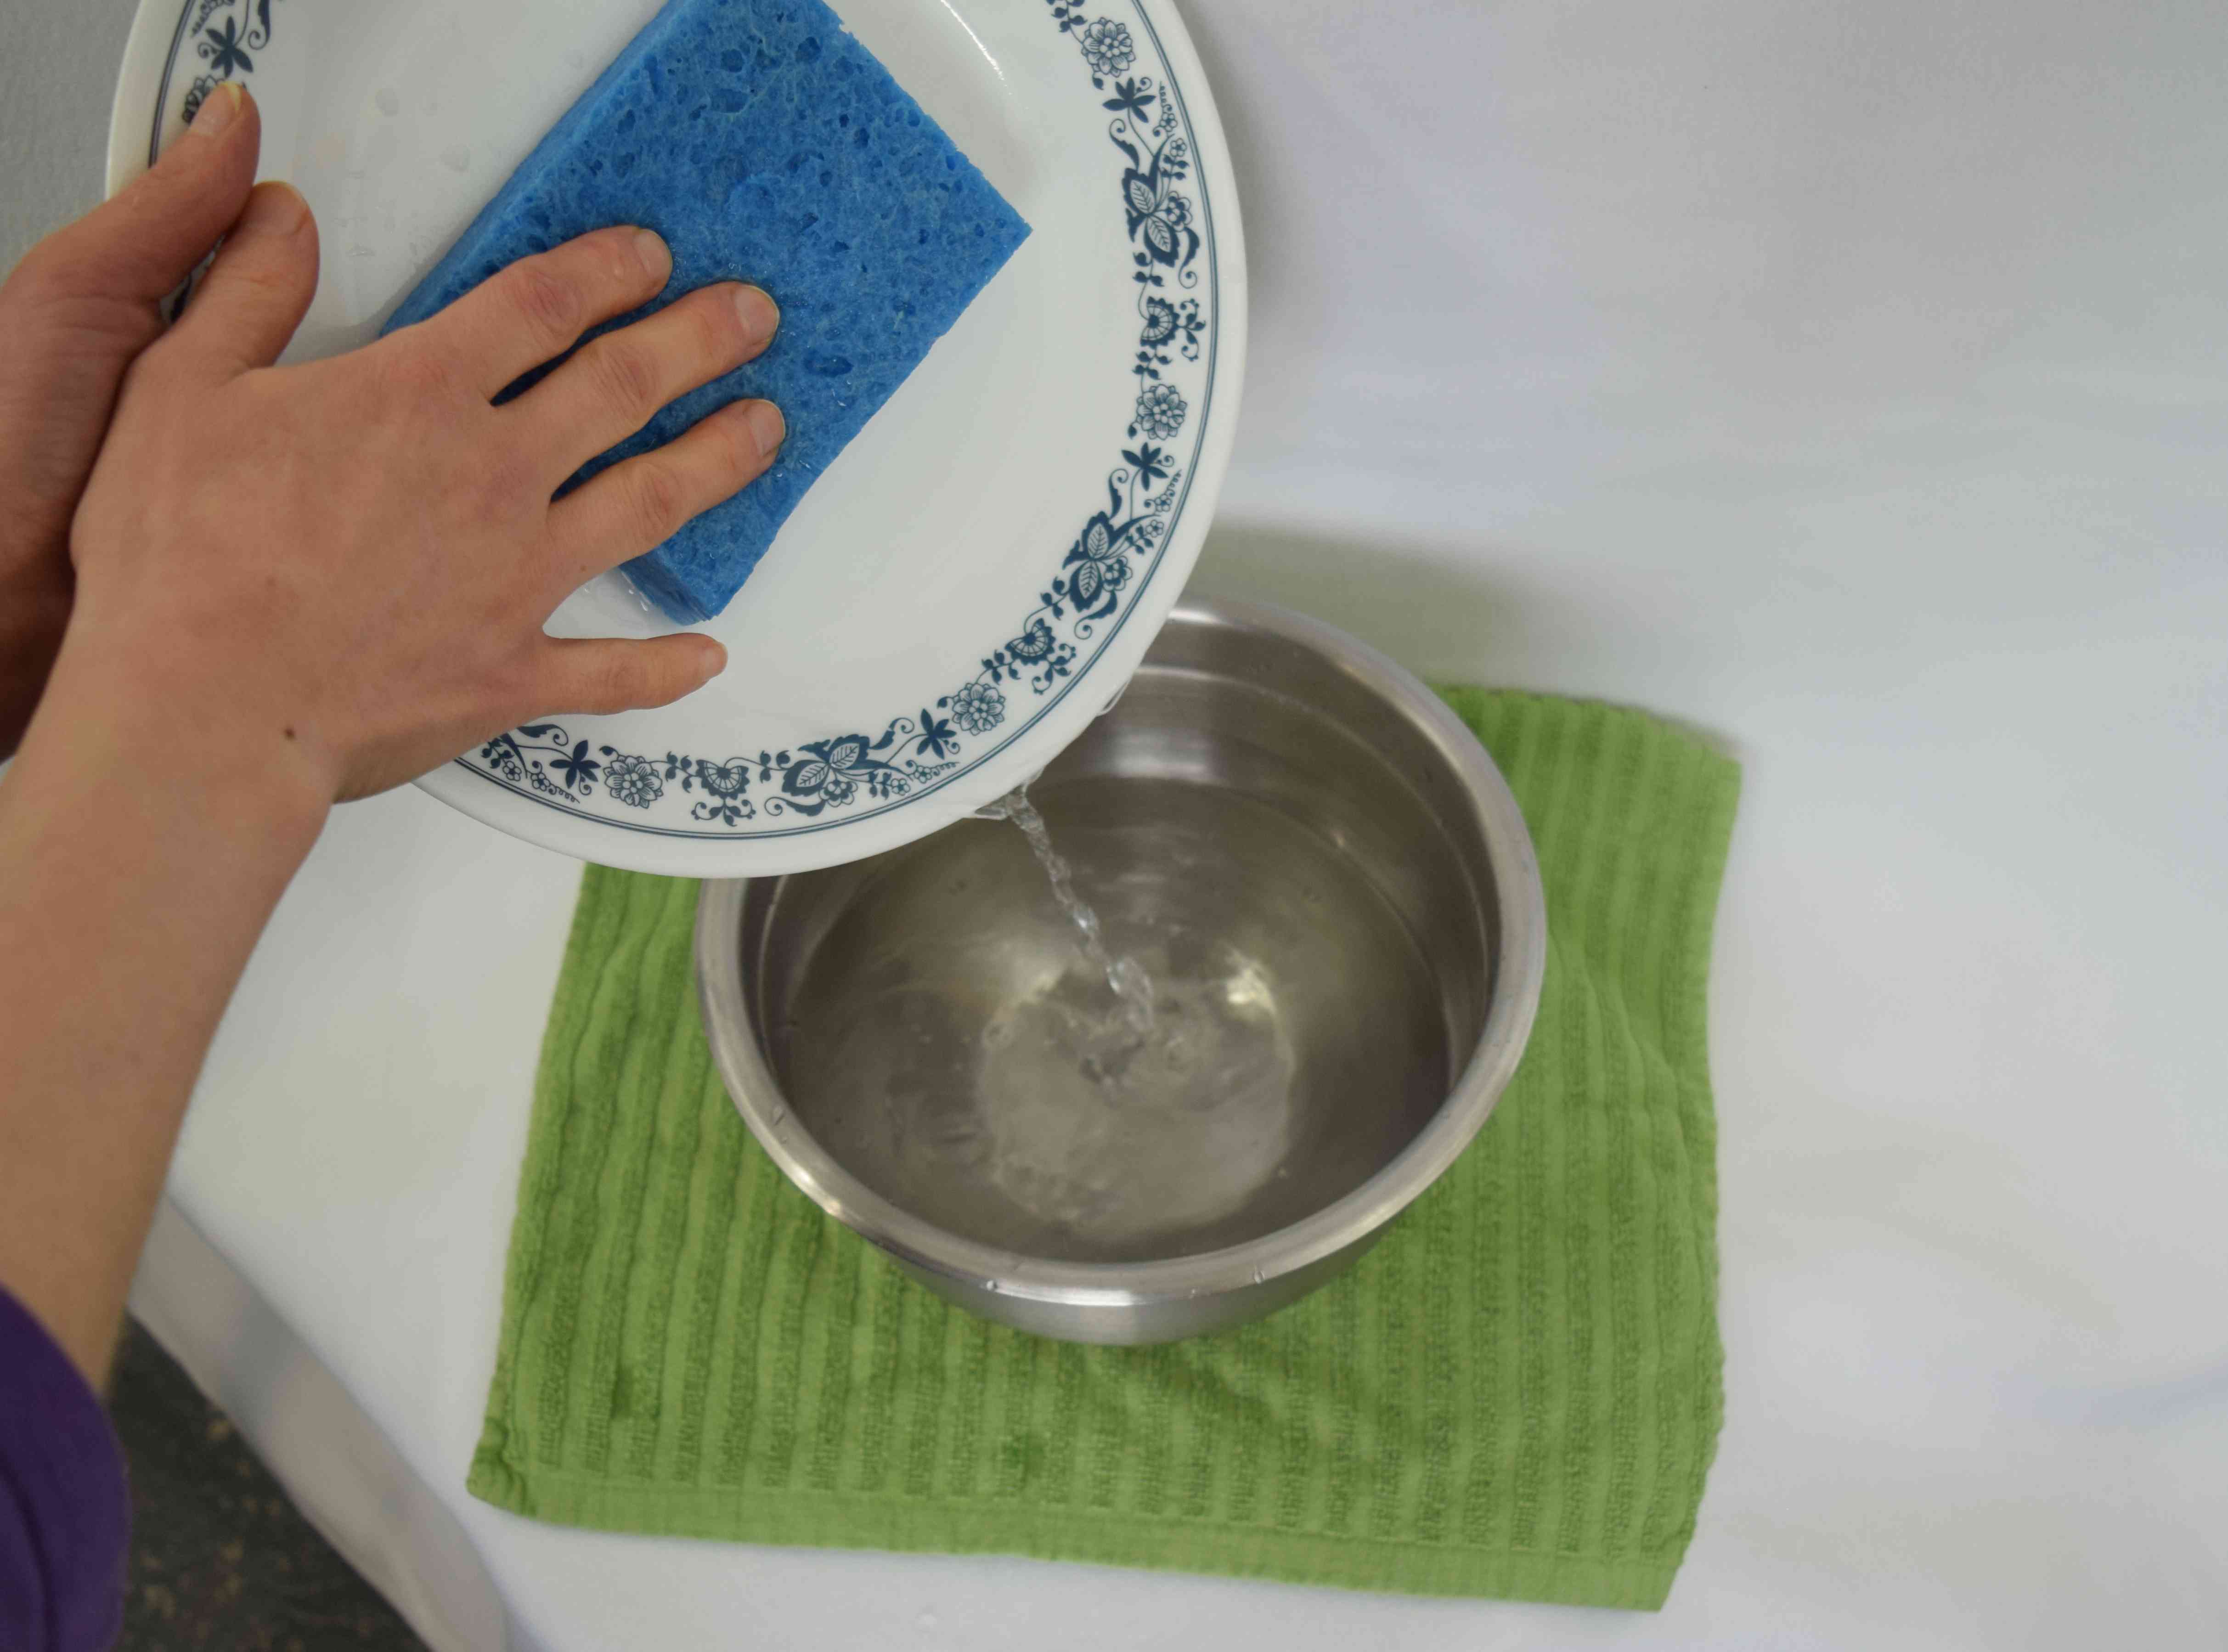
First, dunk a sponge in a bowl of water.

Place the sponge on a plate, then gently press on the sponge while holding the plate at an angle over the bowl to squeeze a little of the water out. You want your sponge almost saturated, but not quite. The sponge should not be sitting in a puddle of water on the plate. The exact amount of water you need in your sponge will vary depending on humidity – you’ll want your sponge a little wetter if the air is dry. You’ll have to experiment to get it just right. Re-wet your sponge every 15-30 minutes.
To wet a piece of tape that is smaller than the sponge, place it adhesive side down on the sponge and pat it down onto the sponge. Pick up the tape as soon as the whole piece is wet – don’t let the tape sit on the sponge too long.

To wet a long piece of tape, press one end onto the sponge, then pull the rest of the tape over the sponge while holding the tape down with your other hand. You’ll have to experiment to get the right speed and pressure. If you pull too slowly and press down hard on the tape, you’ll actually wipe the glue off of the tape. If you go too fast and/or don’t press firmly enough, you may miss getting some of the tape wet.

When you are applying tape, wet a piece of tape, set it aside, then wet another one. Now set aside the second piece of tape and apply the first one. Always wet another piece of tape before applying the one that has been sitting. Letting the tape sit for a few seconds gives the glue time to activate and get really sticky. The tape will stick better, peel up less, and create a more rigid form with fewer layers when you do this. Just make sure you don’t let the tape sit so long that the glue dries.
Preparing the Model
The model will be standing for hours, and won’t be able to use the bathroom during this time. There are a few things you can do to make them more comfortable.
First, the model can have a small drink of water and a snack, then lie down with their feet propped up for 30 minutes. This will help the kidneys process the extra fluid in the body much faster. Then they should use the bathroom right before you start taping.
The model should wear their usual undergarments, with only the custom made T-shirt over that. If she regularly wears both non-padded and padded bras, I suggest wearing the non-padded bra for making the dress form, since you can pad out the dress form to be larger later, but you can’t make it smaller. One thing you can do to accommodate different bras is to only tape around the edges of the breasts, leaving most of the breasts untaped. Close up the holes on the finished dress form with cardboard and more paper tape, then put a bra on the dress form and stuff it until you get the right shape and bust measurement. This way you can have one dress form, but still be able to fit a garment to a specific bra.
Shoes affect posture, so if the model regularly wears high heels and thinks she will be OK standing in them for hours, she should wear shoes with the heel height she wears most often. If the model is wearing shoes, note down which shoes they are wearing and measure the heel height. If the model opts to not wear shoes, they should wear warm socks.
The room should be quite warm. As the tape dries it will chill the model, so have a warm hat ready for when they get cold. I wished I had some leg warmers when I was being taped. A heater or heat lamp aimed at the model would be nice, too.
Standing on an antifatigue mat* or other cushioned mat will make the model more comfortable.
The model will start to feel uncomfortable when they are completely taped up and can’t take a full breath. Coughing, laughing, or completely expelling the air from the lungs can help relieve the feeling of needing take a full breath.
The model needs to stand with their usual posture during the taping, but they can and should move their lower legs and feet whenever possible during the taping. The model can bend a leg at the knee, raising their foot behind them, rotate their ankles, and scrunch their toes. They should start doing this right away instead of waiting until they feel uncomfortable.


OK, now you are ready for Part 3 – Taping the Outer Form
* Links in this post identified by an asterisk (*) are affiliate links. If you click through and make a purchase, I will earn a commission (at no additional cost to you).
 GrowYourOwnClothes Etsy Shop

Thank you so much for this detailed series. This is such an incredible and complete resource. Even my boyfriend (who has negative artistic skills) should be able to follow the instructions to paper tape me up.
LikeLike