
Update 11/30/2024: I uploaded the buttonholer cams and top hat cams here, if you want to print them yourself.
I decided to attempt to make a 3-step zig-zag special disc for my Singer 411G. In my opinion the 4-step zig-zag that is built in just isn’t a substitute. I usually use a 3-step zig-zag when I’m sewing through elastic, and the fewer stitches you put through elastic, the better.
Time for a little analog computer programming. I carefully measured one of my existing special discs, deciphered the “code”, and drew up a 3-step zig-zag disc. I decided to draw up the design in Tinkercad, since it’s free and has a short learning curve. In Tinkercad you basically stack a bunch of geometric shapes together to make more complex shapes. I used Inkscape to draw the more complicated shapes that could be extruded, then imported the .svg files into Tinkercad. Hooray for free software.
After I finished the 3-step zig-zag disc, I decided to make a few more things while I still remembered how to use the software. The only Singer slant needle to standard snap-on foot adapter available is a simple plastic one, and it’s not that great, so I decided to try to improve the design a little. I also made some tension stud sprockets for my Singer 237, and the two missing template sizes that were never made for my buttonholers.

I had the parts printed by Shapeways. The only low-cost, high resolution option they offer is their “Strong and Flexible” plastic (nylon). I figured ABS would be better for strength and abrasion resistance, but I couldn’t find a 3D printing site with reasonable prices for high resolution ABS that would also allow me to sell the parts to other people. I figured after going to the trouble of making these parts, it would be nice to be able to make them available to other vintage sewing machine enthusiasts.
At least initially, nylon seems to be OK for these parts. The parts are thick enough that they are rigid, not flexible. They are very lightweight, but seem strong enough. Only time will tell how they hold up under use.
The 3-step zig-zag disc was a little tight. I had to file one of the holes a little larger to get it to go on my machine.

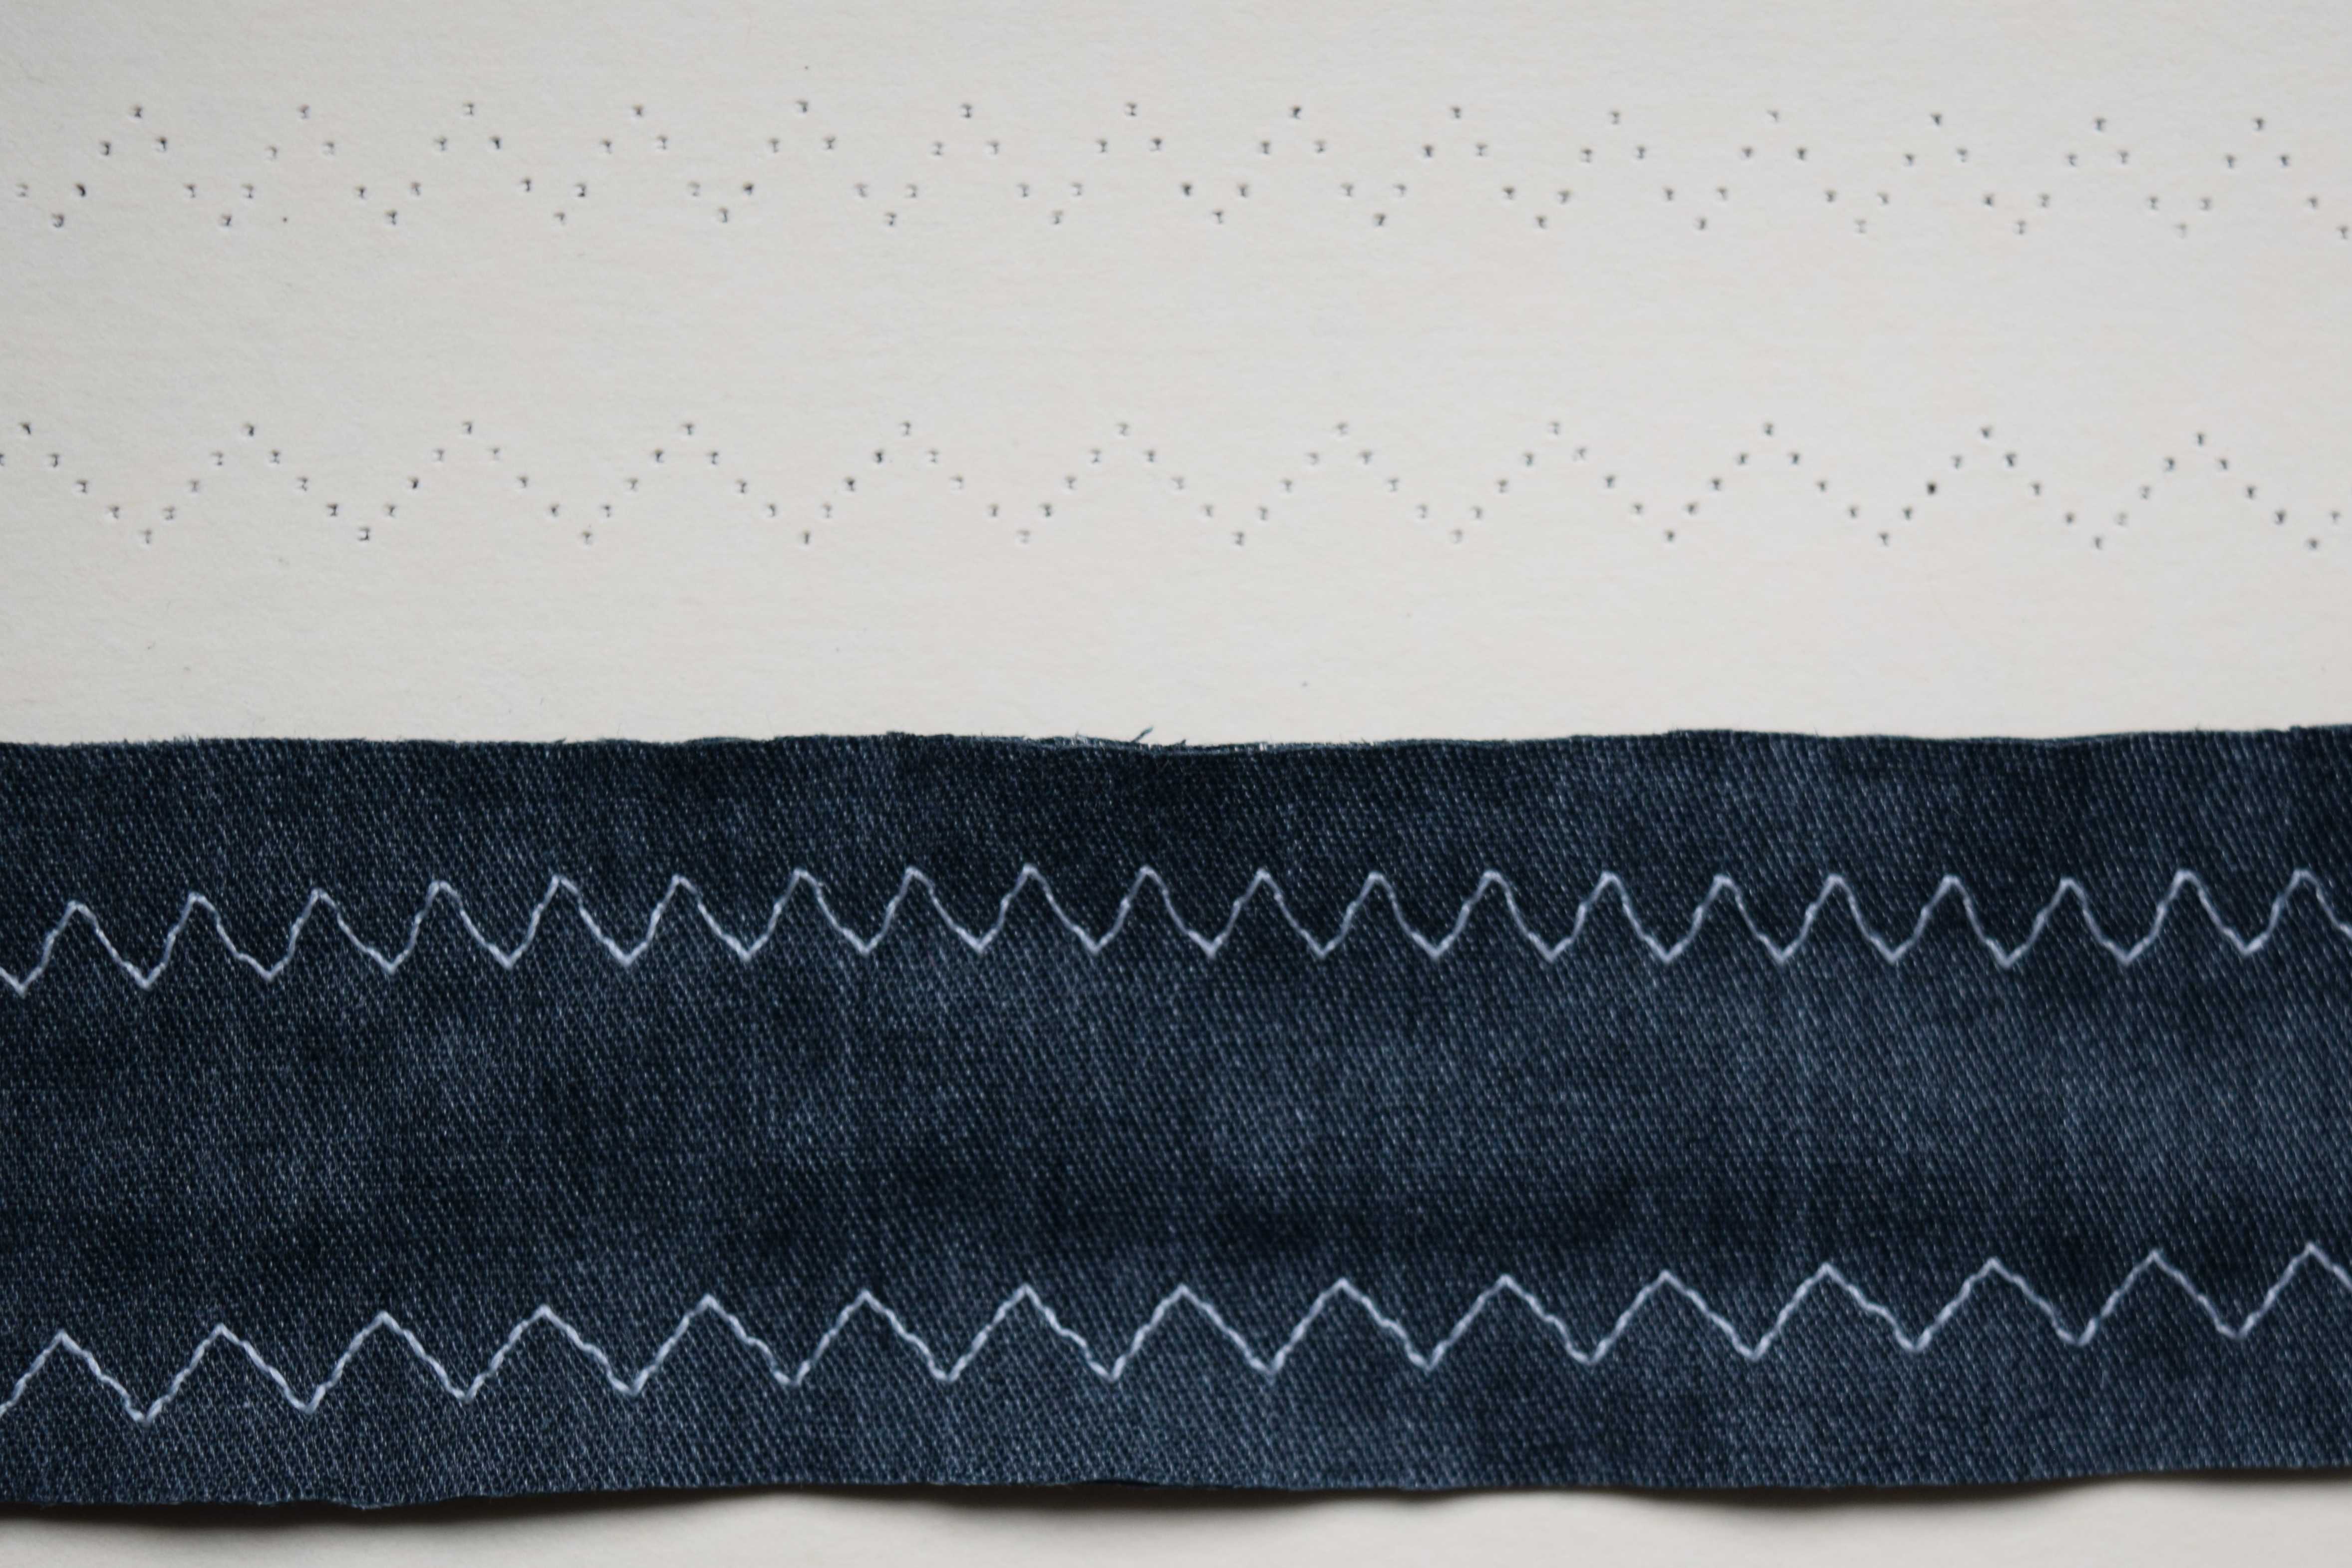
Here’s my 3-step zig-zag disc next to an original Singer special disc. These are for the Singer slant needle machines with model numbers in the 400’s, 500’s and 600’s that take the original style black “top-hat” stitch pattern discs.

The stitch quality is not perfect, but the disc works! I’m pretty sure the crooked stitches are due to minor math and drafting errors on my part, not a printing problem, since it looks like the stitches are shifted the same amount on each set of stitches. I showed the stitches to my husband, and he thought they looked straight, so maybe it’s not that noticeable. I think I’ll use this disc for a while, and if it doesn’t wear out too fast, I’ll correct the design and make it available for others to purchase. (A 3-step zig-zag disc and 2-step zig-zag disc are now available for purchase in my Shapeways shop.)
Here’s the 3-step zig-zag compared to the 4-step. For the top two rows, I unthreaded my sewing machine and sewed on heavy paper.
The plastic snap-on slant needle adapter I previously purchased isn’t designed very well. The presser foot sits too far to the right, and it’s a bit crooked:
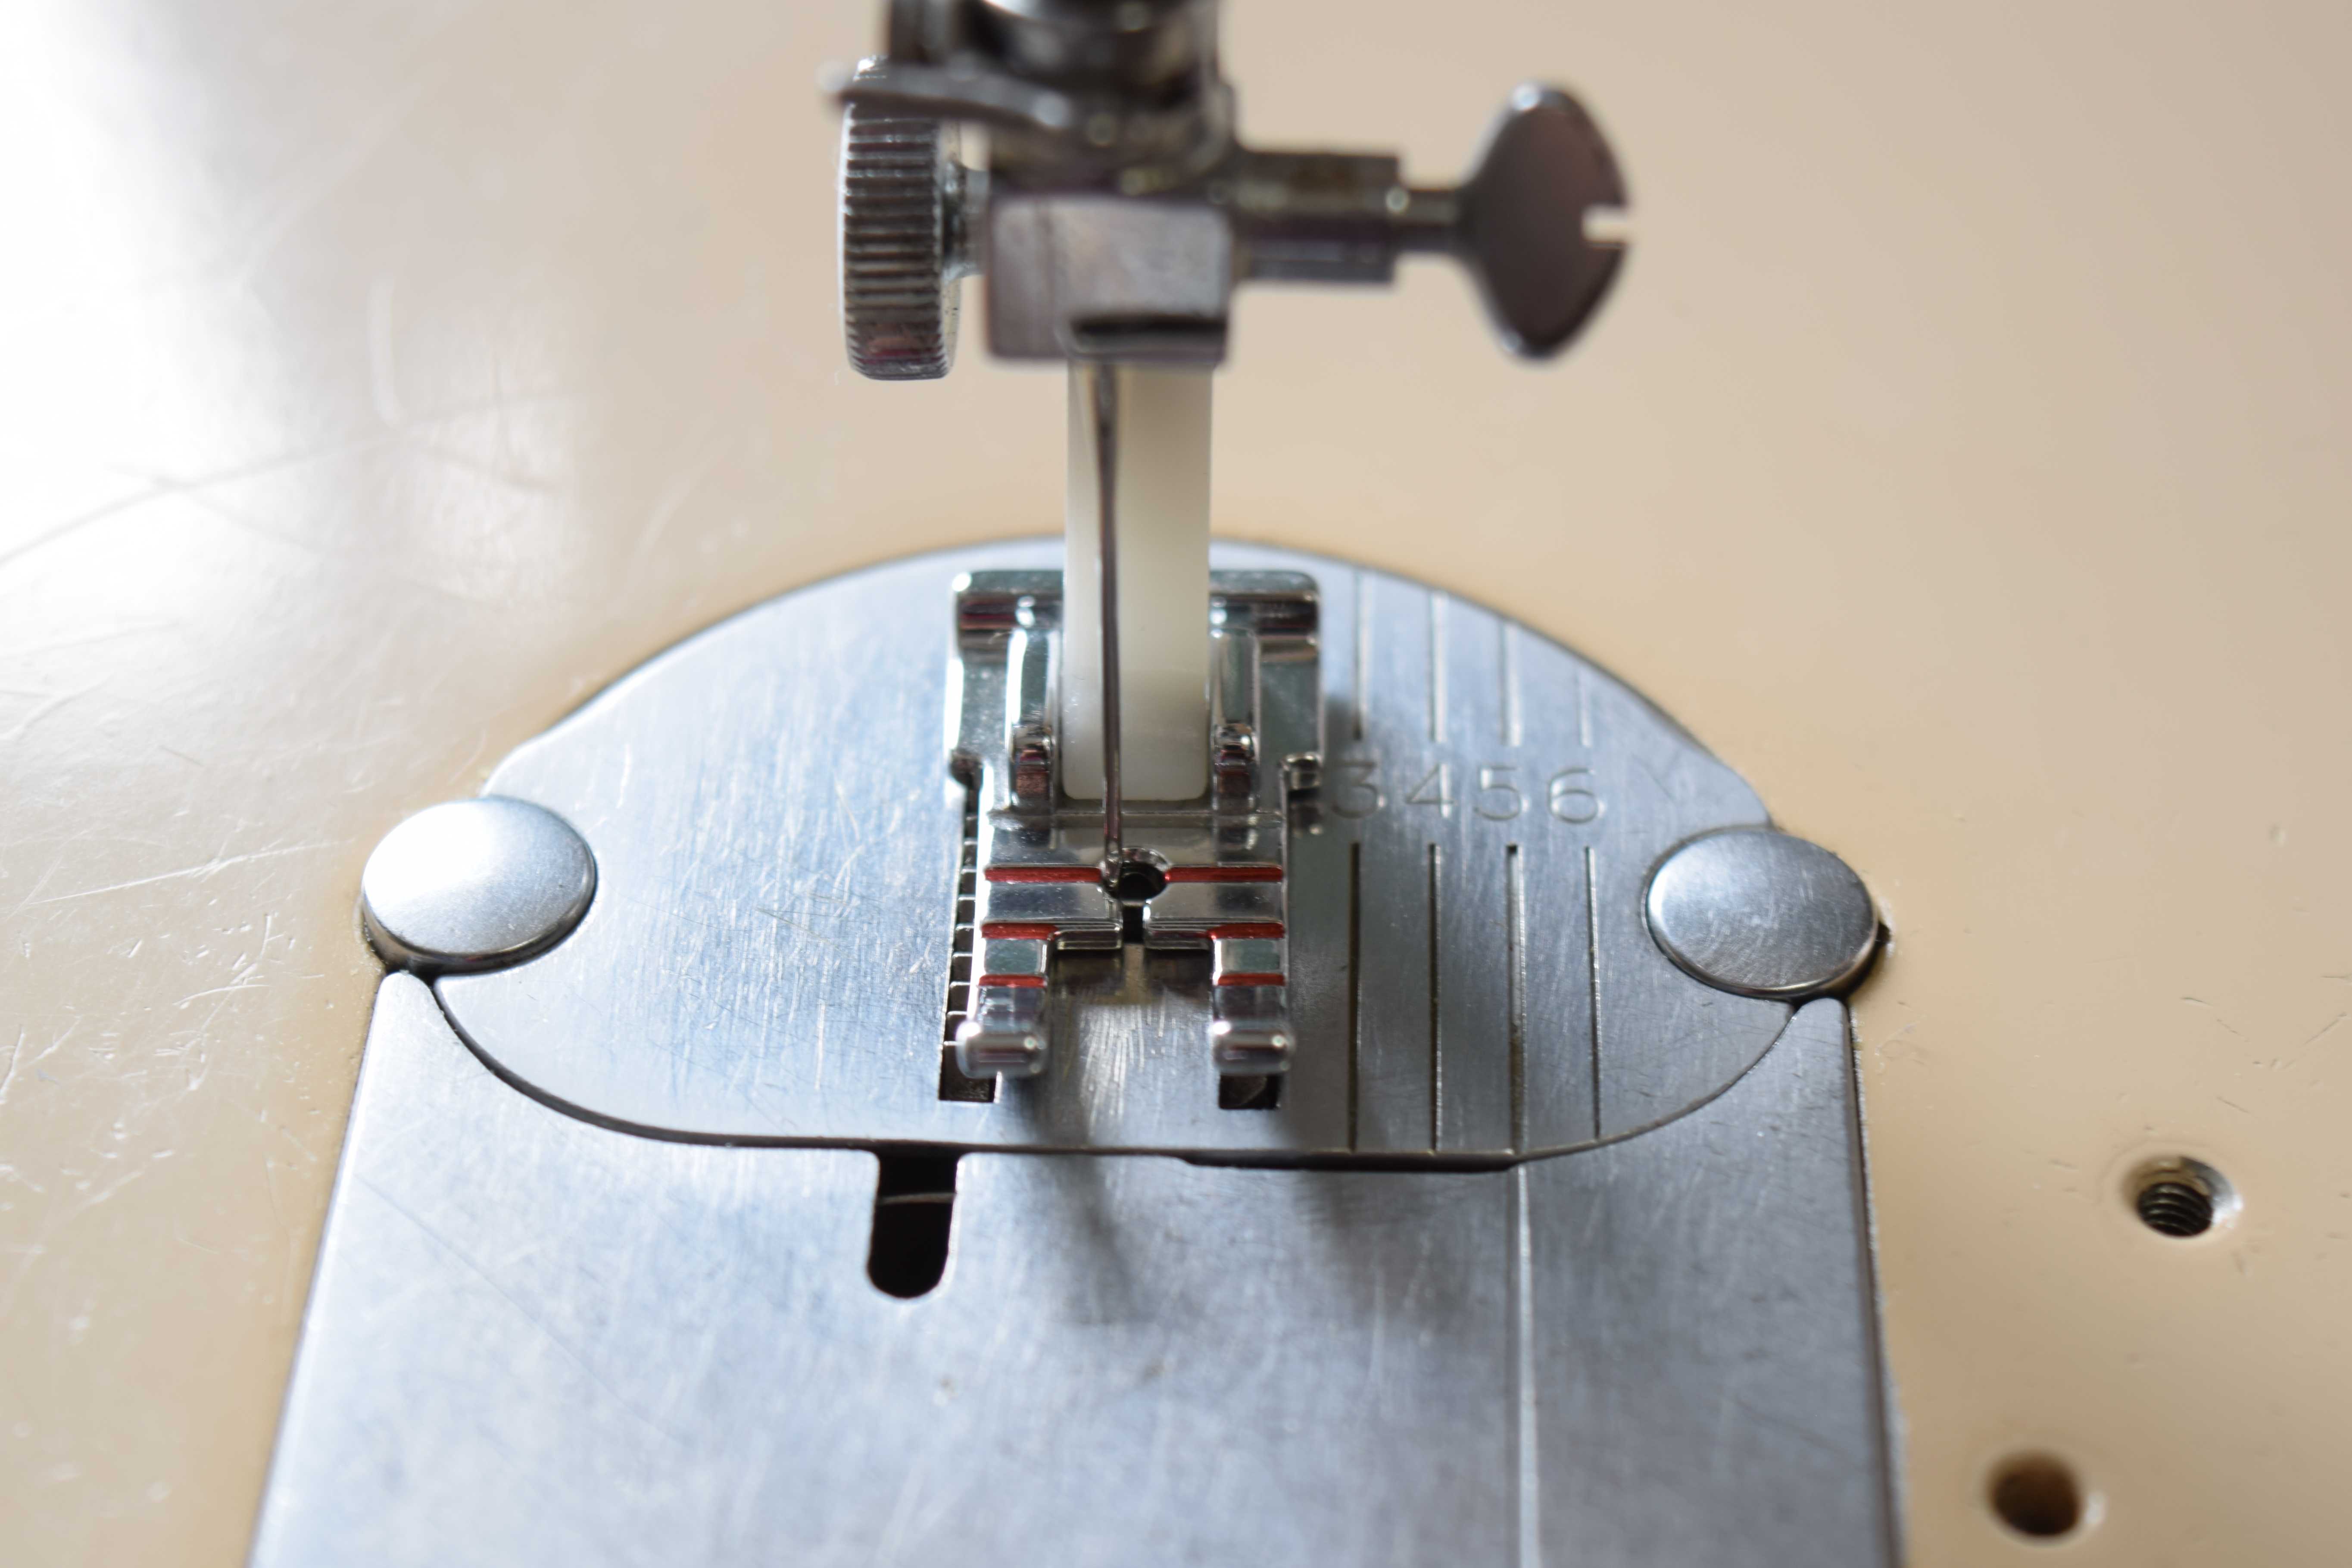
I designed my version so the foot would sit a little further to the left, but it ended up not being far enough. It’s kind of hard to measure what shape it should be. At least the foot is sitting straight now. This is my version:
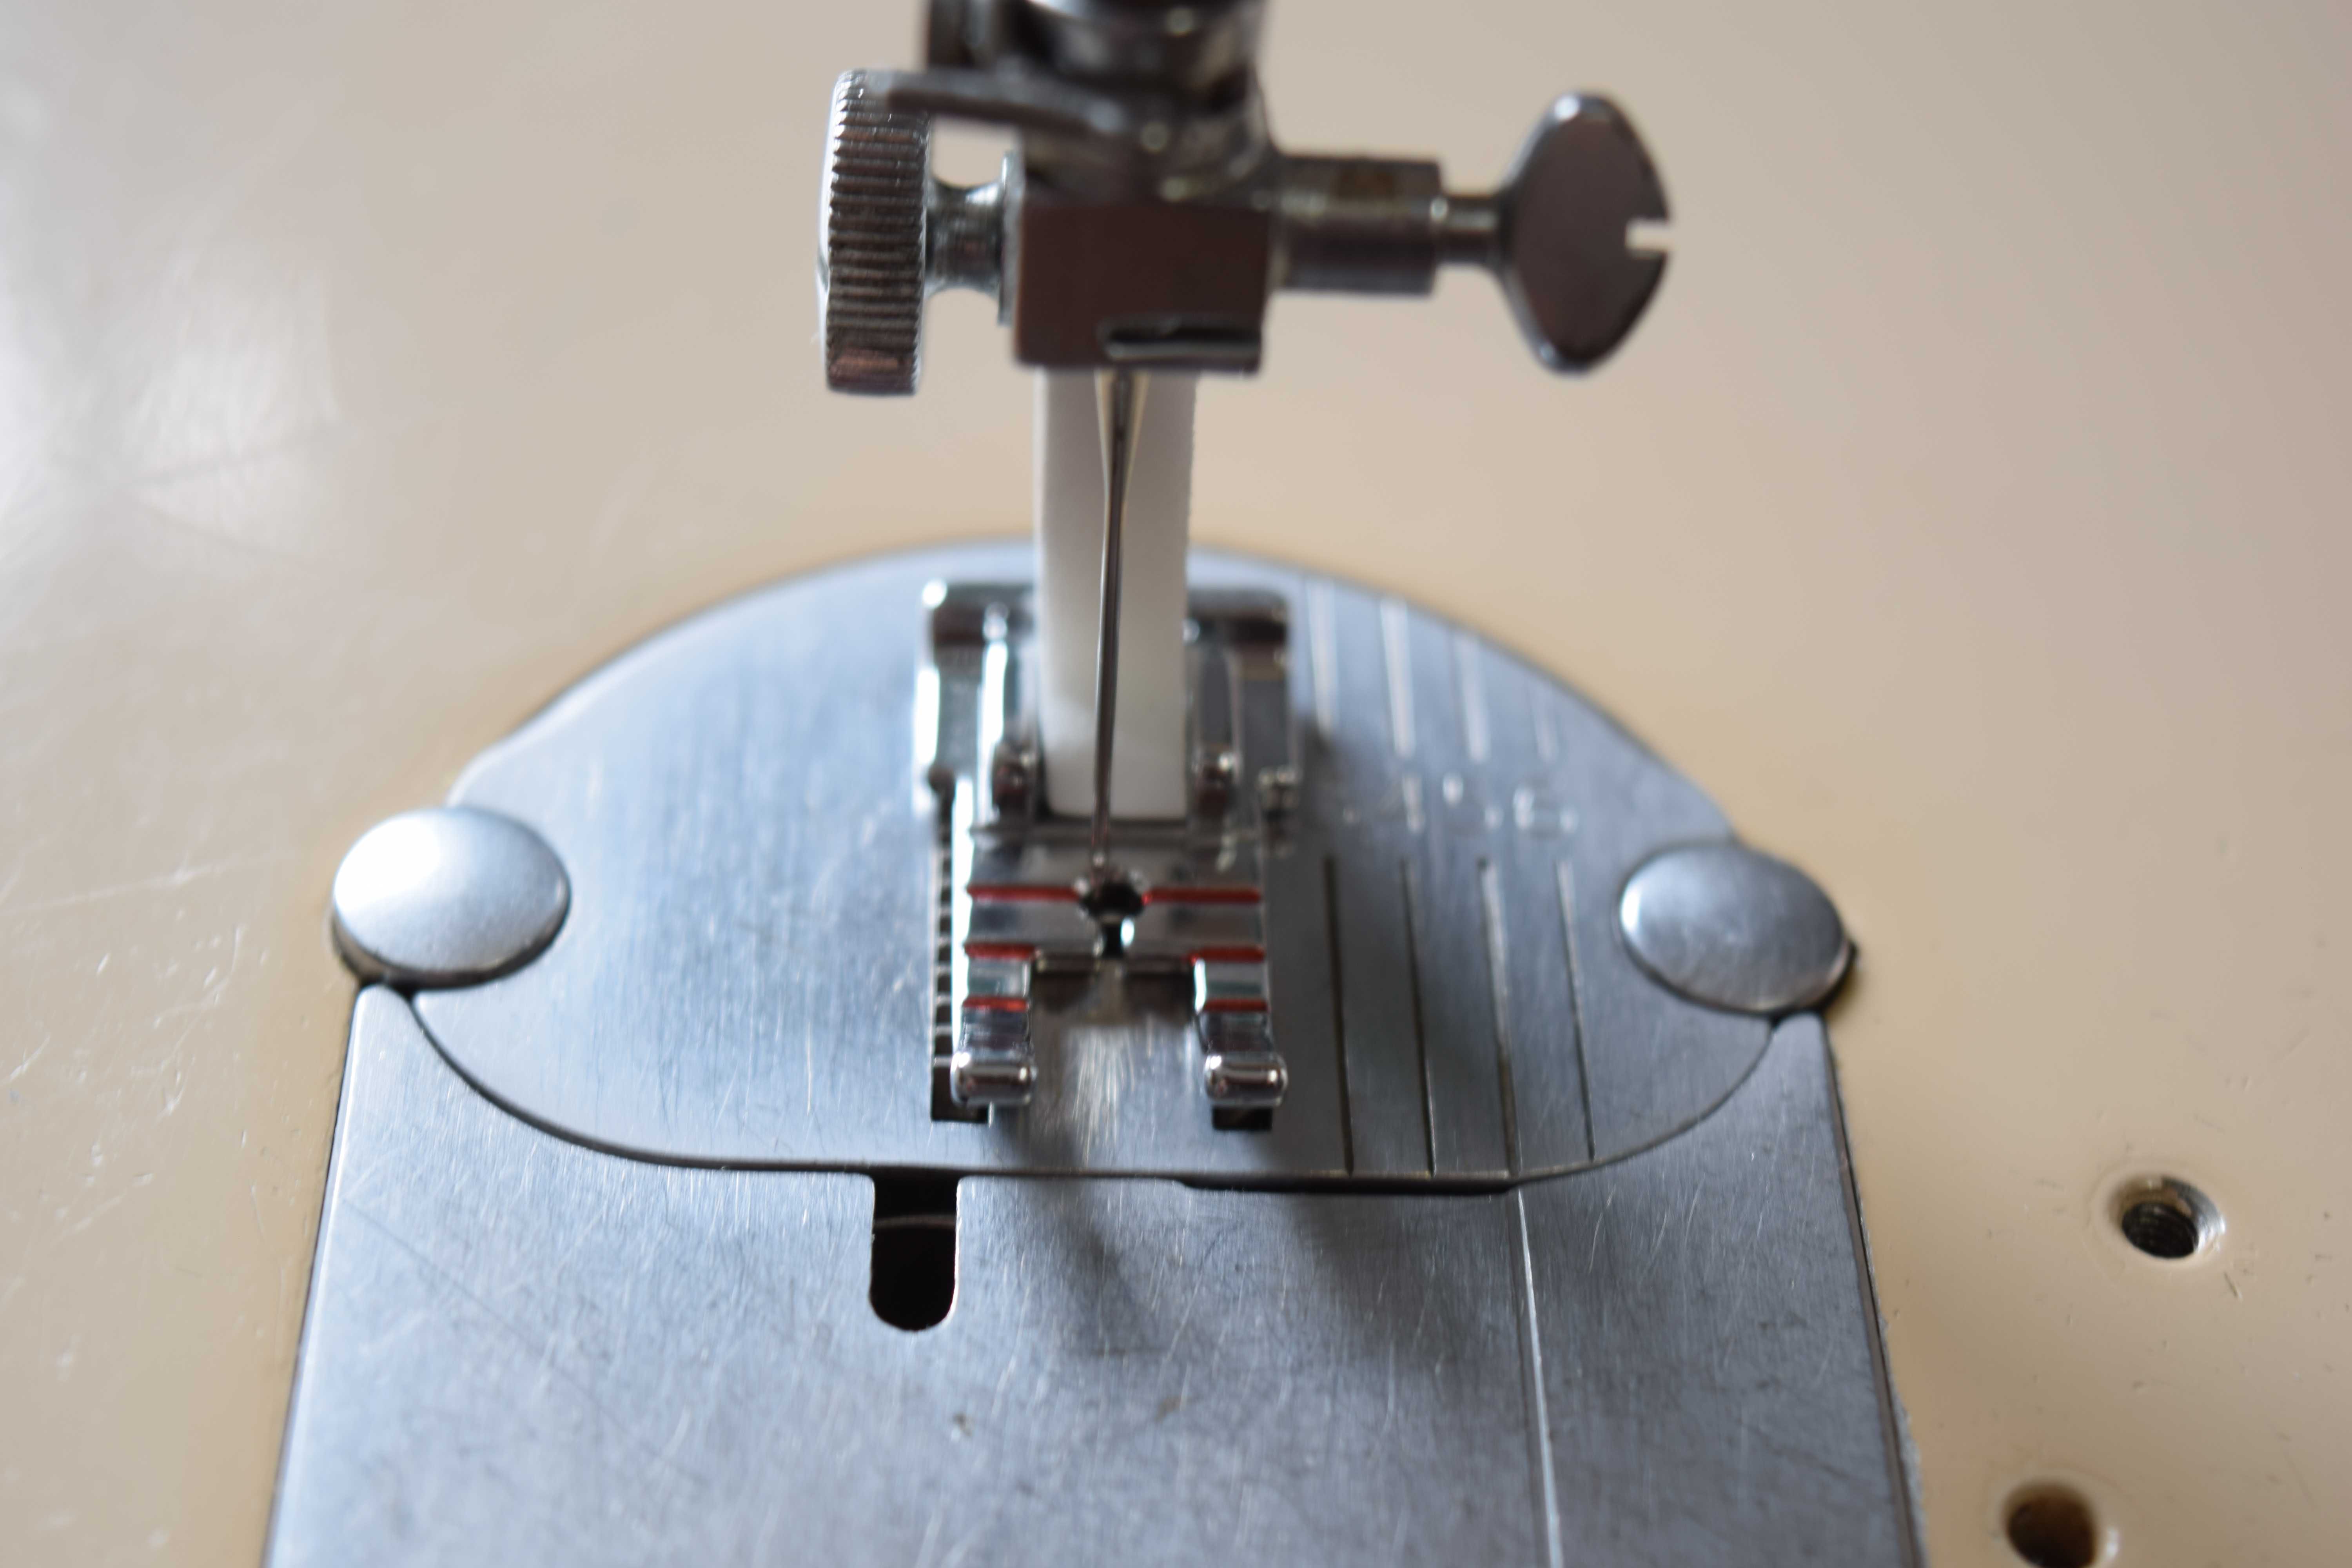
I usually only use my slant shank snap-on adapter with my blind hem foot, which is wider than the feed dogs, so the foot being shifted over doesn’t really matter.

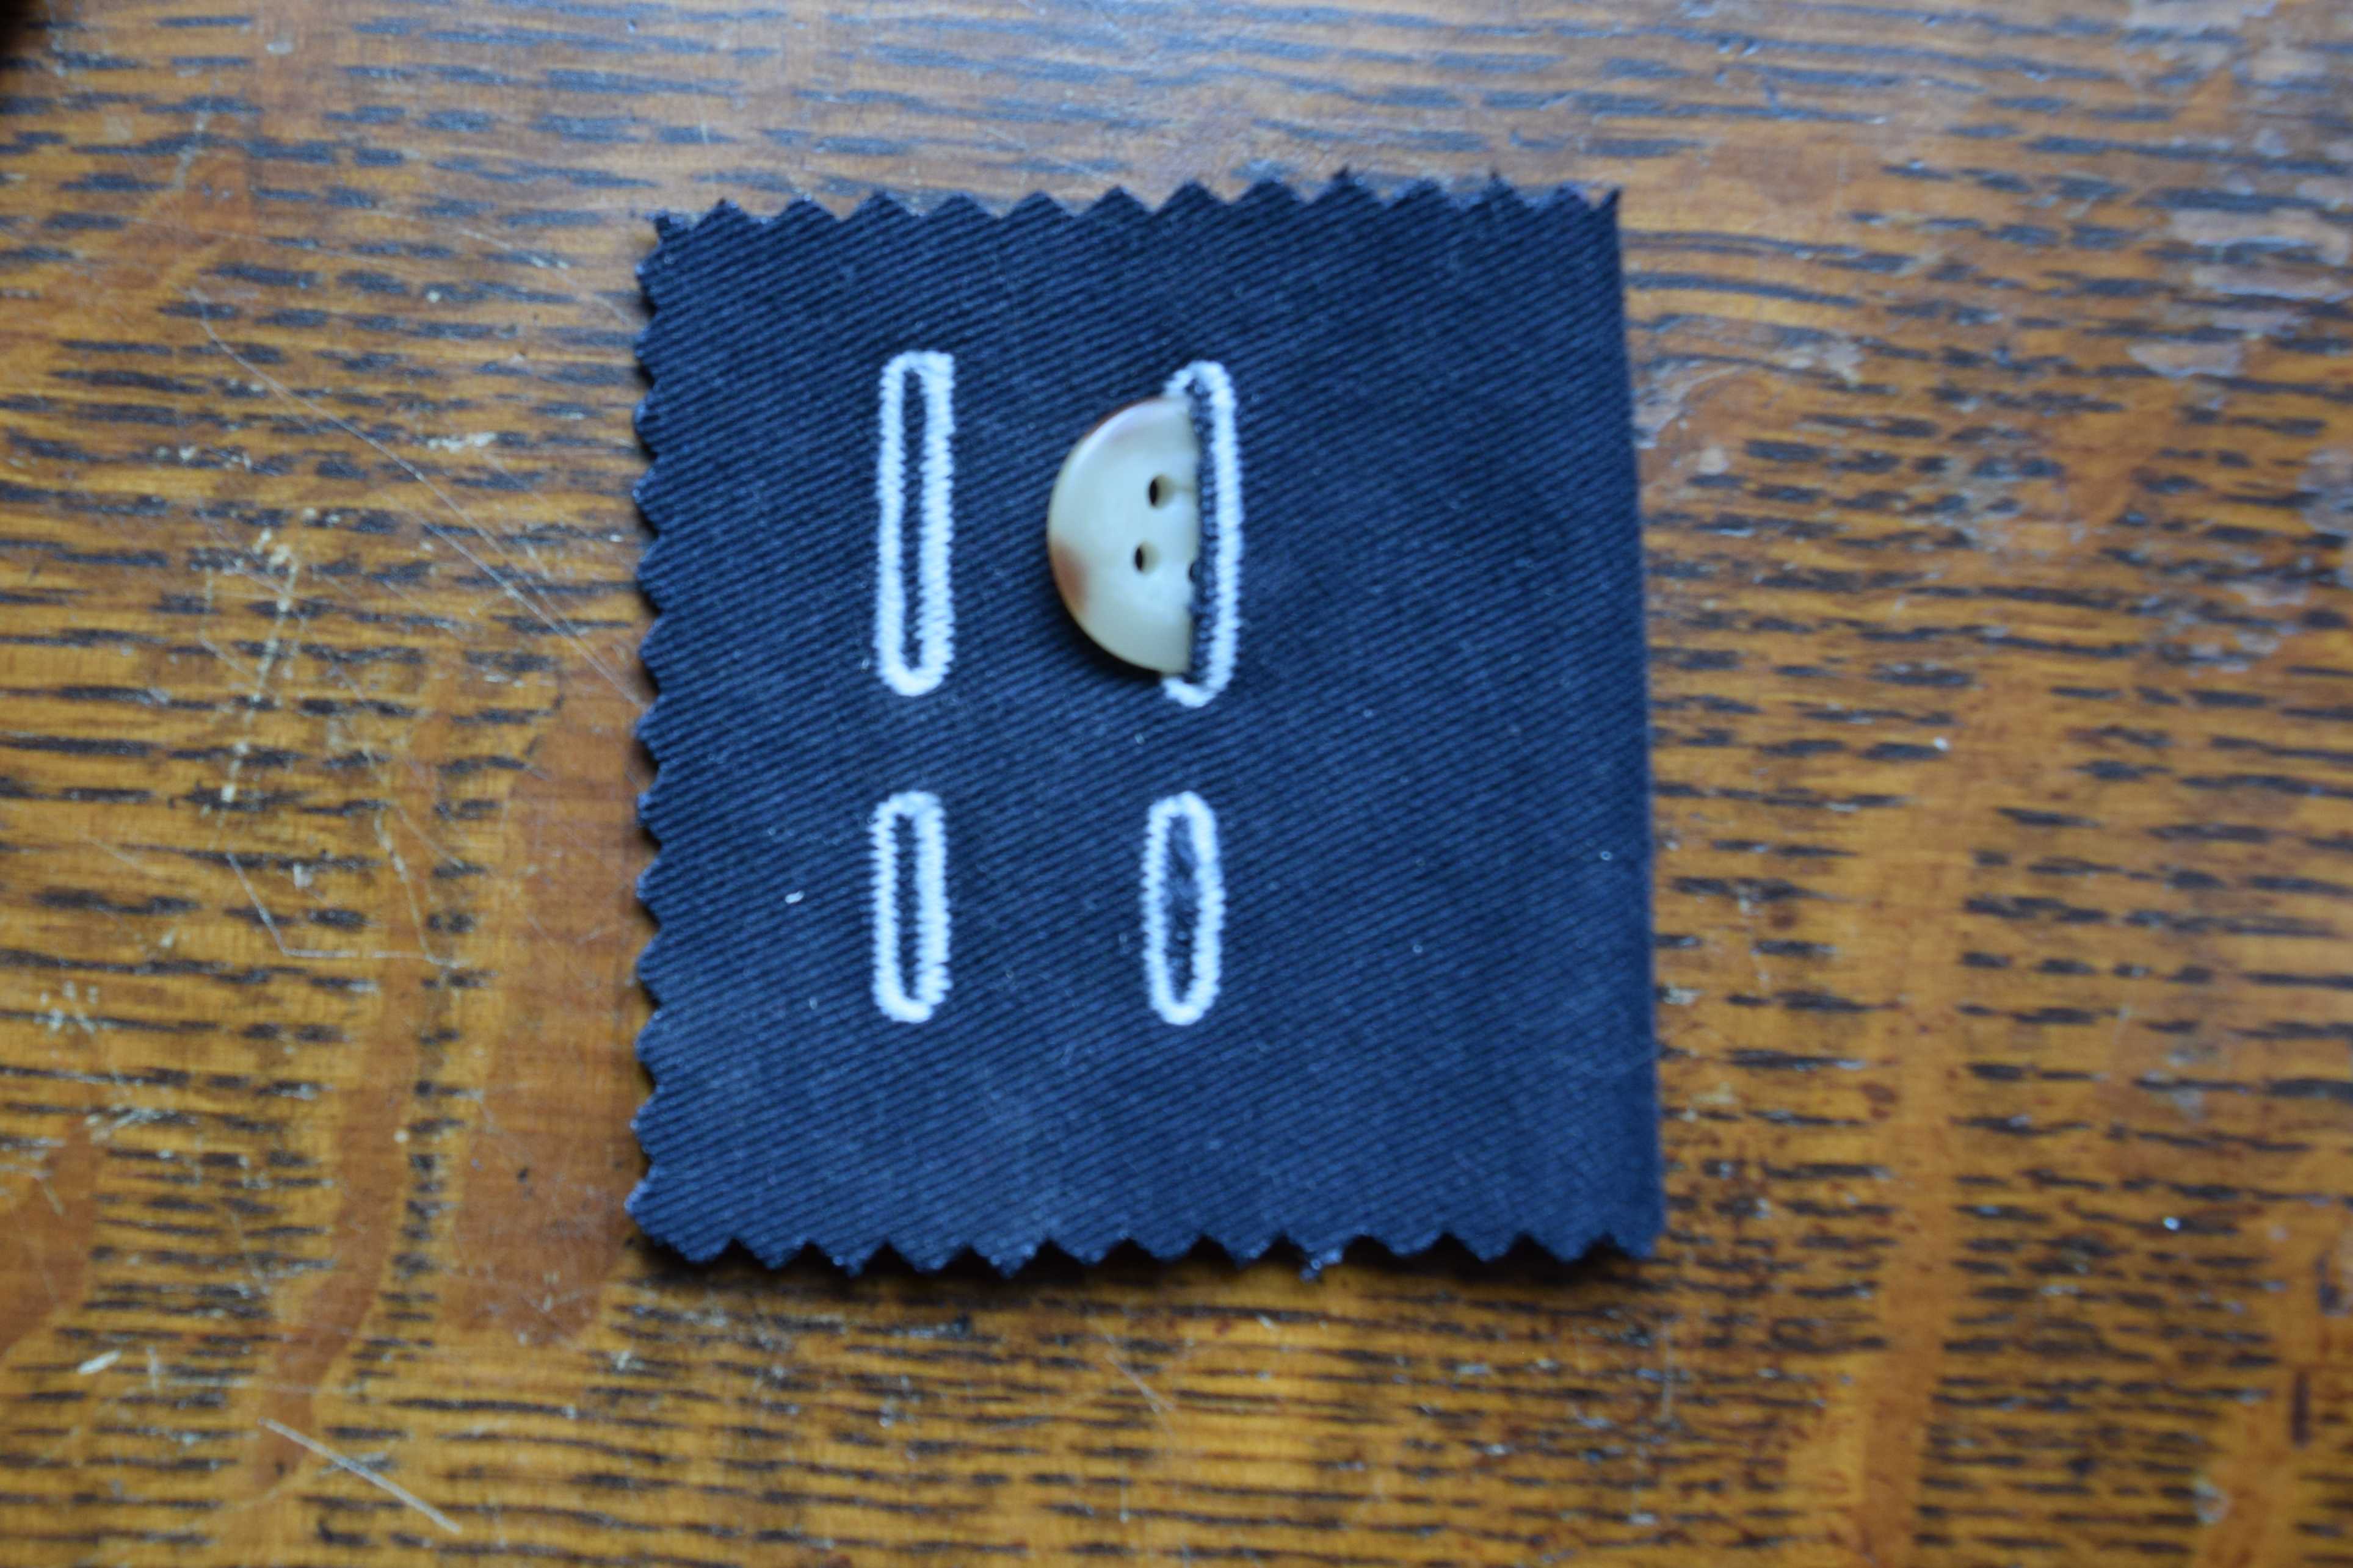
I can’t manage to make a manual buttonhole, and I have no interest in buying a modern machine that I’ll have to pay to get serviced, so I make my buttonholes with vintage buttonholers. I have one (OK maybe I actually have three) of the older style Singer buttonholers that don’t take templates and can make any size buttonhole, but you get skipped stitches with these buttonholers if you don’t stabilize your fabric really well, so I usually prefer to use the template type buttonholer. I’ve collected all of the template sizes that were made for the Singer/Greist buttonholers, but there were two possible sizes that were never made. Until now!


These templates actually came out just about how I intended, so I set up a shop on Shapeways so you can buy them too, if you like. Mine are a bit snug in the buttonholer, but still fit just fine. The 3D printing process seems to create products that vary in size a little, so if yours are too tight, you could sand the outer edges a little with fine grit sand paper.
The Singer buttonholers were made by Greist, so they take the same templates as Greist buttonholers. These templates are about 1 3/4″ long and 3/4″ wide, and will fit Singer buttonholers 160506, 160743, 489500, and 489510. Greist made buttonholers to fit many different brands of sewing machines. I don’t have the model numbers for the Greist buttonholers these templates will fit, but I think they should fit all of the Greist buttonholers that were designed to work with straight stitch machines (or zig-zag machines set on straight stitch). These templates will not fit in buttonholers that only work with zig-zag machines, such as the Singer Professional buttonholers and the Greist buttonholers with a “Z” at the end of the model number.
While looking up model numbers just now I learned there was an adjustable Singer buttonholer made in the UK, model 86718, that has a stripper foot (to prevent skipped stitches) like the template buttonholers do. Great, now I’m going to want one of those, too. At least buttonholers take up less room than sewing machines.
Now I can make perfectly sized buttonholes for those buttons that I bought a whole bag of at the thrift store!
As for those tension stud sprockets . . . they weren’t quite what I’d hoped, but I think they’ll work OK. The resolution on the 3D printer isn’t high enough for the inner diameter to come out exactly as designed. These sprockets are available for sale on various sites that sell vintage sewing machine parts (sometimes they call it a “gear”), but the hole on the inside is too small, so the parts have to be drilled or filed out. Well, mine had to be filed out too, but I happen to have a chain saw file that worked just fine to enlarge the hole. Next time I’ll just buy a sprocket instead of having it printed – it’s probably better quality plastic. Here are some pictures of me replacing the sprocket on a Singer 237:
-

- The old cracked sprocket
-
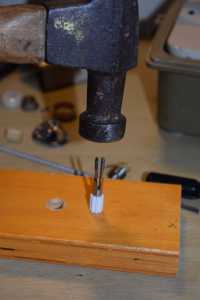
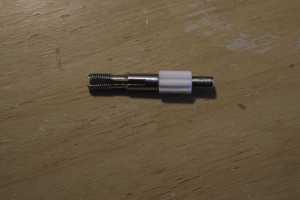
- The sprocket has to fit tightly. I drilled a hole in a scrap of wood to fit the stud, then tapped the stud through it.
-
- Sprocket on the tension stud
-
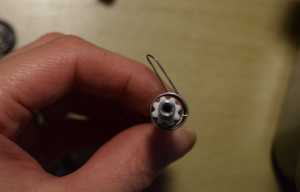
- The sprocket holds the thread take up spring in position
The future is here! Pretty cool, right?
 GrowYourOwnClothes Etsy Shop

Wow! This is really exciting. I never thought you could make sewing machine parts that way -well, let’s say it just never occurred to me.
I remember my mother had a buttonholer for her straight stitch Singer. I don’t know what happened to it. I should look for one for my hand cranked Singer
LikeLike
Wow! I shall have to look into 3D printing this side of the Atlantic. 🙂
Regarding those buttonholers for straight stitch machines. You mentioned model 86718, that one is known as “the red model”, there is also “the black model” 86662 virtually identical to it. They are all over eBay UK. I’ve got the red one myself, they are flawless. I’ve also got several versions of buttonholers for zig-zag machines that take templates, but the results aren’t as good, especially not on thicker fabrics because the width of the zig-zag is not adjustable and is too narrow (which is why I usually make them manually anyway).
For more info on Singer buttonholers & Co., see http://www.singersewinginfo.co.uk/gallery_attachments/.
LikeLike
I just ordered the buttonhole templates. I have over 30 vintage sewing machines,15+ buttonholers, a huge canning jar of metal templates and still I had to resort to my crap high end electronic sewing machine automatic buttonholer to finish my son’s steampunk vest last Christmas Eve cause I didn’t have the right size. I’ve been waiting for someone to start 3-D printing vintage sewing machine parts. Now I need a zigzag needle plate to redeem my impulse purchase of a Singer 431g. Think about it…please?
LikeLike
I don’t really want to get into designing parts for other people. Since I don’t have a true CAD program, it takes a long time to draw up the parts. Also, I’m not sure if plastic would be strong enough for a needle plate. Shapeways has a stainless steel option that is at least partly metal, but it is expensive and has up to 5% error in size due to shrinkage, so that wouldn’t be a good option, either. Unfortunately, Shapeways doesn’t have an option to print in ABS, which is a pretty durable plastic.
There are people out there who will draw up your parts at an hourly rate. Take a look at http://www.makexyz.com. It’s a network to connect people with 3D printers to people who need things printed. Some of the people with printers also design parts. I’d look for someone with a high resolution printer that will print in ABS plastic, since that will be stronger than many of the other materials.
LikeLiked by 1 person
What an amazing endeavour! I am blown away by your dedication to the old machines. I have a few (quite a few!) but I haven’t even considered having parts made for them. Fascinating.
LikeLike
Great idea to 3D print the templates. I don’t know when I’ll use those two sizes but ordered just because I’ve never had anything that’s 3D-printed and thought it would be fun to try. I got the order quickly and just tried them out. Perfect! Thanks so much.
LikeLiked by 1 person
Thanks for letting me know that yours worked too.
LikeLiked by 1 person
[…] In the back of my mind I kept wanting a Singer 411G. I knew it wouldn’t be quite what I wanted, since it doesn’t do a 3-step zig-zag (it’s multi zig-zag stitch is 4-step), and it is almost impossible to find one with a treadle balance wheel. However, I know some people have managed to treadle the electric version by shimming out the balance wheel, using a string or spinning wheel drive band instead of a leather belt, or cutting a groove in the balance wheel, so I figured that with some effort I should be able to treadle the electric version. And as for the 3-step zig-zag, I think I can design a new cam and have it 3D printed [which I did]. […]
LikeLike
the 401a hand wheel is slightly different, but allows a belt to run in the same place as a 411g treadle hand wheel, but the 401a hand wheel is still to light to treadle, at least for me , i’m a beginner at the treadle.
LikeLike
This is a very cool idea! I know eventually it will become too difficult to find needed parts for these lovely vintage machines so you are in the right business!
LikeLike
[…] love my Singer 411G, but it really needed a 3-step zig-zag stitch. I made a 3-step zig-zag disc a few months ago, but it wasn’t quite right, so I fixed the design. I decided I might as well make a 2-step […]
LikeLike
Hi, is there a way to acquire the pattern (?) for the 3-d printed parts? Shipping from Shapeways to Europe is pretty expensive… Thanks!
LikeLike
I’d rather not share the files. If you would like to create your own file for 3D printing the discs, check out this amazing tool that was shared by Wileur in the comments for my other post on printed Singer discs. It took me a bit to figure out how to use it, but if you read all of the directions carefully, you can see how to create different stitch patterns by changing lines of text. You will need to install OpenSCAD first, then download his files.
LikeLike
[…] [Grow Your Own Clothes] had actually ultimately located their suitable stitching equipment for doing zig-zag stitches (///) as well as transforming to a treadle drive (mechanically foot-fed)– a Vocalist 411G. This is a well-respected workhorse of a device, as well as if you see one in a used shop, you may wish to order it. The only trouble is that its multi-step zig-zag stitch is a 4-stepper as well as not a 3-step, which is what [GYOC] favors. Having actually heard it was feasible to hack them right into doing a 3-step, [GYOC] set out to learn Tinkercad and grow their own sewing machine parts. […]
LikeLike
Hola , te felicito por tu talento y dedicación para las máquinas , yo he comprado una impresora 3d y me interesa hacer esas piezas , hay algún lugar donde descargar los archivos ?
LikeLike
I think I love you. Vintage machines + 3D printing. sigh.
LikeLike