
A while ago I got all excited about KAM Snaps and bought a bunch of them (quite possibly a lifetime supply) along with the pliers to install them. I have problems with tendonitis, and it turns out that using these pliers is really painful for me, even for just a few snaps. Since it doesn’t make sense for me to buy an expensive snap press for home use, I adapted the pliers to be used like a press. I cut up some scrap pieces of wood, then wedged in and strapped the pliers down onto a base. It’s not pretty, but it works really well. I just have to press down on the handle, which is a lot less effort than squeezing pliers.

KAM Snaps Pliers Holder/Adapter
Update: Here are some more details about making the pliers holder. Also KAMsnaps.com now has a base stand for snap pliers available for sale if you would prefer to buy one.
None of the pieces of wood need to be an exact size. They are arranged to fit the pliers. I don’t know if there are different versions of the pliers with different dimensions than mine, so be sure to test fit all of the pieces with your pliers before screwing or gluing anything together. Start with a rectangular wood base (piece A in the picture below) at least 3″ (8 cm) wide by at least 10″ (25 cm) long. The larger you make your base, the more stable it will be. The only reason my base is that shape is because I used a scrap of wood from an old mini ironing board.
For the pieces labeled C, cut two pieces of wood 4 1/2″ (11.4 cm) or a little longer. They should be at least an inch wide (but can be as wide as you want) and between 1″ (2.5 cm) and 1 1/2″ (3.8 cm) in height. Arrange them as shown with a gap at one end to fit the base of the pliers. To help get an exact placement, glue them in place, and then when the glue is dry screw them in place from the bottom.
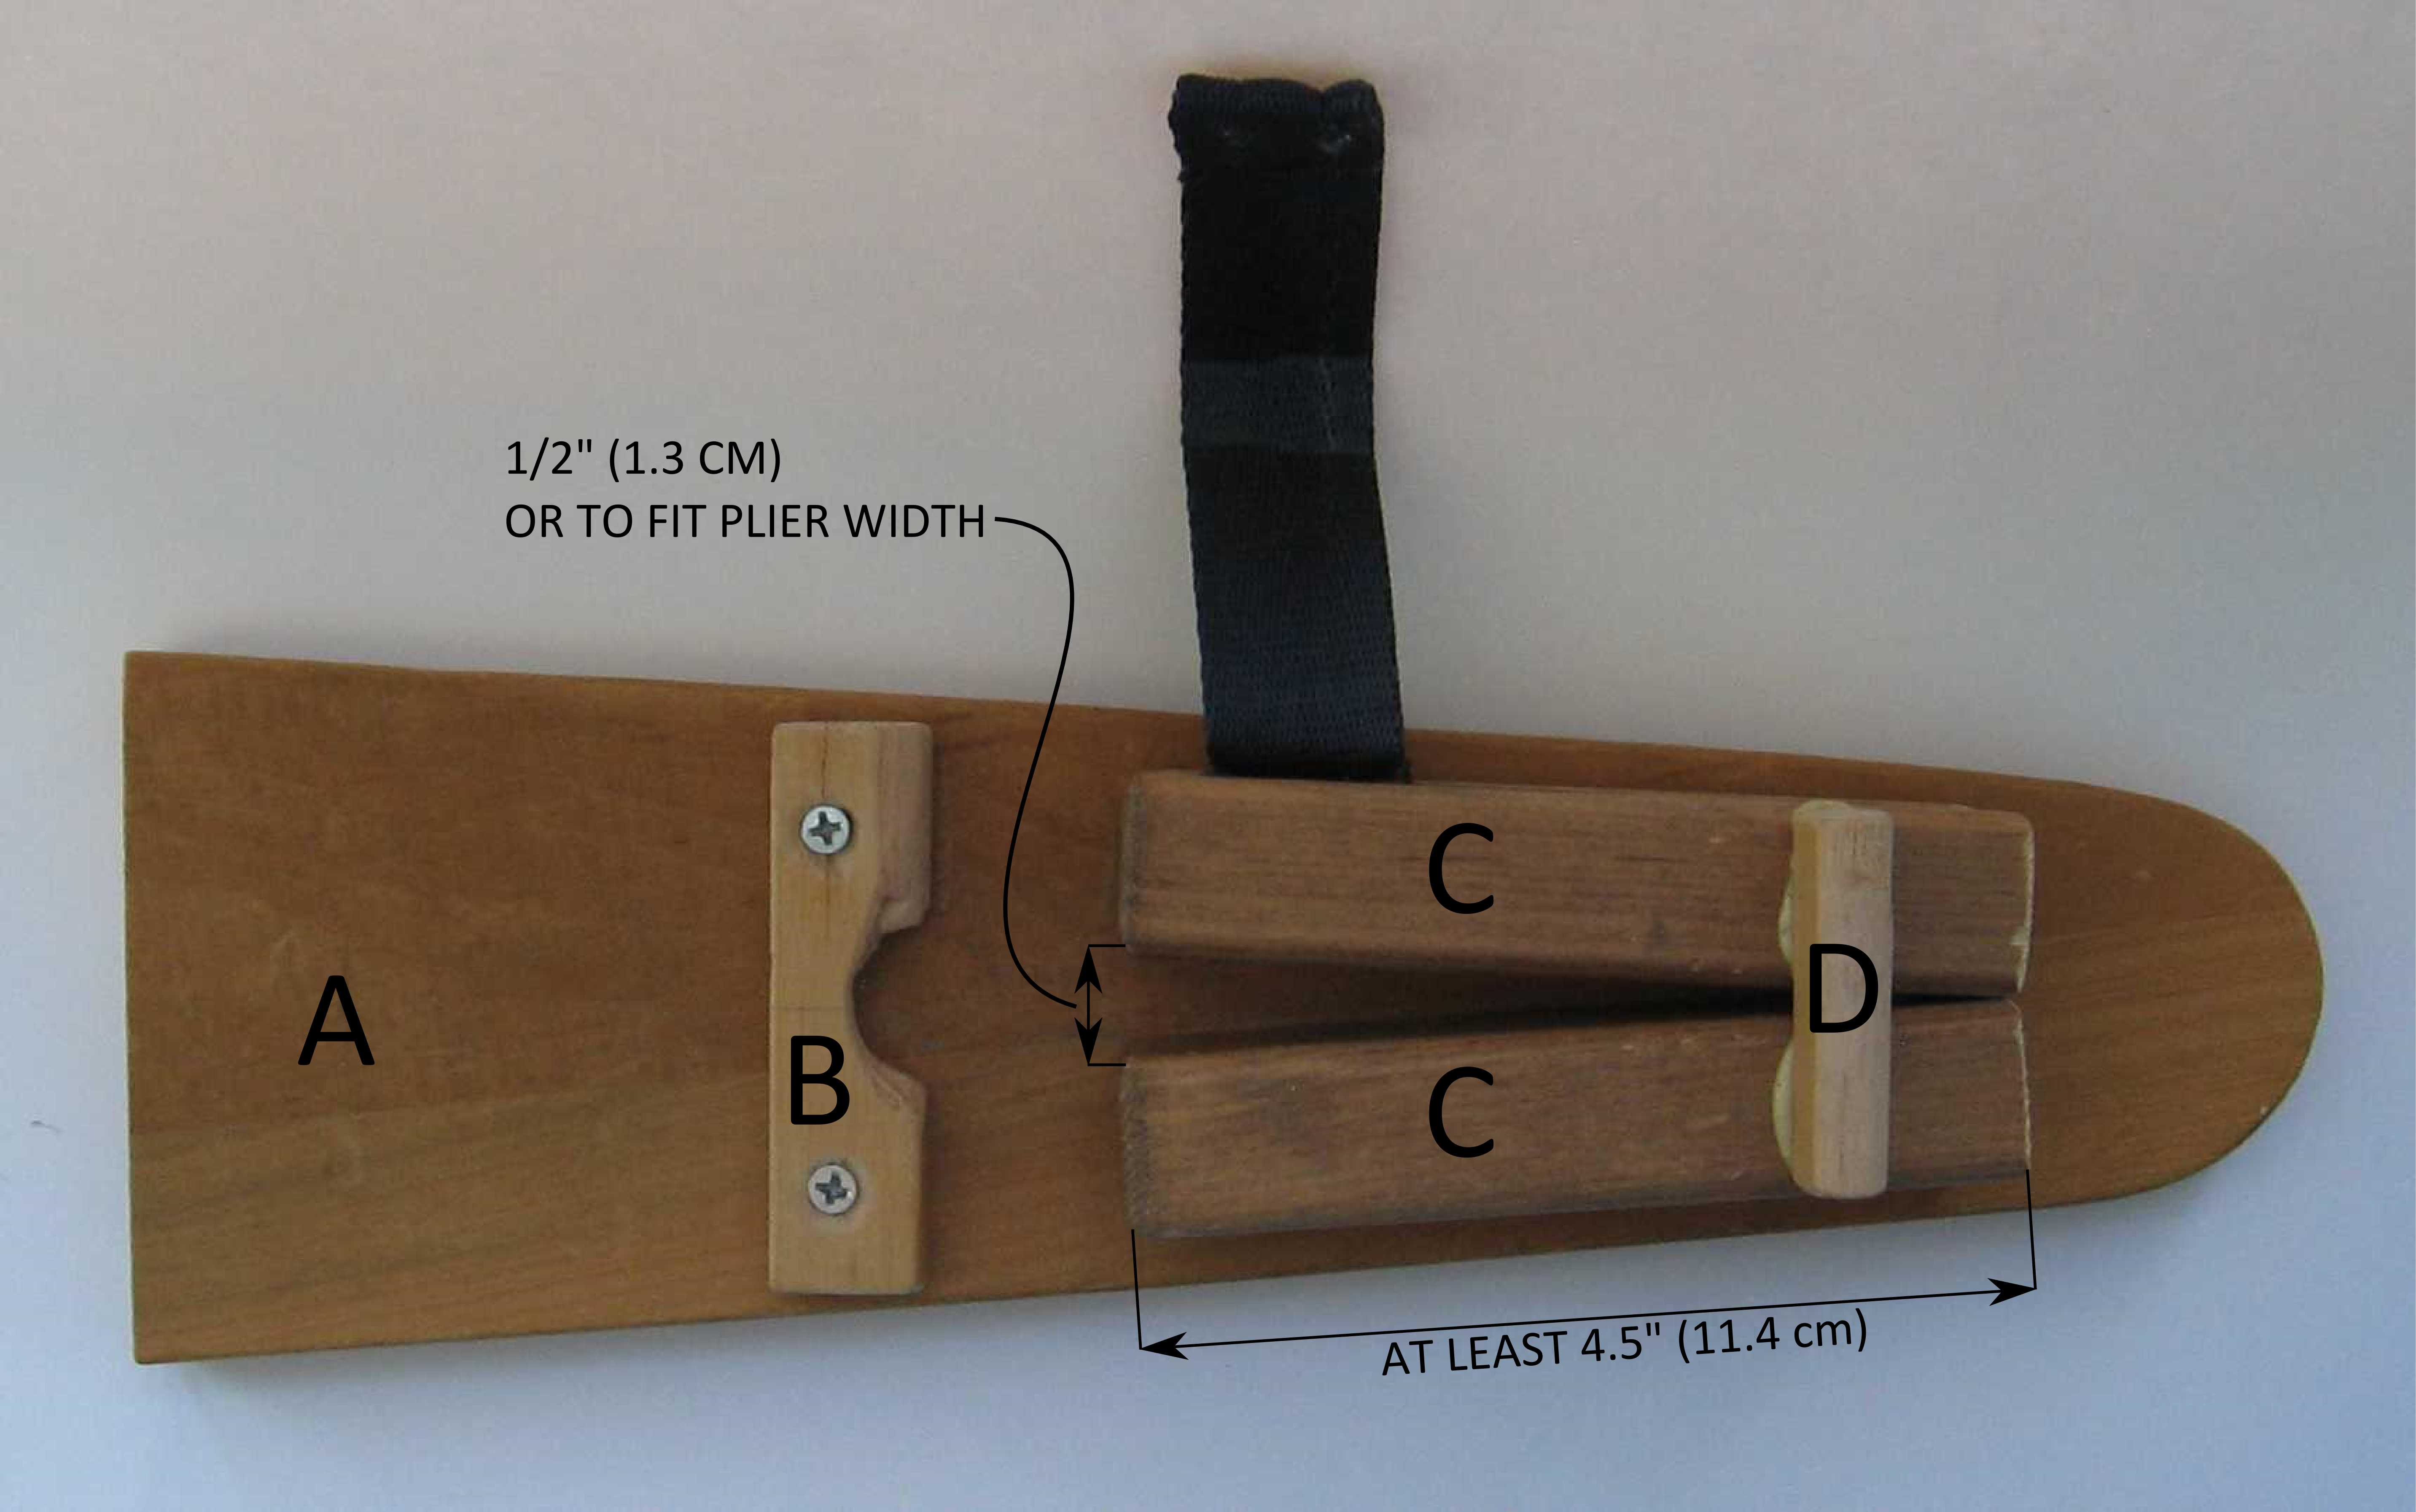
Now put the pliers in place and jam them in tightly between the two pieces of wood labeled C so you can determine the location of piece B. Piece B should be no taller than 5/8″ (1.5 cm), but the other dimensions can be whatever you want. I don’t think that semi-circular groove I cut is actually necessary to hold the pliers in place. It was a pain to cut, so I’d recommend trying a rectangular piece of wood to see if it keeps your pliers stable enough before going to the trouble of cutting that half-circle out. The purpose of piece B is just to keep the pliers from sliding forward. Once you have it positioned correctly, screw it down. If you do decide to cut piece B into the shape I used, be sure you are not blocking access to the screw that holds in the die:
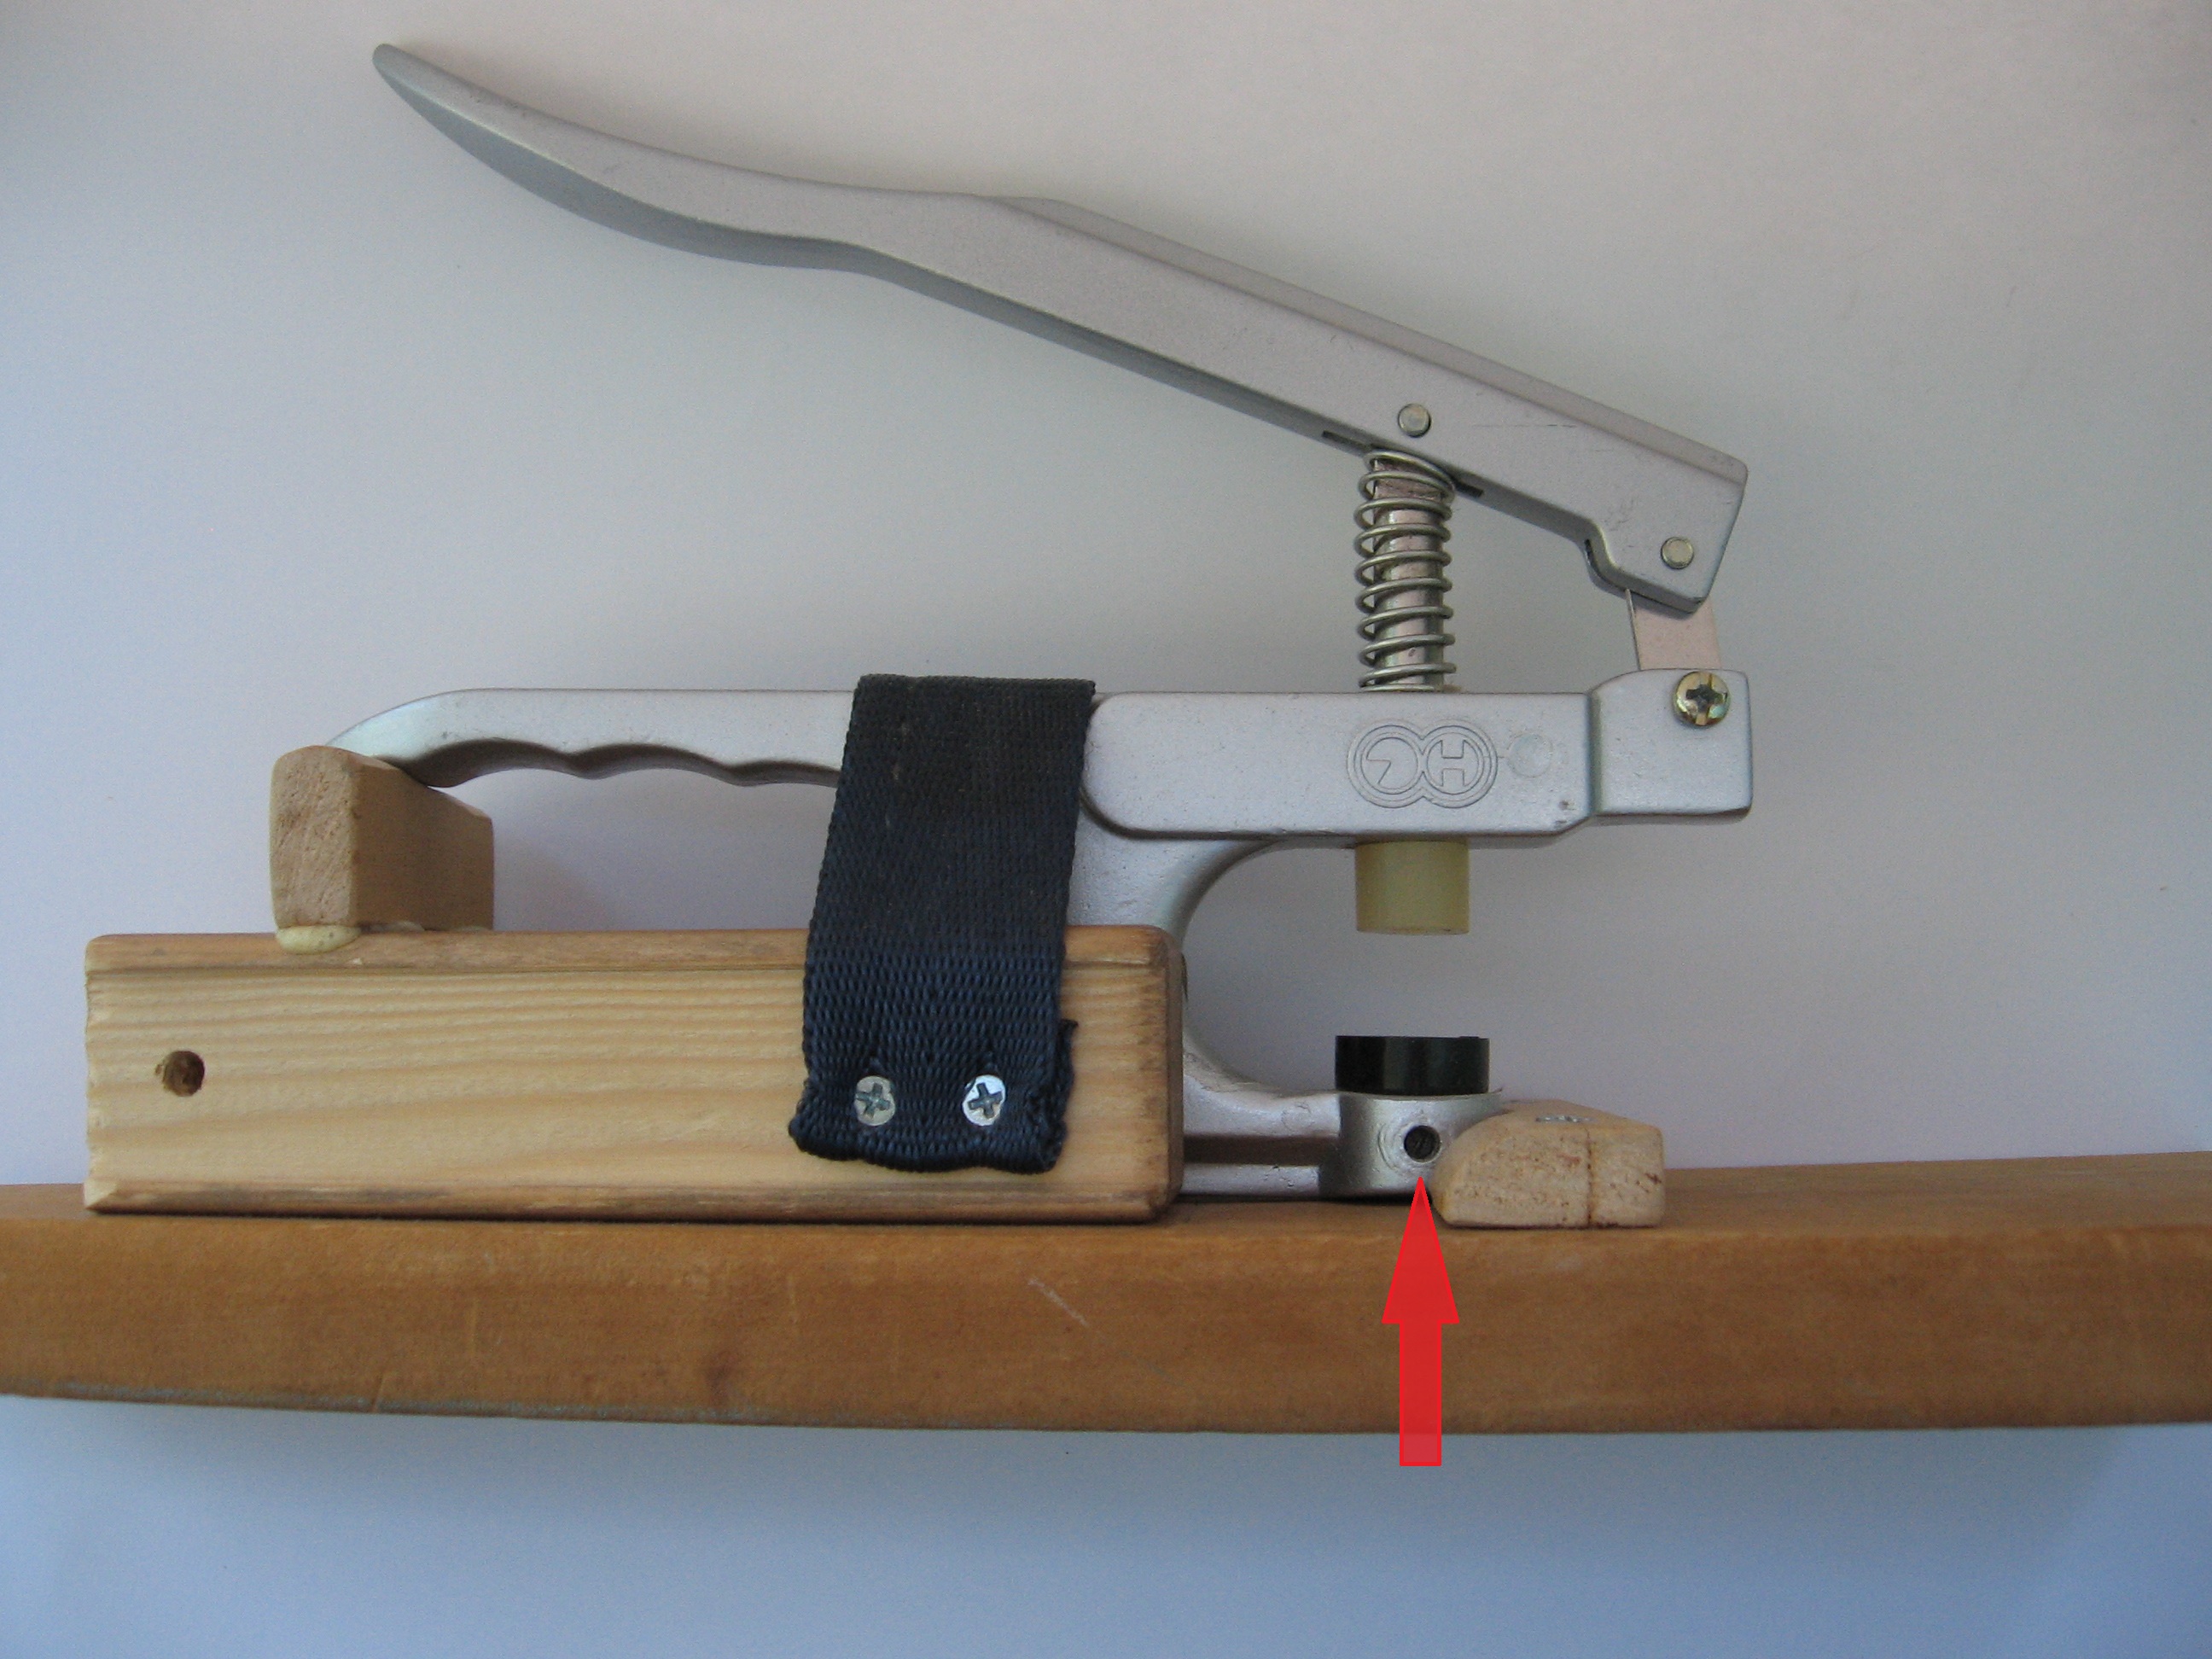
Piece D needs to be cut to fit under the handle of the pliers. Glue it in place. Mine kept coming off, so I finally used Gorilla Glue (polyurethane glue), and it hasn’t moved since!
For the strap, I screwed on a piece of strap from an old car seat. If you want the pliers to be easily removable, you could make a strap out of Velcro with a D-ring on one end. Or you could make your strap so it snaps in place. 🙂
Here is a side view. The hole on the right side of piece C serves no purpose – it was already there in the scrap of wood I used.

 GrowYourOwnClothes Etsy Shop

Good idea!
LikeLike
Wow, that’s impressive!
LikeLike
I need this. Do you sell them?
LikeLike
No, sorry. I just made this one for myself.
LikeLike
I will butt in and tell you I sell them. Mine is a little different and we have to know if your pliers are Kam Snap or Babyville. If you are interested: estherwaayenberg@netzero.com. I am on Facebook too Esther Waayenberg
LikeLike
You said you sell them, how much for one for Kam Snap pliers?
LikeLike
Did you find your snap pliers base yet? I sell them if you want to find out about it, give me a holler on Facebook, Esther Waayenberg or estherwaayenberg@netzero.com. I charge $20 plus shipping.
LikeLike
Did you ever get or make a pliers base for your Kam snaps? I just ran across your post and I do sell them. I’m on Etsy under Esthersbase or Esther Waayenberg on Facebook.
LikeLike
I’ll pay! I need it, too.
LikeLike
Is it possible to get some type of instructions and/or measurements. I showed this to hubby and he can reproduce it but if you had some measurements, that would be awesome. I have arthritis in the hands and fingers so this would be excellent for the job! Thanks in advance.
LikeLike
I’ll update the post tomorrow with some dimensions and instructions. Most of the dimensions are not critical, since the pieces are just positioned to press against the pliers.
LikeLike