
After making a double-sided tracing cloth using washable crayons, I decided to try making single sided tracing paper as well, since commercially available wax-free paper just doesn’t mark well, and professional waxed tracing paper is expensive and makes permanent marks on fabric.
Links in this post identified by an asterisk (*) are affiliate links. If you click through and make a purchase, I will earn a commission (at no additional cost to you).
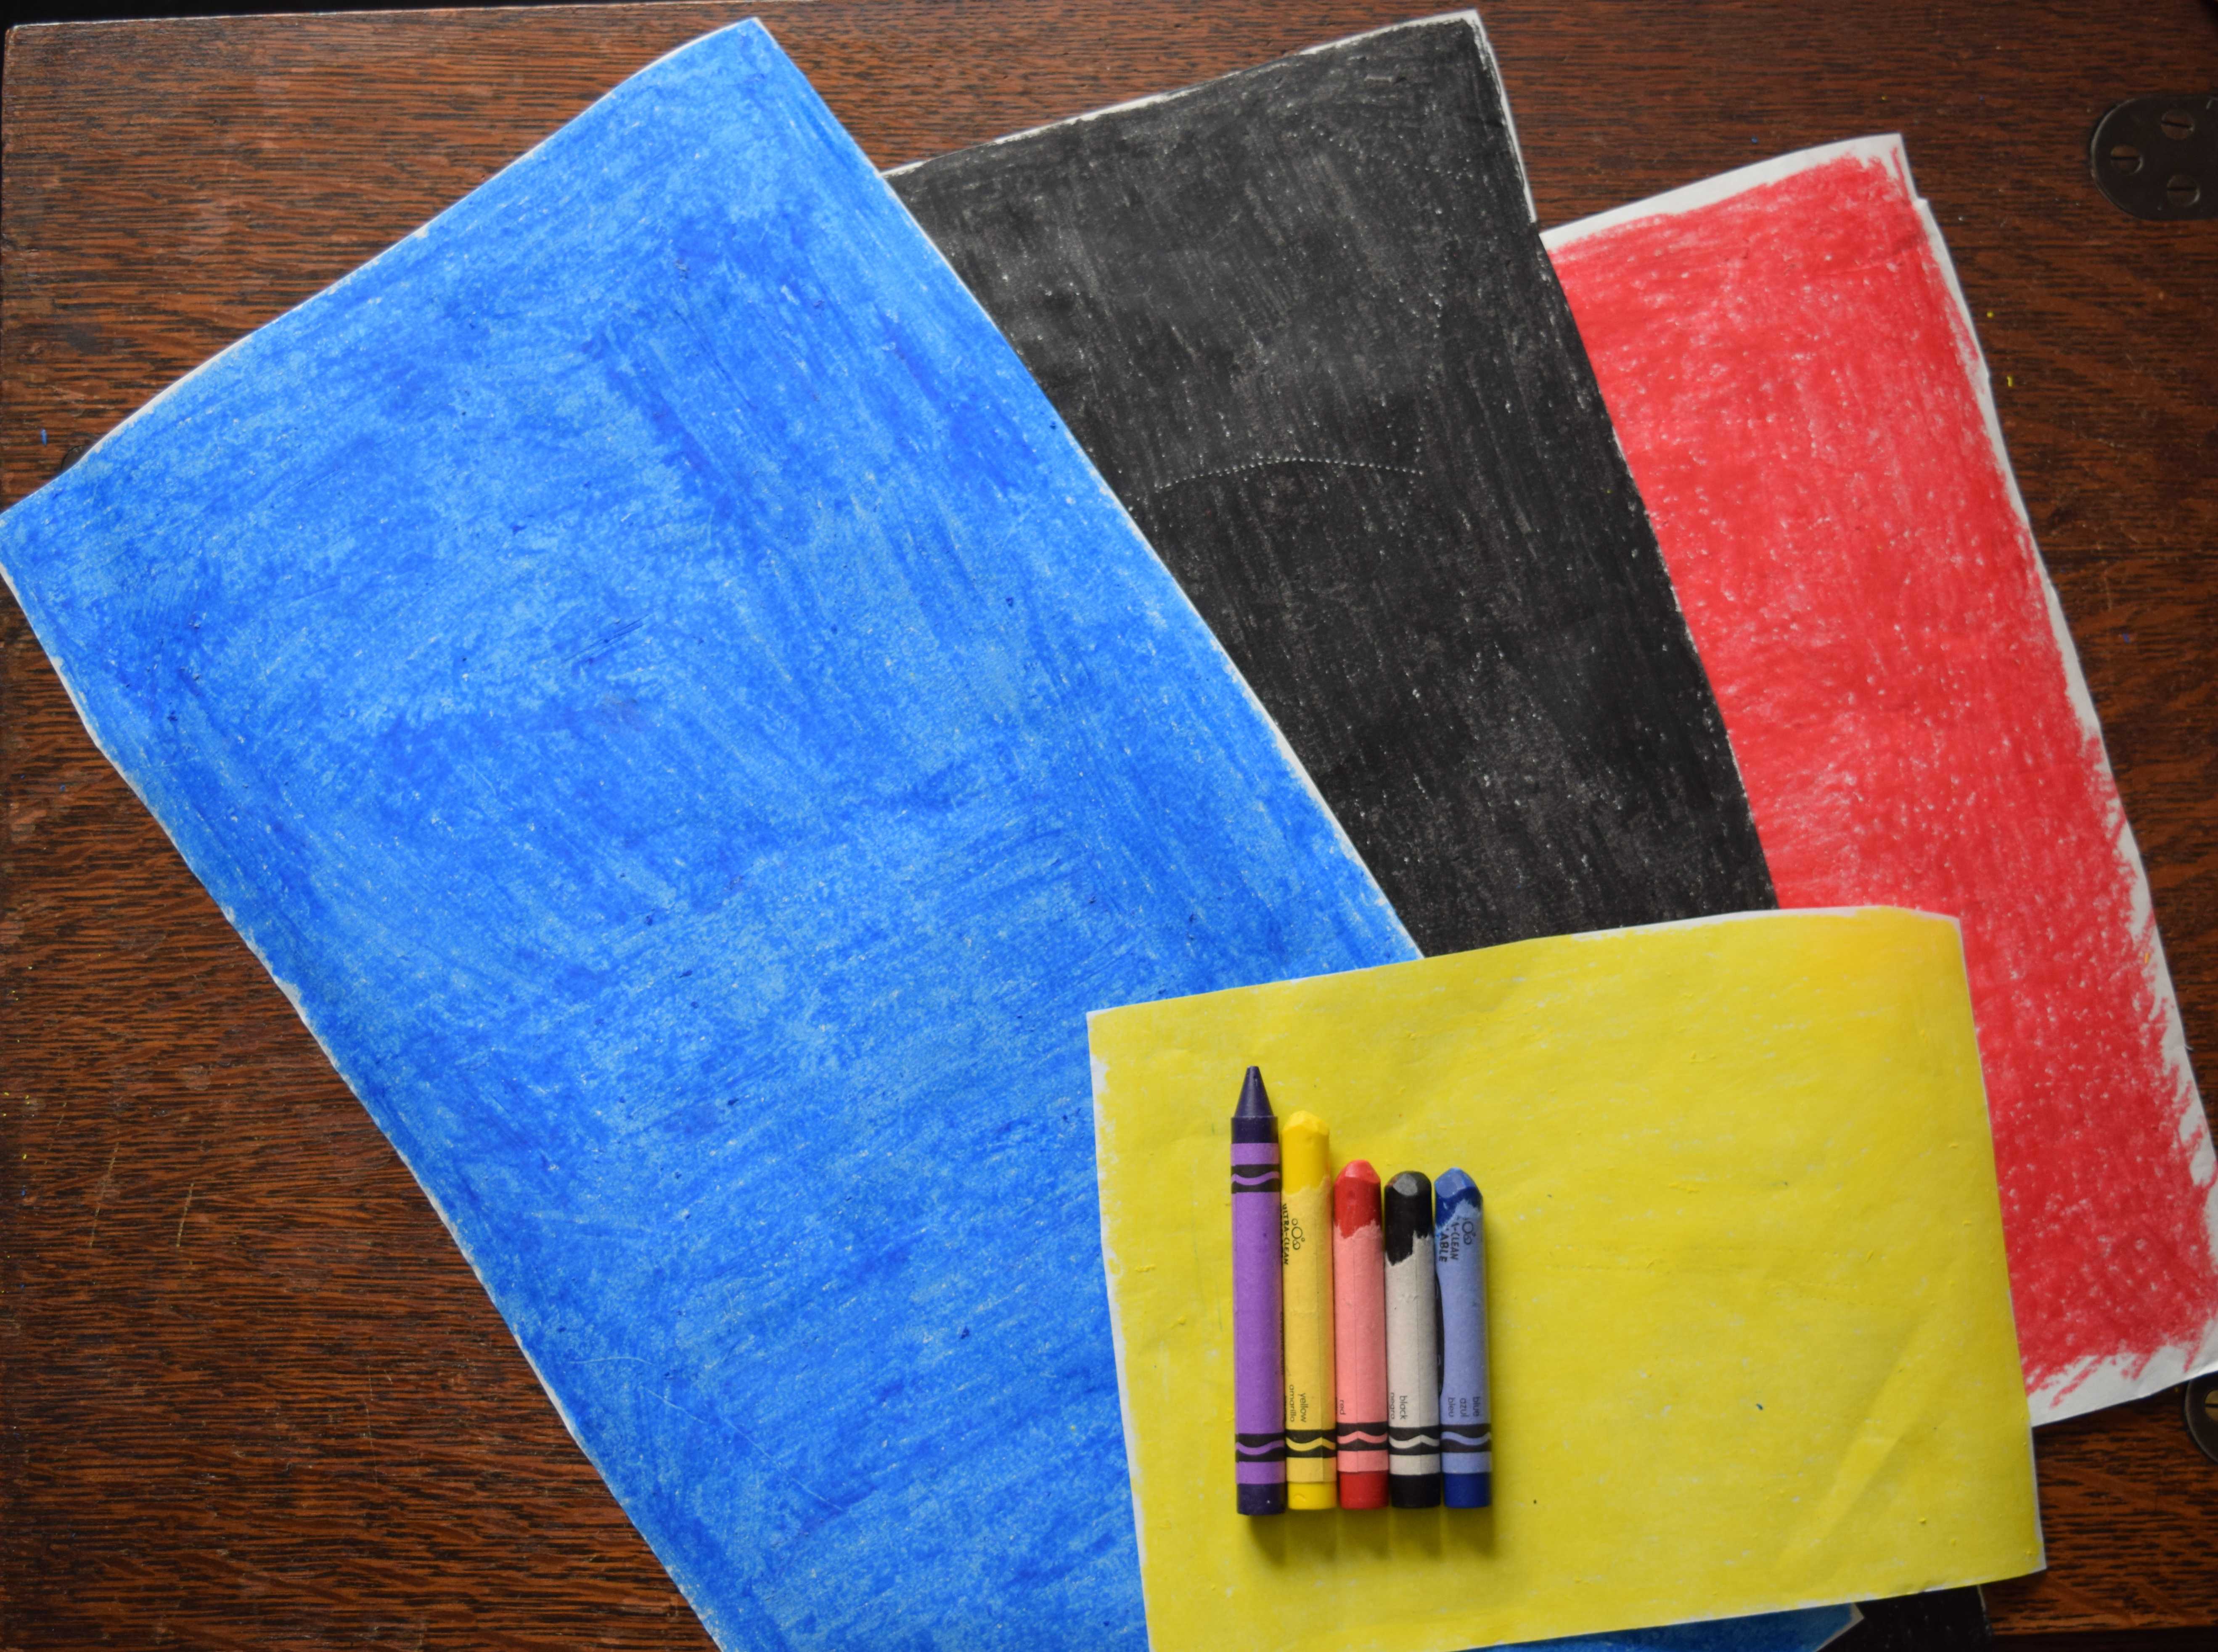
My initial idea was to just color on paper with washable crayons, but that seemed like too much work, so the first thing I tried was melting and diluting Crayola washable crayons* and painting the mixture onto the paper side of plastic-backed freezer paper*. Painting on melted crayon didn’t work well at all. I got thick clumps of crayon, the paper rippled, and the crayon ended up flaking off in the too thick areas.
So I went back to the idea of coloring on freezer paper with washable crayons. This worked great! Can you get any simpler than that? It wasn’t nearly as messy as trying to paint on melted crayon, and was actually faster when you count clean-up time. It took me about 10 minutes to color in a 9″ by 18″ piece of paper. You have to press firmly while coloring to get complete coverage, so my arm got a little tired (especially since I was already worn out from shoveling snow), but it was totally worth it.

You can actually use any kind of paper, by the way. I used freezer paper because I happened to have some and I thought the plastic backing would make it last longer without tearing. You can also put plastic box sealing tape on the back of any tracing paper to keep it from ripping.
My tracing paper makes excellent marks on both paper and fabric.
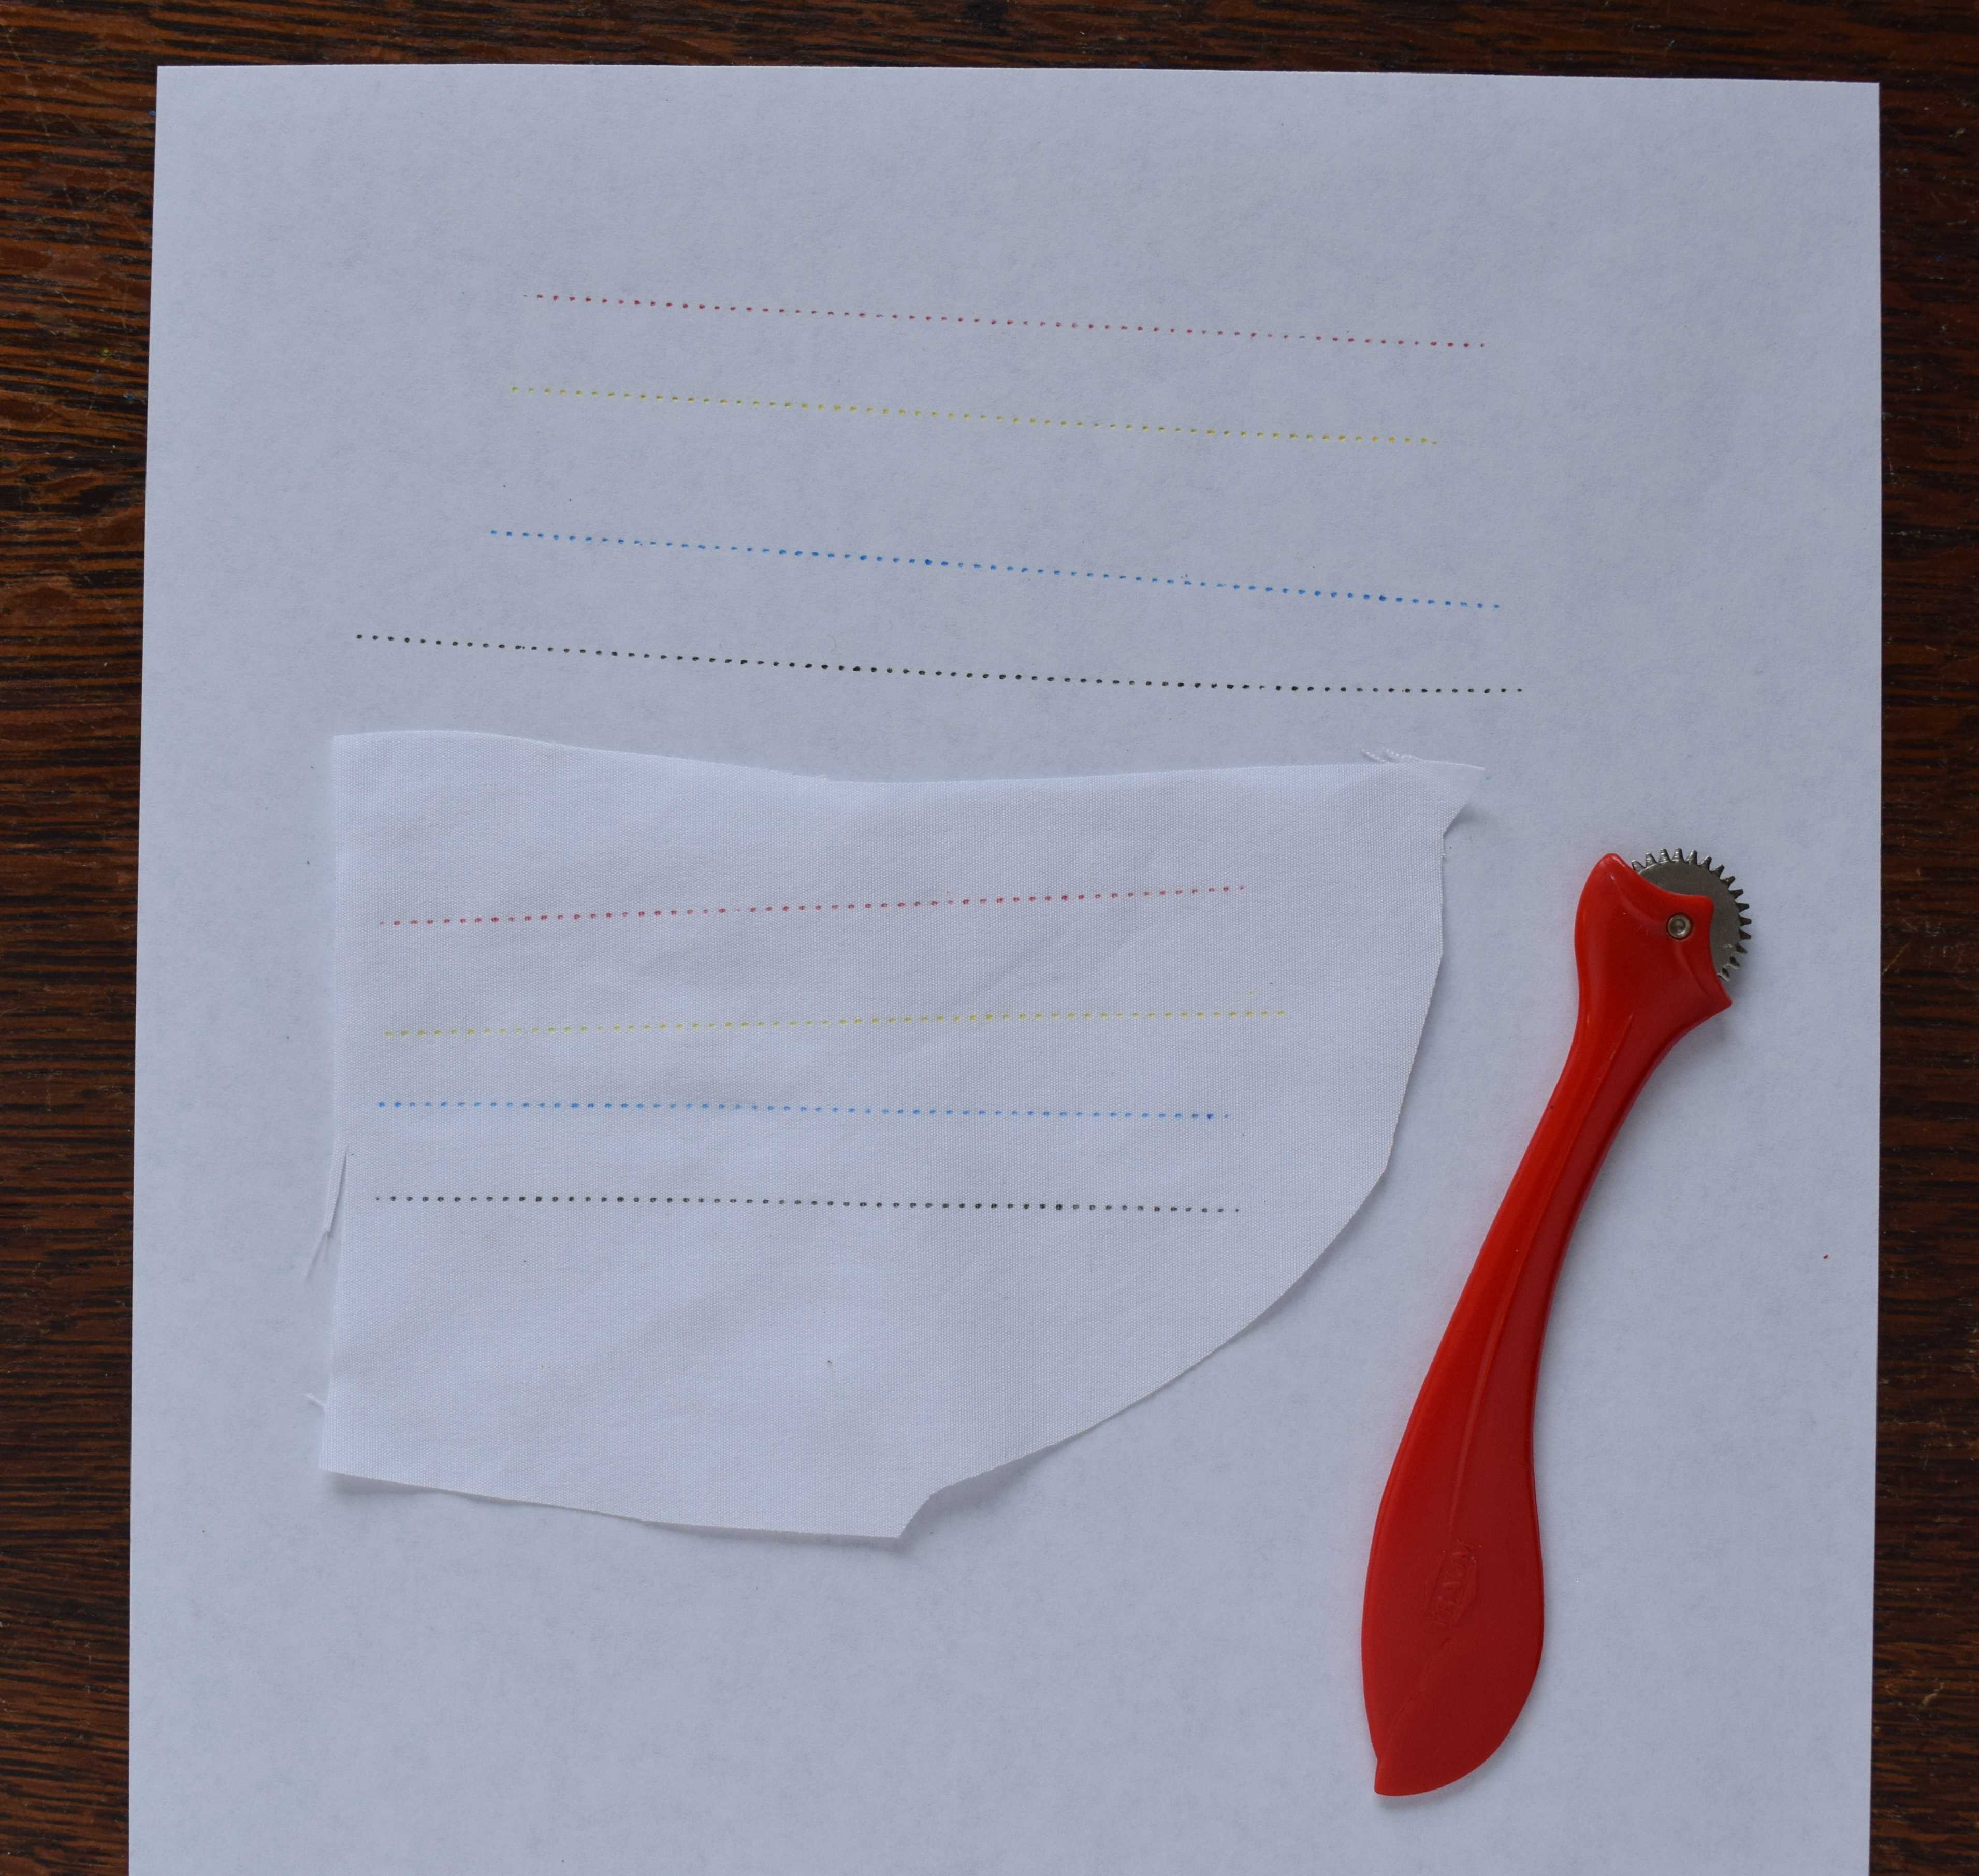
I tried the yellow tracing paper on dark colored fabric. The marks are a little harder to see on dark fabric, but still visible. And the marks don’t brush off!

So far the marks seem to wash out fine, but if you try this yourself, I’d recommend doing your own tests before you use it anywhere the marks might end up showing on the right side of a garment. Ironing might also set in the marks – I haven’t tested that yet, since I usually only use tracing paper for marking the stitching lines on muslins and for tracing patterns onto paper.
I have two sides of me that are constantly at odds. On the one hand, I want to have the best tool for every job, but on the other hand I also like to be frugal and make do with what I have or can get cheaply. Since I have a limited sewing budget, I end up doing some of each when it comes to sewing notions and tools.
In this case, I think my tracing paper is a win for both sides of me. It was inexpensive, I made it myself, and it works well. In fact, since I used washable crayons, the marks wash out of fabric, which makes it even more versatile than waxed tracing paper! Also a plus is that I can make it in many colors.
* Links in this post identified by an asterisk (*) are affiliate links. If you click through and make a purchase, I will earn a commission (at no additional cost to you).
 GrowYourOwnClothes Etsy Shop

Great idea. I don’t know if you know that years ago all tracing paper was waxed. I’m pretty sure it washed out. This waxless stuff is useless. I’m surprised they are able to sell any of it.
LikeLike
I still have some scraps of that old waxed tracing paper, which I think I bought in the late 1980’s or early 1990’s. I think it washes out to some degree, but leaves permanent marks on fabric if you press too hard with your tracing wheel. I distinctly remember being surprised that there were marks on the inside of my dress after several washings, since I had just assumed it washed out.
LikeLiked by 1 person
You mentioned using “any kind of paper”. I would recommend against printer paper. Having skimmed your article the first time around I totally missed your talk of using freezer paper so I used printer paper because I had it on hand but I could not get a good transfer from it.
LikeLike
Maybe your printer paper is too smooth? I think more crayon will transfer to paper that has a slight texture. Also make sure you press hard with the crayon when coloring.
LikeLike
Great idea! I think I will try 🙂
LikeLike
Ha, fantastic! I was trying to do this with tailor’s chalk on paper yesterday. It sort of worked, but the chalk line was not as crisp as wax, and of course the chalk will tend to dissipate if you are handling the fabric. I will get some washable crayons tomorrow!
LikeLike
I’m gonna try melting the crayons in a dish and lay the paper on top and pull it off, like for ink paintings (google water transfer printing). I don’t know if this will work, but I wanna give it a go. I’m also gonna use parchment paper since that meant to be washed/reusable (I do it all the time) so the liquid crayon probably won’t make a huge difference.
LikeLike