
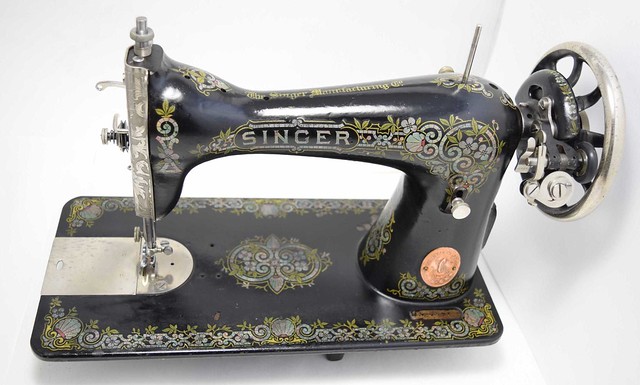
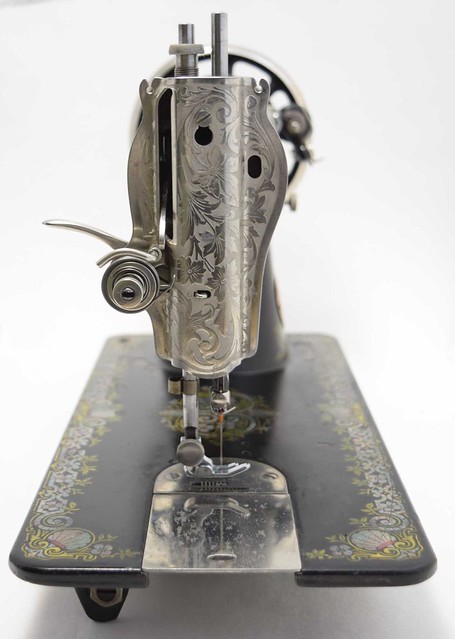
Whoops, I did it again. I bought another vintage sewing machine. This is a Singer 115 with Tiffany decals, made in 1919. I don’t typically name my sewing machines, but I think I’ll call this pretty lady Tiffany.
I had made a few rules for myself in an effort to keep my vintage sewing machine addiction somewhat in check:
- Only buy machines that I want to actually sew with. Since other than my serger and coverstitch machine, I can’t stand to sew on electric sewing machines, that means I also have to be able to treadle the sewing machine.
- I have to have a specific reason for buying it. The sewing machine has to perform at least one task better than the machines I already have.
- I have to be able to figure out a place in my house to put it. I have six treadle bases squeezed into my house, and I can’t fit in any more, so I have to be willing to displace one of my other machines from its treadle stand in order to use a machine regularly. I’d rather not swap out machines frequently, and it seems like six machines should be enough for one person.
So how did I justify Tiffany’s purchase? Well, the Singer 115 has a full rotary hook, which means no vibration at high speeds, and I was hoping it would treadle with very little effort (which it does), making it a good machine for quilting. Never mind that I hardly ever sew quilts, and when I do they are usually small and made from large squares. The other reason I bought this machine is that I really like the Tiffany decals. I figured I’d keep this machine out as a decoration even if I couldn’t get it sewing. So, OK, maybe I mostly bought this machine because it’s pretty. I’m allowed at least one machine in that category!
I did the most thorough cleaning and polishing job on this sewing machine that I’ve done yet. I found a series of blog posts about cleaning up a Singer 15-30 that were very helpful. I did all of the cleaning and polishing by hand with the help of Evaporust and metal polish, so it took me a couple of days. This machine deserved it, though.
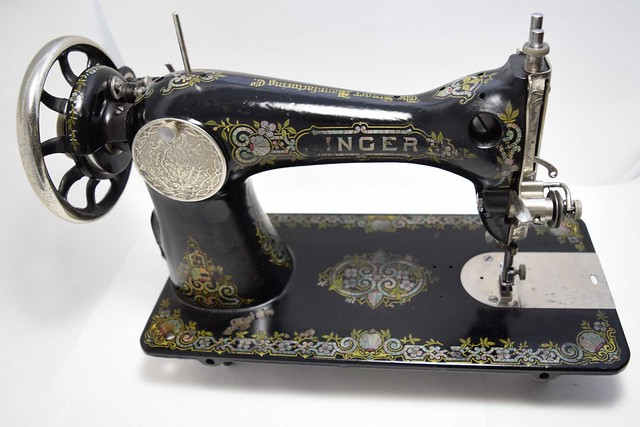
Here are some before and after photos:


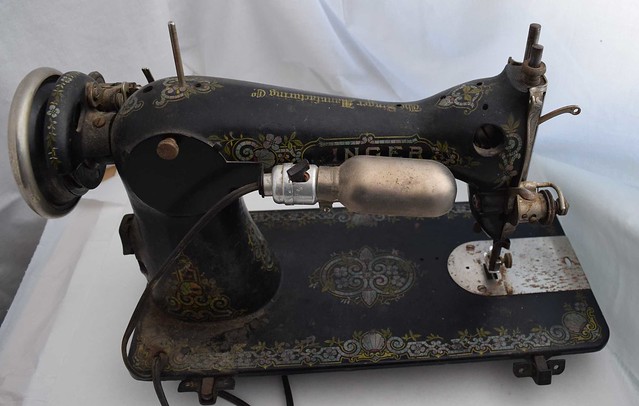
Tiffany was locked up at first, but the problem ended up just being a bit of ancient-looking thread caught in the bobbin area. I’m guessing the previous owner decided their machine was broken, put it in the back of the closet (where it sat for over half a century), and went out to buy a new modern sewing machine with advanced features such as reverse and zig-zag. Ha, and I fixed it in a few minutes just by jiggling the balance wheel until the piece of thread came into view and I could pull it out.
I found a manual for the Singer 115 on ismacs.net. Apparently Singer reused the model number 115, because if you look up 115 in the manual search on the Singer site, you get the manual for a different machine.
Tiffany did not come with a bobbin case, which was a bit of a problem. The original bobbin cases are really hard to find. You can easily find inexpensive replacement bobbin cases advertised to fit the Singer 115, but they don’t actually work well with the 115. I got a bobbin case and L type bobbins from SewClassic, and although they seem to be high quality items, they were designed to fit other machines that take L type bobbins, not the Singer 115.
The first problem I ran into was that the bobbins would not fit on the bobbin winder. They went onto the shaft OK, but the finger that is supposed to go down inside the bobbin would not fit into it. I think my bobbins have thicker edges than the originals did. I decided to file down the sides of the finger until it fit into a bobbin. This took forever, since I didn’t have the right tools, but I got it to work. I really need to get a Dremel one of these days.
When I started to sew, at first I thought everything was fine, but I kept getting thread snarls every few inches. I watched what was happening in the bobbin area, and the thread was getting caught on the edge of the bobbin case in two places. There were corners there that the thread was getting hung up on, so I used a diamond knife sharpener to file those corners off and smooth out the curves. After that I sanded the area with 1500 grit sandpaper and polished it with metal polish, and I think the area I worked on ended up smoother and shinier than it was originally!
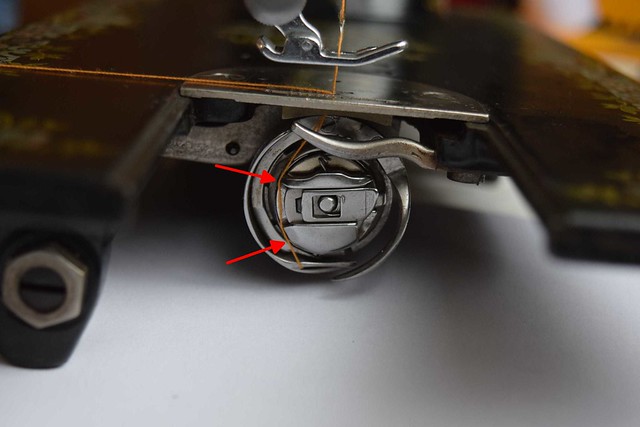
I tried sewing again, and now the thread slipped right around the bobbin case with no problems. I sewed for a bit, and things went well for a while, but then I got another thread snarl. I figured out that the bobbin case was gradually rotating counterclockwise, since there is nothing to hold it stationary. The machine would sew fine until the bobbin case rotated to about an eighth of a turn from horizontal, then the thread would get caught on the bobbin case.
I tried to find pictures of what the original 115 bobbin cases look like. I could only find this blurry picture and this picture of a broken one that show the top of the bobbin case, but it looked to me like the original bobbin cases have some sort of protuberances at 10 o’clock and 2 o’clock to keep the bobbin case from rotating. My bobbin case did not have those, so no wonder it was turning around. There is a stationary piece on the sewing machine that the little bumps sit on either side of.
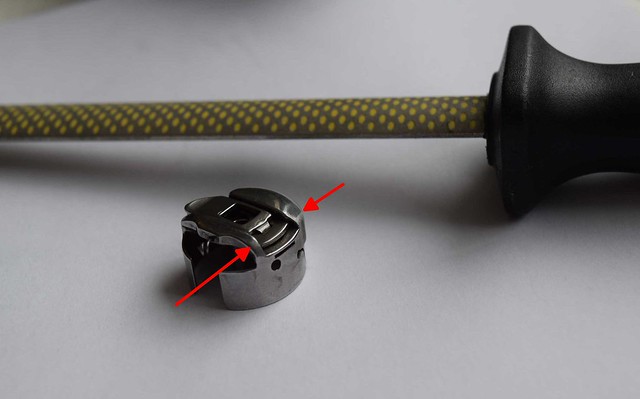
I thought it would be easy to find some little things to glue onto the bobbin case to keep it from rotating, but I couldn’t find anything around the house that was small enough. I ended up cutting 2.5 mm by 2.5 mm by 1 mm thick pieces of metal from the corners of a hinge. I have a small hack saw, but I don’t have a setup appropriate for working with tiny objects, so this was a bit of a challenge. At one point I dropped one of the tiny pieces on the floor and had to crawl around on the floor for a few minutes to find it. That was fun. I rounded down two adjacent edges on each piece to help keep the thread from getting caught on them, then I glued them onto the bobbin case with JB Weld.

The next day after the epoxy had cured, I tried sewing, and it worked! No more thread snarls! I really hope the JB Weld holds. I’ve been having problems with it on other projects, and I think it might be because I didn’t get the proportions of the two components right or the hardener had separated too much. I have a milligram scale now, so this time I weighed the two components to make sure I got equal amounts. I cleaned the parts with alcohol before I epoxied them together, but I’m not one hundred percent sure I got all of the oil off, which would also cause problems. At least the little tabs aren’t under much stress.

One other problem I had with this machine was that the tension would not release when the presser foot was lifted. I finally figured out that the tension release pin was slightly too short. I found a longer pin on one of my parts machines, filed it to the right length, and now the tension release works perfectly.
When I was looking for my 115, it took me a while to figure out how to tell the difference between a Singer 115 and the very similar looking and much more common early model 15’s. The simplest way to tell the models apart is to open up the slide plate or look at the underside and see what the bobbin area looks like. There are some side by side pictures of the bobbin areas of a 115 and 15 on this quiltingboard thread.
Here are some tips if you are trying to identify a Singer 15 or 115 from pictures and you don’t have a picture of the underside:
• The first thing to look for is that the tension assembly is on the left side of the machine. 115’s, 15’s, and 15 clones all have this feature.
• Look for the typical rounded, curvy body shape of a model 15. There were quite a few variations of the model 15 over the years. Some versions of the model 15 have the exactly the same body shape as the 115, and some are different.
• If you know the serial number, you can look up the model number in the ismacs database. I think all 115 serial numbers start with G followed by a seven digit number. Many model 15’s have serial numbers that start with G too, though. The “G” may be smaller than the numbers, right on the edge of the serial number plate, and/or covered by grime, so it can be easy to miss.
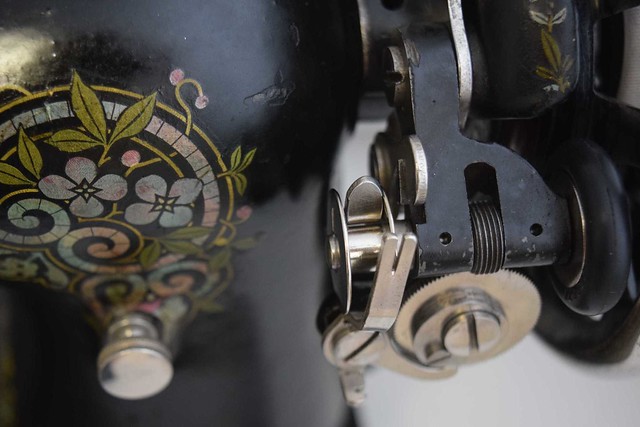
• Model 115’s were never made with reverse. Model 115’s and early model 15’s have a round knob that slides up and down to change the stitch length. If the machine has a stitch length/reverse lever with a round plate around it, it’s a later version of the model 15.
• Look at what type of balance wheel (handwheel) the machine has. If it is solid, that doesn’t tell you anything, but if it is spoked, count the number of spokes. If there are 9 spokes, it could be either a 115 or a 15. If there are 6 spokes, it’s a 15.
• If the sewing machine is not in a cabinet or case and is sitting on a table, a 115 will sit level. A 15 will be tilted at an angle, with the left side up a little higher.
• Model 115’s only came with either the “Gold Wings” (aka “Wings”) or “Tiffany” (aka “Gingerbread”) decals. If the machine has Gold Wings decals, it’s a model 115. If it has Tiffany decals, it could be either a 115 or 15. If it has some other decals, it’s a 15. Of course this only helps if the machine has the original decals. If the decals are bright and perfect looking, it’s possible the machine was repainted and new decals were applied.
I couldn’t help taking a lot of pictures of Tiffany, since she’s so pretty. I didn’t want to overload this blog post with them all, so click on over to Flickr if you want to see more pictures.
 GrowYourOwnClothes Etsy Shop

You did a fantastic job of cleaning up Tiffany
LikeLike
Awesome decals. And beautiful cleaning job. Now I’m sad when I look at my 15-30’s nicked up finish. 🙂
LikeLike
Pretty cleaning job. What did you use on the painted portion to clean it without causing the decals to silver?
LikeLike
Since these Tiffany decals are multi-color, I don’t think they silver. They do fade and rub off, though. I washed it with a damp cloth dipped in water with a little dish soap, then wiped with plain water. (I probably shouldn’t have done this, because most of the remaining brownish shellac came off.) Then after it was dry I gently wiped it down with sewing machine oil a few times. It only looks pretty in the pictures because it was freshly wiped with sewing machine oil. Since most of the shellac is gone, I’ll need to repair the shellac coat before sewing with it much, or the decals will rub off.
LikeLike
I love the decals on this one, she is very pretty! Nice job with the clean up. Thanks for showing the before/after photos – those are great to see. I always forget how dirty my machine was before I started cleaning it, so I’m always happy to see the before/after shots! I too have stopped buying machines because of a lack of storage space and also, I can’t stand to have a machine that I can’t sew with.
LikeLike
Thank you for posting all this 115 machine information detail!! I really appreciate it.
LikeLike
Another way to identify a Singer 115 is the 3 holes on the bed of the machine. The Singer 15 only has 2.
I am in the process of rehabbing a 1919 Singer 115, it has a bit more rust than I’m happy with.
LikeLike
Thank you for the info on adding “tabs” to the U20 bobbin case. How has the modified bobbin case held up to time and use?
LikeLike
Well, I haven’t used it much, so I can’t say. My machine needs to be French polished with a new coat of shellac, or what decals it has will wear off, and I haven’t gotten around to that yet. I was hoping this machine would be super-smooth and easy to treadle for quilting, and it is, but I have only been sewing garments since I got it. The spring that returns the feed dog is pretty loud and makes a clackety noise, so it’s not as quiet of a machine as I had hoped, and I wonder if that spring will eventually wear out. I don’t anticipate problems with the bobbin, since the tabs aren’t really under much stress. I did finally find an original bobbin on ebay, too.
LikeLike
” it seems like six machines should be enough for one person.”
Funny. Part of your standup routine?
Thanks for the info. I found your post on Victorian Sweatshop as I just bought a 115 with the Wings decals and the bobbin case is a bit corroded so I’m just starting to do the research in case I can’t clean it up.
I see Leila found one on ebay but when I went to look the only one listed had sold for $115, well over what I paid for the machine. Isn’t that the case generally with our old sewing machines.
LikeLike