
The Amazon product links in this post are affiliate links. If you click on these links and purchase something, I will earn a small commission.
My husband has been asking me to make him a white shirt. This fall decided I would make him the shirt for Christmas. I got fabric and prewashed it twice. I bought interfacing. I bought the Sew Better, Sew Faster: Shirtmaking Craftsy class, which includes a free copy of the Islander Sewing Systems Men’s Shirt Maker’s Express pattern. I watched the class. Watched it again. I printed out the pdf pattern and glued the sheets together. Finally I got started. Sort of. Really, I think it’s that white fabric that scares me more than anything. I’m afraid I’ll stain it if I look at it wrong.
I wanted the shirt to fit really well, but I hate making pattern alterations. I don’t mind adjustments that involve pinching a bit of fabric out, but trying to figure out how much to enlarge an area is a problem for me. Judging from how my husband’s ready-to-wear clothes fit (or don’t) I expected to have to enlarge the neckline and make a broad back adjustment.
Since Mr. GrowYourOwnClothes as been working out of town quite a bit lately, and wouldn’t be available for frequent fittings, I decided to drape a fitting shell on him and use that to help me make the pattern adjustments. Plus I just like to make clothes the right shape in the first place rather than trying to “read the wrinkles” and figure out how to fix the shape after the fact, even if it takes more time, since I think I get better results that way.
A few years ago when I first attempted to drape a fitting shell, I kept thinking there had to be a better material to use than fabric. Something that I could tape instead of pin, a material that would hold a crease well; something flexible that had just a little bit of give, but wouldn’t stretch on the bias; something not too slippery, and maybe transparent . . . Well, I found it.
To make the draping material, I layer together about five layers of commercial grade PVC plastic food wrap, keeping some wrinkles in each layer to add stability, then press it flat with a rolling pin. You have to use commercial grade PVC plastic wrap – the safer types of plastic most consumer brands have switched to aren’t as sticky. Store brand cling film might be PVC, but it’s too thin. Stretch-Tite brand will work – it’s the same stuff as the Polyvinyl Films food wrap I have, just in a smaller package. I haven’t tried pallet wrap, but it might work too – it is stickier and stretchier than food wrap, though.

This plastic wrap draping material is fairly easy to work with, but it does have some drawbacks. The main problem is that you have to prepare the draping material, do your draping, and trace the pattern onto paper all in one day, because the layers start to separate after a few hours and the material starts to stretch out of shape. The only other problem I’ve had is when I folded my plastic wrap pattern in half, then had trouble getting it apart again. You have to keep in mind that it sticks to itself, which makes it easy to fold out darts, but it can be a problem if you are not careful.
I’m always astounded at the excellent results I get when draping with this stuff. Mr G is a volunteer firefighter/EMT, and he was on call when I draped his fitting shell, so I really hurried to get it done, since I knew I might have to rip it off of him any second if his pager went off. I didn’t look at the clock, but I think I got the draping done in about 20 minutes. It was a sloppy draping job – the left and right sides didn’t match very well, but it didn’t matter, because after averaging the two sides, the pattern came out quite well.
The key to successful draping, especially when draping on a real person, is to drape both sides of the body. I’m not sure why so many sewing experts tell you to only drape one side, even on an actual person. Maybe because that’s the way it’s always been done, it sort of works on a symmetrical dress form, and no one will take you seriously as a sewing expert if you don’t do what everyone else is doing? In my experience you will get better results in less time if you drape both sides, even on a symmetrical dress form. Keep the center front and center back vertical, and try somewhat to keep the darts and seamlines the same on both sides, but don’t waste a lot of time trying to keep the left and right the same.


After you mark the darts and seamlines, remove the draping material. To “average” the two sides, trace the left and right sides on top of each other, aligning center front or center back lines. I use dressmakers tracing paper and a tracing wheel to do the tracing. Everywhere there is a corner, make a dot midway between the corners on the left and right side tracings. Then simply draw a line midway between the two traced lines. I usually just do this by eye, and only measure if there is an especially large gap between the two lines. The only exception would be the shoulder line – I adjust it to fit the higher shoulder when I’m draping on a real person or custom dress form. True up the darts similarly.


After that, I add wide seam allowances to the pattern, sew up the fitting shell in fabric, and make any minor adjustments needed. Despite the hasting draping I did on Mr. G, I only had to deepen the back of the armholes and lower the front neckline a tad. Everything else was fine. I swear this “averaging” technique works like magic. It really doesn’t take long, and it cuts down on the pattern alterations needed later, since your full circumference measurements will be correct, and it allows you to quickly make a symmetrical pattern to fit a not perfectly symmetrical figure.
Since coming up with this plastic wrap draping material, I’ve learned about additional alternative materials other people use for draping – heavy weight non-woven interfacing, Swedish tracing paper, plastic sheeting, paper, etc. Swedish tracing paper is the only other material I know of that has similar benefits to layered plastic wrap when used as a draping material (and it doesn’t have the drawbacks plastic wrap does), but I still don’t use it. Every time I need to do some draping I reach for my giant roll of plastic wrap. I think it’s mostly just a cost issue – Swedish tracing paper is great, but a bit expensive for my taste, and I already have a lifetime supply of plastic wrap.
So, back to Mr. G’s shirt. I placed his torso block over the Islander men’s shirt pattern I got with my Craftsy class. After staring at it for a bit, I decided the alterations would be more than I wanted to deal with, and there were some features I didn’t like about the pattern anyway, so I decided to mostly re-draft the pattern. I tend to go to great lengths to avoid complex pattern alterations.

I used the book The Practical Guide to Patternmaking for Fashion Designers: Menswear by Lori A. Knowles, which takes the non-traditional approach of designing men’s clothes based on basic blocks, like the method most pattern making textbooks follow for women’s clothing design. In my opinion, this is a better approach than drafting everything from measurements, as is often done for menswear, since you don’t have to make as many fit corrections on the final pattern when you’ve already fitted your basic blocks. I followed the directions in the book for making a shirt pattern from the torso block, mixed in some elements from the Islander men’s shirt pattern, some ideas from a ready-to-wear shirt, used Pam Erny’s shirt sleeve placket tutorial, and somehow I came up with a shirt pattern.
After I had make the pattern, I sewed up a quick muslin. The only changes I had to make were to shorten the sleeves, take in the side seams, and raise the back yoke line. Yay, no slashing and spreading to make it larger!
After procrastinating for so long and spending so much time working on the pattern, I didn’t get the white shirt done in time for Christmas, so Mr. G got a wearable muslin instead. It’s made from quilting cotton with roosters all over it. The fabric was from a stash my mother bought at an estate sale and gave to me, and it’s come in quite handy for making muslins. I didn’t quite think through the consequences of choosing that particular print, though.
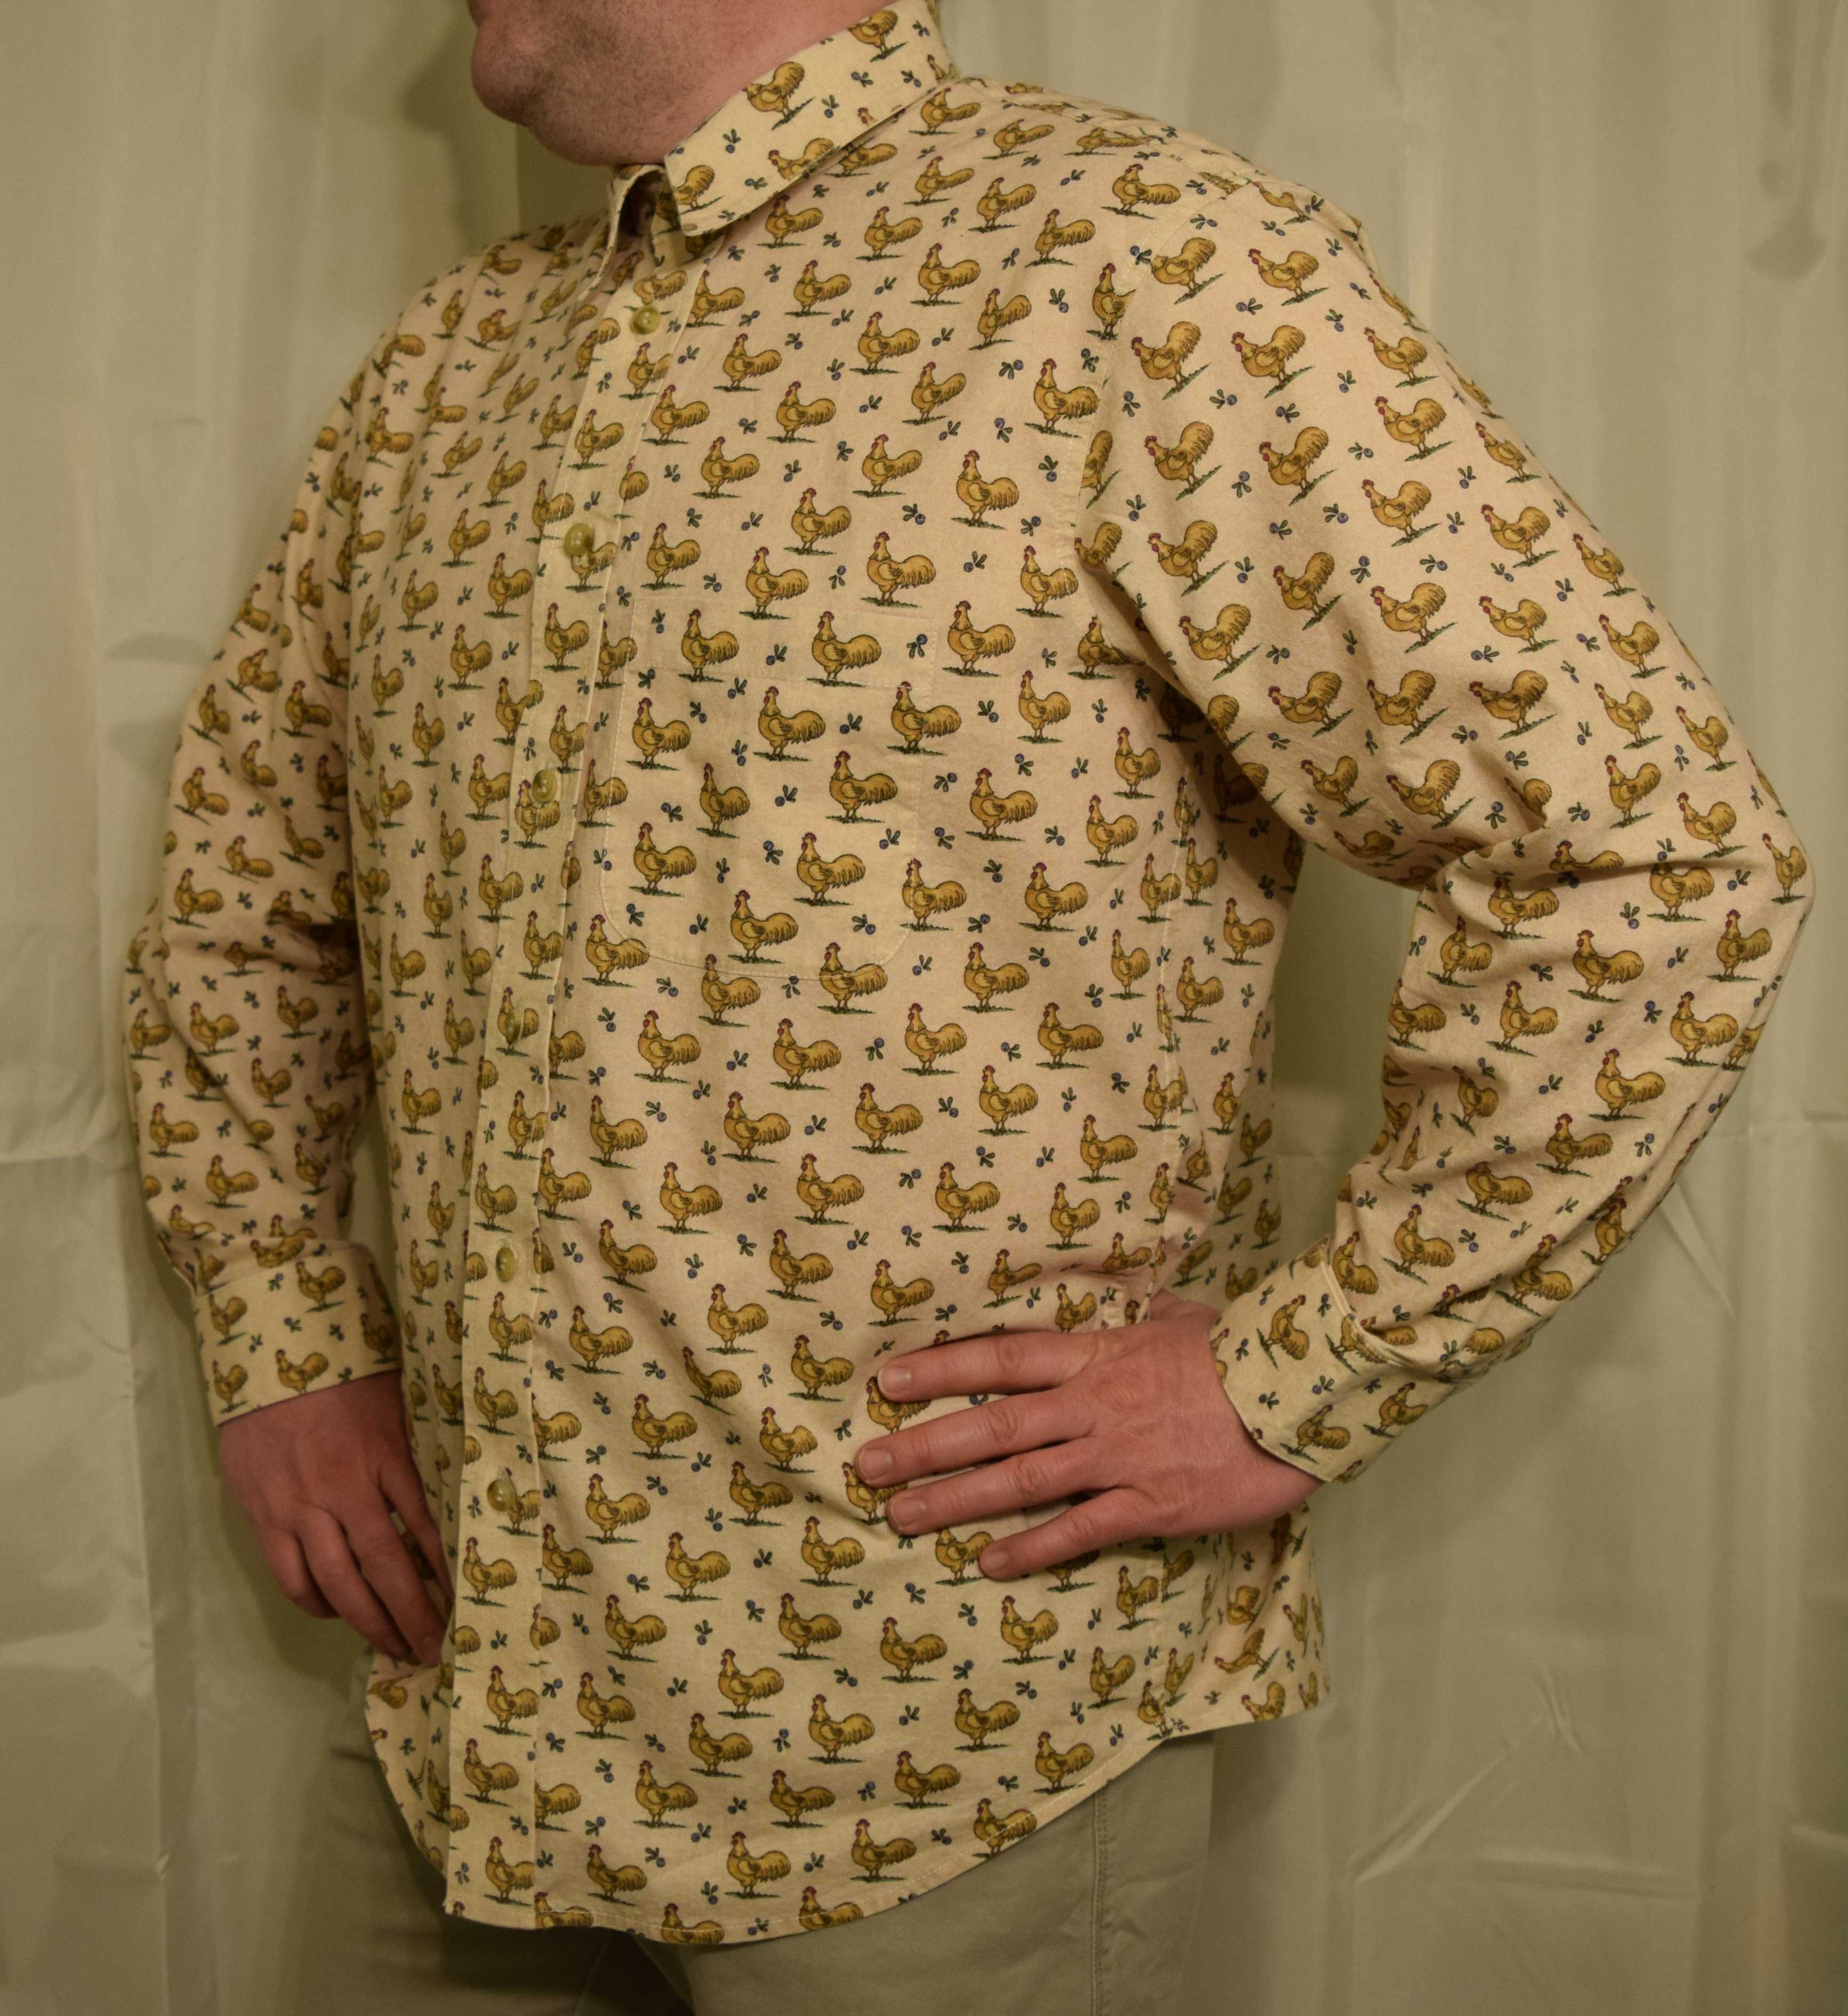

Mr. G wasn’t supposed to wear this shirt out of the house. Now he’s out on another business trip, he took the shirt with him, and he said he’s going to wear it out to dinner! Erg. He brags about the things I sew, and I just imagine people snickering at the shirt. What do people think of me for sewing such a wacky shirt? Do they think less of him because he married a nut job who sews ridiculous things? I think maybe he just wants an excuse to make rooster jokes, using the other word for roosters, of course, as in “I have a lot of [roosters] on my shirt”. Ha ha. How did I not think of that before I made the shirt? I should have used the fabric covered in acorns – oh, wait, no, then there would be nut jokes.
His comment on the fit was “It feels like I’m not even wearing it,” which pleases me. It was a lot of work to get that perfect fit, but it all worked out, and now I have a pattern I can use many times.
I like this method of making sleeve plackets. They come out well, even without a lot of practice.


The hem was sewn before the side seams, which keeps the curved hem from curling up. I think I’ll only do this when the seams are flat-felled, though. I wouldn’t want to see any seam edges peeking out.

Now it’s time to brave that white fabric and make the real shirt!
 GrowYourOwnClothes Etsy Shop

What a beautiful shirt! I really like the roosters and can see why he does as well…minus the “rooster” jokes 😉.
LikeLike
How interesting to read your post. I think you are the first person I’ve seen use plastic wrap since reading about this on Kathleen Fasanella’s site many years ago. It’s great to have confirmation that this method works! Maybe I will even get around to trying it myself. 🙂
Here are two links to Kathleen’s articles from 2005 for anyone who would like further reading.
http://fashion-incubator.com/saran_wrap_pattern_making_method_1/
http://fashion-incubator.com/saran_wrap_pattern_making_method_2/
I chuckled over your husband wearing his rooster shirt outside the house.
LikeLike
Those articles were what gave me the idea, but I am using the plastic wrap differently. I roll it flat, then drape as you would with fabric by folding out darts, etc.
LikeLike
The shirt is awesome and it fits him very nicely. Just think that artsy people in New York city would pay through their noses to get their hands on rooster shirts like this one. Your husband might start a trend!
LikeLike
I love it! You obviously got the perfect fit! Maybe next time make the muslin out of fabric with roses or ballerina’s on it! 😂 roosters aren’t that bad you know!
LikeLike
I think it’s lovely! Think I prefer roosters to a plain white shirt
LikeLike