
 I tend to get a bit obsessed with custom dress forms. Sometimes I’ll spend more time making them than using them for sewing. But I guess that’s OK – it’s a craft project, and if I enjoy it just for the sake of making it, why not? This time it was PattiJ’s comment on my Mini Stuffed Dress Form Pattern post that got me started on my latest dress form obsession. I had already been wondering if the same technique I used for the stuffed dress forms would work for making a custom form for an actual person. Then the next morning my husband had to get up early, and as I was lying in bed trying to go back to sleep, I planned out how I could make a dress form for my daughter. I’d wrap her up in tape, cut the tape apart to make a pattern, true up the pattern, then sew and stuff the form. It all seemed so easy and logical at 4 am.
I was fully prepared to bribe my daughter to let me wrap her in plastic wrap and tape to make a pattern, but I figured I’d just ask first and see what she said. She said “OK,” just like that. Wow, what a kid. She thinks it’s totally normal for Mom to wrap her up in tape, poor thing.
I planned everything out ahead of time, since getting the taping done quickly would be essential when working with a child. About a half an hour in she started sighing heavily, then after a while there would be a little whimper after the sigh, but she actually did quite well. Of course she couldn’t stand still, so there were some extra wrinkles in the tape I had to figure out how to deal with.
I got the actual taping and marking done in about an hour. The last time I made a paper tape form for an adult, it took about four hours, even with a helper handing me tape, and it was exhausting for everyone involved. So this technique could be a way to make a custom form for someone who can’t stand long enough to make a tape or plaster form, and for figures where padding out a dress form is not an option.
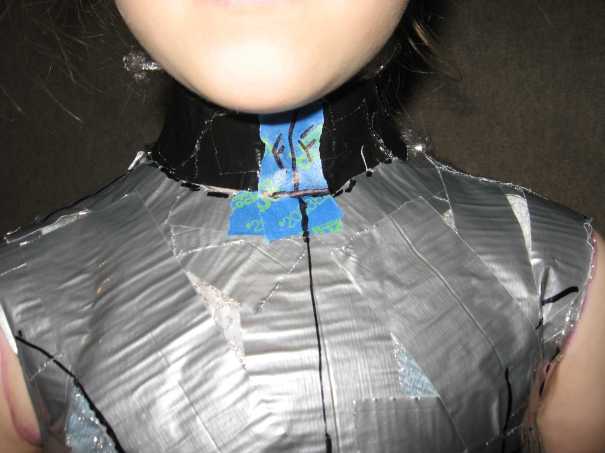
First I marked her neckline, shoulder line, and armholes. I’ve learned that it’s important to mark the armholes carefully when making a custom tape form, then tape right up to the edge of the line. It’s really difficult to go back later and figure out where the armhole and shoulder point should be. A little aside on the markers I used – I did the marking with Crayola Ultra-Clean Washable Markers, which really wash out well. They are perfect for marking fabric – way better than anything I’ve found at the fabric store. I learned about them from this Baste and Gather post.

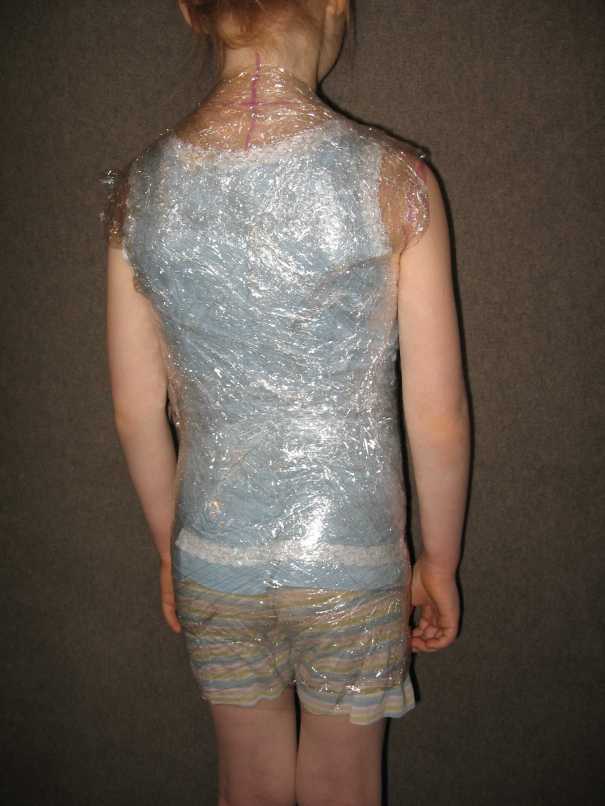
I wrapped plastic wrap around her body, then covered it with duct tape. I used several layers of Stretch-Tite plastic wrap, which is commercial grade PVC plastic wrap, so it sticks to itself better than most of what you will find in the grocery store these days. Most plastic wrap sold for home use is made of plastic that is safer for use on food, but it’s not as good at sticking to itself. If you want to try this with plastic wrap that won’t stay stuck to itself, use only one layer of plastic wrap, tape it to hold it in place as you apply it, and make sure you tape over all of the plastic wrap, rather than leaving some of it exposed like I did.
I wrapped duct tape over the plastic wrap, then marked reference lines and potential seam lines. I didn’t go to much effort to get the right and left sides the same – no matter how careful you are, they’re never going to match anyway, and I was in a hurry. I figured I’d just average everything out later, which ended up working fine.

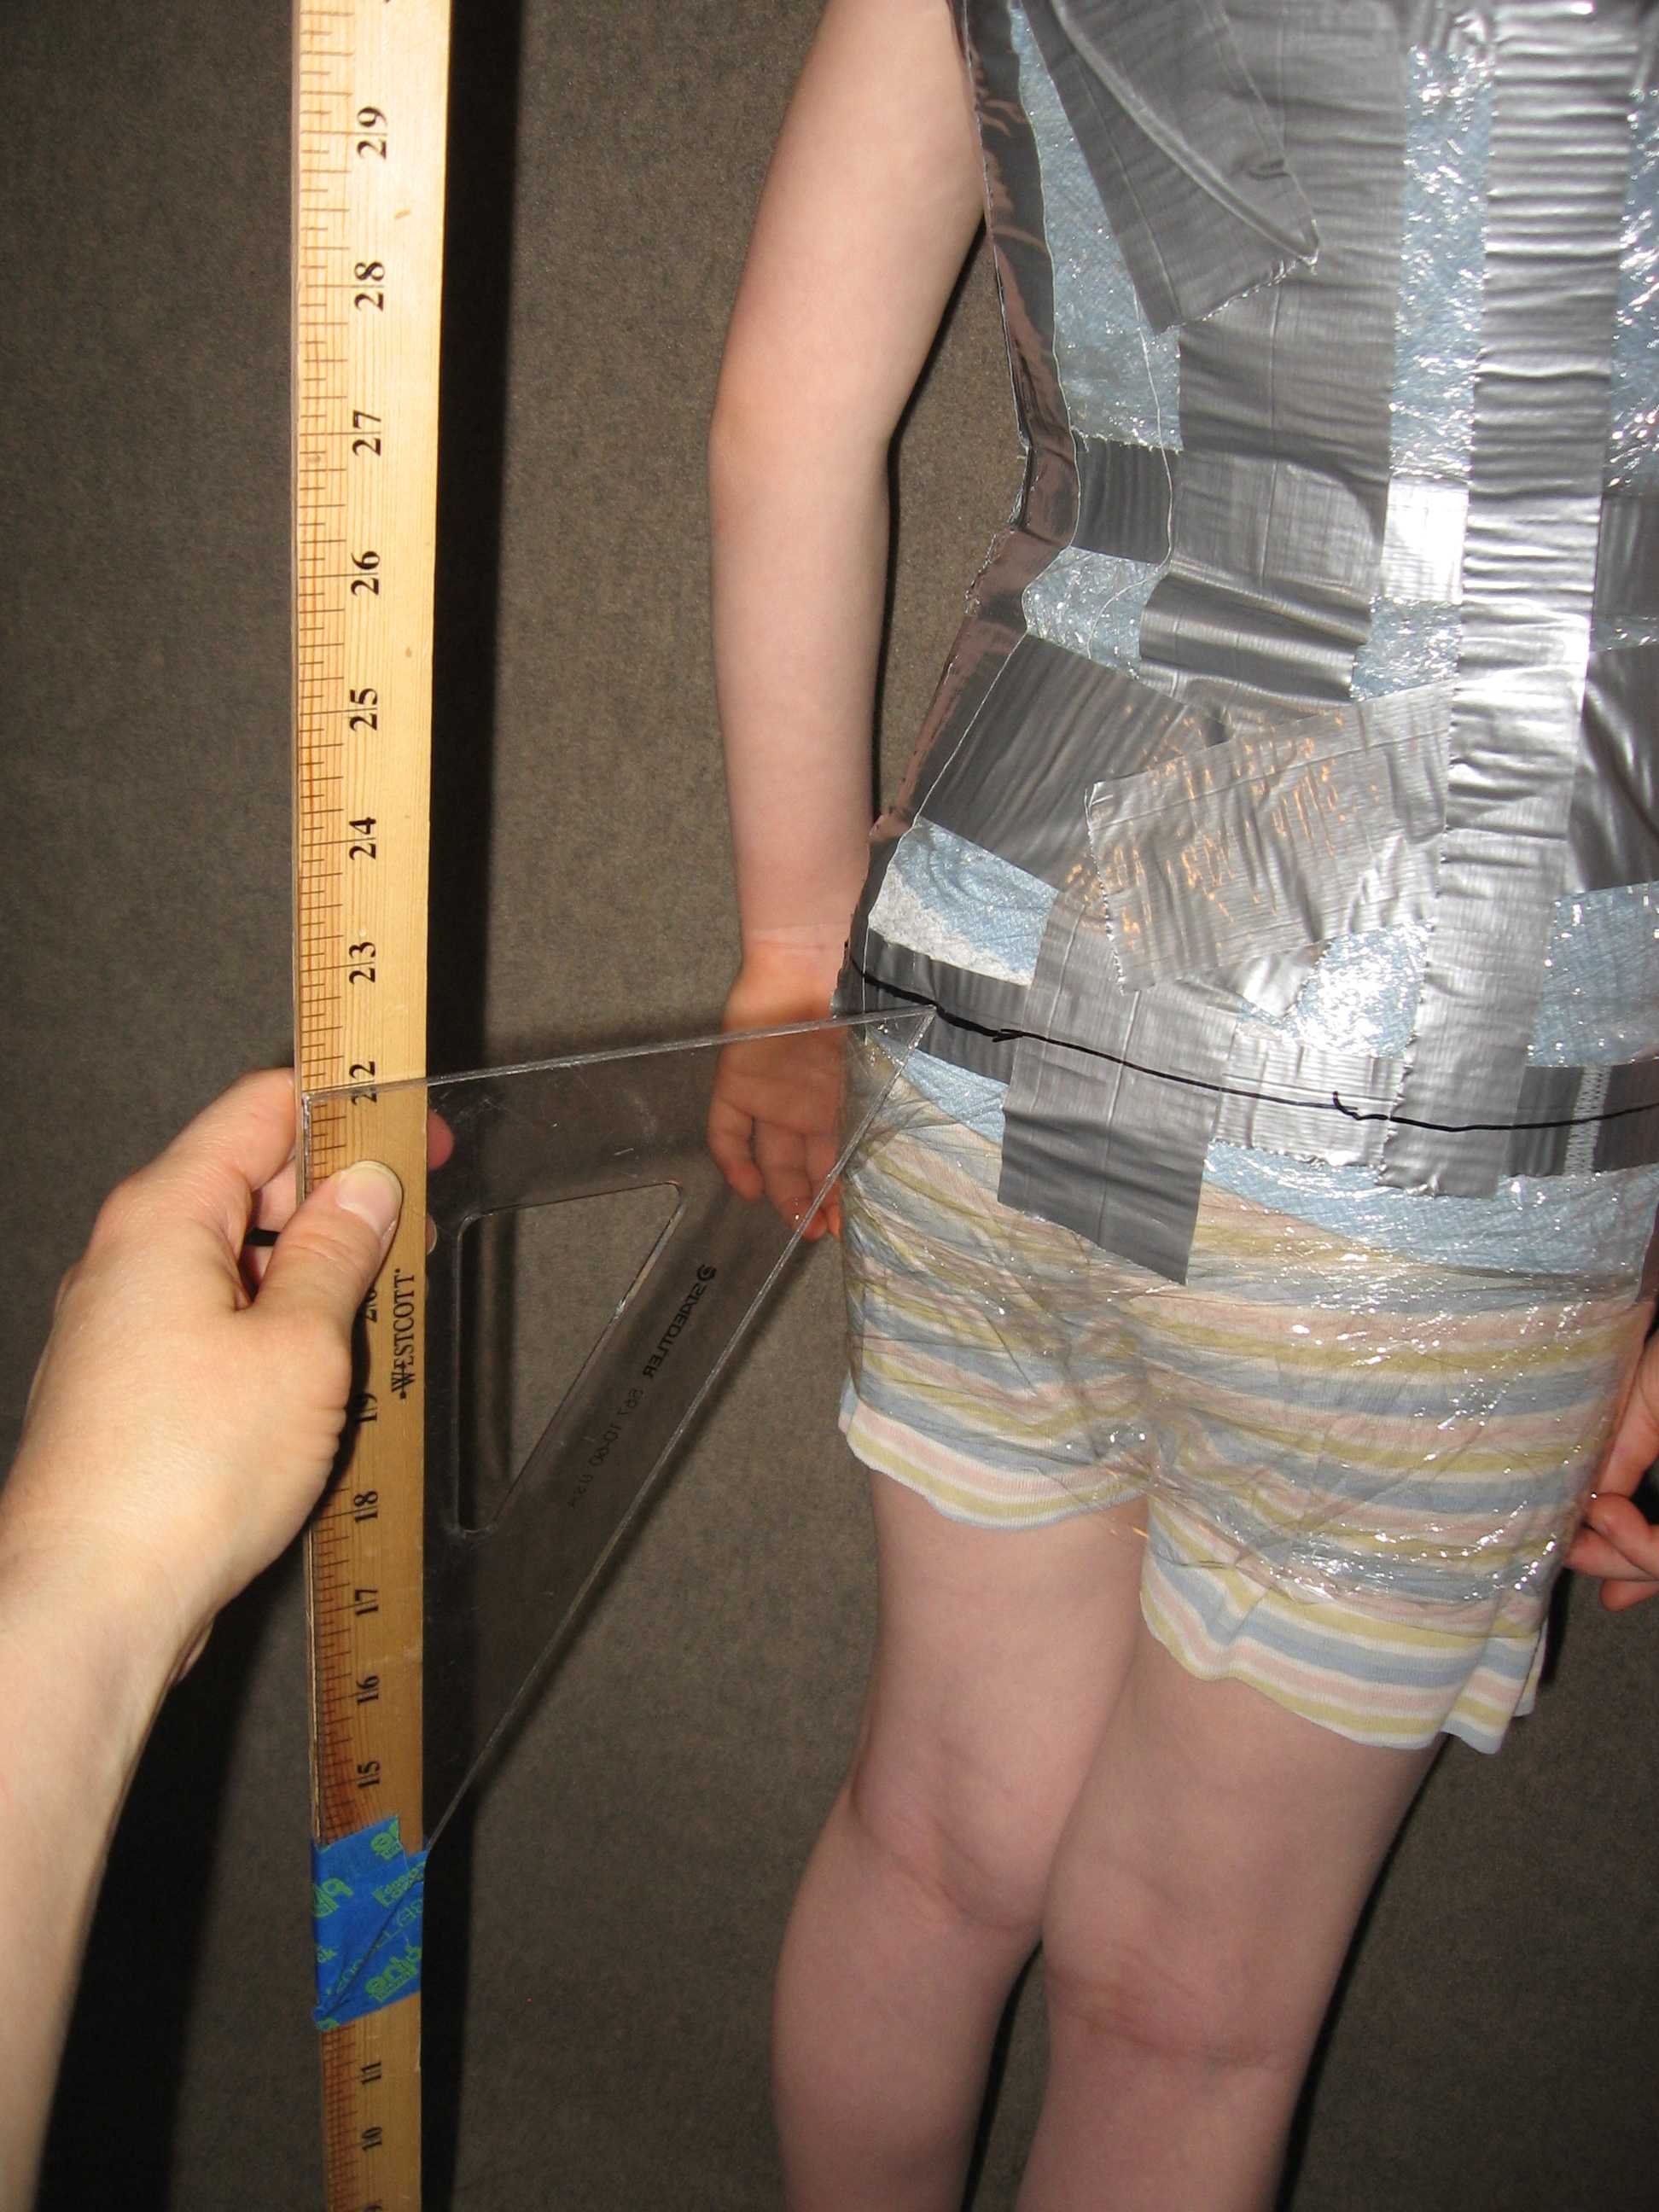
I did do my best to mark a level line around the hips, since I used that as a reference line.
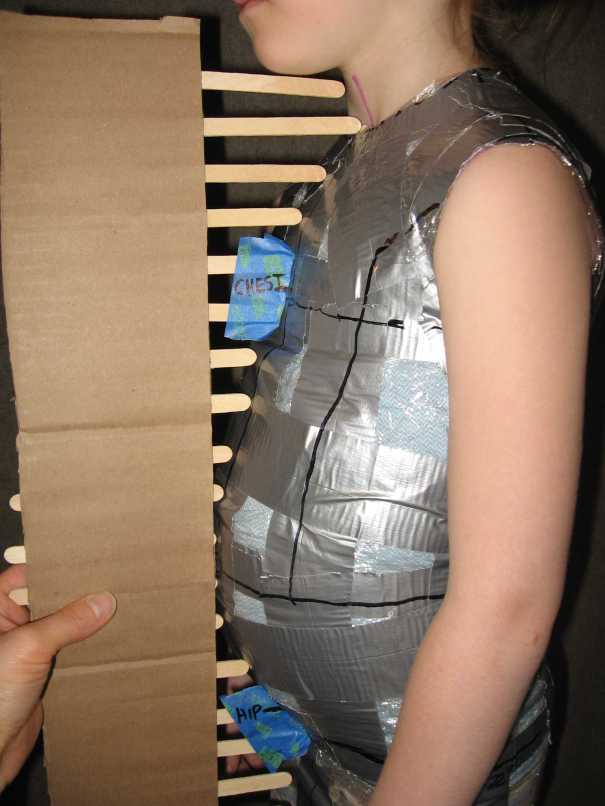
Here’s the key that makes a sewn and stuffed dress form hold the correct shape – capturing the center profile shape. I made a profile gauge using Popsicle sticks and a piece of cardboard as my variation on this instructable. I captured the center front profile, marking the locations of the hip and chest lines. For the back profile, I put the edge of the cardboard up against a wall so I could establish a plumb line to reference. I traced the profiles onto paper, along with chest marks, hip marks, and plumb lines.

I measured the body depth at hip, waist, chest, and neck.

I used water activated kraft paper tape to capture the shape of the armhole. I used four layers of paper tape, so it held its shape pretty well even though I had to remove it before it dried.


I also used paper tape to capture the cross section shape at the lower edge of the form 3 inches below the hips.

I taped around the neck as one of the last steps, since it gets pretty uncomfortable having your neck constricted. Then I cut her out! She was very happy to escape at this point.

I cut out the front profile, marked the body depth measurements on the back profile, and lined up the front profile so the depth measurements were correct. I used this shape to make the pattern piece for the center support that is sewn to the center front and center back of the form and keeps it from bulging out into a round shape when it is stuffed.

Before I cut apart the tape form, I labeled each piece with its name, left or right, and an arrow pointing up. Some of the pieces were rectangular, and I would have gotten the pieces mixed up otherwise. I cut apart the form on seamlines located so that each piece was fairly flat. I used an armhole princess line in the front, but a shoulder princess line worked better in the back.
I traced the left and right pattern pieces on top of each other, aligned at one point. I averaged the two by putting a dot midway between corner points, then drawing a line midway between the original two. This worked really well. Lumpy, jagged shapes were magically smoothed out.


Then came trueing up the pattern to get all of the seam lines to match. This was the point when I started to think I was crazy for beginning this project, but I was too far into it to quit. My new Japanese measuring wheel got a lot of use. The pieces actually fit together surprisingly well, considering. I decided not to try to reduce the chest, waist and hip to match her actual measurements because a) it was easier, b) I’d had about enough of this and c) she’s growing anyway. I did reduce the tummy a little though – whenever you wrap someone in tape the tummy always seems to come out too big.
I added quarter inch seam allowances, cut out the pieces in quilting cotton, and sewed it up using the same construction methods I used for my mini dress forms. I interfaced the neck, armhole covers, and center support, but I didn’t want to fuse that much interfacing on the rest of the pieces, so I used 505 basting spray to layer two layers of quilting cotton together, one layer with the grainline going vertically, and the other with the grainline horizontally. It worked well, was easy to sew, and hardly stretched when I stuffed it, but I think I’d use thicker fabric for one of the layers if I did this again.
 I stuffed it with fabric scraps that I’d been saving. I save every scrap of thread, fabric, and serger trimming, since I always find a use for it, usually to stuff some sort of dress form. Stuffing with fabric scraps made the resulting form a bit lumpy, but I didn’t want to buy a couple of bags of fiberfill to stuff it with. I can’t believe how much that stuff costs.
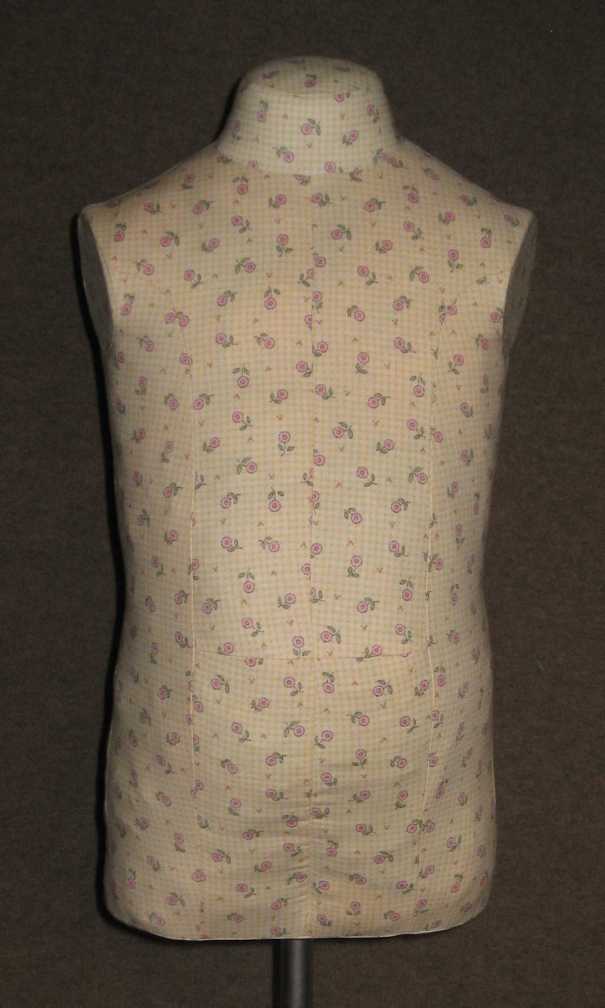
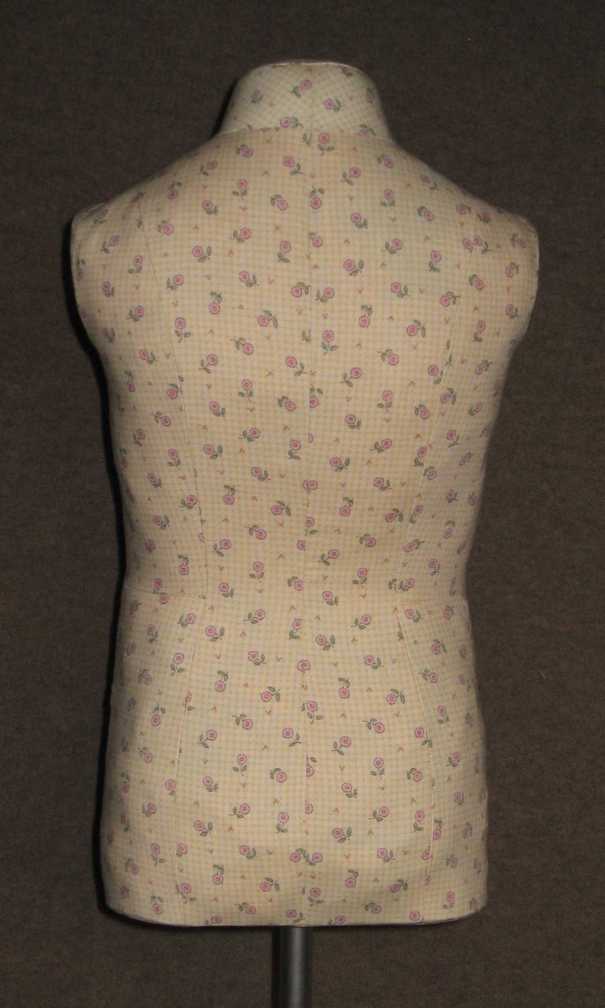
And there she is – my calico kiddo.


This is the dress I made for my daughter with the remnants from my blue dress.

 GrowYourOwnClothes Etsy Shop

Very nice job!!! And what a patient little girl. She got a “twin” and a new dress! Pretty.
LikeLike