
If you’ve made pattern alterations near a dart, rotated a dart, or made your own pattern, you’ll need to true up the edges of the pattern at the darts so the dart excess lines up properly when the darts are sewn and pressed into place.
Every patternmaking book I’ve read says to fold your paper along the dart stitching lines, fold the dart down or to the center, and then cut the paper along the outer edge of the seam allowance. I always find it difficult to fold an accurate dart in paper, though. Even worse, If I’ve altered a pattern, it’s typically a mess of tape holding bits and pieces of paper together, and there’s no way I could fold it accurately. Also, I’d rather not crease up my patterns if I can avoid it.
One solution is to trace just the dart area onto another piece of paper, fold and cut the paper, then trace the shape onto the pattern. However, I find the following method is easier and faster. This method uses principles of geometry, but don’t worry, you won’t need to do any math calculations.
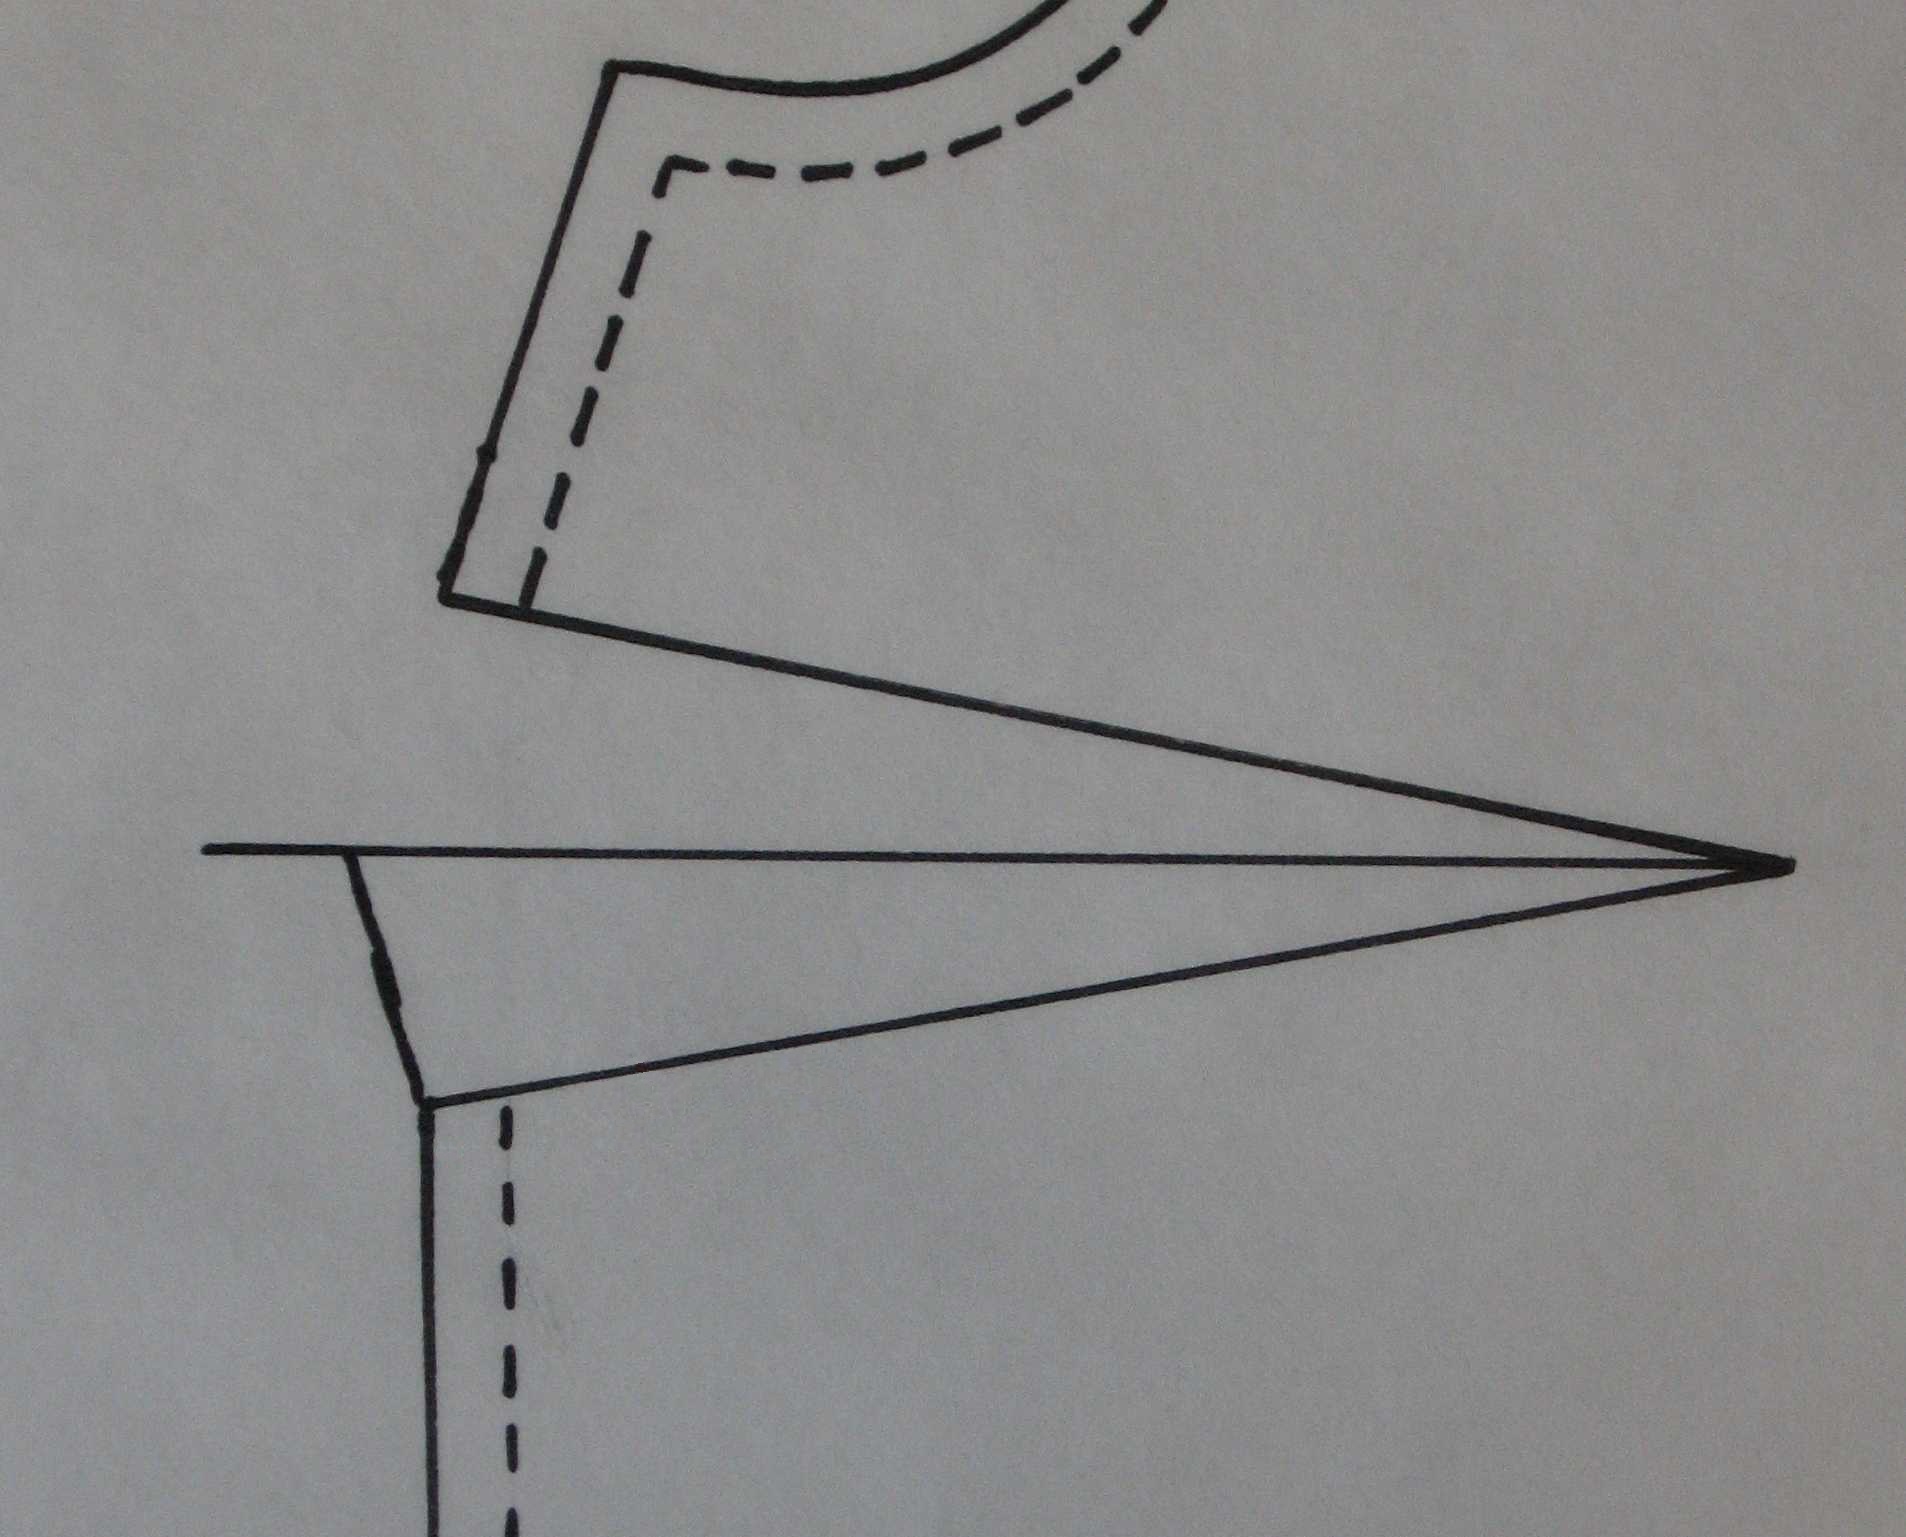
Step 1: Draw in the centerline of the dart.

Step 2: Cut a scrap of paper that has at least one straight edge. Align the straight edge along the dart leg that the dart will be folded toward (generally the dart will be folded either down or toward the center).

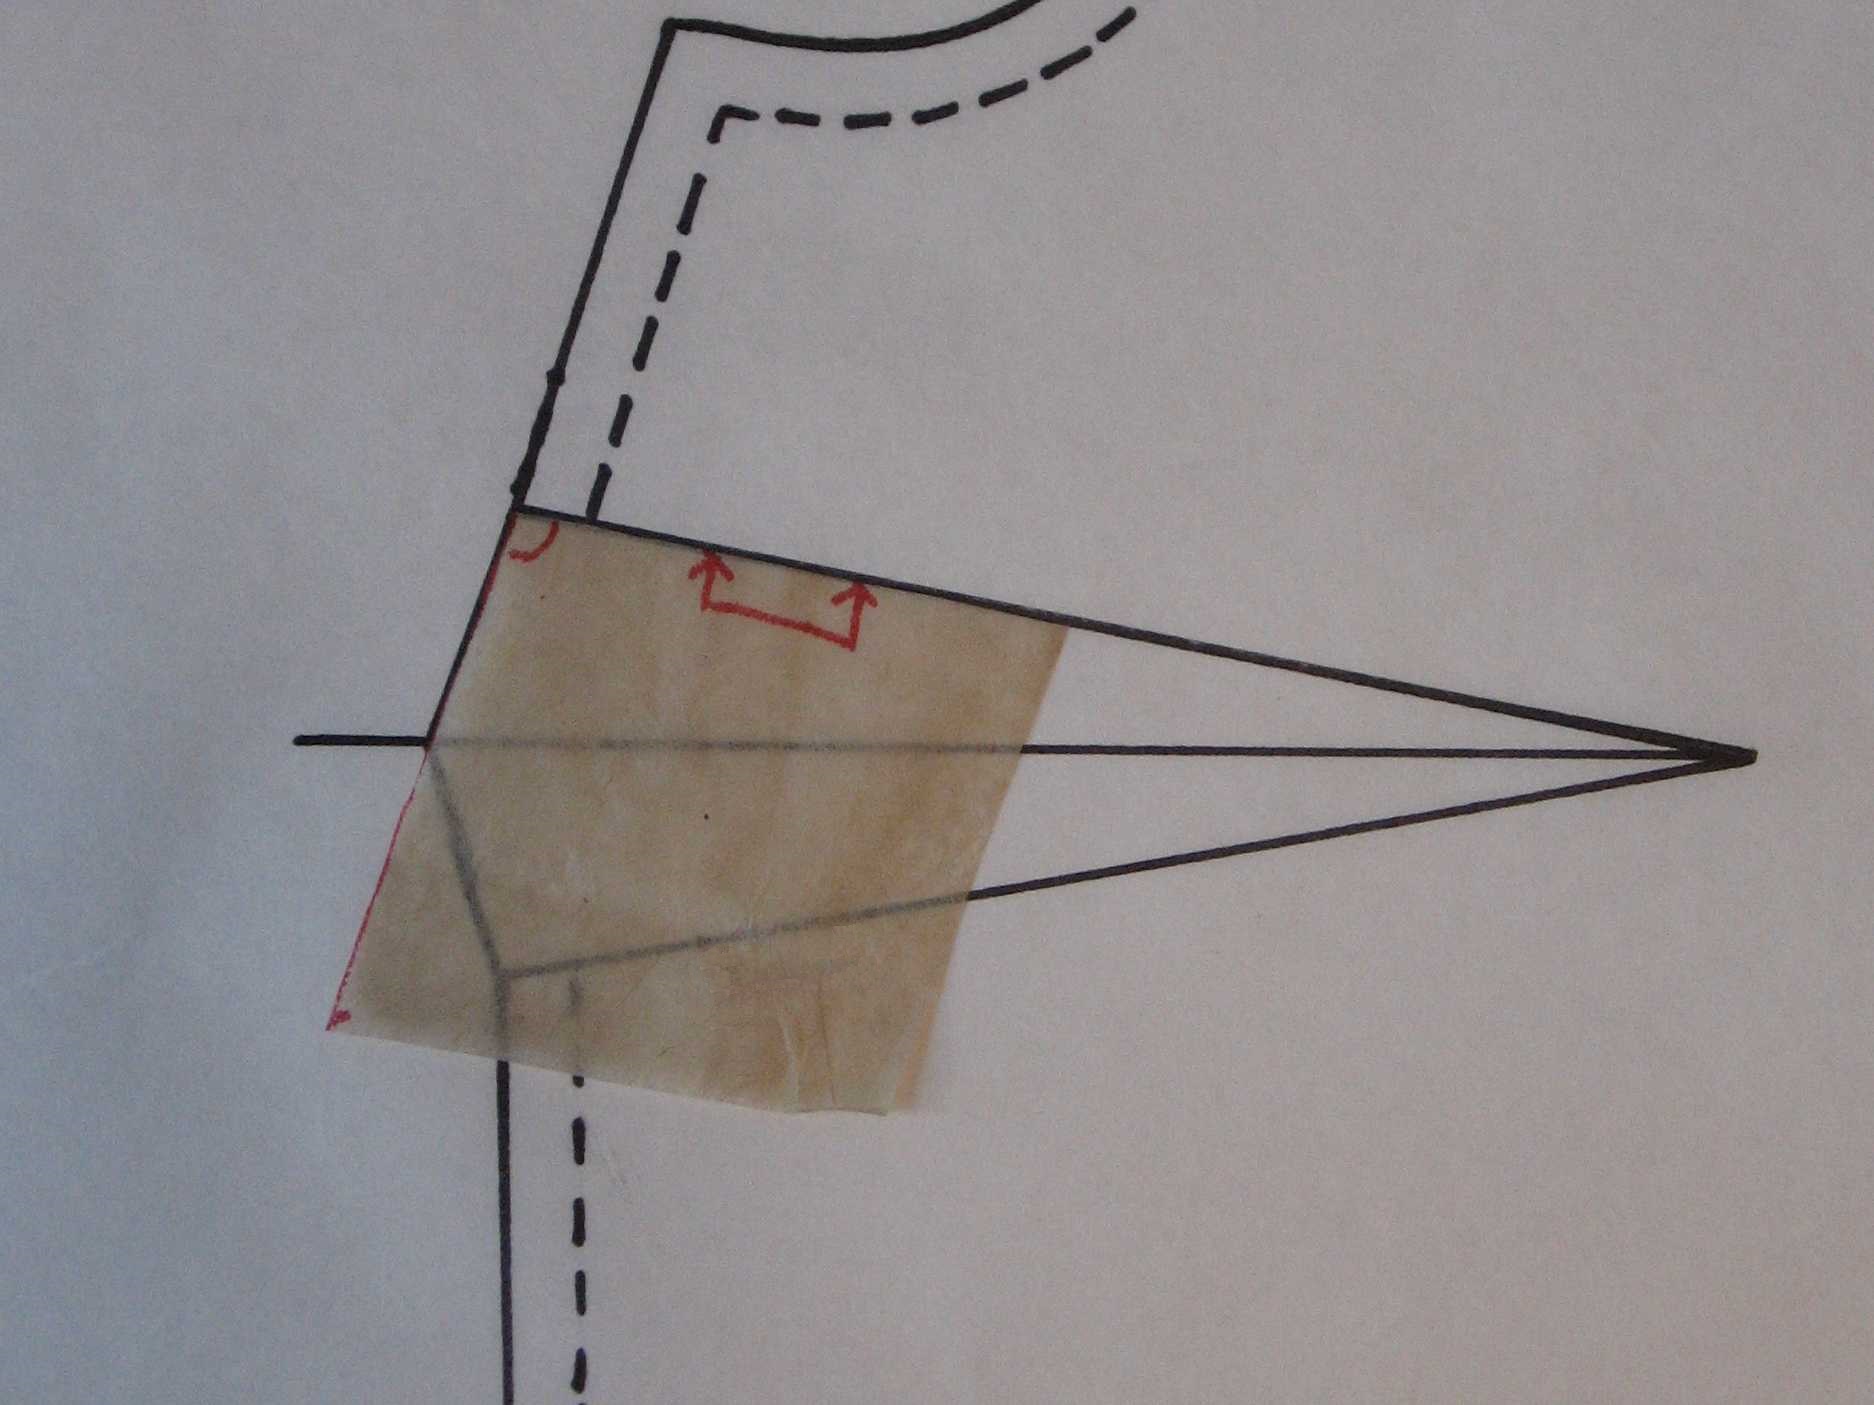
Step 3: Trace the edge of the pattern onto the scrap of paper. Make a little mark to mark the angle at the end of the dart leg. Also mark the edge of the paper that is aligned with the dart leg. These marks will keep you from getting the scrap of paper flipped around the wrong way.

Step 5: Cut your scrap of paper along the traced line. Flip over the scrap of paper along the edge that was aligned with the dart leg. Trace along the edge of the paper from the end of the dart leg to the centerline as shown below.

The dart should now look like this:
Step 6A: If your pattern edges are straight near the dart, you can just draw a straight line connecting the other dart leg to the centerline.

Step 6B: If your pattern edges are curved near the dart, place the scrap of paper right side up against the other dart leg and trace the outer edge.
Step 7: Feel clever and admire your uncreased pattern.
 GrowYourOwnClothes Etsy Shop

Good description! I was always crinkling and cutting before.
LikeLike
Such a clever way of doing this. Thank you Leila!
LikeLike
Does this work on a dart on an angled line? For example, I am tripping up on how to true the shoulder line, when the dart is angled toward the bust point? It seems that I have to fold the dart out, and then draw a line from the high neck point to the edge of the shoulder, and that adds to the outer line. In other words, one leg of the dart is longer than the other and the shoulder slopes downward. Thank you. I seem to have hit a mental block with this, because I have had issues finding the correct slope for my moulage pattern in Suzy Furrer’s Craftsy class.
LikeLike
First you need to use the method you described to get your dart legs the same length and the shoulder line straight. After that you can use the method I outlined above to get the seam allowance to line up properly when the dart is sewn and pressed to the side.
LikeLiked by 1 person