
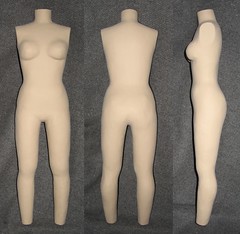
After making the half scale dress form, I decided I wanted a pants form, too. I thought half scale would be a little big, so I made this one 3/8 scale. I added a torso on top of the pants form to make it a full body form. The form is 21″ tall from top of neck to ankle.
The Amazon product links on this page are affiliate links. If you click on these links and purchase something, I will earn a small commission.
Here are instructions for making the pants form or full body form:
Materials:
• 1/16″ (2 mm) thick craft foam
• High quality masking tape or clear packaging tape (the thin kind for moving boxes, not the thicker mailing tape). I discovered that thin cheap masking tape will start slipping off after a while.
• Corrugated cardboard
• Manila folder (if you are making a full body form)
• Bamboo or cotton fiber fill
• Scissors that will cut cardboard
• Mechanical pencil or very sharp pencil
• 1″ wide paint brush
• PVA glue (e.g. Elmer’s Glue-All). You’ll need a large bottle – about 7 ounces
• Newspaper
• Lightweight spackling compound (optional)
• Fine sandpaper (optional)
• Paint (optional)
• The pants form pattern. If you want to make a full body form, also print pages 2, 3, and 6 of the dress form pattern scaled to 75%. If you want to make a half scale pants form, scale up the pants form pattern 133%.
Print out the pattern(s) (preferably on thick paper). The border around each sheet is 7.5″x10″ when printed with no scaling. Cut out each pattern piece, making sure to cut on the inside edges of the lines.
Determine which side is the right side of each sheet of craft foam, and mark X’s on the wrong side. The foam will bend more easily toward the wrong side.
Trace and cut out each pattern piece from the material indicated on the pattern piece. Again, cut on the inside edges of the lines when you cut out the pieces so they don’t grow larger than the pattern.
• Mark all notch marks on the right side.
• Mark the piece numbers on the foam leg pieces.
• Label foam pieces to indicate if they are for the left or right side of the body.
Some general tips on taping the pieces together:
• Do the taping in a cool room. The tape and foam stretch out of shape if they get too warm.
• Use pieces of tape 1/4″ by 1″ or smaller.
• Butt edges together tightly
• For curved seams, place a small piece of tape on the outside at each end. Tape at any notch marks, then fill in the rest of the seam on the outside.
• Tape the inside of the seam after taping the outside unless directed otherwise.
Tape the darts closed in the WAIST TO HIP FRONT pieces and WAIST TO HIP BACK pieces.
Tape the WAIST TO HIP SIDE BACK pieces to the WAIST TO HIP BACK pieces.
Tape the WAIST TO HIP FRONT pieces to the WAIST TO HIP SIDE BACK pieces.
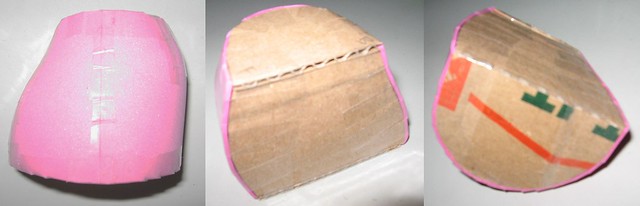
Tape the cardboard WAIST SUPPORT and HIP SUPPORT pieces to the top and bottom of the assembled WAIST TO HIP foam pieces.
Insert the UPPER CENTER HIP SUPPORT and tape in place.
The assembled pieces should now look like this:
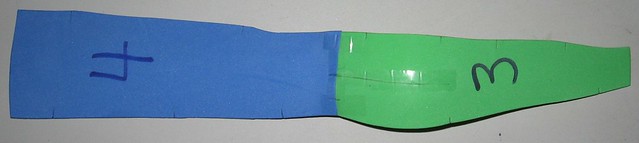
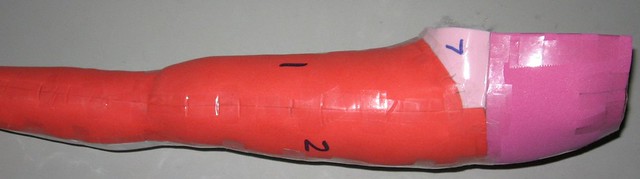
Tape the dart closed in LEG PIECE #3.
Tape LEG PIECE #3 to LEG PIECE #4:
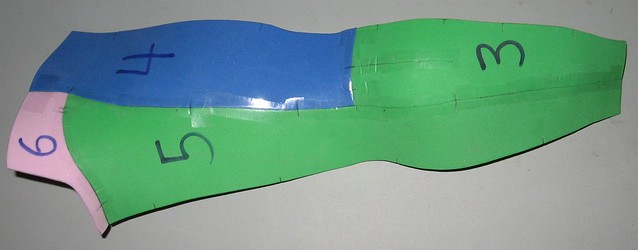
Stretch the upper edge of LEG PIECE #5 and tape it to LEG PIECE #6, only taping on the outside:

Tape LEG PIECES #5 and #6 to LEG PIECES #4 and #3:
Stretch the upper edge of LEG PIECE #1 and tape it to LEG PIECE #7, only taping on the outside.
Tape LEG PIECES #1 and #7 to LEG PIECES #5 and #6.
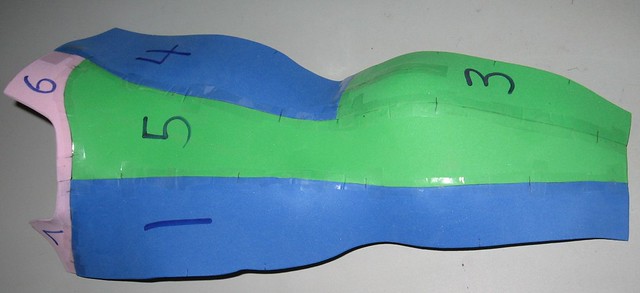
Tape LEG PIECES #1 and #7 to LEG PIECE #2:
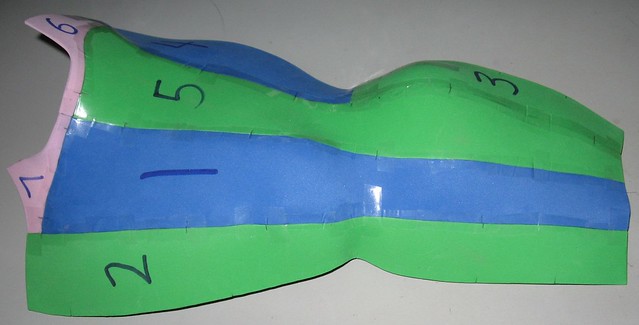
Close up the leg by taping LEG PIECE #2 to LEG PIECES #3 and #4. Tape on the inside as much as you can.
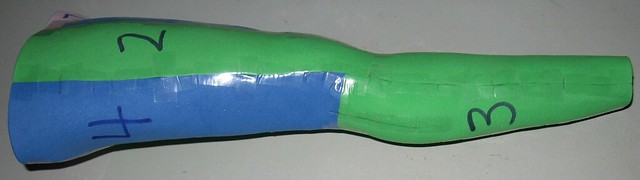
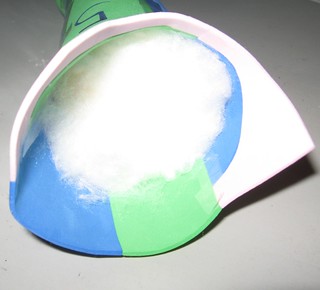
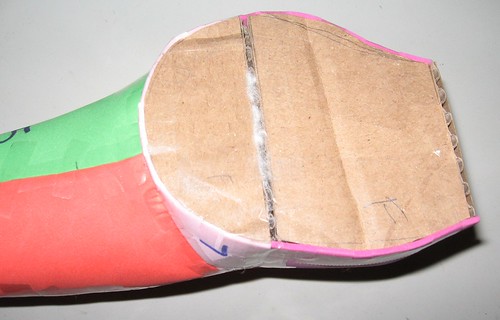
Tape on the ANKLE SUPPORT piece:
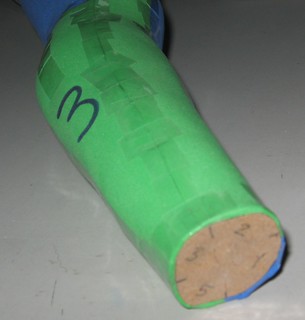
After you have assembled both legs, stuff them with cotton or bamboo fiber (or something else that will pack firmly):
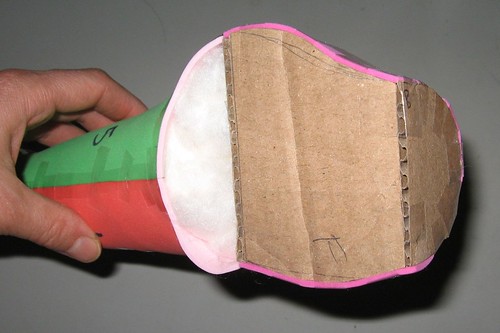
Tape the WAIST TO HIP pieces onto the leg pieces:
Add some more stuffing:
Tape the LOWER CENTER HIP SUPPORT into place:
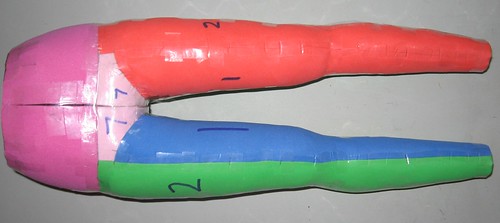
Tape the left and right legs together:
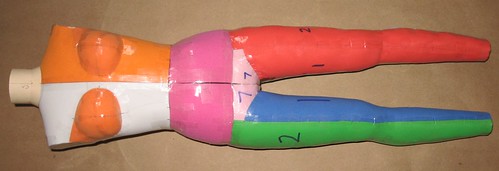
If you want to add an upper torso, assemble the above the waist pieces. See the half-scale dress form tutorial for instructions. Insert the chest support, but don’t use the waist support. Tape the upper torso onto the lower half of the body:
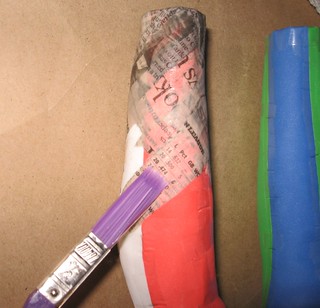
Make a 50/50 mix of Elmer’s glue and water. Pour some of the glue mixture in a small bowl or cup, dip a paintbrush in it, and paint some on a small area of the dress form. Tear off a strip of newspaper, place it on the dress form over the glue, then brush some more glue on top. Keep slightly overlapping pieces of paper until you have a layer done.
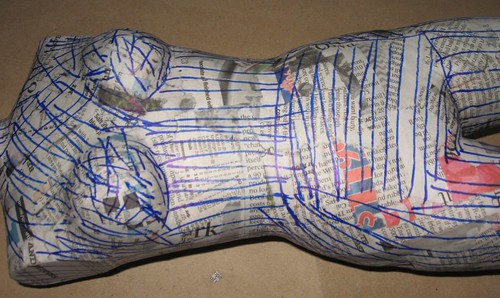
In between layers, scribble all over the form with a permanent marker to keep track of your layers, or alternate between text and picture areas on your newspaper. Keep adding layers of paper mache until it seems strong enough. I used five layers of newspaper.
If you are painting the form, you can smooth the surface with lightweight spackling. I rubbed spackling all over, let it dry, and then sanded with 220 grit sand paper.
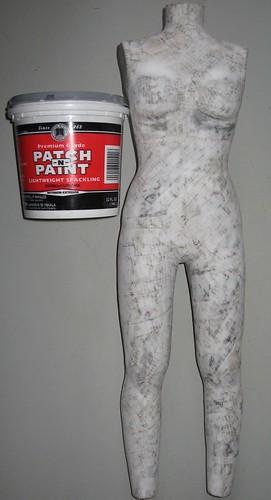
I used a makeup sponge to apply several layers of diluted acrylic paint. Here it is completed:

 GrowYourOwnClothes Etsy Shop

Thank you. I’ve been looking for a way to make a “dress form” for draping so I can experiment with ways to make full body costumes for men. This is wonderful.
LikeLike
THANK YOU SO MUUUUUCH!!!!! i’ve been looking for something like this to work with my designs, and I was getting crazy thinking about how to make it, but your tutorial helped me a lot!!
LikeLike
Hi, thanks so much for your patterns, its so difficult to find these dress forms where i live and im so glad i found your site :D.. if i want to make the pants form half scale, do you know what the border would be around the page. Thanks so much
LikeLike
At half scale, the border would be 10 inches by 13.33 inches (about 13 5/16″), or in metric 25.4 cm by 33.9 cm. If you want to print it on letter or A4 size paper, the latest version of Adobe reader has a poster printing option that will tile the sheets for you.
LikeLike
This is superb and just what I have been looking for. Have you any suggestions as to how this could be suspended so that you could work on pants inn the model?
LikeLike
I cut two holes in the toe of a knee high stocking and put it on the pants form like underwear, then hung it from the stocking.
LikeLike
Hi, I’m from the philippines and my fiance got me your Halfscale pattern on craftsy and I fell inlove with, by far I already made 12 of them and I used them in teaching dressmaking. I hope you’ll create a pattern of this pants form similar to the one in craftsy because that one is musch easier to follow.
LikeLike
I’m really glad you are finding the half scale dress form pattern useful. Thanks for your suggestion for the pants form. I will make a half-scale sewn and stuffed pants form pattern at some point. At the moment I am working on patterns for male dress forms.
LikeLike
That is so awesome. I can’t wait for that pattern to try it myself! 😀
LikeLike
That is so awesome. I can’t wait for that pattern to try it myself! 😀
LikeLike
Hello! i was wondering if this is possible to printout for the half scale dressform,. if possible, what size do i print it out at? I made the haklf scale dress for, and wanted to try to make a pant form version of it. Thanks!
LikeLike
oops, i meant half scale, not haklf
LikeLike
Print at 133% to scale it up to half scale. You can use the poster option in the print window in Adobe Acrobat Reader DC to tile the pages.
LikeLike