

I’ve made 3D printed 3-step and 2-step zig-zag discs for vintage Singer sewing machines that take the top hat style fashion discs. The only multi-step zig-zag stitch these machines come with is a 4-step zig-zag, which in my opinion is useless.
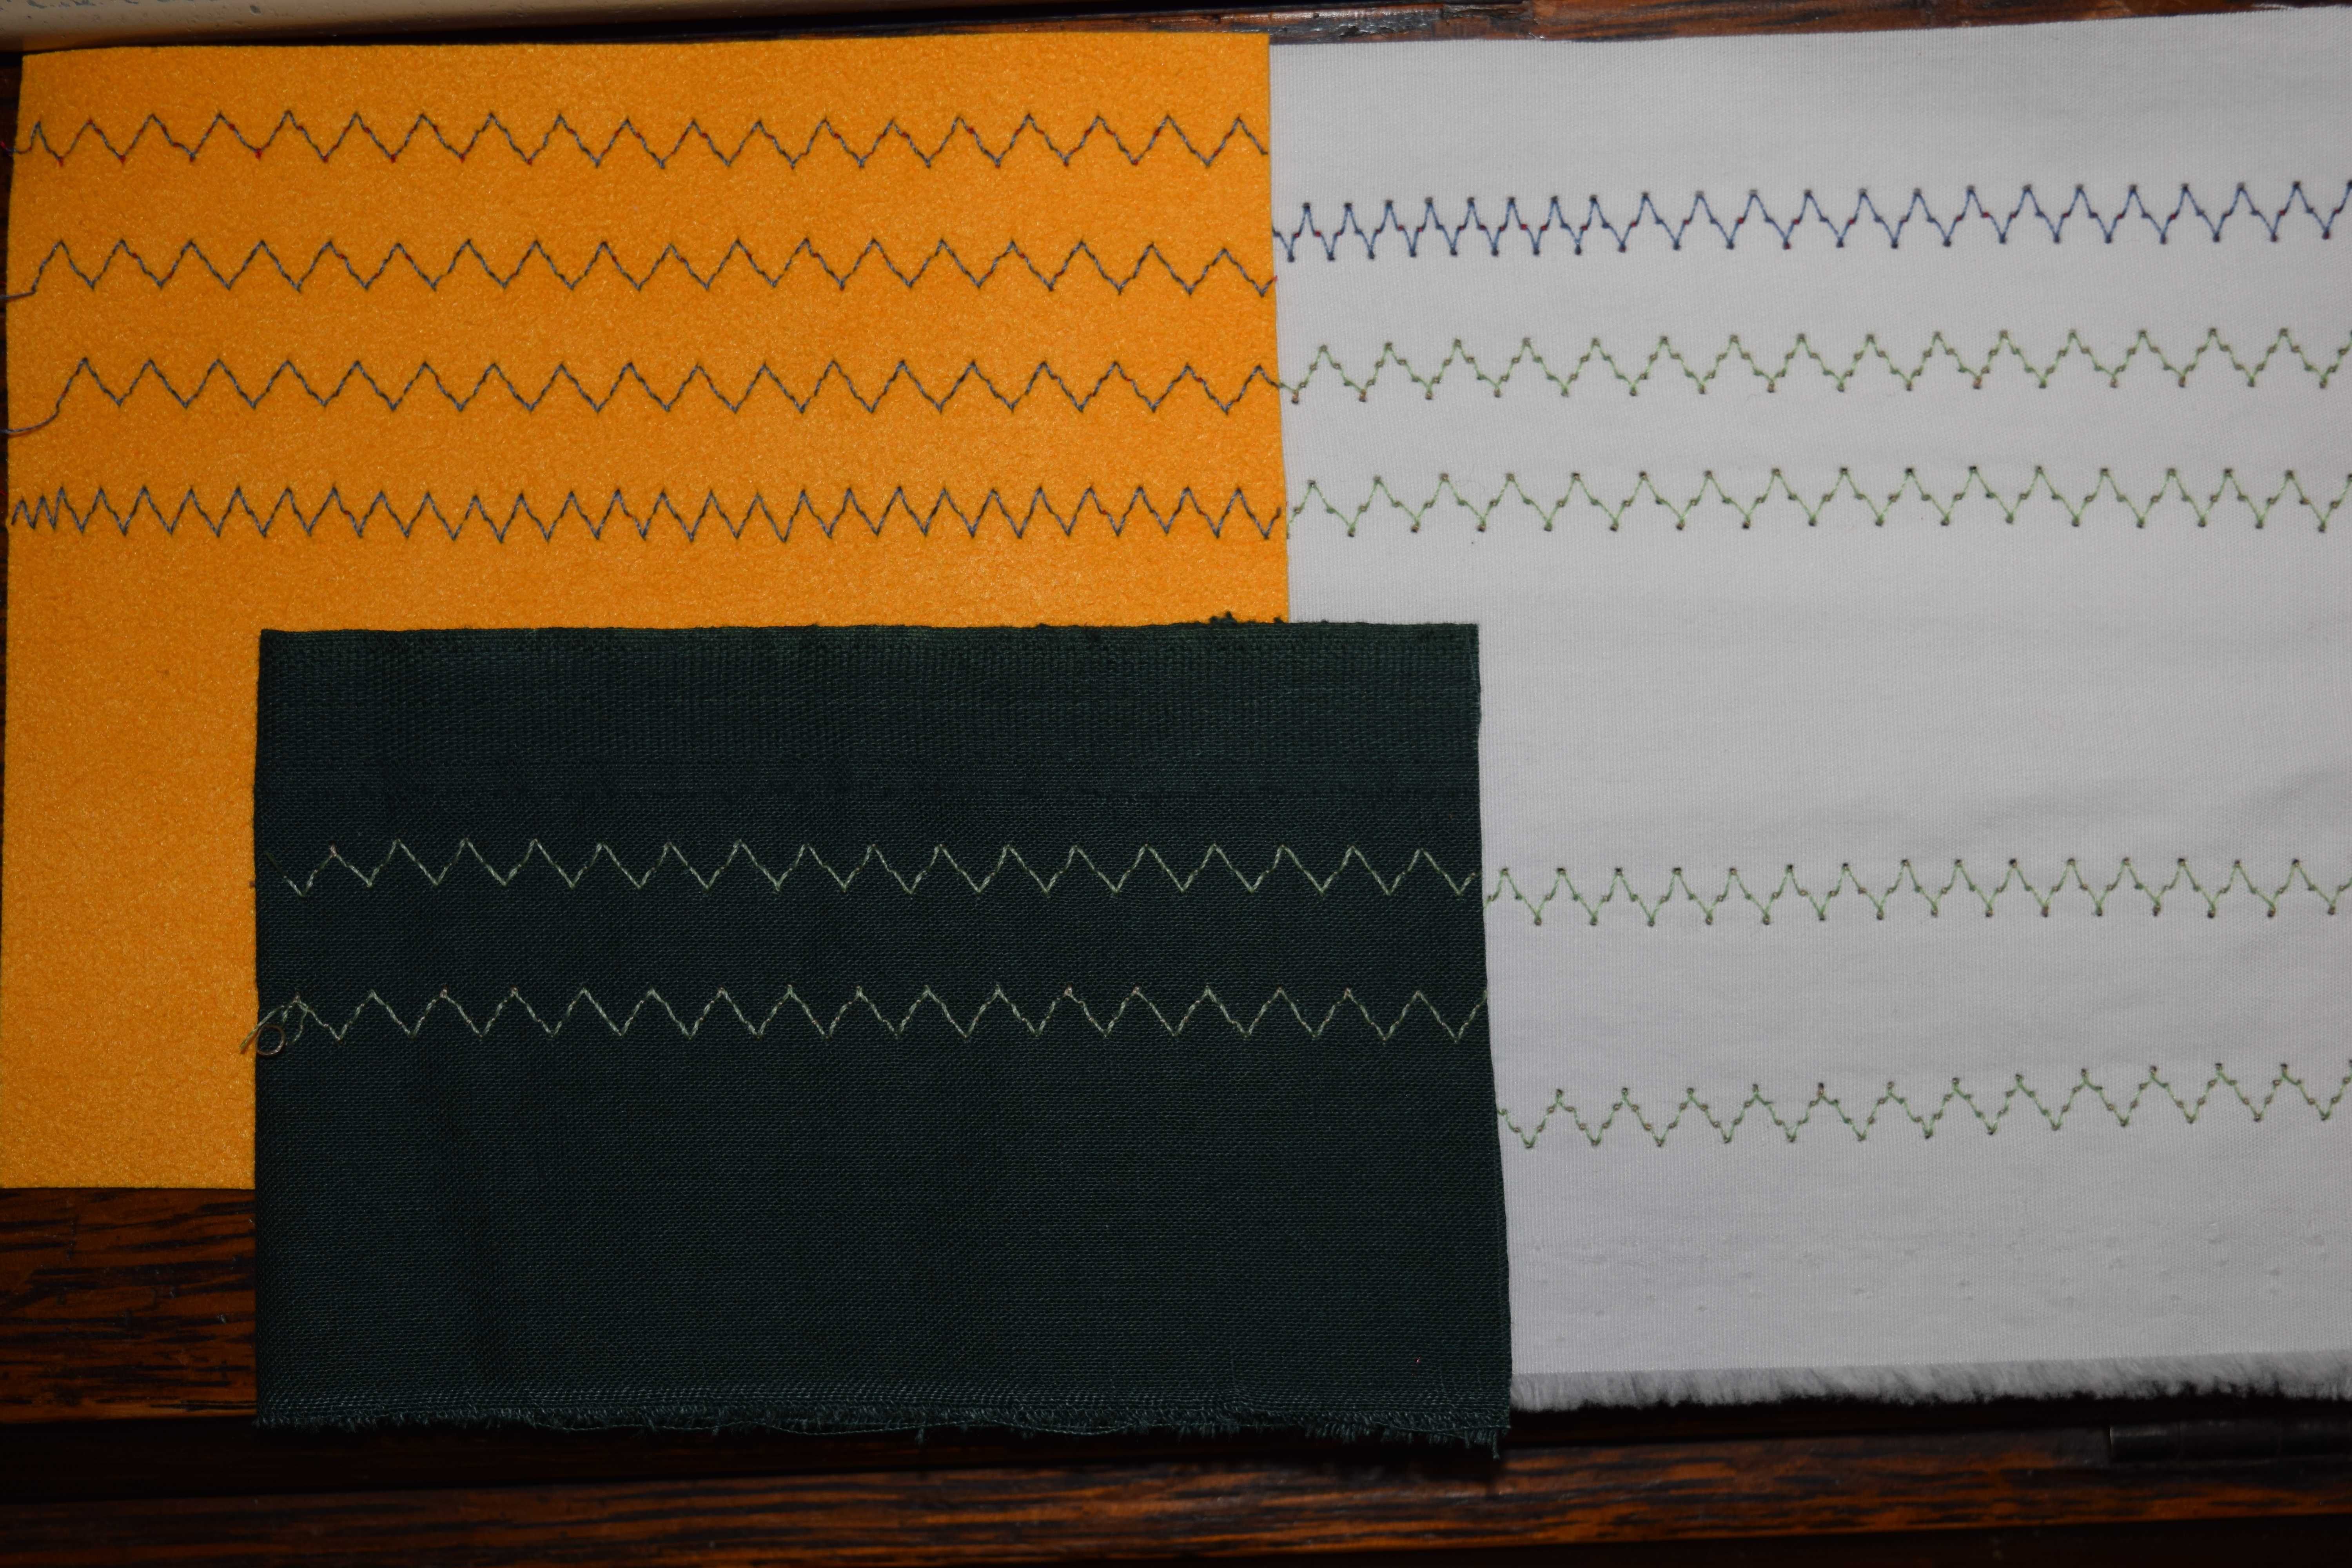
A 4-step zig-zag? What were they thinking? Those stitches are tiny. That’s way too many small stitches to put in elastic or knit fabric. I’m not sure I’ve ever wanted to use a 4-step zig-zag stitch. I use a 3-step zig-zag all the time, and occasionally I thought a 2-step zig-zag stitch would be nice, but not a 4-step zig-zag.

I love my Singer 411G, but it really needed a 3-step zig-zag stitch. I made a 3-step zig-zag disc a few months ago, but it wasn’t quite right, so I fixed the design for this version. I decided I might as well make a 2-step zig-zag disc while I was at it.
I’ve made the 3-step zig-zag disc and 2-step zig-zag disc available for purchase in my Shapeways shop. If you are not sure if your vintage Singer sewing machine takes this style of discs, take a look at this Singer disc comparison chart. My discs are type “B” in that chart.
I chose “White Strong & Flexible” nylon for the material, since it seemed like the best option in terms of print resolution and price. I’ve had my first version of the disc for about six months, and it’s held up fine, but I don’t know yet how these 3D printed parts will hold up long term. 3D printing technology is still evolving rapidly, so I’m hoping that by the time my discs wear out, there will be a better material available.
The print resolution is not high enough to get perfectly consistent results, so the two holes in the disc may be a little too small on some discs. The holes can easily be sanded larger, though. You can use a small round file or rolled up pieces of sandpaper to slightly enlarge the holes. The disc should sit snugly on the sewing machine, but it shouldn’t be so tight it is difficult to remove.
 GrowYourOwnClothes Etsy Shop

Now that’s a useful skill – being able to make your own pattern discs! I’m going to head over to your shop now and take a look at what else you have.
LikeLike
I just ordered one of each (both top hats and both buttonhole templates). This is so exciting, I can see new life being breathed back into lots of classic mechanical machines. 3-D printing is resurrecting parts that are either extremely scarce or extinct, in addition to creating new parts that have just been invented.
LikeLike
I’m looking forward to the day when I can print high-precision metal parts – then I could fix just about anything!
LikeLike
Great idea! I was also thinking along these lines when I first saw the machines with discs. Any chance you you could share the basic shape to let me and others experiment?
LikeLike
OK, here are the template files. Here’s how it worked with the software I was using (TinkerCAD and Inkscape 0.91): Units are in mm. Import the .OBJ file into TinkerCAD. This is the center of the disc. Leave it at the default coordinates. Edit the .SVG file in Inkscape. This is for the flat part of the disc at the bottom, with the stitch pattern around the edge. In the template file, the two outer circles represent the left and right needle positions. It is set up at the correct coordinates to line up with the center of the disc, so don’t move it.
There are 24 stitches per revolution of the disc. I recommend referencing an original plain zig-zag disc as you design your pattern, and watch what the needle does as you slowly turn the handwheel. You’ll need to make sure the stitch and transition lengths are correct, or you could break a needle or possibly damage your sewing machine. I drew a circle for each needle position in the pattern, then I drew some radial lines from the center. Each stitch was a 10 degree arc, with 5 degrees between each stitch arc for the transition line. After drawing/trimming to get the final pattern for the outer edge, the corners between each needle transition line and needle position arc need to be rounded a little.
Here’s a warning if you are using Inkscape: Inkscape includes the width of the stroke (line thickness) in the object dimensions when you are scaling an object (the line is centered on the actual edge of the object), so if you use the scale command on a circle, you’ll need to select the circle, turn off the stroke, scale the circle to the size you need, then turn the stroke back on (and leave it set to the thinnest lineweight, to be safe).
Once you have your pattern drawn, delete any extra lines in the .SVG file. Import the .SVG into TinkerCAD, setting the scale to 28.222 (at least that’s what I had to do using Inkscape 0.91 — I’m not sure what was causing the units issue). TinkerCAD will automatically extrude the .SVG to a solid with a height of 10, and the inner circles are automatically cut out as holes. Change the height to 3.25 mm. The imported flat disc should already be centered on the center portion of the disc, with the bottom edges aligned. Now you can group the objects into one, then export them for 3D printing.
LikeLike
Thanks for posting the template! 3D printing really opens up new possibilities for old stuff, like Carolyn said above.
I have my own 3D-printer and like to make useful parts for my other hobbies. I also like programming so you inspired me to make my own version of the discs using OpenSCAD, which is very flexible when you want to try different parameters.
I designed and printed a couple of discs to try it in my 670G, including a 2-step zigzag and a disc for stretchy zigzag overcasting. It’s quite easy to make your own if you are interested, just fill in a list of needle positions like below, render and save the file.
1……..”, // 1
“..1……”, // 2
“1……..”, // 3
“..1……”, // 4
“1……..”, // 5
“……..1”, // 6
etc.
I put it on Thingiverse, https://www.thingiverse.com/thing:3268941, in case anyone want to try it out.
I’ve also used the 3D-printer to print different size hemming attachments for my camping hammocks. https://www.thingiverse.com/thing:3170225
Best regards,
Andreas Wileur
LikeLike
Wow, that’s amazing. Thanks for sharing this. Too bad I already have all of the disc patterns I want!
LikeLike
I just went to purchase the two zig-zag discs.
They were each $15.00, so I added them to my cart.
When I went to check out the price for each in the cart was $15.50, so I went back to the listing page.
The price was still $15.00.
If I were to order these discs, what other surprises am I going to come across?
The price increase, if it were real would be ok, I suppose, but to price an item at one price, then increase the price during Checkout when the listing price did not go up SHOWS A COMPLETE LACK OF INTEGRITY!!!
LikeLike
It looks like Shapeways is including their $0.50 processing fee in the displayed item price on the checkout page. They also list the processing price separately, so this is confusing. This is beyond my control.
As for other surprises, I hope you read the description here and on Shapeways and understand that there is some variation in size of the center hole due to the print resolution, and you may need to sand it to enlarge it slightly. Two of the three I ordered needed this adjustment.
LikeLike
Wow! I am blown away by what is being accomplished with 3-D printers. Kudos to all of you who are putting this technology to practical use. And kudos for all who generously share your knowledge.
That said, which of the multi-stitch zig zag cams do you like the best — 2 or 3 stitch? Is one sufficient for most stretch applications, or do you find yourself using both, depending on circumstances?
Thanks in advance.
LikeLike
I usually use the 3-step zig-zag, I think just because I am used to how it looks. In terms of function, the two stitches are interchangeable for the most part. I do prefer the 2-step zig-zag for overcasting the edges of fabric in situations where a serged finish would be too bulky or awkward. Unlike a regular zig-zag, the 2-step zig-zag lies flat and doesn’t curl up the edges of the fabric, even when you don’t use an overcast foot. I like to use the 2-step zig-zag with the original Singer overcast foot, which makes the top thread wrap over the edge of the fabric slightly for more edge coverage.
LikeLike
Hello! I am from Argentina and I have a Godeco Supermatic 3003, I need the three step zigzag sticht but I am not sure how can I made or adapt the Singer version to the Godeco discs. Could anyone help me with this? Maybe the edges of the discs are the same but the center is the thing we have to change, if that is correct it is not difficult to try it but if not, how could I adapt the borders/edges of the disc to godeco’s one?
Thank you very much!
LikeLike
The discs for different machines are usually completely different in size and shape, so I doubt you would be able to adapt these discs for your machine. To design a disc, you would need to study and measure a disc you already have for a different stitch. First you would need to determine the number of stitches the machine makes each time the disc makes a complete revolution. If the number of stitches per revolution is a number divisible by 6, you could in theory make a 3-step zig-zag disc (if not, it is not possible to make a 3-step zig-zag cam for your machine). If the number of stitches per revolution is divisible by 4, you can make a 2-step zig-zag, though, which works similarly to the 3-step zig-zag. Then you would need to determine at what radius the needle is completely to the left, and at what radius it is at the far right. Then you would calculate the intermediate needle positions for your stitch of choice based on that.
LikeLike
Does the cam disk control the zig zag width, so I might need a different disk if I desired a 4mm width vs. a 9mm width?
LikeLike
No, the stitch width is controlled by the stitch width lever on the machine. So you can adjust the width from 0 to 5 mm for any stitch on these vintage Singers.
LikeLike
Have you thought about creating a blanket stitch Cam. It would be similar to the blind hem stitch but with only one stitch between “bites” to the side instead of the three or four straight stitches. The bites would go to the left. It`s used for applique
LikeLike
In Wileur’s comment above, he has links and instructions for a semi-automated way to make your own custom stitch cam designs.
LikeLike