
Years ago, when I first learned about using narrower seam allowances like the garment industry does, it didn’t work for me. I’d sit down at my sewing machine and without thinking, I would sew 5/8″ from the edge, forgetting I’d changed the seam allowance. My seam ripper got a lot of use.
Then I took a break from sewing for a few months, and when I came back to sewing I had somehow miraculously broken the 5/8″ habit. I realized how much better narrower seam allowances worked, especially around curves. Now I mark the seam allowances on my pattern and keep it handy for reference.
I should probably mention that I don’t like to press seam allowances open. Typically after sewing a seam I just serge the edges together for a finish like you find in ready-to-wear. I suppose 5/8″ seam allowances might be a better choice for seams that you prefer to press open.
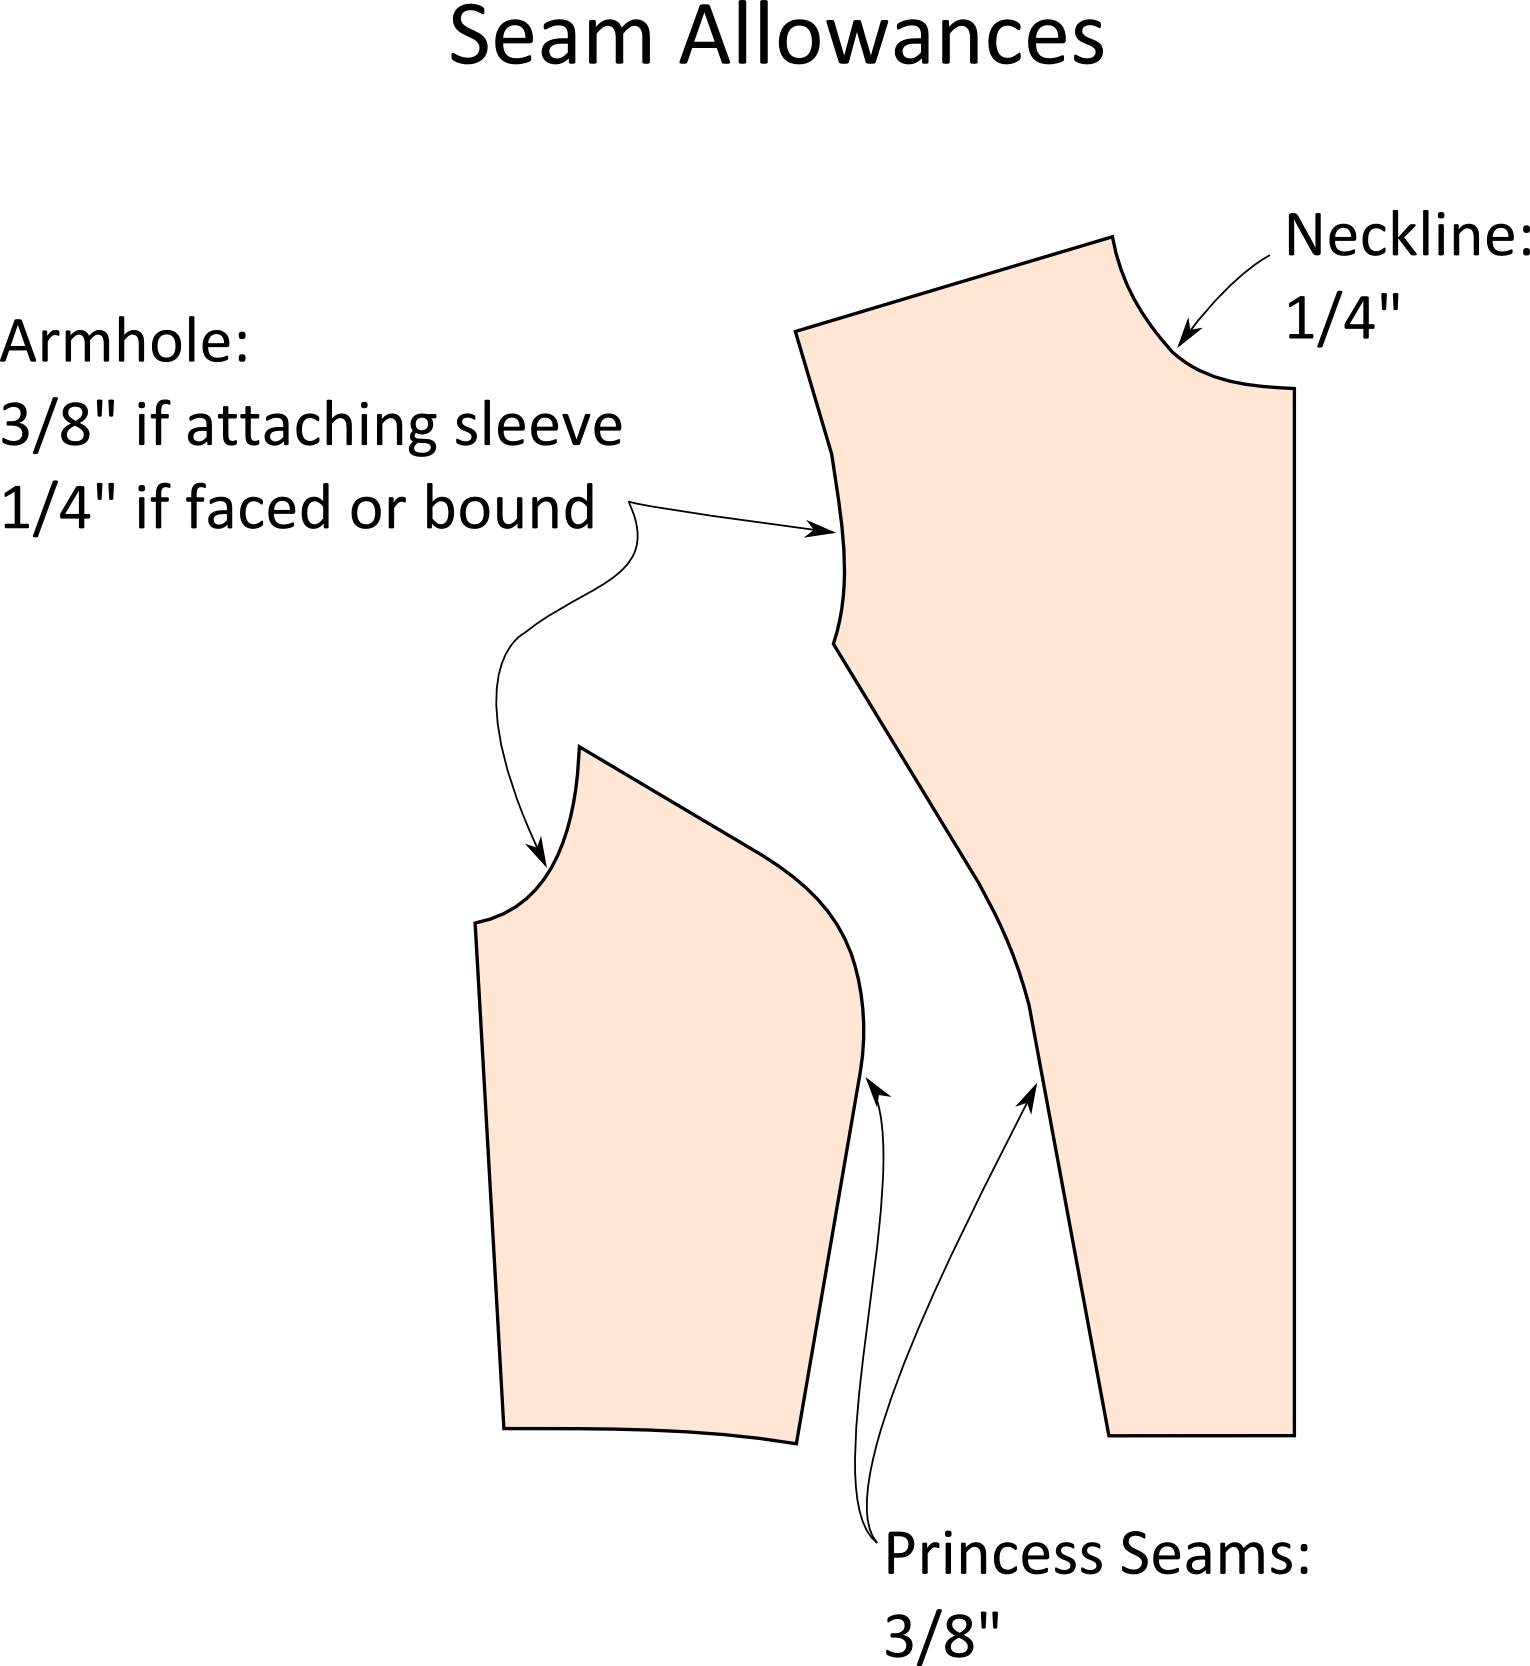 Why bother with different seam allowances? For fairly straight seams, it doesn’t really matter what your seam allowances are – you can sew them accurately as long as you have a guide on your sewing machine. In general, though, narrower seam allowances are easier to sew accurately and require less trimming and clipping. Seams where you match an inner curve to an outer curve, like sleeve caps and princess lines, are especially hard to sew with 5/8″ seam allowances. Try changing these to 3/8″ and see how much easier they are to match up properly.
For necklines, armholes, jeans front pocket openings, collars, and sleeve cuffs, use 1/4″ seam allowances. The benefits are that you can sew more accurately and you don’t have to trim or clip curves.
Trimming terrifies me, and I try to avoid it whenever possible. Although I can only remember two times I’ve actually ruined garments by accidentally snipping a hole in them while trimming seams, I’ve had a lot of near misses. Plus I can never get a trimmed seam an even width – it wobbles all over the place, which sometimes shows through on the right side. Also, if you clip or notch a curve, it won’t bend smoothly; you get sharp bends where each clip is.
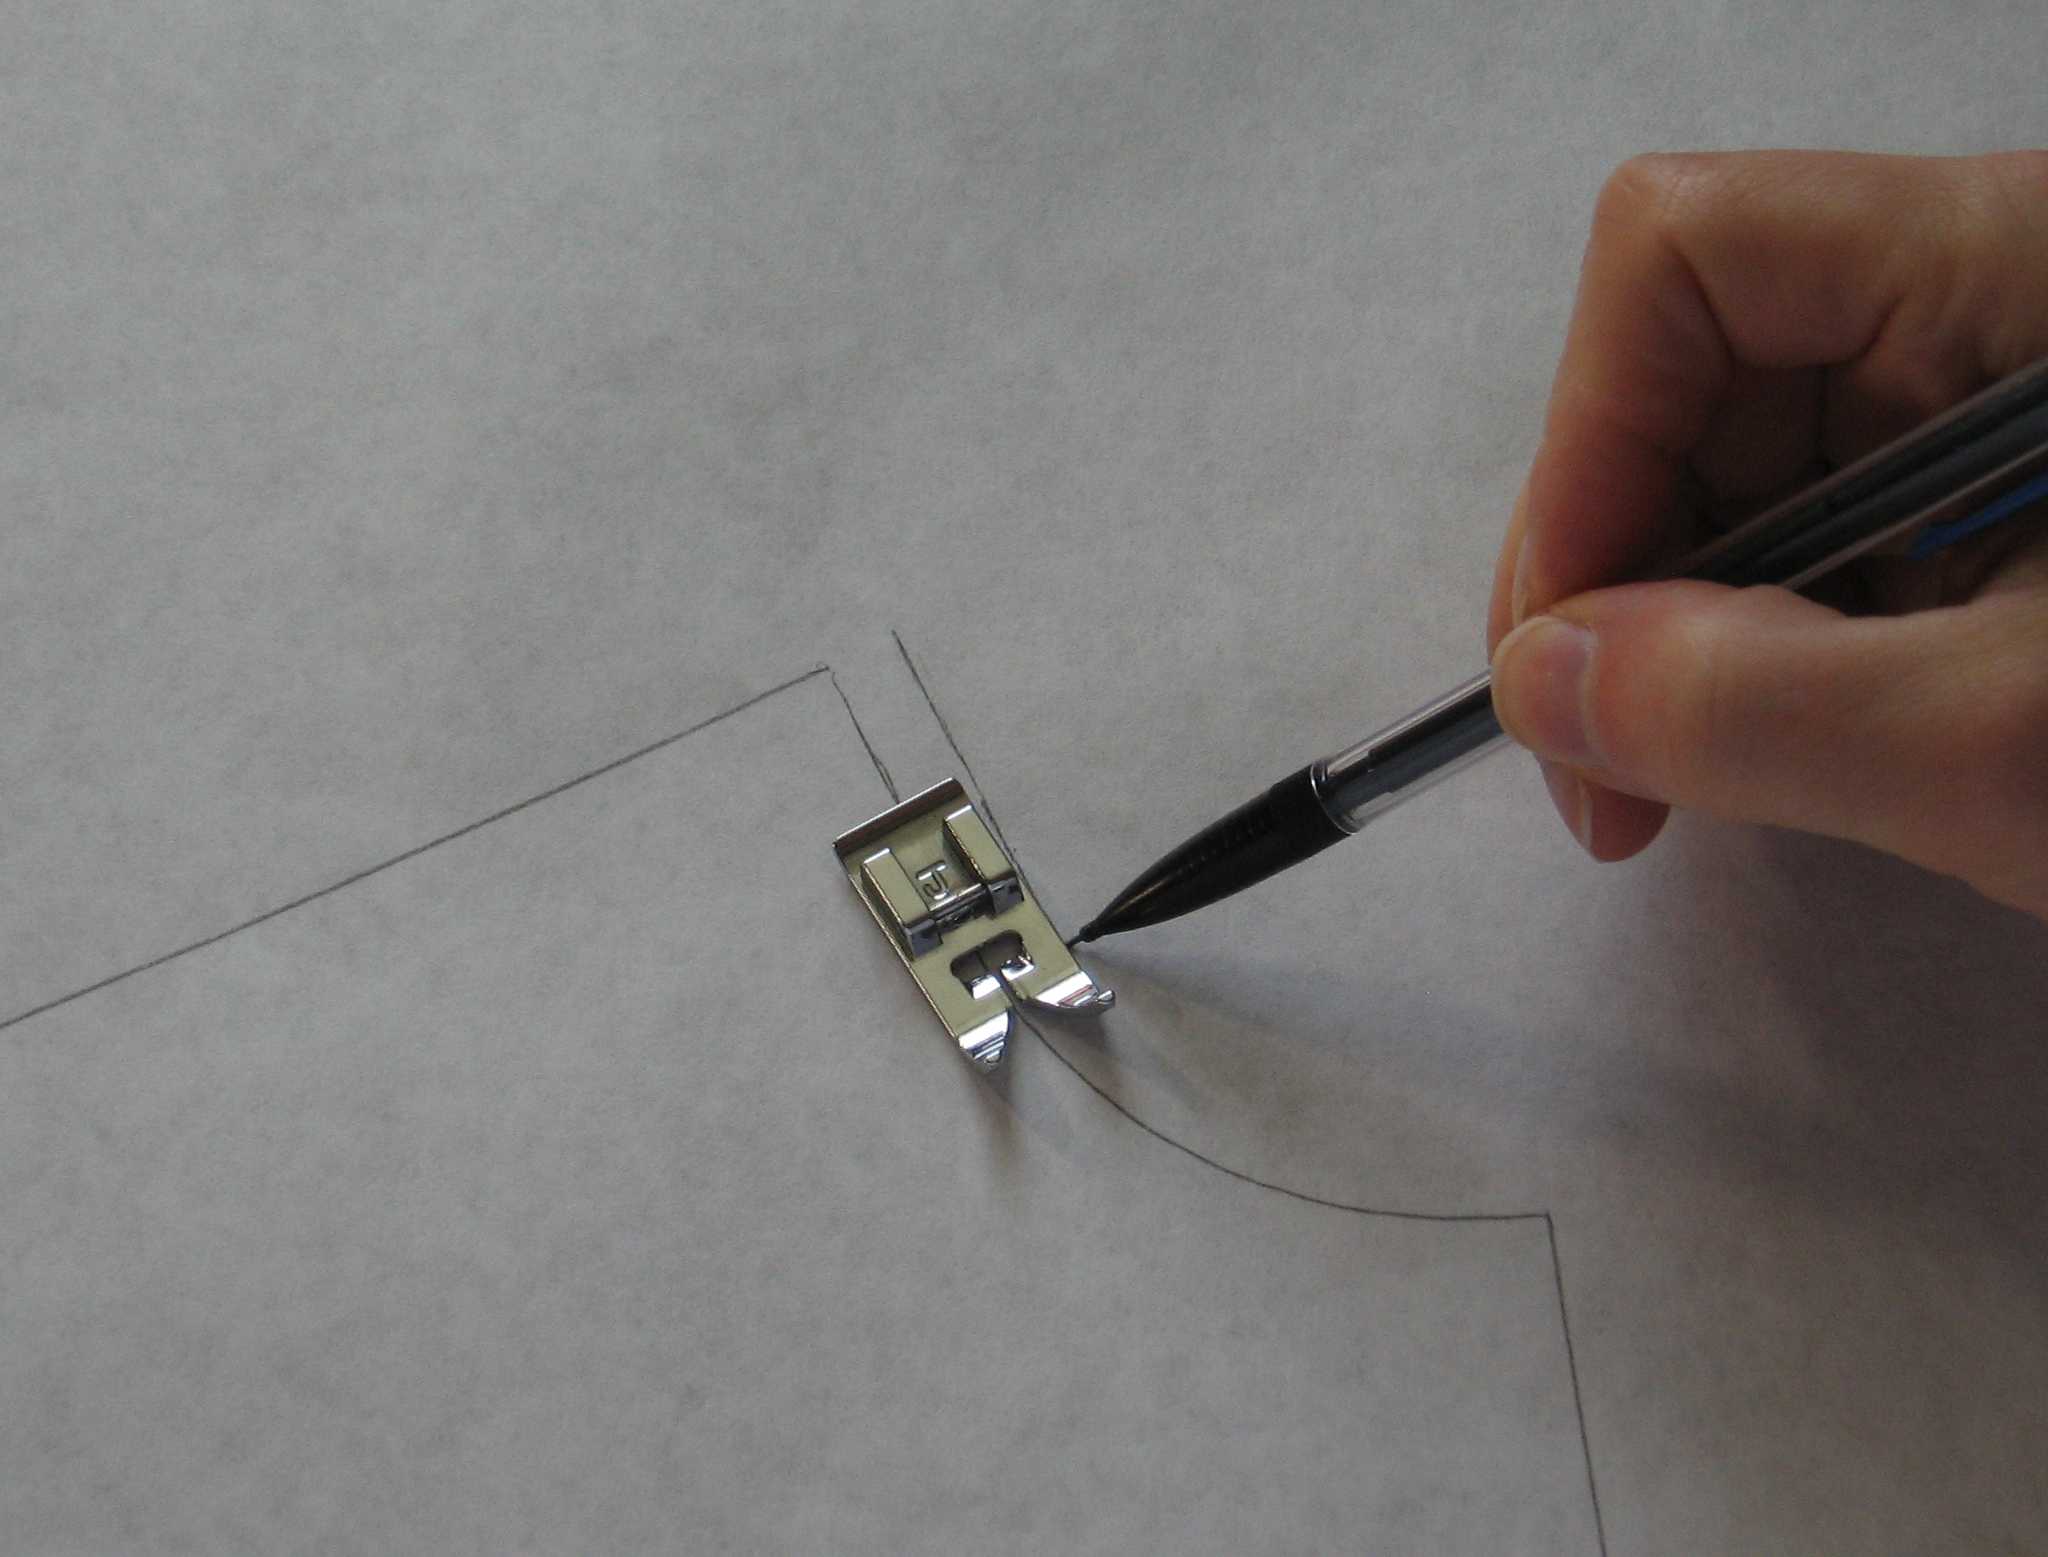 If you don’t have a quarter inch presser foot for your sewing machine, instead of 1/4″ seam allowances try using narrow seam allowances that are half of the width of your standard presser foot. That way you can guide the fabric right along the edge of the presser foot for perfect seam allowances and you ensure that the edge of the fabric won’t be on the middle of a feed dog, which can chew up the edge of the fabric on some sewing machines.
Most of the time I don’t have problems with necklines stretching out of shape even when I use 1/4″ seam allowances. However, it is a problem with some fabrics. Here’s how I deal with staystitching for fabrics that stretch out of shape. This method can be used on hard-to-sew fabrics even if you decide to stick with 5/8″ seams.
When you cut out the garment, instead of cutting out the neckline or other edge that will be staystitched, just mark the cutting line and cut roughly around it. If you are cutting on the fold, use a tracing wheel and dressmaker’s tracing paper to mark the other side.

Immediately staystitch, using the marked line as a guide. Staystitching is usually done 1/8″ away from the seam line, but with narrow seam allowances you can accurately sew 1/16″ from the seam line. A walking foot or non-stick (Teflon) foot can also help keep the fabric from stretching out as you staystitch. Don’t cut along the marked cutting lines until you are ready to sew those seams.

For thin, stretchy, or slippery fabric, you may want to pin a layer of tissue paper behind your fabric before staystitching. After staystitching, cut on your marked cutting line, then gently tear away the paper. You can layer paper and fabric before cutting to make it easier to cut out slippery fabric, and if you use tissue paper for the bottom layer, you’ll already have tissue paper in place for staystitching.
Here are some suggestions for measuring and marking seam allowances on your patterns:
For straight seams, transparent gridded rulers are quite helpful.

To mark seam allowances along curves, I use my home-made seam allowance guides.

Tape pens or pencils together, adding spacers as needed. A compass can be used the same way. Make sure you always hold either of these perpendicular to the curve, or your seam allowance will be too small in places.

Use this little measuring tool. This is not my favorite tool, because I always get it flipped around and forget which side I’m using.

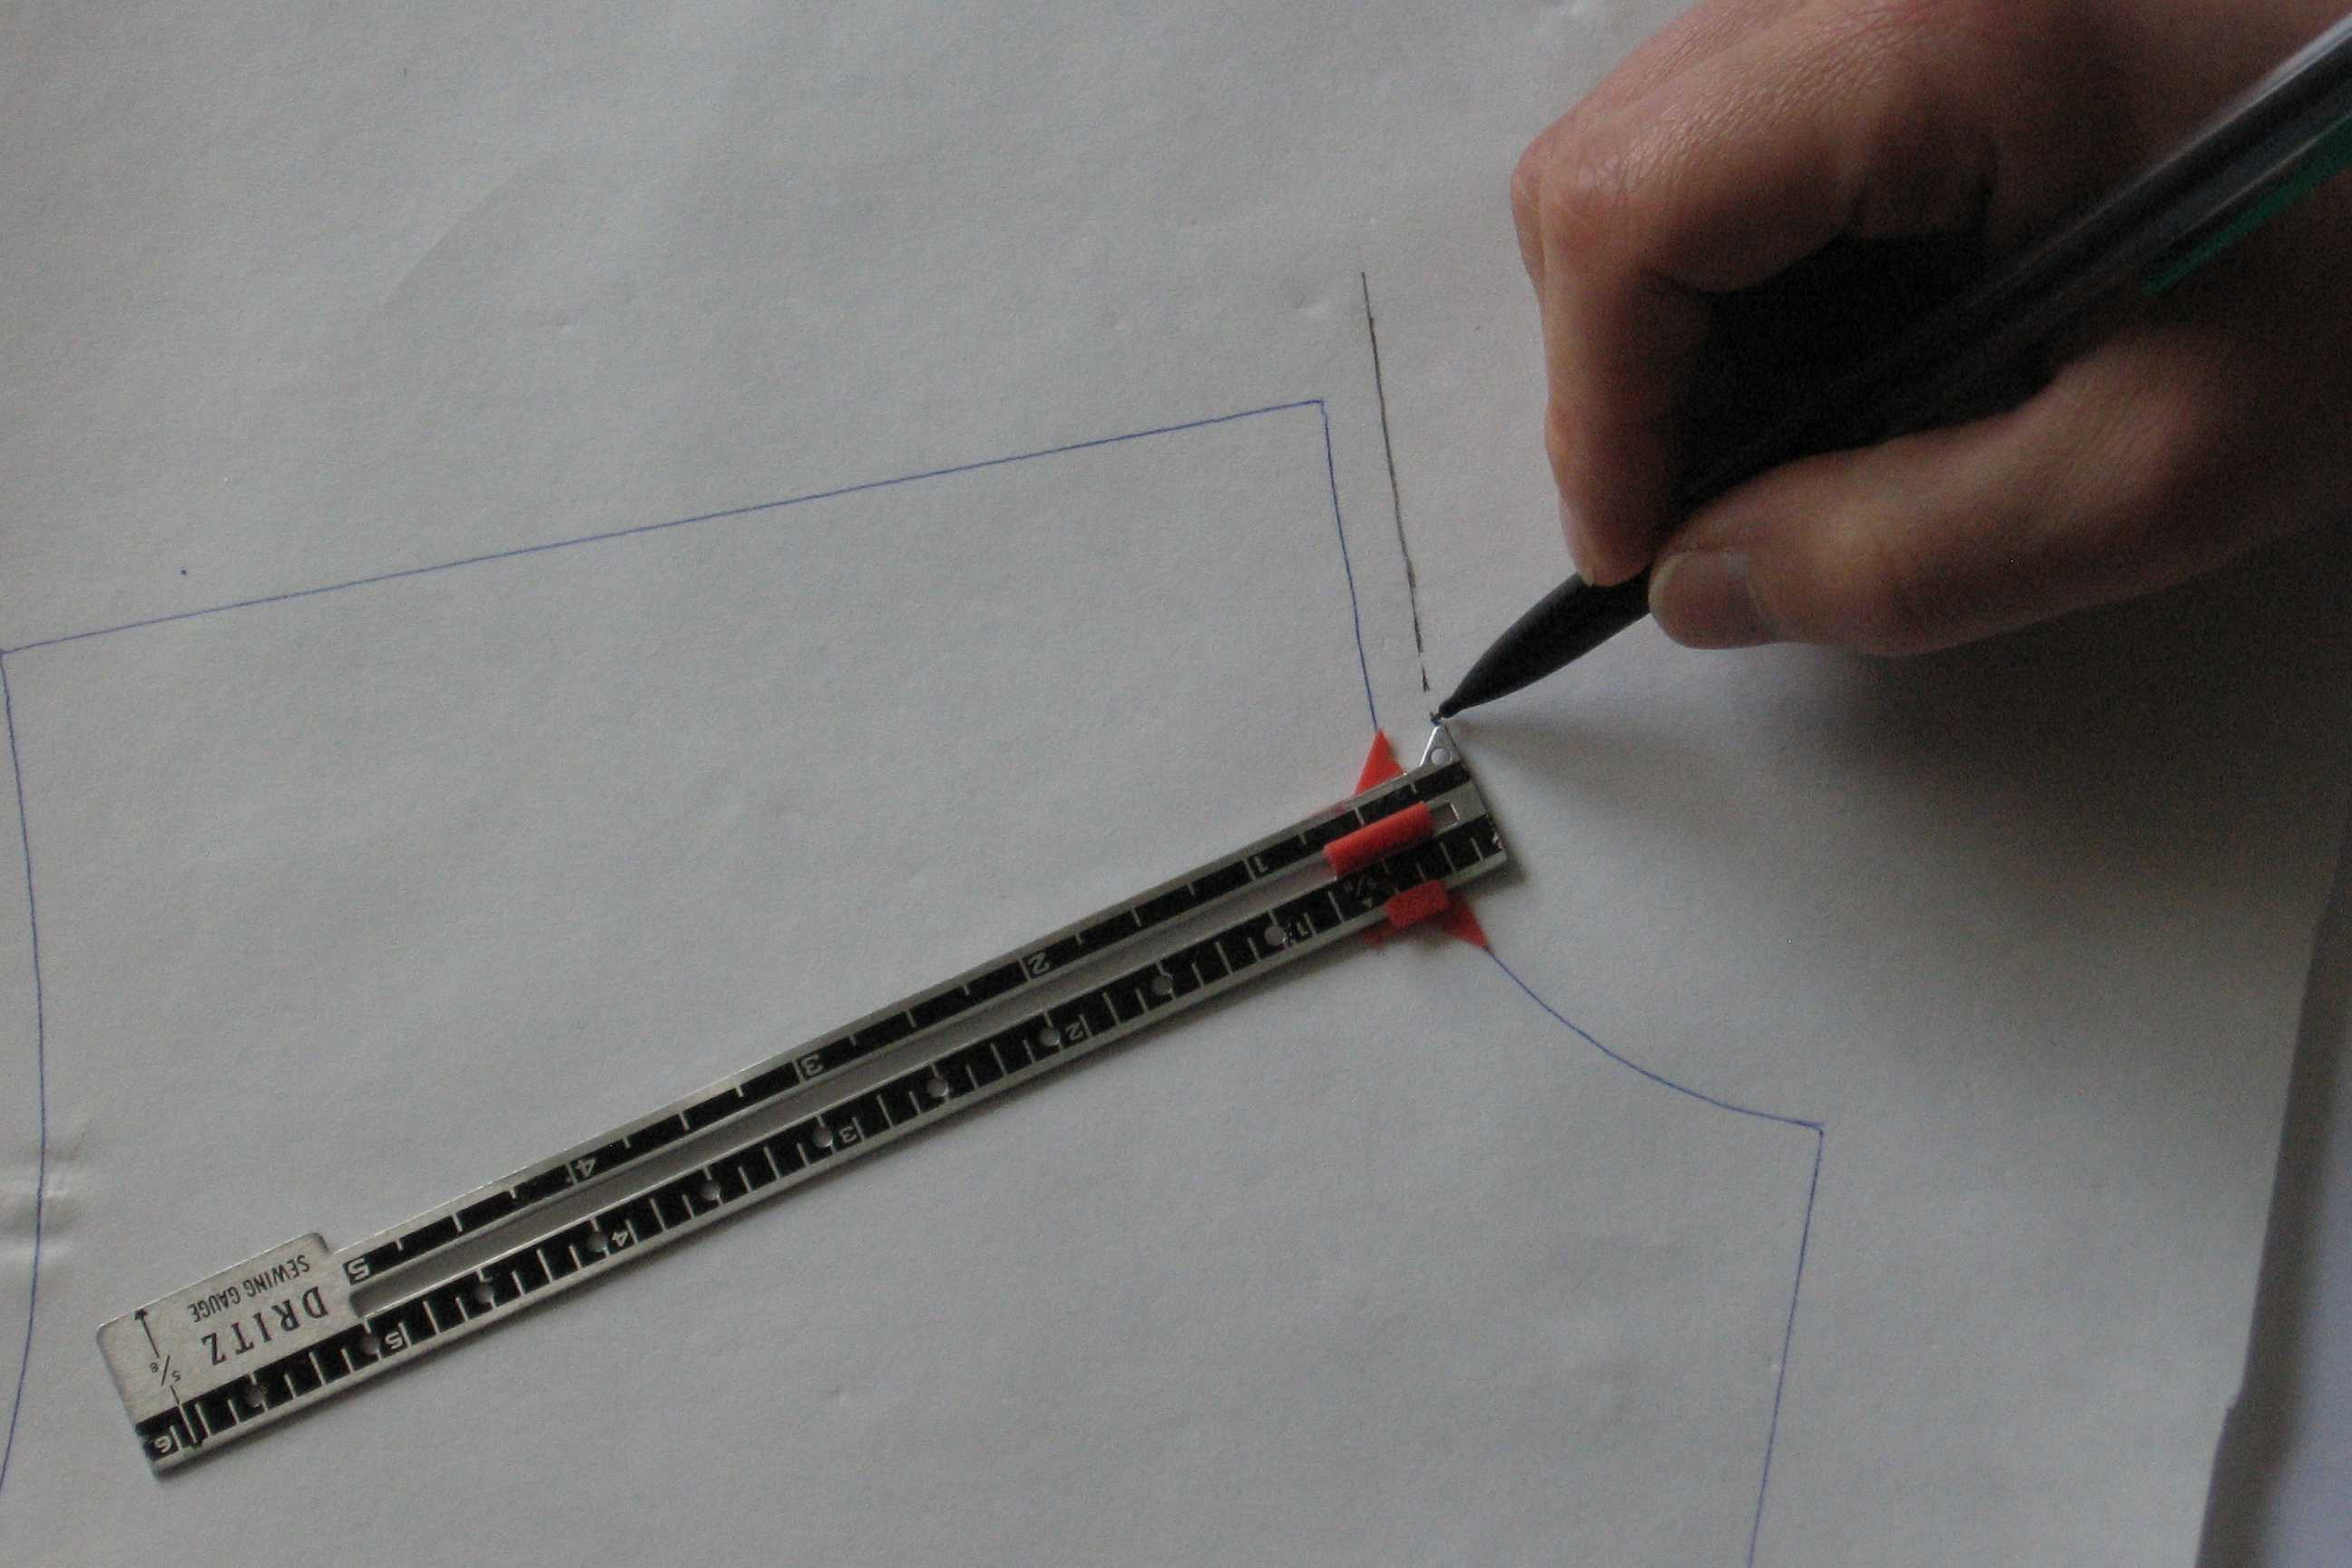
Use an an adjustable sewing gauge.
A note on units: I do most of my measuring and pattern drafting in metric, despite the fact that I live in the US and think in inches and feet. Math is so much easier with metric units! However, I almost always add seam allowances after I’m done measuring and calculating, so I add seam allowances in fractions of an inch since all of my sewing machines and gridded rulers are marked in eighth-inch increments.
 GrowYourOwnClothes Etsy Shop

I’ll definitely have to try this!
LikeLike
I love all the tips and tools you showed us! Thanks!
LikeLike
Your photos show self-made or traced patterns. How do you change the seam allowances on commercial patterns? Do you trim all the seam allowances first?
LikeLike
I would trim off some of the seam allowance on the paper pattern. For example, if the pattern has 5/8″ seam allowance and you want 1/4″, you would trim off 3/8″. Usually I only trim commercial patterns where it really makes a difference, like around necklines, collars, and cuffs, and I just use whatever seam allowance the pattern came with for the other seams.
LikeLike