
I’ve had denim sitting in my stash for years waiting to be made into jeans, but I kept putting off making them because I didn’t know how to get the fit right. I finally did it. It took making four muslins, but I perfected my jeans pattern enough that I was willing to sew it up in denim.
I’ve had such bad experiences with the fit from commercial patterns, I wasn’t willing to use one. So instead I started with a rub-off pattern from my best fitting pair of old jeans. I altered the pattern to add some length to the back crotch seam, and I got the length right, but I couldn’t quite get the shape right.
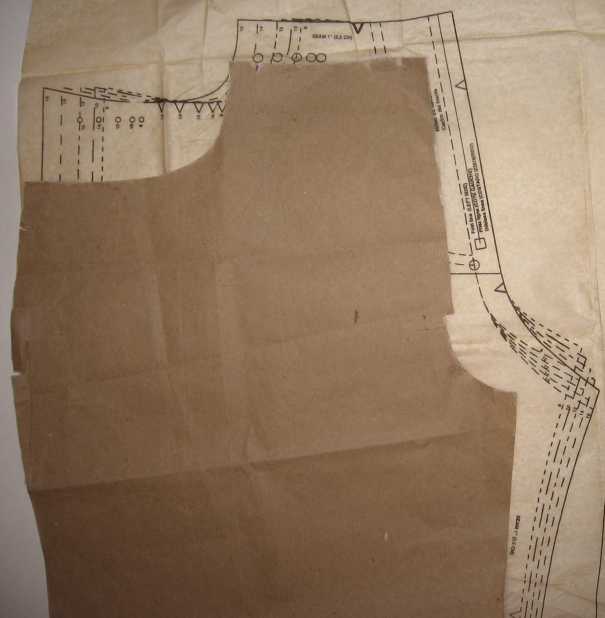
After three muslins, I was about to give up and say my figure just isn’t suited to jeans, but I decided to give it one more try. I have a custom pants form I made from a plaster mold last year, and I draped a completely new jeans back pattern on it. I was surprised at how straight the back crotch curve is. I sewed up one more muslin, and finally, the jeans felt right.
I compared my pattern to McCall’s M5894, a classic fit jeans pattern I have, hoping I could get some clues about how to alter commercial patterns in the future. Maybe these comparisons will give someone else with a similar figure some fitting hints. My pants front pattern was not altered from the ready-to-wear pair I copied. Look how different the McCall’s front crotch curve is (the solid line corresponds to my size). If you look at the pictures of the models wearing these jeans, you can tell there’s some weird bagginess in the front crotch area. I’m thankful I did not use this pattern – I would have had even more fit issues.
-
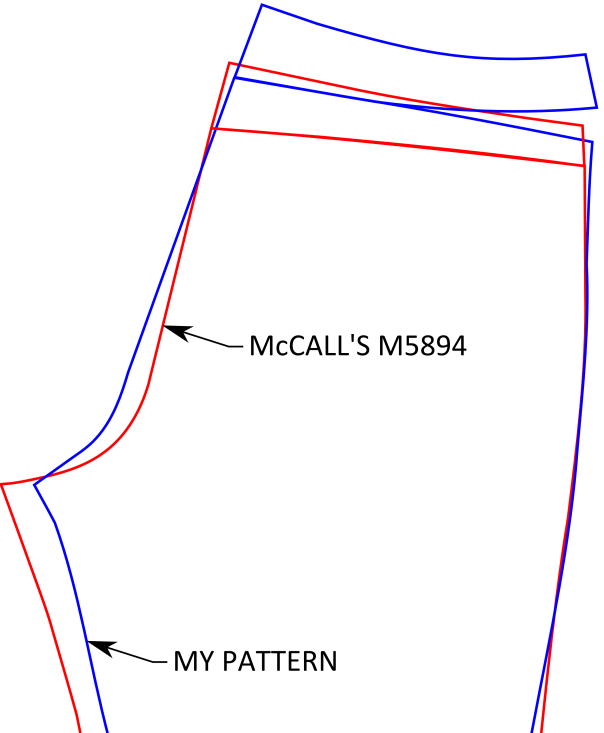
- Jeans back patterns
-
- Jeans front patterns
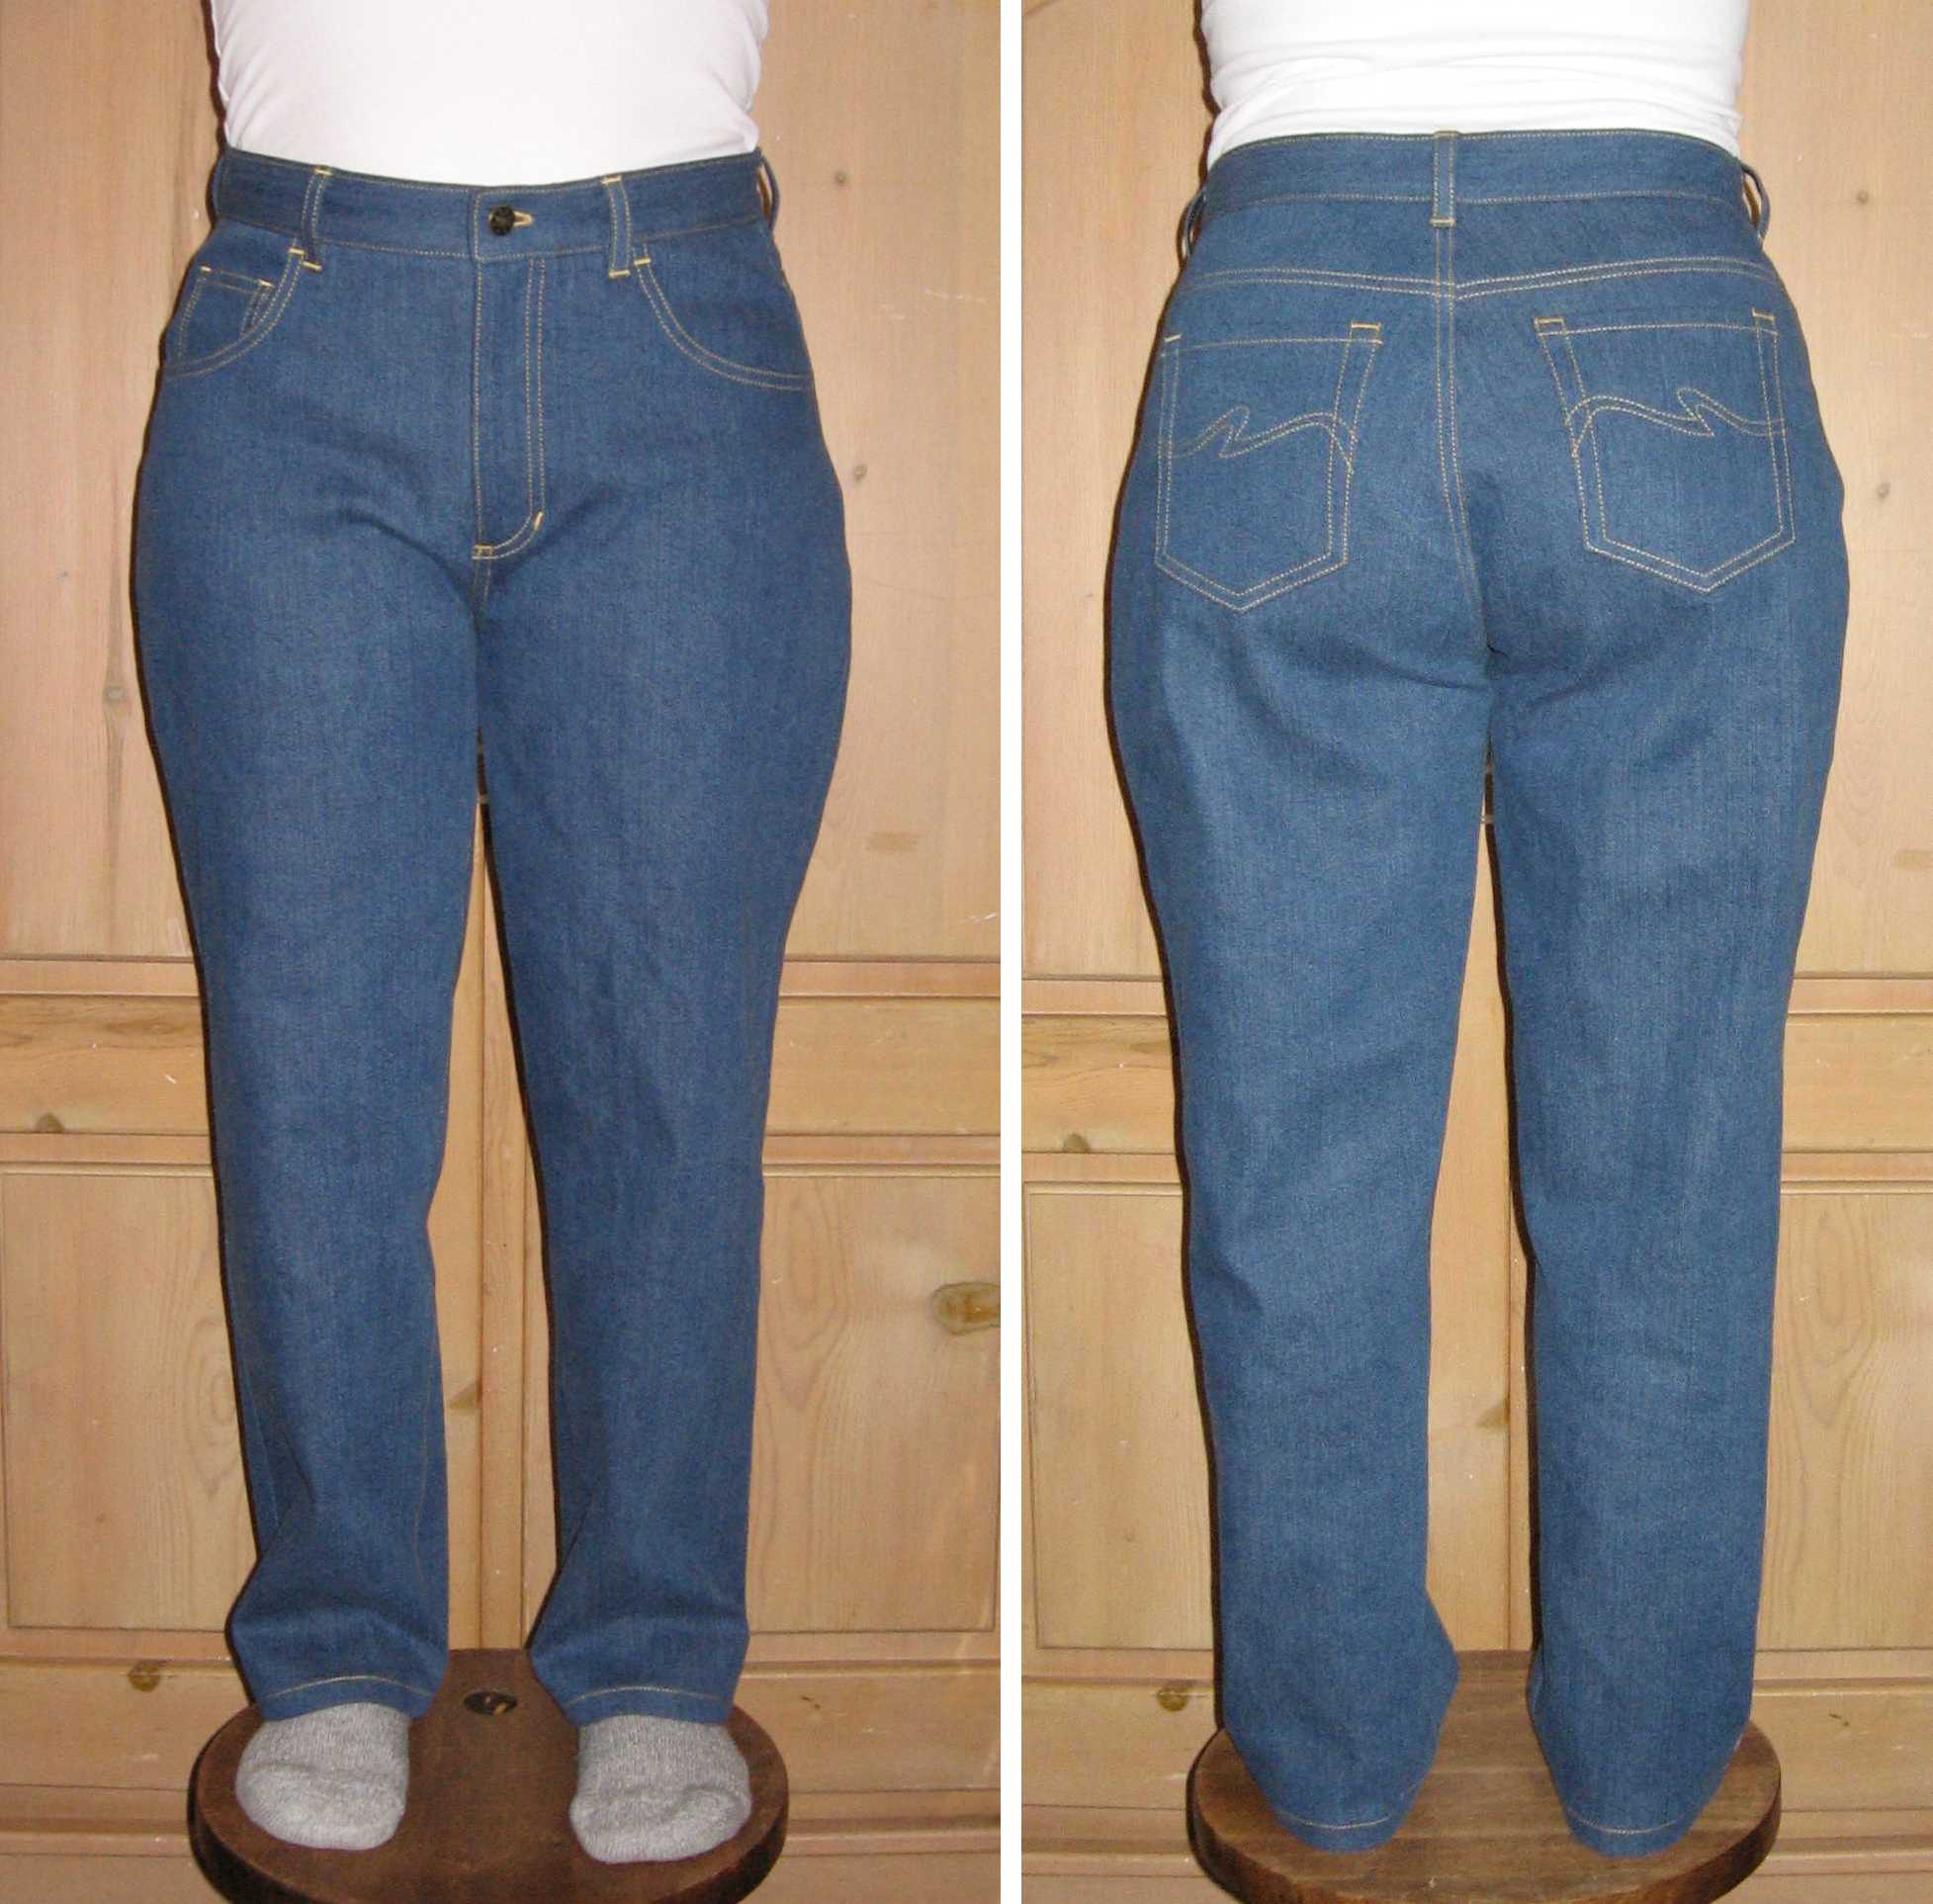
And look, no mono-butt! At first I wasn’t too concerned when I noticed that style had become popular. I thought it was just a fad and would be gone in a few years. But now all pants seem to be cut tight under the bum, and I realized how uncomfortable they are, since the tightness on the lower butt cheeks makes the pants pull themselves down every time you move. Also, there is no extra fabric down there to allow you to sit without pulling down the back waist a little too far. This style has lasted so long, there is an entire generation that thinks it’s normal to be constantly tugging up your jeans. Thankfully, I have a jeans pattern for myself now, and I no longer have to be subjected to the discomfort of mono-butt jeans.
The Amazon product links in this post are affiliate links. If you click on these links and purchase something, I will earn a small commission.
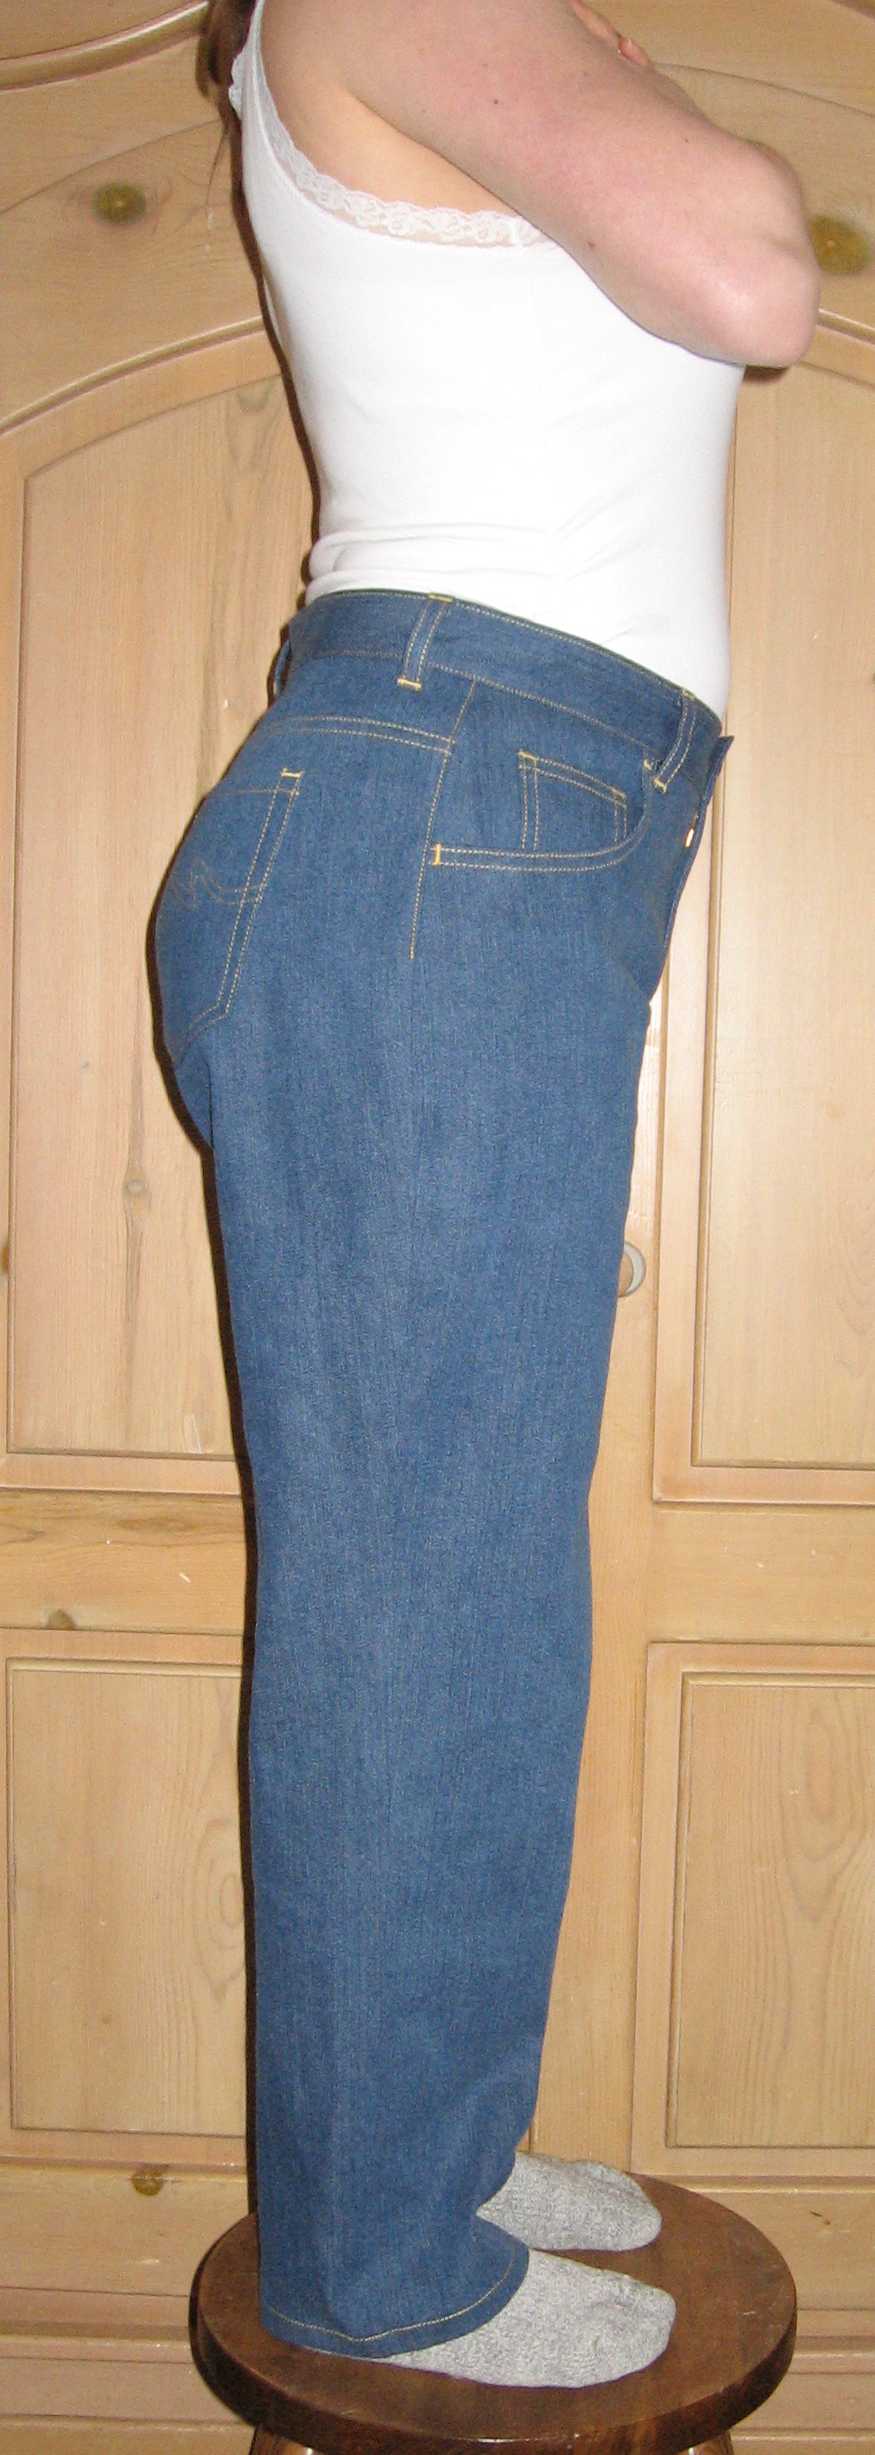
I wasn’t trying for completely wrinkle-free pants like those modeled in Pants for Real People – comfort was my primary concern. I’m not sure it’s possible to get the back wrinkle-free for my body shape anyway – I have a lot of curves back there!
After all the pairs of jeans I sewed for my kids, and the wearable muslins I made, I got pretty good at topstitching. And aren’t my inner pockets pretty?
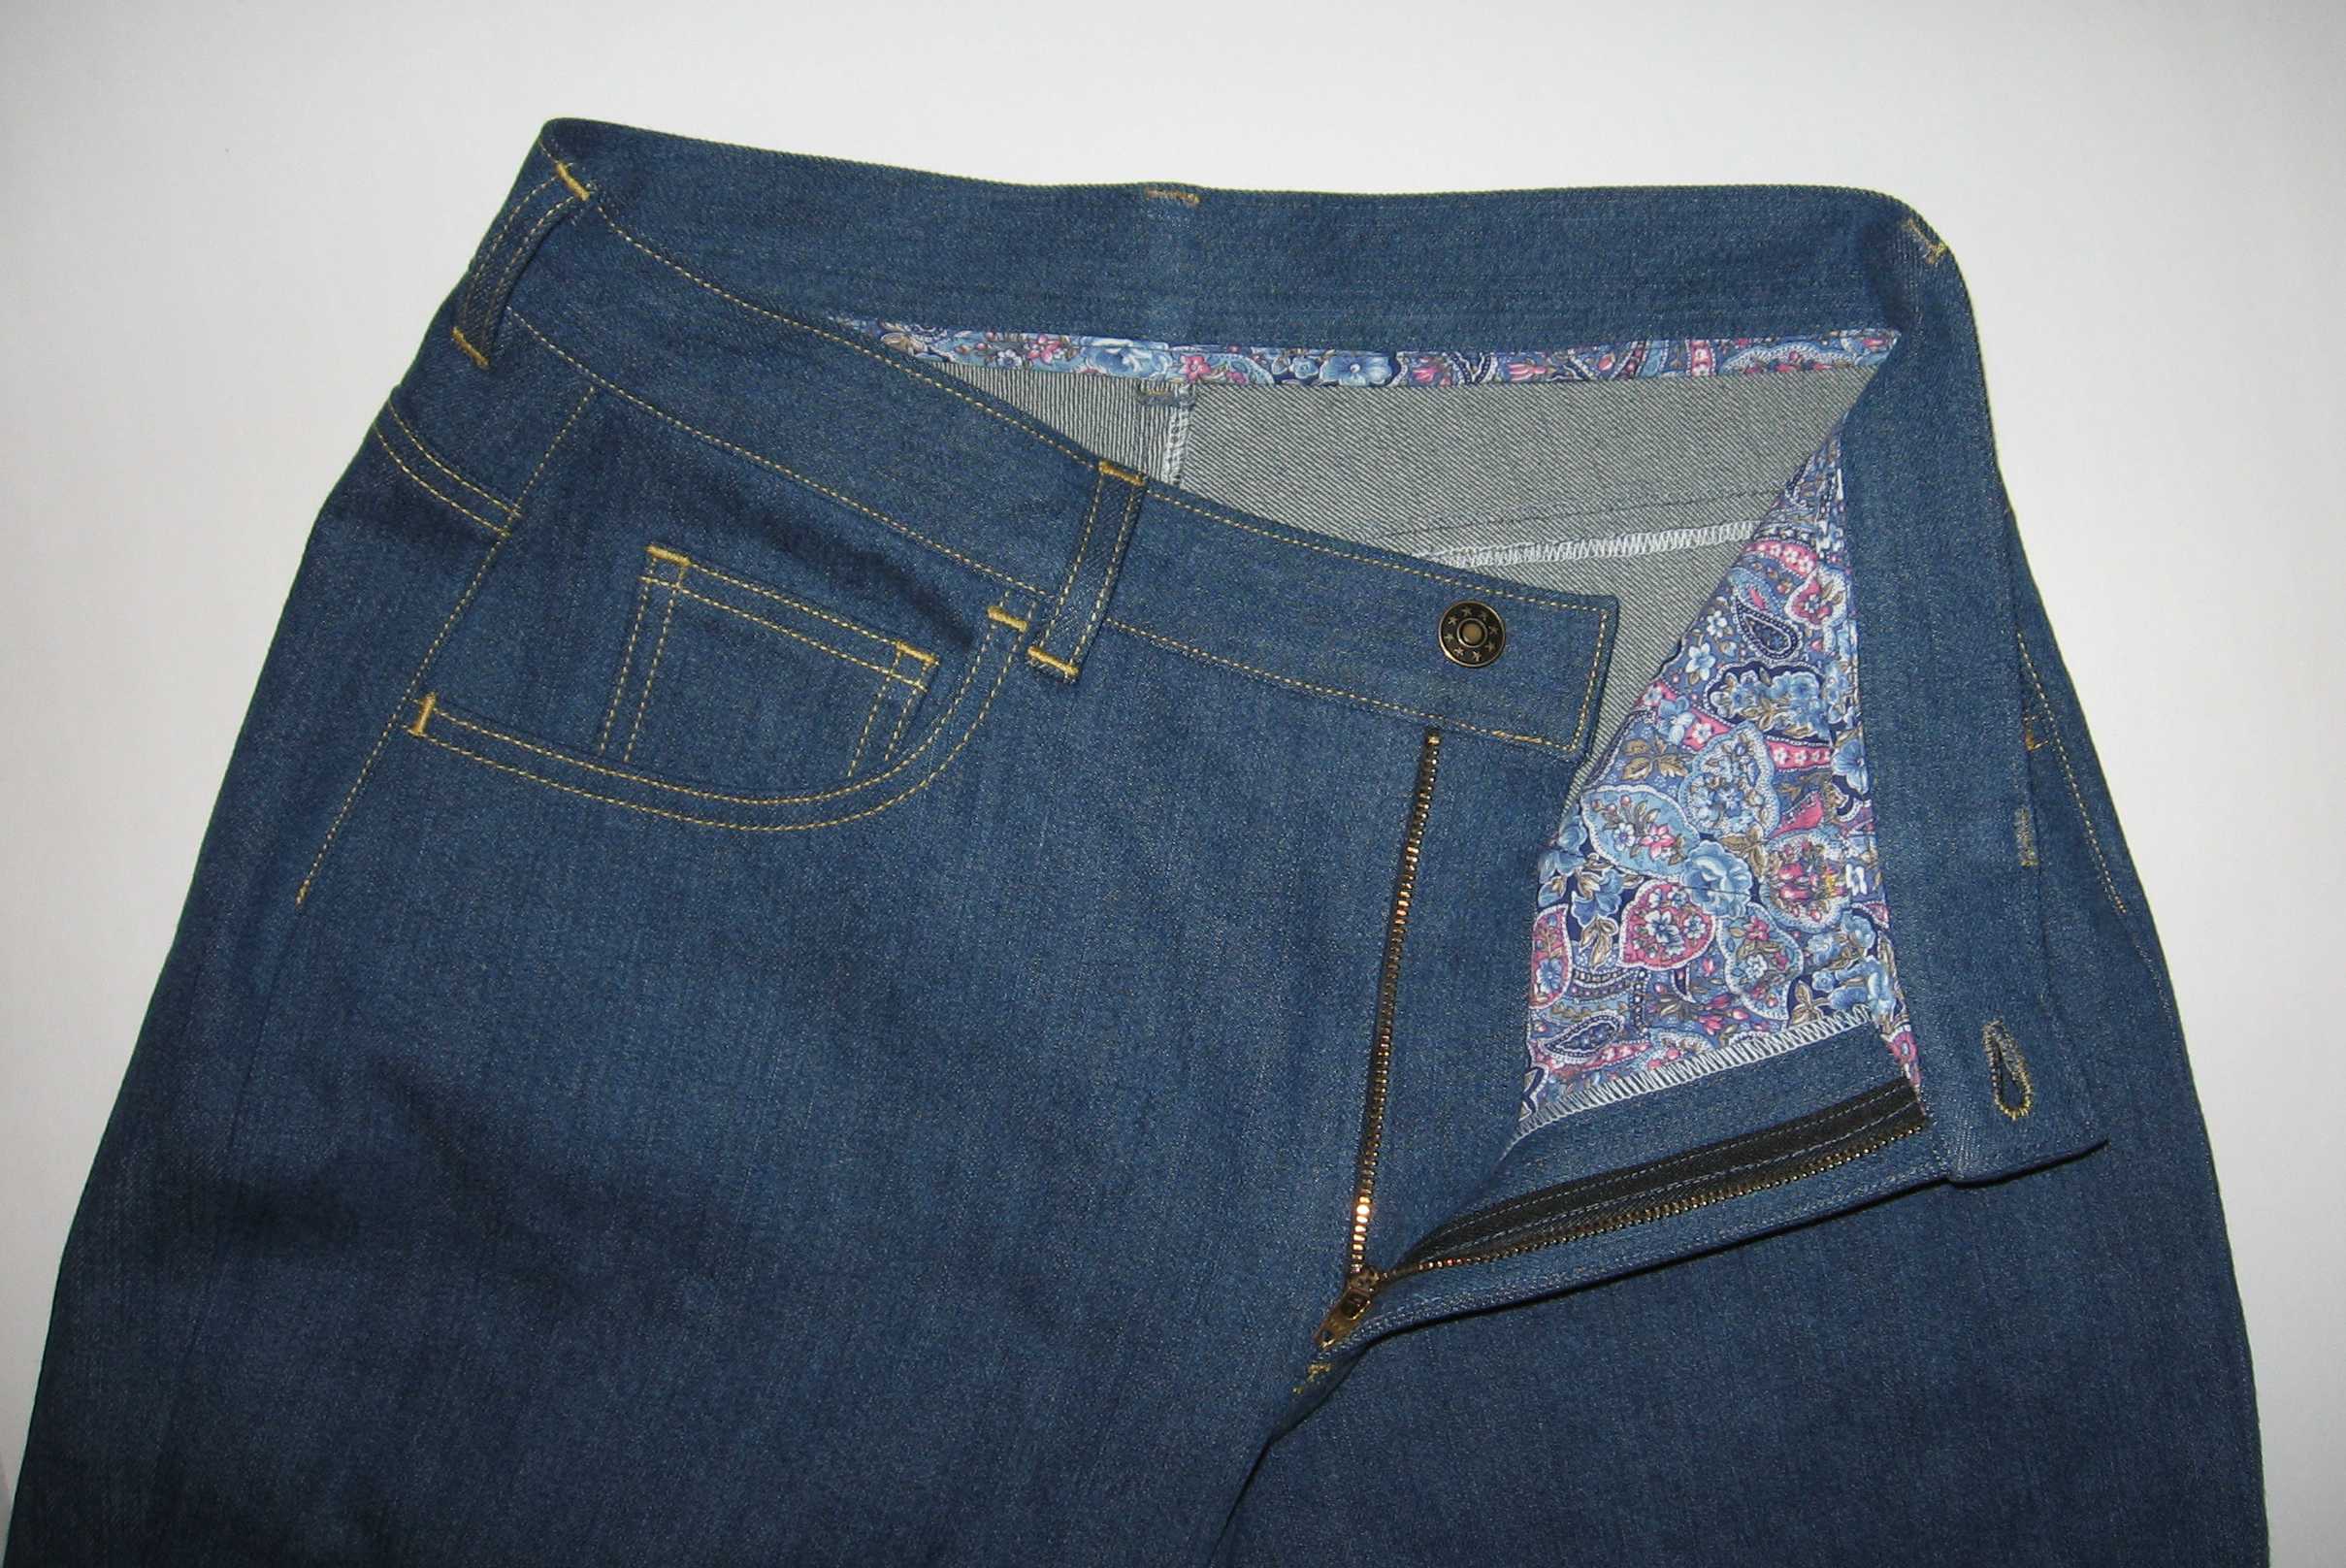
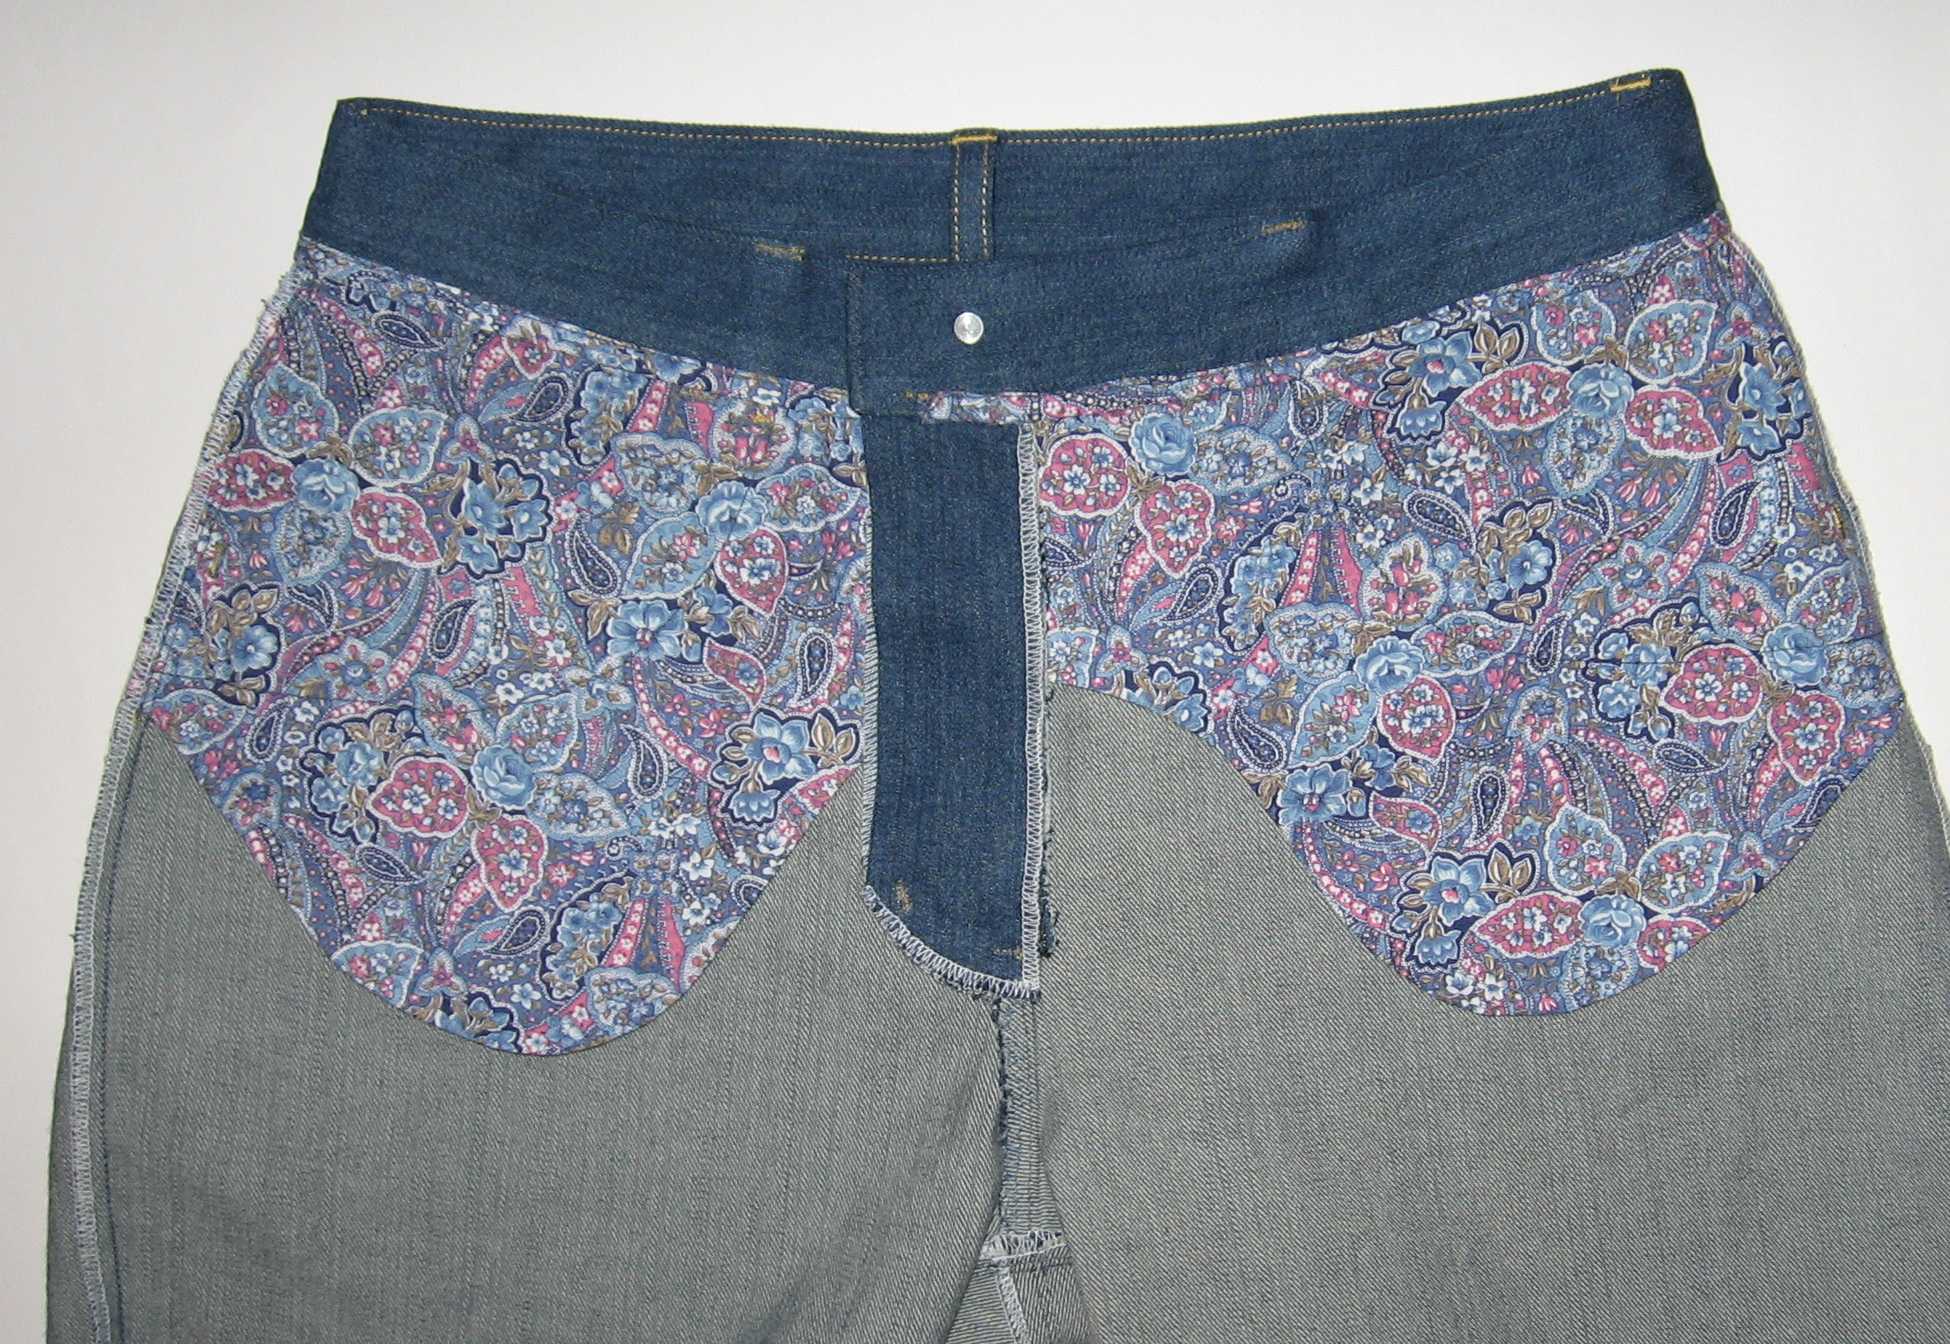
P.S. I uploaded my back pocket pattern, if you want to use that swoosh I have on them.
 GrowYourOwnClothes Etsy Shop

Your’s look good. I think they have a good fit. I am still working on mine. Hopefully I can pull it off as I have never liked the fit of RTW jeans or pants. I have taken a couple of Craftsy courses and read a couple of books and they say that it is impossible to get rid of ALL the wrinkles when fitting clothes or you wouldn’t be able to move!
LikeLike
Good point about needing to be able to move. The other thing is, since I’m so used to only seeing people in RTW, perfectly smoothly fitted clothes just look weird to me.
LikeLiked by 1 person
Thank you for posting the pictures with the inside details. I’ve made 4 wearable pairs of jeans in the past few months but I’m still making changes to the pattern and trying to get it perfect. (Maybe I should spend less time on my pattern and more time dealing with my perfectionism!) One problem I keep having is my buttonholes. My Pfaff makes a decent keyhole buttonhole but not on thick or uneven fabric, or maybe it’s just me. If you have any tips I’d love to hear them!
LikeLike
I don’t have a sewing machine that does automatic buttonholes, so I usually make buttonholes with a vintage attachment, but it won’t work on thick, uneven fabric either. I thought about hand sewing a keyhole buttonhole, but I was too lazy, so I approximated one by machine. I drew the shape of the buttonhole in chalk, then had to hand baste around it to mark it because the chalk didn’t stay visible, sewed around the buttonhole twice with short straight stitches, cut out the buttonhole, and finally zig-zagged around it. It’s not perfect looking, but I’m OK with that since it’s mostly covered by the button when I’m wearing the jeans. Oh, and when I was making the waistband, I fused a couple of small pieces of interfacing inside the waistband in the buttonhole area, since my waistband is not interfaced.
LikeLike
Thanks so much. I can’t wait to try that on my next pair.
LikeLike
I just finished sewing a buttonhole on another pair of jeans, and I realized the hardest part is marking the buttonhole. Next time I’m going to draw the shape of the buttonhole on a piece of masking tape, cut out the hole, and stick the tape on the fabric to use as a guide for the straight stitches.
LikeLike
Excellent job.
LikeLike